1979 Starcraft V5OB transom

bash11

Cadet
Joined
Jul 26, 2012
Messages
20
I have a 1979 18 foot Starcraft V5 OB with a questionable transom. It is powered by a 135 HP. There is a little movement (about 1/16 inch) on the top lip of the transom when I put weight on the cavitation plate. I measured the longitudinal movement at one of the lower engine mounting bolts during acceleration and cruise. The bolt moved forward about 3/16 inch from where it is at the no power condition. (So it is flexing about 3/16 inch from no power to near full power.) Is this acceptable? What should the upper limit of flex be? Most areas, I can not poke an awl in more than 1/4 inch, but there are a few areas where the awl goes in much further. I think that I will replace it this winter, but what is the risk of using the boat for two more months this summer? If the transom is weaker than expected, what kind of failure would there be? Would the flexing just get worse giving me adequate warning, or would it fail more catastrophically? What would it cost to replace if I did the work myself?
 

GT1000000

Rear Admiral
Joined
Jul 13, 2011
Messages
4,916
Re: 1979 Starcraft V5OB transom

Risk assessment is a very subjective thing and no one here can adequately tell you whether it is OK or not to continue using the boat...

In the end, it is your boat and you are the one who is ultimately responsible for its safety.

That being said, the flexing and soft spots you are describing is not good. It is an indication that the transom is rotting.

When in perfect condition, there should be zero flex in the transom.

It is highly unlikely that failure would be catastrophic, but who knows for sure...

If you decide to dive in and repair it, we will be here to help you get it done right...

The cost can vary quite a bit depending on what you find when you begin the tear out...

Most estimates will range from a low of a few hundred dollars, to a few thousand...

Best Regards,
GT1M
 

Bob_VT

Moderator & Unofficial iBoats Historian
Staff member
Joined
May 19, 2001
Messages
26,065
Re: 1979 Starcraft V5OB transom

Welcome to iboats.

Yes, the V5 transom is fairly easy, a bit time consuming and a good size transom to replace. If you are finding places softer then other's I would suspect you are very close.

Replacing it yourself......... 2 sheets of 3/4" exterior plywood (or marine plywood)[never pressure treated since it will react with aluminum], a bunch of stainless steel fasteners, a tube of 3m 5200, fiberglass lay-up resin (Or epoxy for overkill), associated fiberglass cloth & mat, some simple hand tools and safety equipment.

Your motor needs to be hoisted off and you need a place to store the motor AND work on the transom. Makes a great winter project if you have a heated space (have no idea of where you are) or a covered area.

Based on your description you have time to keep fishing and run out this season.

Link to post pictures here http://forums.iboats.com/showthread.php?t=533219
 

jigngrub

Fleet Admiral
Joined
Mar 19, 2011
Messages
8,155
Re: 1979 Starcraft V5OB transom

I wouldn't wait to fix it.

If it was just something cosmetic like the carpet was ragged out or seats needed to be replaced you could wait... but structural and mechanical/drive, fix it now.

It's only going to get worse and I'd be very concerned about those engine mounting bolts, I'm pretty sure the movement isn't good for your outdrive.

Warm weather is better for restorations anyway. Resins, adhesives, and paint setup much quicker in warm weather.
 

bash11

Cadet
Joined
Jul 26, 2012
Messages
20
Re: 1979 Starcraft V5OB transom

Thanks for your expert opinions. Well I live in Michigan, but I have a suitable motor stand, a 4 car heated garage and lots of tools. Being retired I have the time. Except for the transom, I believe the boat is in good shape. It was painted a few years ago, and the paint looks well sealed around the rivits. I see no signs of stress cracking or fatigue. I replaced a section of the floor last year and the aluminum under the floor looked nice and healthy. Is there anything else I should consider before I commit to this?
 

Bob_VT

Moderator & Unofficial iBoats Historian
Staff member
Joined
May 19, 2001
Messages
26,065
Re: 1979 Starcraft V5OB transom

Nope.

You are on the right track and actually if you can recruit some help...... it is a fast job. Collect the materials, the tools and go for it.
 

Yacht Dr.

Vice Admiral
Joined
Feb 26, 2005
Messages
5,581
Re: 1979 Starcraft V5OB transom

It's only going to get worse and I'd be very concerned about those engine mounting bolts, I'm pretty sure the movement isn't good for your outdrive.

Its an outboard mate :D ..

You are on the right track and actually if you can recruit some help...... it is a fast job. Collect the materials, the tools and go for it.

Yuppers .. Nice thing about them tinnies is that the wood replacement is EZ pie compared to glass boats ( all the grinding and glassing and gloves and mess etc. ).

You could do the preliminary glue and screw/paint part now on horses. I would use epoxy resin and Marine ply for this. After the cut out you only have to seal up your edges with epoxy.

You can still use the boat until your ready for the transtransplant ( I just made that up :) ) .. just dont go bells out full throttle or any crazy stuff like that until you fix it.

YD.
 

bash11

Cadet
Joined
Jul 26, 2012
Messages
20
Re: 1979 Starcraft V5OB transom

Well Summer is over and I am ready to tackle the transom on my 79 SS V5 O/B.
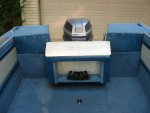
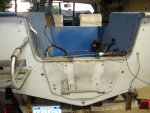
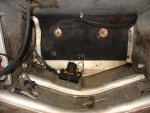
Here are some pictures.IMG_0280.jpgIMG_0282.jpgIMG_0286.jpgIMG_0279a.jpg

This boat has a rather narrow spashwell and no knee brace. Apparantly the knee brace is replaced with the two brackets shown in the bilge picture. I have been studying other threads and I have not seen any boat built this way. Does anybody have a good way to dis-assemble this? I am thinking of drilling out the rivits on both brackets that connect with the splashwell and drilling out the rivits on each gunwale right where the gunwale widenes in the back. Then lift the whole top off at once.

I have read various opinions on the type of adhesive to use to glue the transom together. Could someone rank these for me? Tightbond III, Gorilla glue, Polyester with 1.5 oz cloth, Polyester with Chopped fiber, and epoxy with ?? filler. Any others? What is closest to the factory glue? If I put a cloth or chopped fiber between the boards, could it be too thick to slide back in?

Thanks in advance,

Bash11
 

Fisherball

Chief Petty Officer
Joined
Mar 19, 2009
Messages
470
Re: 1979 Starcraft V5OB transom

Cruise this forum looking for transom repair threads or search transom repair. There are lots of details about how to do it.
 

GT1000000

Rear Admiral
Joined
Jul 13, 2011
Messages
4,916
Re: 1979 Starcraft V5OB transom

Well Summer is over and I am ready to tackle the transom on my 79 SS V5 O/B.
Here are some pictures.View attachment 168635View attachment 168636View attachment 168637View attachment 168642

This boat has a rather narrow spashwell and no knee brace. Apparantly the knee brace is replaced with the two brackets shown in the bilge picture. I have been studying other threads and I have not seen any boat built this way. Does anybody have a good way to dis-assemble this? I am thinking of drilling out the rivits on both brackets that connect with the splashwell and drilling out the rivits on each gunwale right where the gunwale widenes in the back. Then lift the whole top off at once.

I have read various opinions on the type of adhesive to use to glue the transom together. Could someone rank these for me? Tightbond III, Gorilla glue, Polyester with 1.5 oz cloth, Polyester with Chopped fiber, and epoxy with ?? filler. Any others? What is closest to the factory glue? If I put a cloth or chopped fiber between the boards, could it be too thick to slide back in?

Thanks in advance,

Bash11

Really nice looking Starcraft, Bash...

Can't help on the R & R of the transom, but I am sure some of the SC guys will jump in and give you some direction...

My DIY opinion on the glue for the transom boards...Titebond III and Gorilla Glues are really good choices, since they are waterproof and allow you positioning time and will be pretty much ready for use in 24 hours...

Can't speak for using epoxy, but I suspect it too would work...

I would rank using poly with any cloth or mat at the bottom, due to the limited working time, although in colder climes, you might have plenty of time...
 

jasoutside

Supreme Mariner
Joined
Dec 20, 2009
Messages
13,269
Re: 1979 Starcraft V5OB transom

Bash, that is one sweet ride man!

Yah, to get at that transom you have a fair amount of structure that needs to be freed up. In short, all the bolts, rivets, screws and drain tubes holding it in place need to come off in order to let it free.

I happen to like TightBond III but certainly any of what you mentioned will work to laminate your transom. Some are "better" than others and of course some are more expensive too.

Yes, you can make it too thick to fit back into the "shelf" and have the "cap" not fit if you stuck too much glass in between the pieces of ply. But you'd have to put a bunch in there to get to that point.
 

jigngrub

Fleet Admiral
Joined
Mar 19, 2011
Messages
8,155
Re: 1979 Starcraft V5OB transom

To get that wood out you'll just have to keep taking stuff off/apart until it'll come out... and it looks like there will be a fair amount of work to do that.

As for the adhesive, I would suggest a quart kit of epoxy and some cabosil or SM fairing compound and mix your own epoxy adhesive, then there should be enough resin leftover to give your transom 2 or 3 nice coats to seal it.
 

djpeters

Lieutenant Commander
Joined
Jun 9, 2010
Messages
1,824
Re: 1979 Starcraft V5OB transom

I used epoxy on my transom. Actually, every piece of wood going back in the boat got epoxy put on it!

Nice boat!
 

bash11

Cadet
Joined
Jul 26, 2012
Messages
20
Re: 1979 Starcraft V5OB transom

I got the transom out today. It was in pretty bad shape. It was designed to be in three pieces so I was able to take it out without cutting or bending up the last 1.5 inches of gunwhale. Some of the threads mentioned making the replacement in one piece instead of three pieces. Is this necessary? Would it be that much stronger? I would think that Starcraft would have made it all one piece if it was necessary.

I have some pitting on the inside of the aluminum. (The transom wood was original and not PT) Most pits are so small that they would not catch my fingernail, but there are a few that are about a half inch long and an eight to quarter inch wide. None of these large ones go in more than a half the thickness of the aluminum. There is also some white powder and rust colored stuff that comes off easily with a stainless steel wire brush. Are those pits good candidates for JB Weld? Do I put the weld on first or should I treat the Aluminum first? Should I spray it all with something like zinc chromate?

How much Titebond III will it take to properly glue up the transom? Do I put a thin even layer on the wood or should I use a notched trowel? How much epoxy should I need to coat it? It is about 16 square feet in area.

Where can I get replacement drain tubes for the splashwell?

I really appreciate all your help,

Bash11
 

Woodonglass

Supreme Mariner
Joined
Dec 29, 2009
Messages
25,929
Re: 1979 Starcraft V5OB transom

A Quart of Titebond III should do the trick using a 1/8" notched trowel on Both pieces of wood. I'd use Deck Screws to hold em together and then remove em the next day. The epoxy will will the screw holes. I'd say two cups of epoxy will give you One coat. Then the next day mix up another two cups and put on another coat. DONE!! You can get Aluminum Drain Tubes right here on iBoats.
http://www.iboats.com/1-7-8-Aluminu...8249083--session_id.550611240--view_id.166845
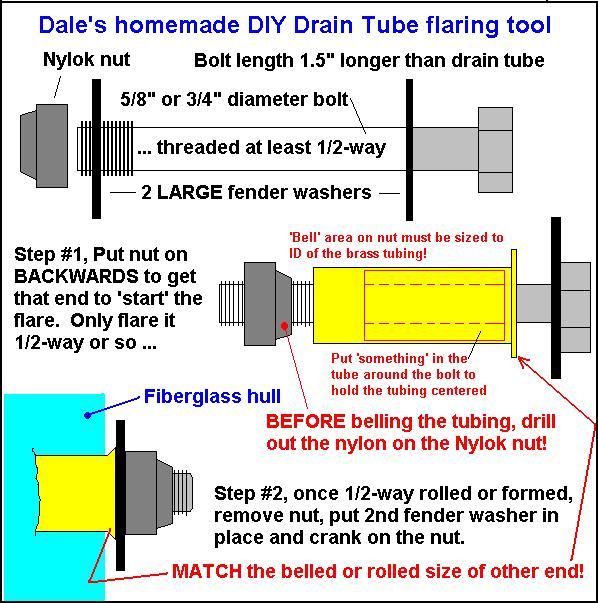
Here's how you can make your own Tube Crimping Tool.
FlaringTool.jpg
 

bash11

Cadet
Joined
Jul 26, 2012
Messages
20
Re: 1979 Starcraft V5OB transom

Thanks for your reply. That tool looks like it will work fine. What are deck screws? Couldn't i use any kind of wood screw since it will be removed after the glue sets?
 

Yacht Dr.

Vice Admiral
Joined
Feb 26, 2005
Messages
5,581
Re: 1979 Starcraft V5OB transom

A Quart of Titebond III should do the trick using a 1/8" notched trowel on Both pieces of wood.

Not to sound abrasive or anything .. but 1/8 " trowel seems a bit much.

Im thinking that Titebond has a 50% shrink rate .. so two 1/8" together would/could possibily leave voids in the glue lam right ?

Could a 1/16" notch trowel work better for glue lamming two solid surfaces ?

I dont know for sure so I am asking a serious question .. what benifit and why so large of a notch ?

YD.
 

Woodonglass

Supreme Mariner
Joined
Dec 29, 2009
Messages
25,929
Re: 1979 Starcraft V5OB transom

Yeah, yer prolly right it prolly just roll it on both sides. I think you're thinking is off a bit. Titebond III actually resists shrinking fairly well. and therefore the possibility of voids is practically nill.

Titebond? Ultimate III
Titebond III is the most advanced wood glue available today. While all Titebond products provide superior performance, Titebond III is especially useful for outdoor applications in cooler temperatures or when concern for substantial moisture calls for the use of a Type I glue (USA boil test). For interior applications, the longer working time of Titebond III provides woodworkers the necessary latitude to ensure that substrates are precisely aligned before being bonded. Overall, Titebond III combines superior strength, sandability with water cleanup the ease of use of aliphatic resins with the, durability and water resistance of polyurethanes into one easy-to-use formulation.


GT1000000

Rear Admiral
Joined
Jul 13, 2011
Messages
4,916
Re: 1979 Starcraft V5OB transom

That's a good question...I don't have a thorough understanding of different notch sizes for different applications, but from the Home Building side of the equation, some one in the trades, once explained to me that the size of the notches is relative to the amount of un-eveness you can expect to encounter and make up for between the substrate and when laying certain coverings such as tile...To allow for some height adjustments over the entire expanse of the area being covered...to eventually end up with a fairly flat and level surface...

My only thinking, when it comes to assembling the two transom plates together, is that both adjoining faces are fairly flat and mostly void-free, so I would think that using almost any trowel size, basically allows the glue on both faces to remain "wet" until the two pieces are joined...since there really shouldn't be too much, if any "gaps" to make up for...

I must admit, I took a different approach and slathered on a wet layer to both pieces then slapped them together and clamped them tight, spewing the excess out of the edges...:redface:

I would like to know how far off my understanding of the whole notched trowel explanation is/was from those who really know this kind of stuff...:)
 
Top