1980 Terry bass boat restoration...it begins!

gm280

Supreme Mariner
Joined
Jun 26, 2011
Messages
14,605
BYK, I see in comment #58, your transom doesn't go all the way across. Is that how the old one was? Odd it didn't go from side to side for the additional strength. :noidea: As per the diagram, the red area was left open so any water, either boating or rain, would simply flow back to the transom area. So if you plan on using that front center section for storage, I would make certain there was an easy way to allow water to drain out from the front. Just a suggestion. JMHO!
 

BackyardKrazy

Petty Officer 3rd Class
Joined
Sep 11, 2015
Messages
90
Yep, that's exactly how it was. two laminated pieces of 3/4 ply, i used the old one for a pattern. The rear of the boat is designed so the engine is set in a bit, thats the best way I can explain it.

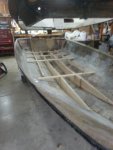
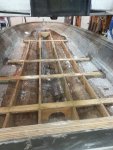
The transom is all glassed in, and I laid my new stringers in to see how they fit. Somehow I got them to high, I think. I measured and remeasured the old ones, but my cross beams are about 1 1/4 " off the fiberglass. :confused:

I'm going to set the top of the boat on and see how far i'm off, at least i can trim them rather than have made them too short... I didn't have much of a pattern, the old ones were pretty shaky.
 

gm280

Supreme Mariner
Joined
Jun 26, 2011
Messages
14,605
Well it is always better to have things too large then to small. You can cut the stringers down a little for a good fit. But trying to stretch them is a no go. Your work looks good to me. :thumb:
 

tallcanadian

Captain
Joined
Sep 7, 2006
Messages
3,250
Any new Pictures? I like the idea of your storage area. Not sure if that would cause a strength issue with all that void. Maybe not. I'm kind of computing all the info in my head..lol. I personally would not do it for that reason. I hope Woody or Sam chimes in..
 

BackyardKrazy

Petty Officer 3rd Class
Joined
Sep 11, 2015
Messages
90
Thanks GM! I hace fiberglassed before, but never with anything that mattered this much!

TC, It originally had braces between those two center stringers, which i would still have in there. The only difference would be a hatch door on the top.

I haven't got any more good pictures yet, i'm hoping to make some progress tomorrow with our day off. I am currently trying to determine the exact correct height for the stringers, front to back. If i were smart id have taken a measurement from the top of the lower section down for reference... :facepalm:

How thick is the top layer of decking before the fiberglass top goes on, normally?
 
Last edited:

BackyardKrazy

Petty Officer 3rd Class
Joined
Sep 11, 2015
Messages
90
I just bought another 3 2L pails of cabosil, 3 rolls of 4" 6oz matt, and a bottle of hardener. I felt like I was being too careful with the materials, and i wanted to stop thinking about how much it was costing and just do it!

i also asked about the foam i was sent and it turned out I was short shipped....so she sent the rest down! Woo Hoo!
 

tallcanadian

Captain
Joined
Sep 7, 2006
Messages
3,250
You can use 1/2", which will suffice. I used water sealant on the bottom and glassed the top side. It's good they sent you the rest of your foam. That stuff is expensive enough. As far as using cabosil, figure a litre of cabosil per litre of resin. This will give you roughly what you need. The more you fibreglass the better you will get at figuring how much stuff you need.
 

BackyardKrazy

Petty Officer 3rd Class
Joined
Sep 11, 2015
Messages
90
I have the stringers done, 90%. I just need to extend the two outside ones. The manufacturer had 10ft plywood somehow because the old ones were all one piece.
20151111_155758.jpg

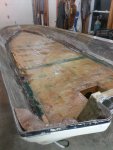
I test fitted the top of the boat after i had them made, the first time... and something just wasn't right. I assumed the floor was supposed to be straight and flat, but no. the floor needs to slope upward, starting at the steering console. Not what i expected, but i easily fitted them better since they were spliced 3/4 of the way up. I allowed space for the plywood floor, and the carpet.

You can see the top of the boat in this (blurry) photo, i have the top of the boat hung from the rafters, I can lower it on and off with a chain hoist on oone end and an atv winch sat the front. it took a bit of time to set up, but it made test fitting way easier.

Finally, a bit of accomplishment!
 

gm280

Supreme Mariner
Joined
Jun 26, 2011
Messages
14,605
Nice stringer and bulkhead work there. :thumb: And I like the idea of the hoist and winch too. Some times you have to be inventive to get things done. Keep posting, I am watching for sure. :thumb:
 

BackyardKrazy

Petty Officer 3rd Class
Joined
Sep 11, 2015
Messages
90
Well I have my stringers made, and somewhat fastened in the boat. Id have taken a pic, but i set the top half on in place to make sure the sides were in the correct location while the PB was setting up. Maybe its just me, but it seems like the cabosil slows down the setting up of the resin.

I should be able to lift the top off and finish PB'ing the stringers down tomorrow night, and ill take some progress pics then. I don't mind the itchiness, but the sticky is enought to drive me nuts!! :loco:

I had a few questions for all you smart boat rebuilders, i have a few holes where wires/cables go through, and i want to get some sort of grommet to fill them in.

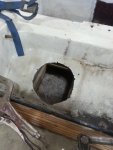
This one is in the splash well ahead of the engine, steering cables, wiring and fuel lines come through here:


20151117_173606.jpg

Is there a proper name/item I can buy to put here? Looks like there may have been one before?

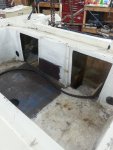
And these are two openings toward the engine, behind the gas tank. they are accessible with the gas tank installed, i wonder if i could put my batteries in there? 20151117_173627.jpg
 

tallcanadian

Captain
Joined
Sep 7, 2006
Messages
3,250
Cable boot. I've not seen be one the bottom of the splash well. Usually they are on the side. You could put your batteries n there. Just provide some ventilation.
 

BackyardKrazy

Petty Officer 3rd Class
Joined
Sep 11, 2015
Messages
90
hey guys! Sorry TC.....:facepalm: I have been working here and there at the ole relic, but deciding on a big career move so my head hasn't been into the boat as much as usual.

But I do have all that pain in the butt structural stuff that no one ever sees completed..... :joyous:

Heres some PBing:


20151119_173222.jpg


And some glassin the stringers down:

20151119_200108.jpg


and the new floor all glassed down:

20151130_193236.jpg

I didnt get a pic of the foaming, I did it at work in the paint booth so I had low humidity and a good 25 deg room temperature. let me tell you, I learned not to underestimate how far the foam expands.... CRAZY :eek:

So for now unfortunatley its tarped over in my driveway, i had to get my Dads truck fixed before snow flys...4X4 might come in handy sooner than later I'm afraid...

Should be able to get in back in next week, my next step is to flip it over and start sanding down the bottom, eventually getting that painted so i can set it back on the trailer.
 

tallcanadian

Captain
Joined
Sep 7, 2006
Messages
3,250
Looking good so far. Yeah, sometimes life gets in the way. But when your done with this it will be all worth it.
 

BackyardKrazy

Petty Officer 3rd Class
Joined
Sep 11, 2015
Messages
90
Hi Guys, Im finally back and i have some serious updates!!!


I finished off the strigers and the loor, now its time to flip that bottom half over and start sanding....

So I had to get creative, i built some brackets to lift the boat up with in order to flip it
20151220_132101.jpg

Here she is in mid rotation:

20151220_132447.jpg

Next for the sanding.... my garage is nasty dusty....

20160110_122036.jpg

As you can see, she was originally blue, and had a gold large flake designed down the middle. Definitely 80's LOL!

And finally, I have it primed yesterday. It was a "warm" January day here in NS, about 6 deg Celsius.

20160110_154226.jpg

Next step is to sand it down, and figure out a way to trailer it to work so I can paint the bottom half.

And the biggest challenge of all.... picking out some colors!!!!! WOO HOO :D
 

Woodonglass

Supreme Mariner
Joined
Dec 29, 2009
Messages
25,929
That's some nice fabrication on the "Flip Brackets"!!!!:sad:

Uhmmm, what were the temps when you applied the primer???:eek:
 
Last edited:

gm280

Supreme Mariner
Joined
Jun 26, 2011
Messages
14,605
Some nice work there. I always love seeing these project boats get refinished. And the effort to do such things are well worth it when you see the finished results. :thumb:
 

BackyardKrazy

Petty Officer 3rd Class
Joined
Sep 11, 2015
Messages
90
Uhmmm, what were the temps when you applied the primer???:eek:[/QUOTE]

in my garage i had it around 15 deg, the catalyst in our products starts getting inactive around -5. im good, no worries.
 
Top