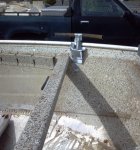
1981 Sea Nymph rebuild

trashcat2

Cadet
Joined
Jun 5, 2012
Messages
19
I finally got rid of some stuff that was taking up room in my garage and started my boat rebuild.
I picked up this boat near the end of last summer and only got out on the water once just to be sure I actually wanted a boat. I do. The problem is the deck is soft, the transom looks about as trustworthy as a used car salesman, and it leaks enough that I had to run the bilge pump every hour. I didn't really know what I had until I discovered this forum, I was just looking for a boat that was big enough for four people and light enough to tow behind my small toyota truck over a couple mountains to the lake.
It's a 1981 Fishing Machine (I'm unsure about the model number) with a two cylinder 2 stroke 50HP Johnson. The engine ran decent, it handled fairly well, and the trailer is in OK shape so I don't think I've bough a money pit of heartbreak and despair, just a simple money pit boat project. I haven't fished since I was a kid so this is just to get me and my girlfriend out on the water to play with a minimum of boat and cost. My plan is to replace the deck. transom, flotation, seating, and fix the leaks while not worrying about how it looks I can repaint it later.

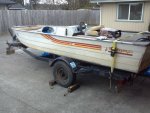
Right after I got it home.
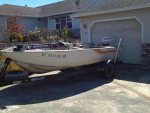
first-small.jpg

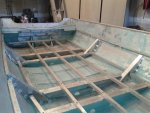
Before I started taking things appart.
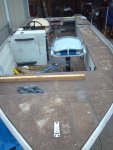
begin-restore-front-small.jpg
begin-restore-side1-small.jpg

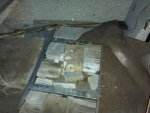
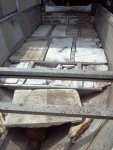
Joy of joys, no poured in foam!
styrofoam-flotation1-small.jpg
And that's as far as I got before it got dark and started to rain.
 

joelybob

Petty Officer 1st Class
Joined
Jun 30, 2012
Messages
224
Re: 1981 Sea Nymph rebuild

welcome Trashcat2. nice boat. lots of great people on here. so help wont be a problem. sea nymph boats are pretty easy to work on.Good luck
 

Pmccraney

Lieutenant Commander
Joined
Jul 26, 2011
Messages
1,734
Re: 1981 Sea Nymph rebuild

Nice boat... Welcome to the club.... There are several active Sea Nymph projects on the board right now...

Should be a fun project for you...
 

jasoutside

Supreme Mariner
Joined
Dec 20, 2009
Messages
13,269
Re: 1981 Sea Nymph rebuild

Sea Nymph? No poured foam? Awesome!

Welcome to iboats:thumb:
 

Huron Angler

Admiral
Joined
Apr 7, 2009
Messages
6,025
Re: 1981 Sea Nymph rebuild

Welcome aboard trashcat! I like that Sea Nymph hull, lots of storage and very lightweight as you mentioned.

Check out jasoutside's thread, he just finished a Sea Nymph that's similar and did a great job.

Maybe some good ideas for you to get started.

These tin cans are easy to work on, and this site has some good info, you are in the right place.:)
 

trashcat2

Cadet
Joined
Jun 5, 2012
Messages
19
Re: 1981 Sea Nymph rebuild

I was only able to remove the foam out of the foam boxes and some of the custom "unique" wiring removed before it started to rain on me again.
I've been considering what layout I want to build. Currently the port side is fairly flexible because the gunwales are thin and flexible and the storage box doesn't help with rigidity like the console does on the starboard.
Is it better to have a more rigid boat by adding some triangle braces from the gunwales to the stringers like you would see in a 12' skiff or would that change the general flex of the hull into a small sections of flex with an increased risk or work hardening and cracks?

Something like this but make them go all the way up.
bracing-example.jpg

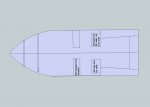
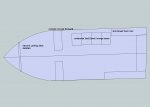
As for the layout here is the current setup, 16' 6" from stern to bow, 70" a the widest point, the foam boxes are oddly angled is not just the slightly off scketchup image.
boat-floor-orig-2-text.jpg

The live well/seat support is awkwardly close to the console and there is currently no good seating for another person. The most basic redesign would be to delete the live well and port storage, add a second console and basic seats either pedestal or a simple storage box base.
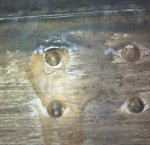

dual-console-simple2-text.jpg
 

trashcat2

Cadet
Joined
Jun 5, 2012
Messages
19
Re: 1981 Sea Nymph rebuild

The more complex layout that I'm considering to to move the consoles forward, shorten the rear foam boxes and put in some back to back lounge seats. In the diagram the lounge seat is in the lounging position. The seat and shortened box would be the same on both sides. This option would require a longer steering cable, the current one is brand new. I would also do some bow seat/storage similar to what sutor623 did with his Fish or Ski
boat-floor-dual-console-lounge-2-text.jpg

I'm sure this wont be my first and last boat just my first boat. I think I should keep it in reasonably fishable configurations to make it easier to sell when I want a different boat. I would like the lounge seats for basking in the sun but I could get by with a removable sun pad on top of the foam boxes and a folding lounge chair in the bow. I'm just bouncing some ideas around before I commit to a layout and buy seating.
 

Streetgang

Petty Officer 1st Class
Joined
Oct 13, 2012
Messages
251
Re: 1981 Sea Nymph rebuild

Welcome, nice boat.

Cant believe you escaped the pour in foam. Beauty for you !

While you have the hull opened up and clean spend some time looking closely for cracks. Waterman and I both found some, small, hard to see but easy to repair. Under or near the stringers, close to or under where Capn seat / livewell sat.

There are certainly a wide variety of layouts to consider along with your own thoughts. Personally, I am going to run mine as is this summer and see what jumps out as a must have versus doesnt make sense. try and get a better feel with all these fine options in mind.

Tagging along and good luck.
 

Pmccraney

Lieutenant Commander
Joined
Jul 26, 2011
Messages
1,734
Re: 1981 Sea Nymph rebuild

The beauty of these aluminum boats is that you can really customize (within limits). I think layout (like color) is really a matter of personal preference depending on your specific wants and needs. If you are a hard core fishing guy, then I would favor fishing decks over seating/lounging space. If this is a family boat, I would reverse that. If its both, then land in the middle. I think all your designs are well planned and the "right one" will come to you as you think more about what YOU want out of this boat and what the boat lends itself to. For my boat (pure fishing) I am trying to put premium on casting deck space, freedom of movement (not a lot of clutter); and storage (under those decks)... I went dual-console, I think I had a little more width than you (I want to say 80-someting inches at mid-ships).

As far as the hull reinforcement goes, I don't think its a bad idea of you have the materials (or can fabricate those). others may have different thoughts (that's a bit out of my league in terms of experience and know-how).

Hope this helps.
 

trashcat2

Cadet
Joined
Jun 5, 2012
Messages
19
Re: 1981 Sea Nymph rebuild

Welcome, nice boat.

Cant believe you escaped the pour in foam. Beauty for you !

While you have the hull opened up and clean spend some time looking closely for cracks. Waterman and I both found some, small, hard to see but easy to repair. Under or near the stringers, close to or under where Capn seat / livewell sat.

There are certainly a wide variety of layouts to consider along with your own thoughts. Personally, I am going to run mine as is this summer and see what jumps out as a must have versus doesnt make sense. try and get a better feel with all these fine options in mind.

Tagging along and good luck.

I kind of hope there is a crack or two considering how much it leaks, if it's all leaking rivets it'll be a pain to fix them all. I've got a tig welder for cracks and 2lb kit of gluvit should arrive to day for the rivets.
 

jbcurt00

Moderator
Staff member
Joined
Oct 25, 2011
Messages
25,179
Re: 1981 Sea Nymph rebuild

PMC's & Jas SeaNymph's will both be great resources for awesome ideas, design & layout tips, and construction methods.

As PMC said, how do you want to use the boat when you're done. The Admiral & I will likely cruise, occasionally fish, and likely be the only 2 regularly on any of mine if I ever get 1 ready to splash. My initial layout for mine will be a pedestal seat at the helm and a foldout lounger for the port side, w/ a bench at the splashwell. Comfy captain cruising seat, somewhere for her to recline & catch a ray or 2, and a little extra seating. Mine are all currently closed bow, and for now I intend to keep them that way.

A single console offers more space for movement when fishing, and more overall room, something PMC & Jas were both after, but w/ family & other then hardcore fishing usage, they opted for the dual console w/ windshields, for both the seating & additional wind protection for other people in the boat.

I've seen that hull reinforcement pix you posted, and if I'm not mistaken, didn't they do that because their going center console, and wouldn't be putting any of those storage boxes & etc back along the gunwale. So they needed the additional stiffeners.
 

trashcat2

Cadet
Joined
Jun 5, 2012
Messages
19
Re: 1981 Sea Nymph rebuild

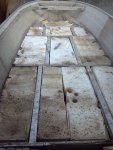
I got it defoamed and all the hardware removed. I was worried a bit about how to turn it over until I got every thing removed and realized I can easily pick it up by my self.

Considering I've been looking through this forum reading about all the horrible foam stories this was a great sight.
foam1.jpg
foam2.jpg
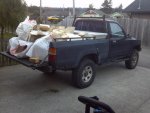
It had a truck load of foam in it, also this is my tow vehicle which is why I needed a light boat.
foam-truck.jpg

At first the transom just looked old.
transom-front.jpg
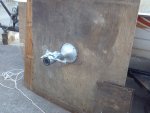
However one of the drain tubes just pulled right through the transom.
transom-back.jpg
 

trashcat2

Cadet
Joined
Jun 5, 2012
Messages
19
Re: 1981 Sea Nymph rebuild

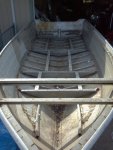
Defoamed
defoamed1.jpg

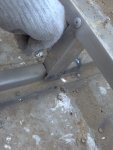
The cross braces aren't really attached to the stringers it's more like they are loosely associated with them but not on a first names basis.
stringer1.jpg

I couldn't remove one of the seat bases so it's still stuck on the plywood, I actually bent the standard driver bit in the drill.
seat-support.jpg

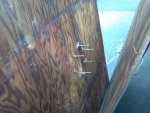
Attached with the ultra secure and corrosion resistant butter fly nuts.
seat-wingnut.jpg

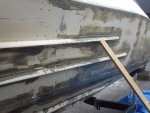
Initially I had not planned on repainting the exterior of the boat but I think have to after I scrape off all the "sealer".
bottom1.jpg
 

trashcat2

Cadet
Joined
Jun 5, 2012
Messages
19
Re: 1981 Sea Nymph rebuild

I've only found two cracks so far, this is the largest.
crack1.jpg

Since I'm working on the boat may be I should replace the bunks as well.
busted-bunk.jpg

Next step is to pressure wash and scrub, then probably the wire wheel on the "sealed" bottom.
 

jasoutside

Supreme Mariner
Joined
Dec 20, 2009
Messages
13,269
Re: 1981 Sea Nymph rebuild

I like your commentary as you are working along there:lol:
 

trashcat2

Cadet
Joined
Jun 5, 2012
Messages
19
Re: 1981 Sea Nymph rebuild

Welcome, nice boat.

Cant believe you escaped the pour in foam. Beauty for you !

While you have the hull opened up and clean spend some time looking closely for cracks. Waterman and I both found some, small, hard to see but easy to repair. Under or near the stringers, close to or under where Capn seat / livewell sat.

There are certainly a wide variety of layouts to consider along with your own thoughts. Personally, I am going to run mine as is this summer and see what jumps out as a must have versus doesnt make sense. try and get a better feel with all these fine options in mind.

Tagging along and good luck.

I haven't pressure washed it yet but I can see two cracks at the ends of stringers it the the same place. I wonder what the flex dynamics are that cause cracks in that area.
 

trashcat2

Cadet
Joined
Jun 5, 2012
Messages
19
Re: 1981 Sea Nymph rebuild

PMC's & Jas SeaNymph's will both be great resources for awesome ideas, design & layout tips, and construction methods.

As PMC said, how do you want to use the boat when you're done. The Admiral & I will likely cruise, occasionally fish, and likely be the only 2 regularly on any of mine if I ever get 1 ready to splash. My initial layout for mine will be a pedestal seat at the helm and a foldout lounger for the port side, w/ a bench at the splashwell. Comfy captain cruising seat, somewhere for her to recline & catch a ray or 2, and a little extra seating. Mine are all currently closed bow, and for now I intend to keep them that way.

A single console offers more space for movement when fishing, and more overall room, something PMC & Jas were both after, but w/ family & other then hardcore fishing usage, they opted for the dual console w/ windshields, for both the seating & additional wind protection for other people in the boat.

I've seen that hull reinforcement pix you posted, and if I'm not mistaken, didn't they do that because their going center console, and wouldn't be putting any of those storage boxes & etc back along the gunwale. So they needed the additional stiffeners.

I'm not sure about the hull reinforcement picture, it was the first picture I found that was similar to what I was thinking.
We'll use the boat mainly for playing in the water and lounging in the sun and after talking with the female half the decision has been made for dual consoles, pedestal chairs, and bow seats for lounging while anchored. However if I had two of the same consoles it would only leave a 13" gap which is to small to be convenient so I'll shorten the consoles 2.5" each for an 18" gap. I would love to do a cedar deck like Piece715 but I'll probably just do plywood and a light color roll on bed liner.
I also plan on fabricating a grab rail for the front portion. I think I can reuse the angled brackets that was the storage box support, in the picture you can see the still attached bracket and my cardboard mockup of a grab rail attachment point.
grab-rail-mock.jpg
 

trashcat2

Cadet
Joined
Jun 5, 2012
Messages
19
Re: 1981 Sea Nymph rebuild

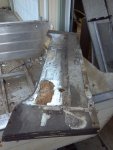
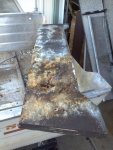
I may have escaped the pour in foam but I did not escape the poured in "sealant" there is actually a puddle in the front rib that's so deep I can't see the rivets. It's also blocking the limber hole under the second rib and gooped on most of the forward seams. I'm glad I used the boat project as an excuse to finally buy a power washer which now that I have it I wonder how I ever got along without it. So far it's been a couple hours of blast up close with the power washer and some of the sealer lifts off then go at it with a putty knife then back at it with the power washer. Progress is slow but there is progress.
 

Streetgang

Petty Officer 1st Class
Joined
Oct 13, 2012
Messages
251
Re: 1981 Sea Nymph rebuild

Trash,

Good progress.

You have got my curiosity going though. Our hull designs are indentical and I think the crack you showed in pic is identical to same for me. Mine is at the starboard end of the 7th rib from stern. Goes right through the last 2 rivits at end of rib. Is that sme as yours?

The general area is just about where your feet would hit deck for Capn. seat, just forward of livewell seat and just aft of where consol sits. Something must be going on there.

You did mention another crack and just thinkin your eyes are younger than mine where was that one? Before I start foaming, decking I would like to double check.

Thank you and good restoing....(not sure if that is a word)
 

trashcat2

Cadet
Joined
Jun 5, 2012
Messages
19
Re: 1981 Sea Nymph rebuild

Trash,

Good progress.

You have got my curiosity going though. Our hull designs are indentical and I think the crack you showed in pic is identical to same for me. Mine is at the starboard end of the 7th rib from stern. Goes right through the last 2 rivits at end of rib. Is that sme as yours?

The general area is just about where your feet would hit deck for Capn. seat, just forward of livewell seat and just aft of where consol sits. Something must be going on there.

You did mention another crack and just thinkin your eyes are younger than mine where was that one? Before I start foaming, decking I would like to double check.

Thank you and good restoing....(not sure if that is a word)

Yep our hull design is the same I've been following your project hoping you'd get some more work done so I could shamelessly copy any ideas you had. The large crack that I posted a picture of earlier is in exactly the same place on rib 7.
The smaller crack in my hull is rib 6, both outer rivets have cracks but it doesn't look like they've connected yet. It's also not noticeable from the inside because the rib hides most of it.
rib-6-crack.jpg

I suspect that there may be a crack or the beginning of a crack at rib 8 as well.
rib-8.jpg

After I conquer or give up in defeat on the puddle of sealer in the bow I'll turn it over and wire wheel the sealer/goop and I should see if rib 8 is also cracked.

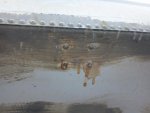
Here's the puddle of goop I'm fighting. Anybody have any ideas heat/chemicals/sorcery/bacon grease and a hungry weasel?
sealer-puddle.jpg
 
Top