I have the Evinrude version
Had it since new and changed the pump impeller several times
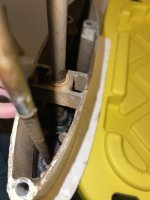
As the others have said all you have to do now is unbolt the 5" extension, but clean up the drive shaft first so that it slides easily through the bush in the extension.
When reassembling I find it best fit the 5" extension on to the exhaust housing first then refit the gear case.
Remove the spark plugs so that you can easily turn the flywheel to get the splines on the drive shaft to line up with the splines in the crankshaft OR put it in gear and turn the prop.
Lightly grease the splines before assembly and ensure the O ring (#55 in the diagram attached) is in position in the groove below the spline.
( in future do as you did this time, remove the gear case and extension as one unit then separate them after cleaning the drive shaft)
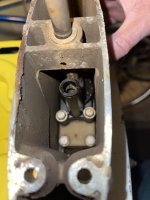
The thing that has caused me most bother with this engine is corrosion around the top water tube grommet squeezing it over the top of the water tube until it cuts off the water flow. It's a power head off job to replace that grommet.
Check that you can get a good water flow up the tube and through the engine from a hose before you reassemble it, if not its probably that top grommet that is the trouble.
PS It's worth replacing the gearcase seals while you have it off. At least the drive shaft seals (#27) and the shift rod seal (O ring #26) while you can get at them.