1984 Silverton 34C Remodel/Update/Upgrade PIC HEAVY

BSnB

Petty Officer 1st Class
Joined
Jan 8, 2007
Messages
281
Re: 1984 Silverton 34C Remodel/Update/Upgrade PIC HEAVY

Have you tried very fine steel wool or bronze wool? It's worked for me on some furniture before.
 

25thmustang

Lieutenant Commander
Joined
Mar 20, 2008
Messages
1,849
Re: 1984 Silverton 34C Remodel/Update/Upgrade PIC HEAVY

I have 000 steel wool, but think it would need to be compounded/polished. I will just scuff it all, hit it with more Epifanes and call it good for now.
 

BSnB

Petty Officer 1st Class
Joined
Jan 8, 2007
Messages
281
Re: 1984 Silverton 34C Remodel/Update/Upgrade PIC HEAVY

Sounds like a plan! :)
 

25thmustang

Lieutenant Commander
Joined
Mar 20, 2008
Messages
1,849
Re: 1984 Silverton 34C Remodel/Update/Upgrade PIC HEAVY

Small update. Switched from a palm sander to an orbital, night and day difference. What would have taken over and hour, if not more, took about a half hour. The steps were sanded, wiped with acetone and coated in the first coat of CPES.

A little comparison of the before and after.
f6862834.jpg


All sanded.
f6b817de.jpg


Acetone wiped.
cf1491c0.jpg


Coated in Epoxy.
df6eea9d.jpg


The teak drinks the epoxy up. I will go with the 3 coats like the other teak, and then its on to varnish.
 

25thmustang

Lieutenant Commander
Joined
Mar 20, 2008
Messages
1,849
Re: 1984 Silverton 34C Remodel/Update/Upgrade PIC HEAVY

A few updates tonight.

Added another coat of CPES to the steps. One more and the should start varnish work! I think I need another can of Epifanes. That will be over $100 worth... yikes.

No photos of that work. Nothing else to see from the last.

Another update, took the center sections of the door. My father had to seam them with a third panel to make it wide enough. The seam is visible, but nothing out of the ordinary and looks nice to me. I then stained it with a few colors to try and match the styles and rails. Tonight I put the first coat of thinned Epifanes on them. Hopefully I can get away with another coat tomorrow, a sand and then one final coat.i5

Snapped a few photos. I think they look better in pictures than person, but hopefully that will change.

9f76c9cd.jpg

2cf32696.jpg

acbec938.jpg

e28d5f52.jpg


continued...
 

25thmustang

Lieutenant Commander
Joined
Mar 20, 2008
Messages
1,849
Re: 1984 Silverton 34C Remodel/Update/Upgrade PIC HEAVY

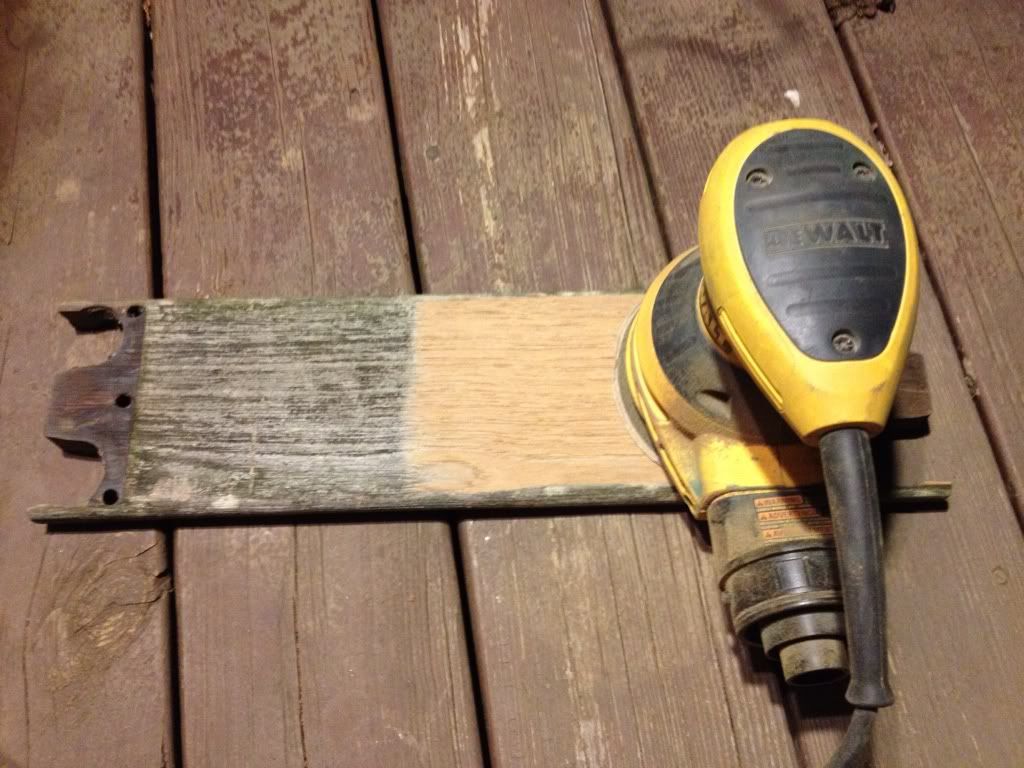
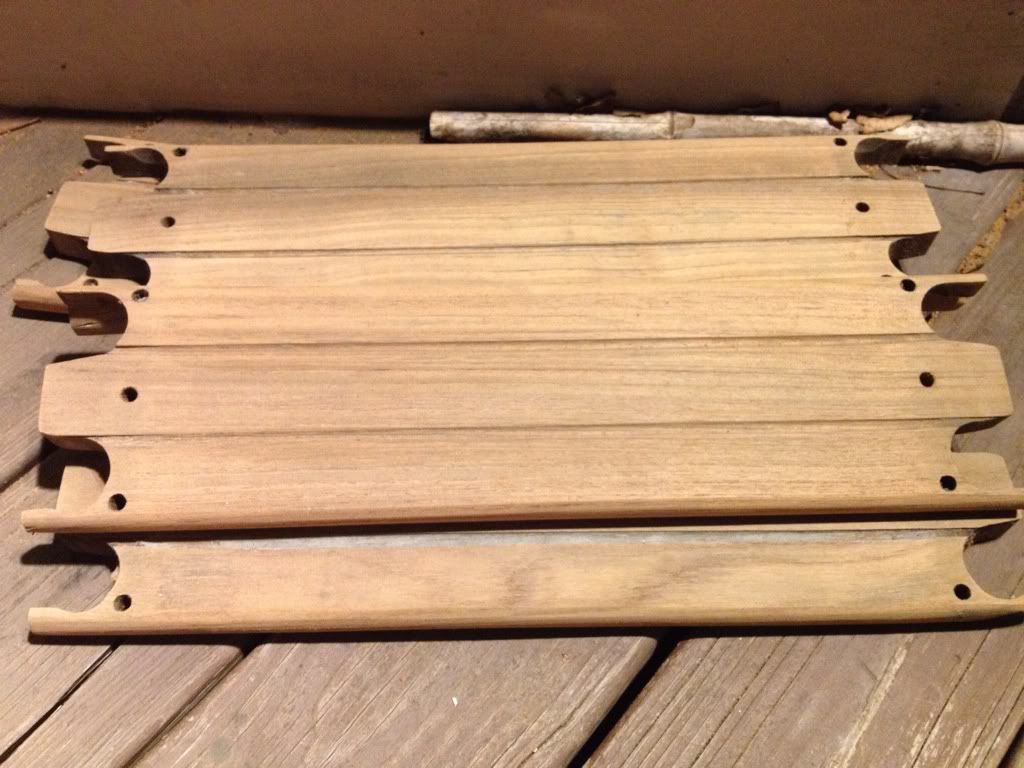
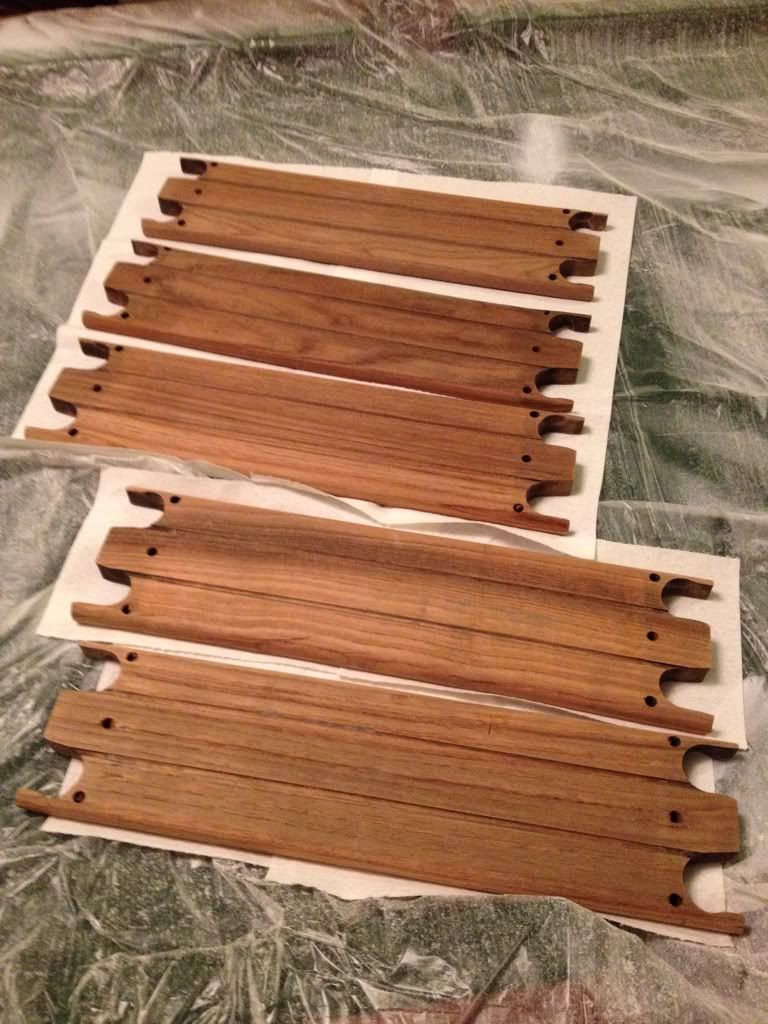
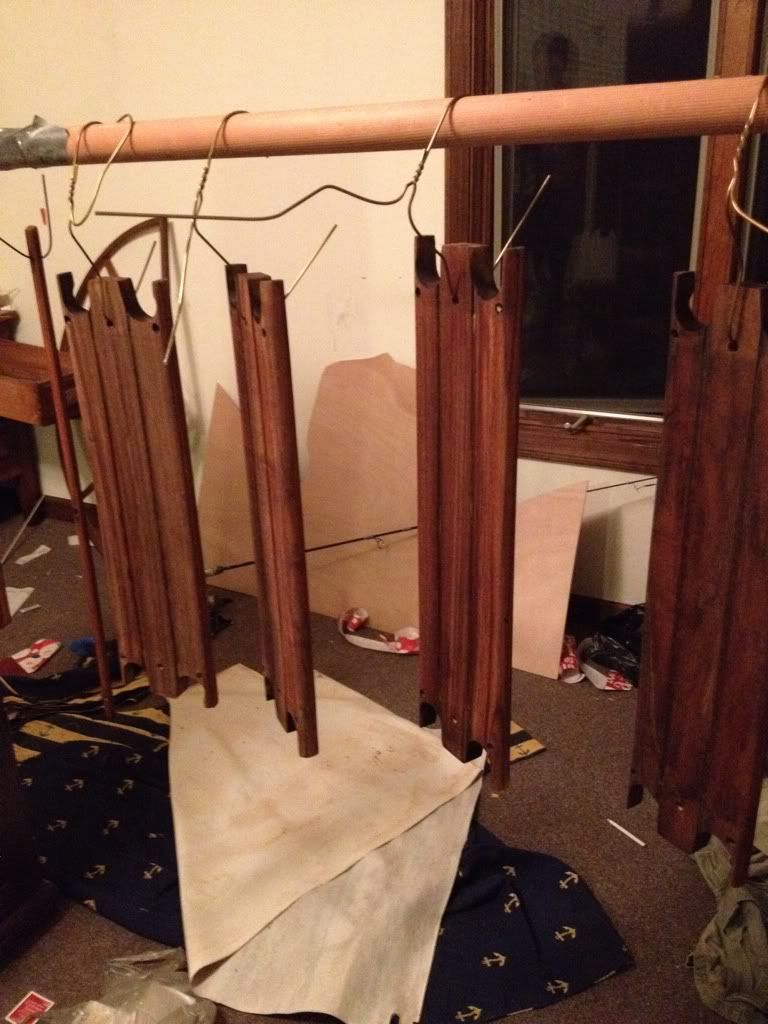
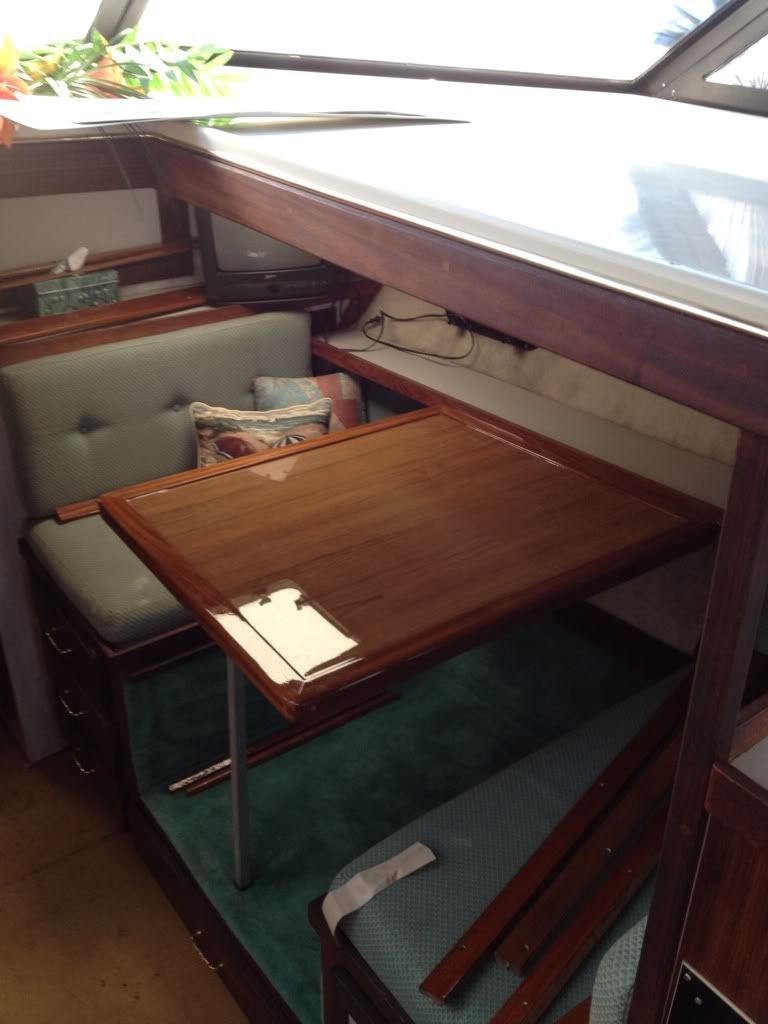
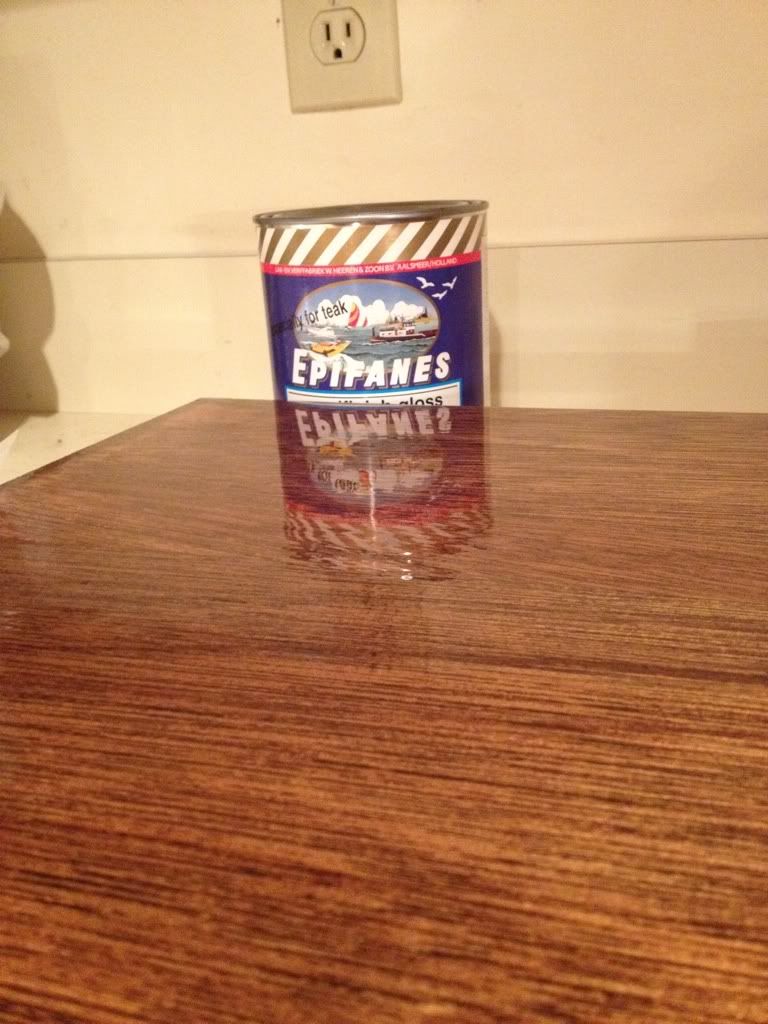
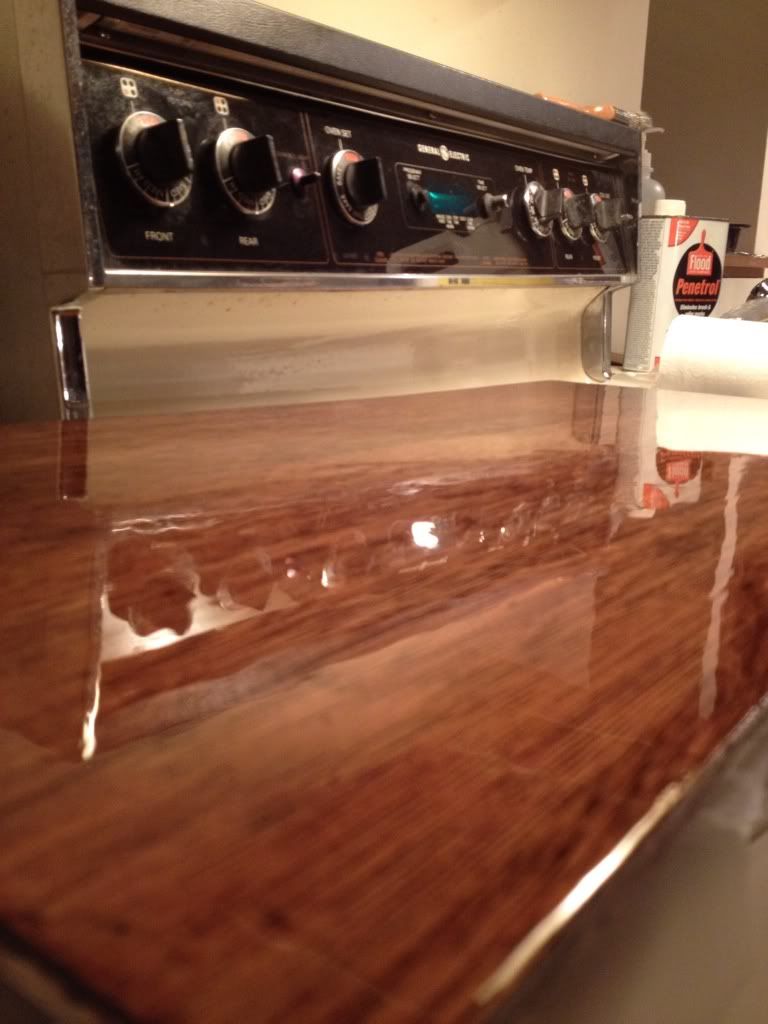
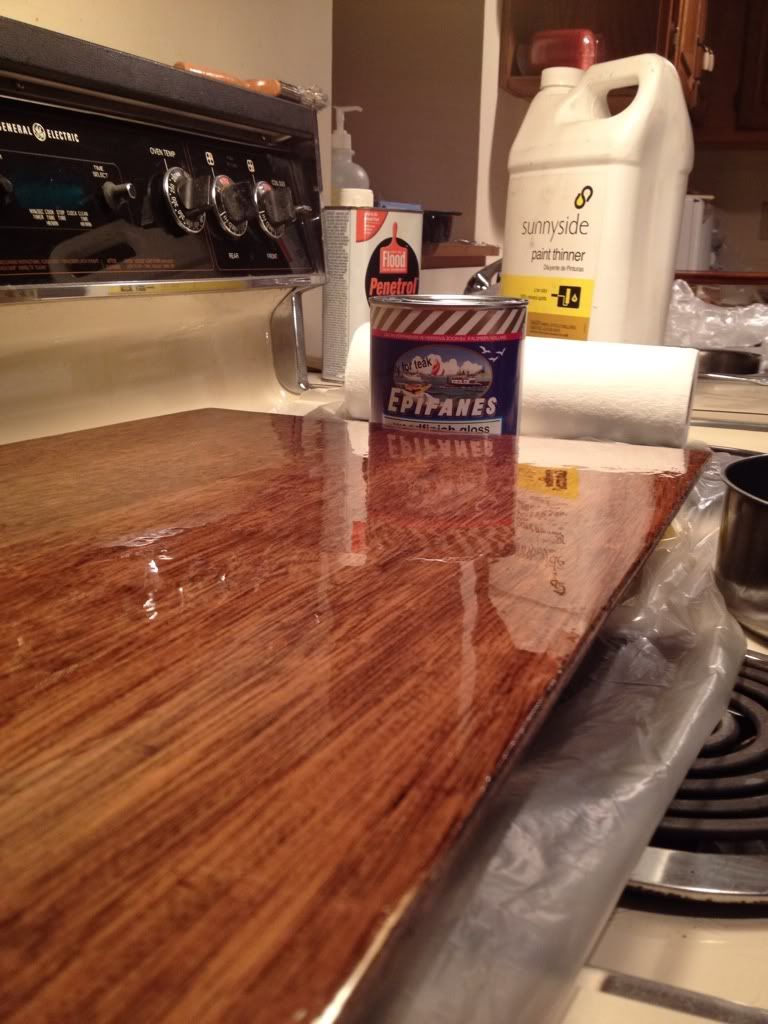
I stopped by may fathers to grab two antennas for my cousin, and remembered I had the old cabin doors to my 27'er. I originally thought I would sell them. I then realized that dealing with the CL people, and the low ballers, and the headaches for $75, isn't worth it. I instead plan to rip them apart, and use the teak on the Silverton. These were stained many years ago (5-6 would be my guess) with a really dark stain, and then polyurethaned. I did a quick sand on one part to reveal some nice clean teak. I may have my father plane the pieces to make it go a little quicker.

a26e542b.jpg

e5f0be9b.jpg


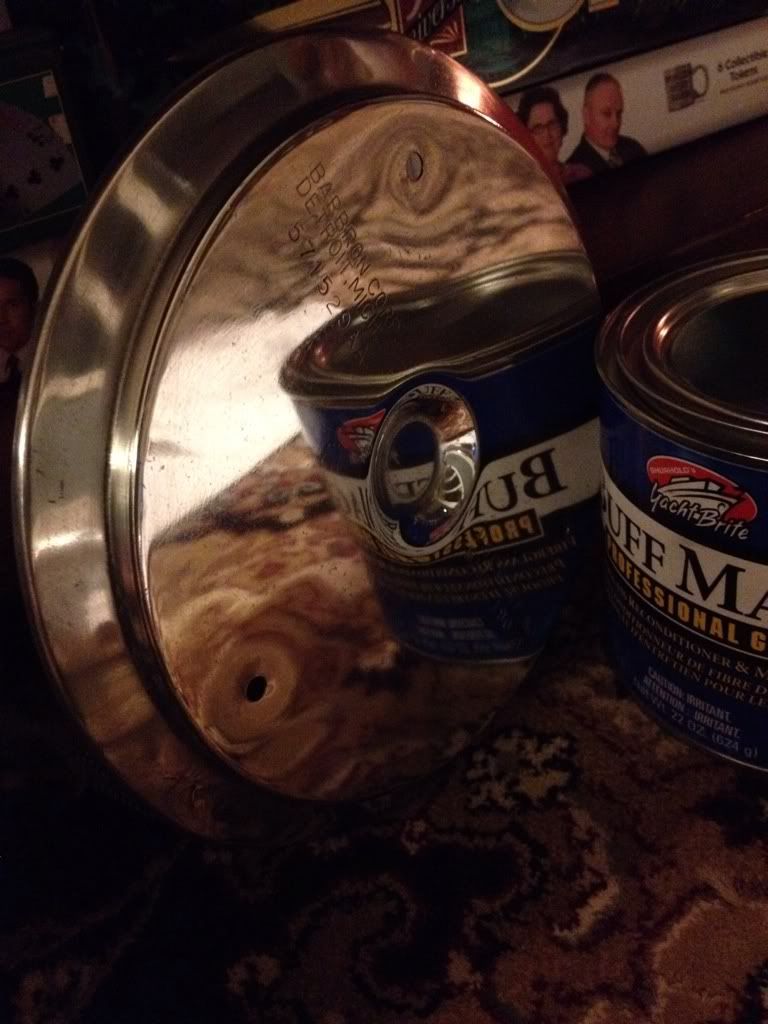
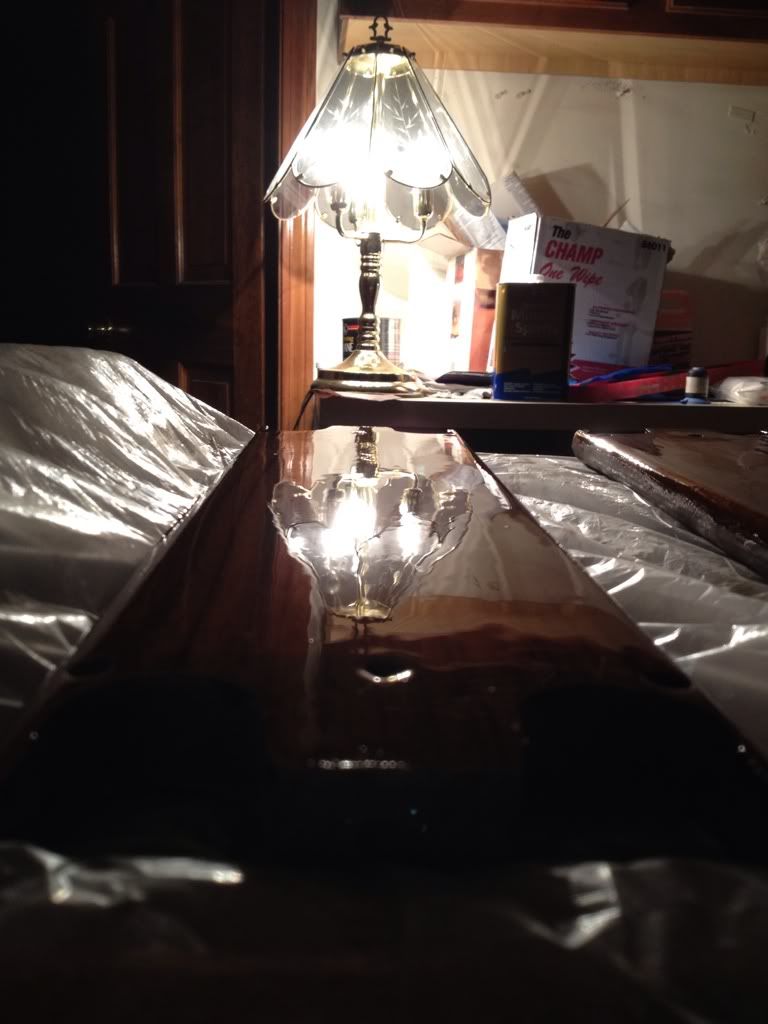
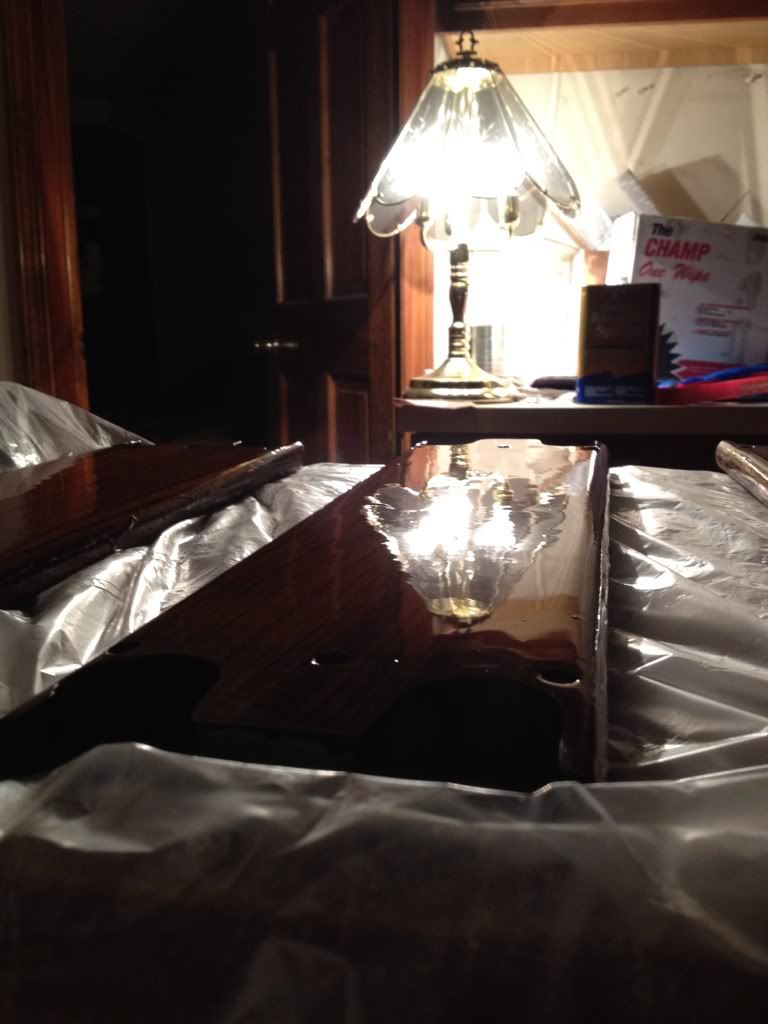
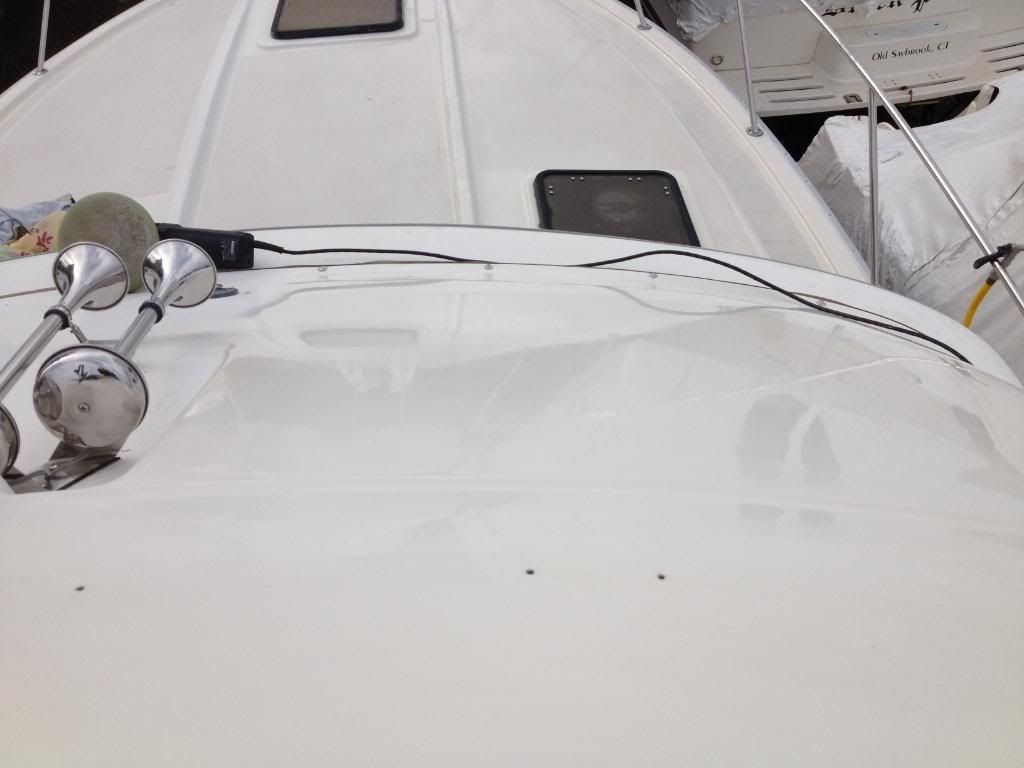
Last thing for the night was just for fun. I took the flame arrestor off the Westerbeke months ago. I figured I would clean the red paint off it and clean it up. I had scuffed it with a scotch brite pad back some time and then left it. Tonight I grabbed some 1500 and 2000 grit paper. I spent no more than 15 minutes with the 1500, 2000 and then a rag and buff magic. The results, although not perfect, were awesome. It was amazing what such little work did to the metal. I could literally watch the reflection form with the sand paper, and then as I worked the BM it just kept getting shinier and shinier. Other than staining my carpet and needing to clean it (btw I have a great product for that too, I will have to do a write up on) this quick little polish was one of the most, wow moments I have had.

f4f18888.jpg
 

25thmustang

Lieutenant Commander
Joined
Mar 20, 2008
Messages
1,849
Re: 1984 Silverton 34C Remodel/Update/Upgrade PIC HEAVY

Polished the bolts, and did some more polishing to the arrester.

48ca5630.jpg

d9948056.jpg


The nest da was spent at the boat. First order of business was the install the dinette table.

0c8dab3c.jpg


Continued...
 

25thmustang

Lieutenant Commander
Joined
Mar 20, 2008
Messages
1,849
Re: 1984 Silverton 34C Remodel/Update/Upgrade PIC HEAVY

Next up was some fun with the bottom paint. Nowhere near the work others put in, but the previous owner had added 3-4 boot stripes, and painted the BP well above the water line. The green will be covered with black, and the bottom paint line will drop 7" at the front, 3-4 at the sides. The white will be polished and a new dark green boot stripe will go on.

How she sat before:
e12aa416.jpg


Boot stripe going away:
da300a94.jpg


Sanding:
5f38225c.jpg


Sanded down:
e416d0c2.jpg


Continued...
 

25thmustang

Lieutenant Commander
Joined
Mar 20, 2008
Messages
1,849
Re: 1984 Silverton 34C Remodel/Update/Upgrade PIC HEAVY

Tried out a new product called Buff Magic. I hear it works wonders so thought I would give it a whirl. On the rotary with a wool pad, it really seemed to work good.

028d3b93.jpg

340a66b5.jpg

c75b26ec.jpg
 

ezmobee

Supreme Mariner
Joined
Mar 26, 2007
Messages
23,767
Re: 1984 Silverton 34C Remodel/Update/Upgrade PIC HEAVY

Looking great!
 

BSnB

Petty Officer 1st Class
Joined
Jan 8, 2007
Messages
281
Re: 1984 Silverton 34C Remodel/Update/Upgrade PIC HEAVY

Polished the bolts, and did some more polishing to the arrester.

48ca5630.jpg

d9948056.jpg


The nest da was spent at the boat. First order of business was the install the dinette table.

0c8dab3c.jpg


Continued...

Wow, Mustang! That's my goal for a table. Beautiful work. I like the slightly raised edging too which is what I'd hoped for with my table but my rounded corners prevent that.

I'm envious that you've progressed so far. That Buff Magic looks like it works pretty well. My goal this week is to catch up to your progress on the hull...then maybe I'll go about polishing some bolts or something...:rolleyes:
 

25thmustang

Lieutenant Commander
Joined
Mar 20, 2008
Messages
1,849
Re: 1984 Silverton 34C Remodel/Update/Upgrade PIC HEAVY

This table has what your looking for. It is also a HEAVY table. I do think a compass appliqu? would have looked nice, like your doing, but just wanted to get it done.

The hill I have stopped the cleaning on. I need to get the polish and actually do the topsides before I go back at the hull/bottom paint.
 

blueangel

Cadet
Joined
Feb 15, 2011
Messages
7
Re: 1984 Silverton 34C Remodel/Update/Upgrade PIC HEAVY

that is a gorgeous boat.. let me know if you ever decide to sell her!
 

25thmustang

Lieutenant Commander
Joined
Mar 20, 2008
Messages
1,849
Re: 1984 Silverton 34C Remodel/Update/Upgrade PIC HEAVY

blueangel, thanks. Hopefully this one sticks around for a while. I can never see me getting a newer boat though... probably only older and larger.

Tonight was round two on the bottom of the steps. It only took 20-30 minutes, so that helps!! Not to mention if the suns up, I'm working outside on the mulch beds, gardens, or pool.

da62800f.jpg

41d78a05.jpg

b1910807.jpg
 

25thmustang

Lieutenant Commander
Joined
Mar 20, 2008
Messages
1,849
Re: 1984 Silverton 34C Remodel/Update/Upgrade PIC HEAVY

Spent the day down at the boat. Had to wait around for some time at West Marine, which cost us a while, but all and all had a productive day.

Got the topsides washed. Found out that s imple scrub and wash was not enough. The boat has been sitting and the mold and mildew stained topsides were in rough shape. I scrubbed the bridge down, but after seeing the work my father put into the foredeck, think it needs more up top. Here are the before and afters up there, although there may be much more after, with a better scrub, and polishing.

IMG_0276.jpg

IMG_0278.jpg


The foredeck was terrible, and covered in mold. My father put a few hours into this, hand scrubbing with a few cleaners, but it came out looking pretty good.

IMG_0277.jpg

IMG_0315.jpg


Continued...
 

25thmustang

Lieutenant Commander
Joined
Mar 20, 2008
Messages
1,849
Re: 1984 Silverton 34C Remodel/Update/Upgrade PIC HEAVY

The flybridge was my goal, and sadly I only got half done. I brought the buff magic and tried it out, but found that we needed to use soft scrub to cut the chalk before buffing. After doing that the buffing went a little better. The buff magic needed to be put on just right to get the results. Too much and it caked up, and too little and it was spotty. I found that if any bit of it is left after the buffer, using a rag will not remove it. It needs to be buffed with a machine. I ran the buffer at a 2-3 speed, which seemed to give good results. We took the canvas snaps and brackets off, but could not get the handrail off. I was able to go around it though. The center venturi came off and that helped a ton for doing the high section of the bridge. It was a few hours of work, just for this areas, but the results were actually very, very nice. Rarely am I satisfied with a final product, but I can say this buff magic and pro polish seemed to work great.

Before:

IMG_0280.jpg

IMG_0282.jpg

IMG_0285.jpg


After:

IMG_0293.jpg

IMG_0316.jpg

IMG_0328.jpg
 

lil buggy

Senior Chief Petty Officer
Joined
Sep 24, 2011
Messages
766
Re: 1984 Silverton 34C Remodel/Update/Upgrade PIC HEAVY

great work.
again the woodwork is spectacular. you are moving along quickly, that buff magic seems to be doin the trick. sweet
 

25thmustang

Lieutenant Commander
Joined
Mar 20, 2008
Messages
1,849
Re: 1984 Silverton 34C Remodel/Update/Upgrade PIC HEAVY

Got the tops of the steps coated with 4 coats of Epifanes. They still need another 5-6, but are getting there.

0415350a.jpg


Also got another coat on the door panels. I'm fighting these a bit, bei g large flat surfaces. I'm hoping they will be done on the next coat.

a00d5398.jpg
 

chriscraft254

Commander
Joined
Jun 4, 2011
Messages
2,445
Re: 1984 Silverton 34C Remodel/Update/Upgrade PIC HEAVY

Nice work man, just catching up. Hope all is well. :)
 

25thmustang

Lieutenant Commander
Joined
Mar 20, 2008
Messages
1,849
Re: 1984 Silverton 34C Remodel/Update/Upgrade PIC HEAVY

Quick update.

Got the door panels for the head door done. One side at least. The door should be all set for the weekend.

c7bfb16e.jpg

da6acf61.jpg
 
Top