1986 Starcraft Super Sport Restoration

BEnberg

Cadet
Joined
Sep 26, 2011
Messages
20
Re: Potential new member of the Starmada - 1986 Starcraft Super Sport

Re: Potential new member of the Starmada - 1986 Starcraft Super Sport

Thank you! Reading up on the restoration threads to decide how I am going to tackle this. Tons of great information and ideas! Now to finish off the tile in my bathroom floor so I can start a restoration thread of my own.
 

BEnberg

Cadet
Joined
Sep 26, 2011
Messages
20
Re: Potential new member of the Starmada - 1986 Starcraft Super Sport

Re: Potential new member of the Starmada - 1986 Starcraft Super Sport

Any suggestions for a good cover? I get a good bit of snow in my neck of the woods but also want to be able to easily remove it to start work during any nice weekends.
 

zopperman

Lieutenant Commander
Joined
Jun 22, 2011
Messages
1,551
Re: Potential new member of the Starmada - 1986 Starcraft Super Sport

Re: Potential new member of the Starmada - 1986 Starcraft Super Sport

Hey there, Neighbor. How much are you looking to spend on a cover? There are 100 dollar ones at wally world that will likely fit your bill and there are "shark skin" covers here on iboats custom fit to your boat ETC that will run a lot more.
 

Starman8

Chief Petty Officer
Joined
Sep 17, 2010
Messages
630
Re: Potential new member of the Starmada - 1986 Starcraft Super Sport

Re: Potential new member of the Starmada - 1986 Starcraft Super Sport

You can get away with a cheap $20 poly during your project.

Get some ziploc lunch bags and a black Sharpie to keep what you start detaching labeled and intact, take pics as needed for reference, and if you will be rewiring, use a multimeter, and order a quart of GLUVIT
 

Decker83

Commander
Joined
Apr 5, 2011
Messages
2,593
Re: Potential new member of the Starmada - 1986 Starcraft Super Sport

Re: Potential new member of the Starmada - 1986 Starcraft Super Sport

Looks like you have a really good start with this SS.
Post lots of pic's.
 

BEnberg

Cadet
Joined
Sep 26, 2011
Messages
20
1972 Starcraft Super Sport Restoration

1972 Starcraft Super Sport Restoration

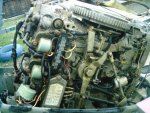
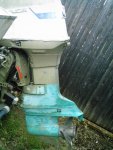
So I landed a motor this weekend. 1974 Evinrude 70hp Triumph. Starts and shifts well. Needs some paint and a good cleaning. Came with controls, a stainless steel prop in good condition and the shop manual which is good because I am a total newbie to motor work. Will pickle it for the winter while I tinker with the hull and trailer. Included photos to appease the Starmada. :)

The orange material on the cover off photo is from the insulation on the inside of the cover that is degrading. Can I use an off the shelf engine ccleaner to remove this and any excess lube then winterize?
 

Attachments

  • 004 (1).jpg
    004 (1).jpg
    70.2 KB · Views: 0
  • 0011.jpg
    0011.jpg
    54 KB · Views: 0
Last edited:

BEnberg

Cadet
Joined
Sep 26, 2011
Messages
20
1972 Starcraft Super Sport Restoration

1972 Starcraft Super Sport Restoration

Game on! I started my restoration project this Sunday between snow flurries (no garage). Removed all deck hardware with the exception of the Bow Rail. I will be drilling out all those screws. Removed the bow seating down to the deck. The seating was in good enough shape to have decent templates. Removed the left side console and most of the right side.

Question, I have a TON of screw holes in the deck. Looks like swiss cheese. Any suggestions?

Will be ordering seats (for color match) in the next week or so as well as my Gluvit.

More pictures to follow.

412792_3421080771388_1401250744_33295772_1235115126_o.jpg426941_3421079011344_1401250744_33295771_1768032724_n.jpgIMAG0192.jpgIMAG0193.jpgIMAG0194.jpg
 
Last edited:

Piece715

Senior Chief Petty Officer
Joined
Jan 26, 2009
Messages
757
Re: 1972 Starcraft Super Sport Restoration

Re: 1972 Starcraft Super Sport Restoration

Are you talking about the plywood deck has many holes? or the aluminum stringers underneath? If its the ply and your doing a resto prob gonna want to pull it up as well and use as a template for a new floor. By the look of the other wood in the boat you can bet ur bottom dollar that flotation foam in there is holding some water adding serious #'s to the hull not to mention it will kill performance of the motor.

I own a Sea Nymph which have basically the same hull design but the stringer setup is different. Always remember to never use pressure treated ply or wood with aluminum boats; causes some serious corrosion. Arauco ply from Lowes or HD works well with our style boats and its cheaper than marine ply

If the floor is original its probably riveted in place; well it was in mine at least. If that is the case find a drill bit that is slightly bigger than the rivets center and drill away. I ate through a couple of bits (1/8 size was mine if memory serves) so the cheap pack of 8-10 at harbor freights was a nice find
 

ezmobee

Supreme Mariner
Joined
Mar 26, 2007
Messages
23,767
Re: 1972 Starcraft Super Sport Restoration

Re: 1972 Starcraft Super Sport Restoration

I used JB Weld with little cut squares of aluminum flashing as backers. Stick it up there like chewing gum under your school desk. The backer allows you to sand it flush from the top without it "popping".
 

sprintst

Commander
Joined
Apr 18, 2009
Messages
2,066
Re: 1972 Starcraft Super Sport Restoration

Re: 1972 Starcraft Super Sport Restoration

That's going to be a fun boat to work on with your helper there. It's got a slick layout and the hull has great lines.

Once she's all done up with the outboard on it you'll be out fishing in no time. Outboards are the way to go as Ezmobee would say :)
 

BEnberg

Cadet
Joined
Sep 26, 2011
Messages
20
Re: 1972 Starcraft Super Sport Restoration

Re: 1972 Starcraft Super Sport Restoration

Question for the Starmada Gurus. Two of my windshield mount bolts are totally shot. Are these still available. They are threaded under the console and have a thin tab with a hole to bolt the windshield to.
 

ezmobee

Supreme Mariner
Joined
Mar 26, 2007
Messages
23,767
Re: 1972 Starcraft Super Sport Restoration

Re: 1972 Starcraft Super Sport Restoration

You don't need those square bolts. I substituted regular bolts that fit the channel for the couple missing ones I had. Worked fine and actually didn't twirl around in there as I was tightening the nuts.
 

BEnberg

Cadet
Joined
Sep 26, 2011
Messages
20
Re: 1972 Starcraft Super Sport Restoration

Re: 1972 Starcraft Super Sport Restoration

Ok, work continues this weekend. Should have her gutted and ready for gluvit by the end of the weekend.

Been ordering parts for the refit. Seats are on the way so I can match colors.

Found a great sale on the noodles. I am thinking that I might need 60 - 70. Does this sound about right?
 

BEnberg

Cadet
Joined
Sep 26, 2011
Messages
20
Re: 1972 Starcraft Super Sport Restoration

Re: 1972 Starcraft Super Sport Restoration

So, between work and SAR missions the project has been moving slowly.

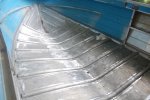
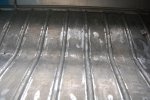
I have her stripped down to a bare hull and have cleaned all the rivets and seams in preparation for Gluvit.

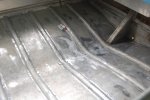
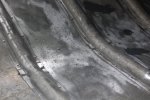
I found significant white corrosion between the ribs and stringers so I pulled them to polish that all out. I also found pitting as well as a few pinholes below the waterline that concerns me. (photos attached)

I cleaned out the pits and pinholes with a brass brush then applied JB weld to the pinholes to patch them. My plan was to apply Gluvit to the seams and rivets but really want to kill any corrosion issues for good.

Should I apply Gluvit to all the pited areas then paint the entire inside of the hull or is a good cleaning enough?

Fish Finder 087.jpg Fish Finder 086 - Copy.jpg Fish Finder 084 - Copy.jpg Fish Finder 085 - Copy.jpg
 

kfa4303

Banned
Joined
Sep 17, 2010
Messages
6,094
Re: 1972 Starcraft Super Sport Restoration

Re: 1972 Starcraft Super Sport Restoration

Looks great BE. You're on the right track. Just fill in any pinholes with JB (there is also a JB marine epoxy putty, kind of like play-doh, for larger holes in areas of minimum flex) let it cure, then apply the GlUV-it to the ribs/seams only. No need to coat the entire interior. After the gluvit cures, it will need some UV protection, you can either paint over it, install a deck above, or both. Be sure to attach your decking with either aluminum rivets and/or stainless steel sheet metal screws dipped in a bit of 3M 5200 prior to their installation. BTw, if you have any Gluv-it left, it can also be use to seal up any wooden components you may have such as the deck, transom and dash. God luck. Keep us posted.

P.S.
B/c gluv-it is a 2-part epoxy it can kick pretty fast at high temps. It helps to keep the supplies in the house the night before so that they're nice and cool when you combine them the next day. It probably won't make a huge difference, but it should hopefully buy you a little more working time.
 

BEnberg

Cadet
Joined
Sep 26, 2011
Messages
20
Re: 1972 Starcraft Super Sport Restoration

Re: 1972 Starcraft Super Sport Restoration

Great advice on storing the Gluvit inside the night before!
 

BEnberg

Cadet
Joined
Sep 26, 2011
Messages
20
Re: 1972 Starcraft Super Sport Restoration

Re: 1972 Starcraft Super Sport Restoration

Gluvit is down! Had enough to cover the pitted areas in the bilge as well!

Next weekend she gets flipped and sanding begins.

266133_4266040294848_767625291_o.jpg 413640_4266811514128_1858758209_o.jpg
 

BEnberg

Cadet
Joined
Sep 26, 2011
Messages
20
Re: 1972 Starcraft Super Sport Restoration

Re: 1972 Starcraft Super Sport Restoration

Great advice on storing the Gluvit inside the night before!

This worked like a charm! Kept it in our basement until just before mixing. In 80deg temps had more than enough time to apply!
 
Top