1987 28' Chris-Craft 283 Amerosport

Status
Not open for further replies.

BSnB

Petty Officer 1st Class
Joined
Jan 8, 2007
Messages
281
Re: 1987 28' Chris-Craft 283 Amerosport

If you look carefully at the top photo above, you can see another boat off my bow. The guy who owns it was painting the blue while I was there and a I wandered over to take a look. Talk about a renovation!!! He said he bought the boat out of Minnesota a couple of years ago and has been doing a full renovation on her. I think he said she was a Stephens Motor Yacht built in 1965 as I recall. Full Mahogany hull and top deck. It looks to be about 60 feet long and he'd lighty sanded the entire hull and bottom and was repainting it with a brush! No roll and tip here, he'd brush on the paint and then tip it and move on.

He was too busy for me to ask for a tour, but I plan to get on her before he takes her away. He said he'd completely refinished the Mahogany interior, but was still making some upgrades. He also said it was his first project boat. Gutsy guy!! I'll get some pictures.
 

lexusbajo

Cadet
Joined
Apr 11, 2012
Messages
6
Re: 1987 28' Chris-Craft 283 Amerosport

Looks like it came out great. Our boats are the same color and i know how bad the black was oxidized on mine. i want to say i saw some actual chrome vent covers for sale for a chris craft but they were about 60 bux a piece.
 

BSnB

Petty Officer 1st Class
Joined
Jan 8, 2007
Messages
281
Re: 1987 28' Chris-Craft 283 Amerosport

Looks like it came out great. Our boats are the same color and i know how bad the black was oxidized on mine. i want to say i saw some actual chrome vent covers for sale for a chris craft but they were about 60 bux a piece.
It came out better than I expected, lexusbajo, The black on mine was very oxidized as well. To the point of almost appearing gray. You can see in my signature photo how the black almost fades to just a shadow line look. Now, with the black all glossy, that line pops and provides more definition to the lines of the upper hull. Even the gray band under the rub rail changed from a battleship gray color to more of a deep pearl gray.

Yup, I've seen some of the chrome or polished stainless too and they are a bit pricey! I think I'll still try to paint those vents gloss black while I look around and try to decide if I want real chrome or stainless.

Good luck with yours. I love the classic lines of these Chirs Craft's. Amerosports in particular. I frequently get compliments as I imagine that you do. Thanks for the support.
 

25thmustang

Lieutenant Commander
Joined
Mar 20, 2008
Messages
1,849
Re: 1987 28' Chris-Craft 283 Amerosport

The polishing looks great! Glad to see you making more headway.

Also if/when you get aboard that 60'er, bring your camera. :D
 

BSnB

Petty Officer 1st Class
Joined
Jan 8, 2007
Messages
281
Re: 1987 28' Chris-Craft 283 Amerosport

I'll definitely bring my camera, mustang. With the extensive wood refinsihing you've been doing to the Silverton, I imagine that it would be of great interest to you. He said that he initially had hopes of leaving the hull a natural Mahogany color with a varnish coat, but after sanding down the entire boat, he found that there was just too many dings and color variation so he decided to paint it. I promise, I'll get pictures. An even better idea would be to get him to join this jolly band of masochists and post his own.

ON another subject, mustang, you suggested that I have the props looked at by a professional. While I was at the Marina the other day, I did have the yard mechanic look at my props and drive shafts. He said that there were no marks at all on the props and the balance looked ok. He did say that maybe next year, I should replace the strut bearings but they weren't bad. He suspects that it's a tune issue and that maybe one of the plugs is fouled. He gave me an amazingly cheap price to tune both engines (which I'd been trying to have done since haul out last season). New plugs, plug wires, rotor, timing, etc for less than the price of dinner out with my family. He'll also replace the fuel water separators and fuel filters, check the cooling system impellers and spray clean the carburetors. All in all, I think they're trying to make up for all the delays. :rolleyes:

I also ran in to the Charter Captain that I mentioned in my reply to CC earlier. It turns out that it was a bad time to talk as he was just arranging with the yard to pull one of his engines which had blown last week while he was out on a Charter. It looks like if I'm going to fish, it will be on my boat and maybe if the Captain has no boat for a couple of weeks I can convince him to take a ride with me.

The Marina has promised to finish the engine work and have me launched before the end of next week. I've got to be out of town then, so they offered to launch for me and tie me up in my slip while I'm gone. They certainly are being helpful now.:cool:
 

Pmccraney

Lieutenant Commander
Joined
Jul 26, 2011
Messages
1,734
Re: 1987 28' Chris-Craft 283 Amerosport

Just checking in to say hello and comment on the nice shine... Looks like you are checking some projects off the list..

Hoe all is well
 

lil buggy

Senior Chief Petty Officer
Joined
Sep 24, 2011
Messages
766
Re: 1987 28' Chris-Craft 283 Amerosport

shaweeeet.
great work, all in one day! looks great man.
and the marina is takin care of you as well:D. sounds like things are heading your way,, thats great to hear!

on a next years note; i been using the toilet bowl cleaner trick for a few years now and i can say that if you think it does good now add 2/3rds pieroxide to the mix! it's like addin sterroids to the hulk:D,,lol. i never used the acid but i can say the mix gets the nasties off in a hurry.

happy boatin:D
 

BSnB

Petty Officer 1st Class
Joined
Jan 8, 2007
Messages
281
Re: 1987 28' Chris-Craft 283 Amerosport

Just checking in to say hello and comment on the nice shine... Looks like you are checking some projects off the list..

Hoe all is well

Thanks for stopping by. Yup, I'm checking a few things off the list to get her ready for the launch. A little ADHD here on my posts I guess, but it's all good! ;-) Who you callin' a hoe?:D
 

BSnB

Petty Officer 1st Class
Joined
Jan 8, 2007
Messages
281
Re: 1987 28' Chris-Craft 283 Amerosport

shaweeeet.
great work, all in one day! looks great man.
and the marina is takin care of you as well:D. sounds like things are heading your way,, thats great to hear!

on a next years note; i been using the toilet bowl cleaner trick for a few years now and i can say that if you think it does good now add 2/3rds pieroxide to the mix! it's like addin sterroids to the hulk:D,,lol. i never used the acid but i can say the mix gets the nasties off in a hurry.

happy boatin:D

2/3rds peroxide??? Interesting. that's more peroxide than toilet bowl cleaner. I'll give it a try lil buggy, thanks for the tip!

I'm still messing with those LED's. I'll post pictures later, but I'm struggling to figure out how to get them wired up and attached under the swim step.
 

BSnB

Petty Officer 1st Class
Joined
Jan 8, 2007
Messages
281
Re: 1987 28' Chris-Craft 283 Amerosport

OK..so I need some advice on these lights. Here's what I got.

IMAG0075.jpg

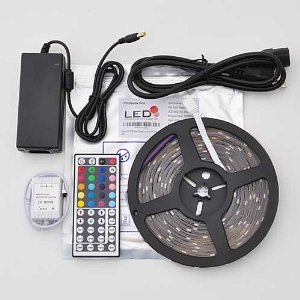
That's the transformer, the controller and the connectors above.
IMAG0078.jpg
A close up of the connector

IMAG0079.jpg
the male side leading from the lights
 

BSnB

Petty Officer 1st Class
Joined
Jan 8, 2007
Messages
281
Re: 1987 28' Chris-Craft 283 Amerosport

IMAG0081.jpg
This marking, on the back side, appears to be where I can cut the light strip.

IMAG0082.jpg
This is a similar marking on the LED side
 

BSnB

Petty Officer 1st Class
Joined
Jan 8, 2007
Messages
281
Re: 1987 28' Chris-Craft 283 Amerosport

One immediate problem. On my remote control, when I press Green I get Blue and vice versa. I can deal with that I guess, but it suggests that some wire is crossed up from the get go and I can only make things worse.

On to the bigger question. This connector might or might not hold up in an exposed environment, like under my swim step getting repeatedly wet. Even if I were to silicone wrap it. That being the case, I've got to cut the connector off and splice some wires...4 of them it looks like....to where the connector was. Then I've got to feed those wires through the hull, into the engine compartment and up to the helm in order to pick up power and mount the controller. I remember that CC was able to order on-line some wire strips that match the strip the connector is attached to. I don't think I've got time to do that and plan to find some thin auto or speaker wire and attempt to solder each wire individually to get a length sufficient to at least reach through the hull and into the engine compartment. Probably I should just run all 4 of these wires to them helm.

If I cut off the connector, are the wires marked in any way so that i know which is the power wire and which are the red, green or blue wires???

Also, when I cut off the power supply from the transformer, will the wires be marked in some way so I can determine which is + and which is - ????????

I'm also only going to need about 6 to 8 feet of this light strip. I know that I can cut it at those marks and then seal that cut end and the wired end will light up. But is it pretty clear what wires I need to solder on to the remaining light strip so that I could use the rest of the strip in another location?

I've never done any soldering. Any tricks to keep in mind?
So many questions...so little time.:confused:
 

25thmustang

Lieutenant Commander
Joined
Mar 20, 2008
Messages
1,849
Re: 1987 28' Chris-Craft 283 Amerosport

Good to hear the marina working with you. I hope the tune will figure things out. Like I said, it just seems odd the drive would fall out of alignment.

I wish I could help with the LEDs, but I have no clue how to set them up.
 

lil buggy

Senior Chief Petty Officer
Joined
Sep 24, 2011
Messages
766
Re: 1987 28' Chris-Craft 283 Amerosport

allright there buddy,
as far as the vents go, pull them and acetone them, if there not scratched up they will look like new, then add protectant like armor all,should hold up well.

as far as the lights go. my ir box (white thingy with the remote eye attatched) my strip is a lil different tho
i used amazon for the connecters http://www.amazon.com/LED-Strip-Con...004Q8OBWK/ref=pd_sim_hi_3/191-1411020-0295004 they have a next day shipping avail,,lol
i think you may have the pins into the connection upside down, not sure but look at where they connect. on my set they have an arrow pointed to the ground or black wire. the r,g,b are the individual power wires to the specific color


yes those are the cut marks. every three cut section on mine are kinda soldered looking and without the connecters if you have those spots i would use those as the cut points(will make it easier to solder) and if you look close around the scissor marks you will see the letters.
as far as keeping the color wires straight i bet when you cut the little white wire they will be all colored.but i have a different way to handle it so you know(below)

i also mounted the ir box with the eye at the helm. to make splicing easier i cut the first 3 light section and plugged it right into the ir. i then used a connecter to get me to the color coded 4 wire. i cut the connecter wire in 2 (made for an easy splice)
you can do the same thing but where i have the connecter you can just solder( my opinion is you should be ok) get the skinny little solder(for computer chipboards,,, i found it at harbor freight)instead of the thicker traditional stuff that will be slower but it will give you more room for error. than run,,,,,,, yep telephone wire,,, cheap 25 ft extension from the dollar store:D cut the ends off and you are in, i think you will have 3 matching colors so you cant go wrong.
run your wire thru the boat out the transom and to the beginning of the strip, once soldered and heatshrunk bury it in 5200 or a heavy silicone ,, gobs of it. just dont bury the first led
imho i think you should mount them as close to the back edge next to the lip you have. it may get wet some but when you are backing up it won't get as drenched.

i have been thinking of your install for weeks now and will be happy to help anyway i can
check your pm:D
 

lil buggy

Senior Chief Petty Officer
Joined
Sep 24, 2011
Messages
766
Re: 1987 28' Chris-Craft 283 Amerosport

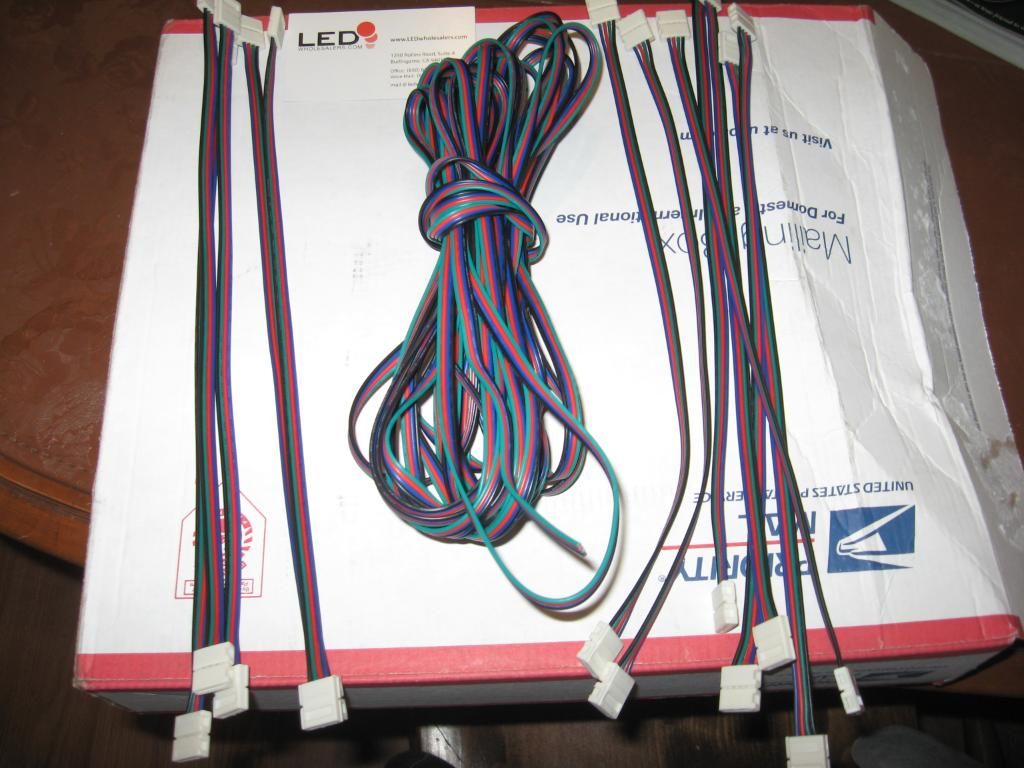
heres the 4 wire and the connecters i bought.
4wireandjumpersled001.jpg

when i got the connecters they were a half a cheeseburger they are a whole one now pretty cheap,,lol the shipping may cost ya 10 burgers,lol mine was 5 for three day ship
learn from my mistakes figure where you will put the rest of them lights and count the connection points(2 connections per each connecter)
then add like 5 extra, if you need them you wont have to pay the darn shipping twice.:facepalm:

hope it helps
 

lil buggy

Senior Chief Petty Officer
Joined
Sep 24, 2011
Messages
766
Re: 1987 28' Chris-Craft 283 Amerosport

as far as the peroxide goes, it thins the non bleach toiletbowl cleaner so its easier to spray and the bubbles kick the mix into high gear
very light agitation a 15 to 20 mins later and it is all gone:D


just read back thru, i had to do the same with the power cord.
this is my set

what i did was plug the power wire into the ir box (white). then i cut the wire that goes to the big black rectangle(power converter) just before the black box and after the barrel thingy:facepalm: i did leave enough room both sides for a resplice if i messed it up,,lol. that exposed 2 wires pink,(poitive) and blue(negative) i tested just to be sure. blue went to a ground under the dash, pink to a switch then from the switch to a red(what i had) wire to fused power.
the darker wire usually is the ground however a wire tester makes it (lil buggy) proof,,lol

i also was thinking of corrosion when i used the clips. my answer was to put the strip into and under the fingers to mach up the lil copper circles and put a dollup of silicone on it and close the connecter. i was nervous that if i overloaded the connecter that it would move the fingers off their mark, so i was careful not to overuse.
either way you attatch the wire to the strip be careful and heatshrink the connections
ohhh also do all your splicing of the strip when the power aint attatched so you dont blow the led's.
also be carefull not to step on the strip, and too much bending of it could also short it out.
hope it helps
 

BSnB

Petty Officer 1st Class
Joined
Jan 8, 2007
Messages
281
Re: 1987 28' Chris-Craft 283 Amerosport

Thanks for all the help, lil buggy, I think I understand the wiring now. I'll order some of those connectors on-line for the rest of my installation, but get some telephone wire for this one. The penetration into the hull will be well above the waterline, yet still under the swim step. I'll gob it up with silicone when I've done running the wire inside. That way I can use that same hole later to run another wire set for the true underwater lights I'll install next year.

As you've advised, I do plan to embed this RGB strip into a gob line of silicone as close along the inside (hull) edge of my swim step as I can. It will be well protected their from sun, rain and prop wash and should also reduce the effect of the LED's reflecting a hot spot when viewing my boat from astern.

When you hooked in your power, did you run it through a switch? or do you rely on the remote control to turn your lights off and on?
 

BSnB

Petty Officer 1st Class
Joined
Jan 8, 2007
Messages
281
Re: 1987 28' Chris-Craft 283 Amerosport

Good to hear the marina working with you. I hope the tune will figure things out. Like I said, it just seems odd the drive would fall out of alignment.

I wish I could help with the LEDs, but I have no clue how to set them up.

Yup, I think that they're finally getting it together. I made it a point to meet with the new ownership partner who outlined for me some of the additional changes and improvements he has planned for the entire property. I learned that there had been a pretty significant shake-up of personnel over the winter. Only one of the mechanics remains and one girl in the office. Staff is being added slowly.

That hold-over mechanic from last year, a really good guy, was the one that looked at my boat and will also being doing the tune and checking things out generally. I feel pretty good about that. With my luck though, he'll be the one who'll have to tell me that I've blown an engine or something serious like that which is causing the vibration.:redface:
 

BSnB

Petty Officer 1st Class
Joined
Jan 8, 2007
Messages
281
Re: 1987 28' Chris-Craft 283 Amerosport

I've also got to wire up the downriggers I picked up. I ordered gimble mounts that bolt on to the swivel plate at the base of the downriggers. They are made to slide in to the flush mount rod holders on the gunnel that I installed last August. I also ordered some flush mount power outlets. The power outlets hold the female end of the power cord and you flip up the cover and the male end coming from the downrigger plugs in to that. The location I've selected for these outlets is basically right behind the helm seats. should make for easy removal of the downriggers...just unplug them and slide the mounts up out of the rod holders for storage.

I've got to splice and run a negative wire down from the power outlets to one of the batteries and then run the positive lines to a switch on my console before finally running back to the batteries to pick up the power. I'll need to put in an inline fuse as well. Taking a page out of CC's playbook, I think I'll install a new connector block behind the console and run my power pair to that, add my fuses and switches and then make my paired wire runs from there back to the power outlets.

Wish me luck. I'm not much of an electrician. The last time I tried boat wiring with a lighted switch, I watched the insulation sizzle and melt before I was able to snatch a wire off the battery. :facepalm:
 

lil buggy

Senior Chief Petty Officer
Joined
Sep 24, 2011
Messages
766
Re: 1987 28' Chris-Craft 283 Amerosport

I've got to splice and run a negative wire down from the power outlets to one of the batteries and then run the positive lines to a switch on my console before finally running back to the batteries to pick up the power. I'll need to put in an inline fuse as well. Taking a page out of CC's playbook, I think I'll install a new connector block behind the console and run my power pair to that, add my fuses and switches and then make my paired wire runs from there back to the power outlets.

Wish me luck. I'm not much of an electrician. The last time I tried boat wiring with a lighted switch, I watched the insulation sizzle and melt before I was able to snatch a wire off the battery. :facepalm:
excellent idea especially if it's a borrowed one.
running a seperate panel will allow alot of things, if the running lights go down,,, it's not your fault:eek::D,,lol. really it makes it a ton easier. althogh you should run the ground wire to the block, the battery will work as well. then all the new gadgets are all plug and play.
although i'm not an electrition, old wires dont like being wiggled and moved.
make sure the size of the wire can handle the current you need to run those downriggers.

As you've advised, I do plan to embed this RGB strip into a gob line of silicone as close along the inside (hull) edge of my swim step as I can. It will be well protected their from sun, rain and prop wash and should also reduce the effect of the LED's reflecting a hot spot when viewing my boat from astern.

When you hooked in your power, did you run it through a switch? or do you rely on the remote control to turn your lights off and on?
to clairify a lil further. are you talking furthest away from your boat, outermost part of your platform, tight up against the lip just inside of the outer edge underneath?,, (now i think i confused myself further:facepalm:.)
if not a flexable piece of rubber or plastic L or plastic 1/4 round will tuck it away nicely under there and minimize the reflection. kinda like Budds bow teak but you wont need a groove just a hump,,lol

as far as the power went , yes i ran the + or pink one on mine to a switch than ran a power wire to the fuseblock power.

it would look real sweet to trace the whole outline under your platform(3 sides) with the same lights that way that whole notch would be lit up and changing colors. another few soldered splices is all,,, lol.,,sounds like faze 2!

i was also thinking of your strip, mine has 3 sections of led's each with cutmarks, and on the next one it has a soldered connection cutmark. if you could cut it so your first section starts with it. that would be easier to solder to than those lil gold circles. practice on a dot on the workbench, with the smaller diameter solder it should be easier


hope it helps

great to hear about your marina, all the ducks are in a row now.
 
Status
Not open for further replies.
Top