peacekeeper6
Senior Chief Petty Officer
- Joined
- Apr 25, 2005
- Messages
- 765
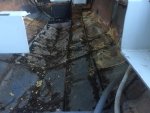
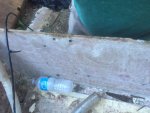
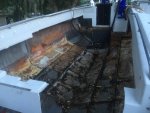
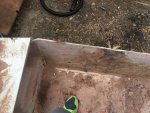
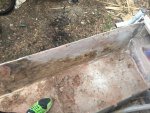
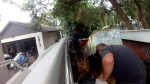
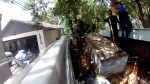
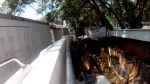
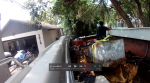
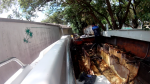
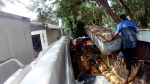
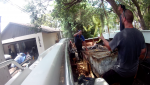
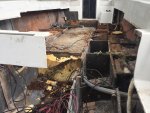
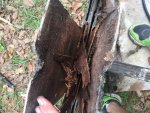
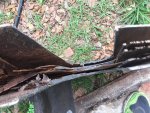
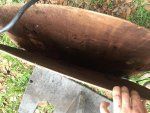
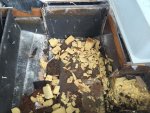
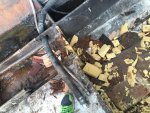
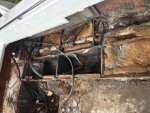
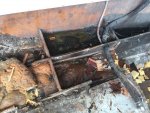
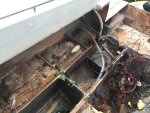
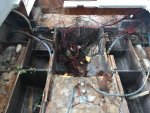
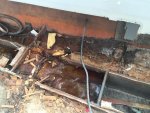
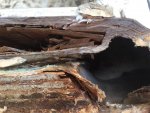
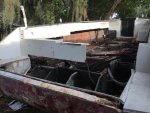
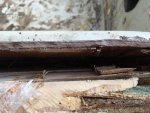
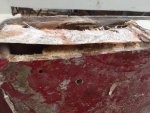
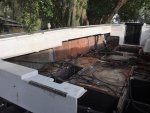
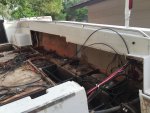
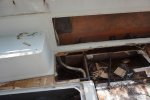
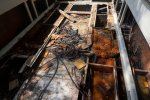
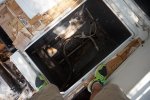
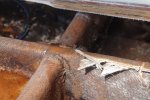
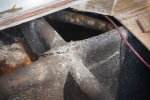
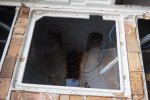
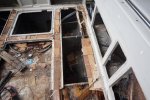
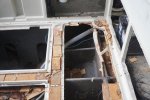
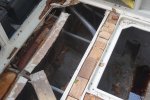
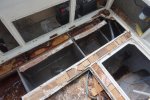
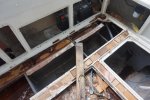
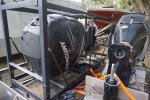
Here goes boat number 2 or 3 if you would count a Scarab I did with a buddy. I had a previous thread where I attempted this restore on the same exact type of boat in the archives with the pictures somehow removed, wish i could get them back. Here is some background on that build...I had no idea what i was getting into. Alas we are here with the new boat. Picking her up I knew she had rotten inserts for the floor and some rot around the console where the previous owner tried to secure the console better than the factory and drove very large wood screws through the deck. These of course rotted small patches of the floor. Going into the build I knew the stringers would need to be replaced however; on these boats a funny thing I have noticed about all the boat builds I have done absent actually banging the stringers or getting in there and drilling pilot holes I have never seen any type of stress damage due to the stringers being rotted. On all the boats we did (and boats i met on the water / shop which had rotten stringers) I never noticed any structural integrity issues due to the stringer system being rotten. Why this is I have no idea, but this boat also shows no sign of stress or flexing /bowing due to a rotten stringer grid and it is very rotten. Now my last build I really didn't bother with the stringers but i did pull the cap which I chose not to do this time due to tackling the stringer system and I don't want to deform the hull when I glass it all back in, plus it was a huge PITA to build two large gantries. Now that I have children and I plan on keeping this boat for some time I have decided to tackle the stringer grid system as I did on the Scarab we rebuilt. SO long story short the list of major surgeries are
-stringers
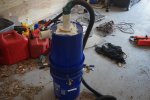
-remove foam
-remove ****ty transom design and raise splash well while glassing in knew stringer knees to the transom.
-re-power with 4 strokes
-redesign cabin
-add air
-add generator
of course I am positive as with the last few we did there will be tons of small items along the way, but I hope that when I get this done I can finally have something to hold on to (my usual boat possession time frame is only about 3 months). These boats have extremely deep stringer grids which I am hoping to be able to hide some nice additional comforts that didn't go in during the 87 build.
-stringers
-remove foam
-remove ****ty transom design and raise splash well while glassing in knew stringer knees to the transom.
-re-power with 4 strokes
-redesign cabin
-add air
-add generator
of course I am positive as with the last few we did there will be tons of small items along the way, but I hope that when I get this done I can finally have something to hold on to (my usual boat possession time frame is only about 3 months). These boats have extremely deep stringer grids which I am hoping to be able to hide some nice additional comforts that didn't go in during the 87 build.
Attachments
-
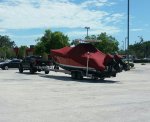 photo245996.JPG130 KB · Views: 0
 -
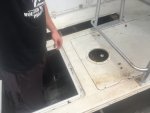 photo246000.JPG125.1 KB · Views: 0
 -
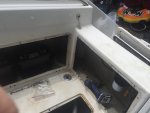 photo246004.JPG129.8 KB · Views: 0
 -
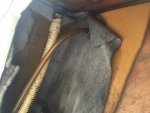 photo246005.JPG148.8 KB · Views: 0
 -
 photo246014.JPG81.6 KB · Views: 0
 -
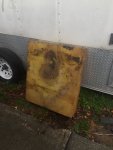 photo246020.JPG99.9 KB · Views: 0
 -
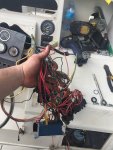 photo246021.JPG129.5 KB · Views: 0
 -
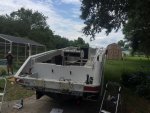 photo246024.JPG204.4 KB · Views: 0
 -
 photo246631.JPG122.5 KB · Views: 0
 -
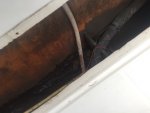 photo246632.JPG99.6 KB · Views: 0
Last edited:


")