1987 Imperial Transom Repair Help

ImperialV184

Petty Officer 3rd Class
Joined
Aug 4, 2011
Messages
99
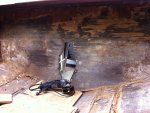
OK, this weekend made some serious progress on removing the transom, the transom is huge and the entire upper portion was still good, despite not being glassed at all. So my next step is to remove the glass and clean it all up. There are some spots that are smooth and have a wood grain look to it, and others that are dry flakey chop strand. I am confused about what to do next to prep the surface. I was going to take a belt sander and sand it all down, then clean and put down a fresh layer of chop strand.

On these forums i have seen three options to attach

1) use a layer of chop strand on both surfaces, wet out and then clamp
2) coating of PL glue and then clam
3) penut butter both surfaces and clamp

My transom semas rather large, i am very concerned about clamping pressure and work time. The vendor i got the fiberglass and resin from recommended the chop strand mat option. Thoughts?
 

Attachments

  • photo.jpg
    photo.jpg
    147.1 KB · Views: 0

ImperialV184

Petty Officer 3rd Class
Joined
Aug 4, 2011
Messages
99
Re: 1987 Imperial Transom Repair Help

just checking to see if anyone is still up
 

zymox

Petty Officer 2nd Class
Joined
Dec 1, 2011
Messages
104
Re: 1987 Imperial Transom Repair Help

If I were in your situation I would have used the angle grinder with an 80 grit flap-grinder and cleaned everything out against the outer skin and at least 6 - 8 inch of the hull.

I would then looked for Oops! hull extension page here on the forum to get all the info I needed.
I would also looked into Friscoboaters instructional video here or on youtube about how to do a transom like yours.
He is a super teacher on this and tell you pretty much everything you need to know about that kind of transom.

First fix the outer skin to have a good bonding surface that is as flat and as good as i would like it to be then I would bond the new transom core with PB. The core I would have done like Oops! does it. I did mine that way and I'm very pleased. Frisco does his core with PL glue and it will of course work but it has a much longer drying time. He then attach it to the outer skin with PB and laminate....

Check out this pages for more info.

Oops! page http://forums.iboats.com/showthread.php?t=234392
Frisco Video http://www.youtube.com/user/FriscoJarretts?ob=0&feature=results_main
My own http://forums.iboats.com/showthread.php?t=525821
 

jbcurt00

Moderator
Staff member
Joined
Oct 25, 2011
Messages
25,118
Re: 1987 Imperial Transom Repair Help

My only add would be to make sure the keyhole area pre & post wood transom is square & perpendicular to the centerline of the boat & that you maintain the close tolerances on total combined thickness of the fiberglass outer skin, PB/PL bonding layer, assembled plywood transom, and the layers of fiberglass & poly resin laid across keyhole opening. I do not know exactly how thick, I don't have an I/O. The info is readily available. Look in the Mercruiser engine forum.

PMC is doing a conversion to Mercruiser but took great care in laying it out & confirming he was perpendicular to the centerline. And documented it very well. Frisco's vids, thread & YouTube are invaluable visual tools for a novice 'glasser. oops is pretty much an anything boat rehab related guru. All 3 are both exceptionally willing to help. There are many others, both MODs & non-moderators that will be cruising through that are extremely helpful.

There is also the Don S sticky of helpful info at the top of the restoration forum home page
 

ImperialV184

Petty Officer 3rd Class
Joined
Aug 4, 2011
Messages
99
Re: 1987 Imperial Transom Repair Help

Thanks, for the info, yea i have watched all Friscp's how to vids, they are great. i am by no means working as fast as he was, i usually get maybe 2-4 hours a week focused on the boat. i am also doing a complete engine rebuild as well. I have another post i started for the project that i need to update. seamed like the transom would never come out, the rotten wood was easy but the last bit has been a beating. Went back and looks at frisco's vid again and i am at the grinding part at this point. Yesterday i was able to get all the stingers out. It looks like most of them are intact and i will be able to trace them, some parts of the stingers were in good shape but they did not glass where the bulkheads attach to the stringer. this actually would have saved the stringers. So looks like i am on to grinding. thanks for the recommendations of the best way to attach the transom. My biggest debate was the oops method or frisco method for the transom attachment. I can't decide what i am most comfortable with. i like the penutbutter idea because is fills the voids well and will conform, but i am woried about not mixing enough and running into trouble with it gelling before i can make more, with the the Oops method i will have a pretty good idea how much resin i will need since i will have already wetted out the transom during waterproofing. I am just trying to get in my comfort zone and was trying to be persuaded on one method vs the other.
 

rickryder

Commander
Joined
Jun 24, 2010
Messages
2,722
Re: 1987 Imperial Transom Repair Help

I like the resin and csm and or PB method myself ;)
 

ImperialV184

Petty Officer 3rd Class
Joined
Aug 4, 2011
Messages
99
Re: 1987 Imperial Transom Repair Help

yea, it is between those two options. i think once i build my clamping setup i should be able to do a few test runs to get the timing down to help me decide, i am worried that the CSM and resin option will leave air pockets or gaps, i would never be able to tell it it did or not. seams the PB method fills more gaps and assures a better attachment.

PS, i bought this tool at lowes called a rotozip. The way i can best describe it is that it is like a big dremel. You can go with a guard or no guard. It has a max depth cut of .75 inches so it allows you to make cuts without going too deep. without the guard it is a little scary to use since the on off switch is not pressure sensitive, in that if i let go it will keep running. need to use two hands and be on your toes. but it allows me to do flush cuts as well and i found a cutting wheel that says great for demolition. Using it i can cut very close to the surface which should reduce the amount of grinding a bit. it is what i used to cut the fiberglass off to remove the stringers. I just could not get my sawsall to get in there and cut. anybody used these before. it was great for cutting out the remains of the old deck as well.
 
Top