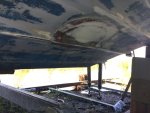
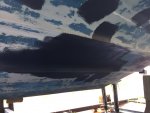
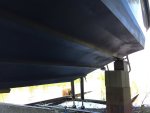
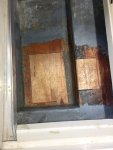
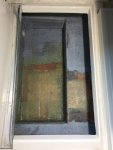
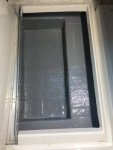
1988 Searay 24', hole in bottom of Boat (from bunks collapsing)

Fastrack

Petty Officer 3rd Class
Joined
Aug 8, 2011
Messages
95
I'm pretty sure I messed up on the catalyzing of the resin, this time around, in 2011 I had no issues and it was colder too.

It was 72F the day I did this (this past Wednesday).

I mixed as per the instructions (68F) @ 1.5% (15 min working time, 45 minutes gel as per the sheet)..

The first CSM layer (the one with the tape) was still soft after 2hrs, so I heated the outside with a 500W halogen 2' away 30m later it had kicked off and I removed the tape. Before the 500W using a laser temp gun the surrounding area was only 62F.

I tried to do the outside with the halogen on but it seemed to be kicking off quick so I stupidly reduced to 1.25% and turned the halogen off. It dropped to 60F that night. The next morning was very sticky, I applied a 2% batch with air-dry and that kicked off.


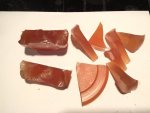
Soft "pucks" left in mixing cups:

I was only mixing small portions (4oz or so at a time). It seemed to gel in the "pot", but the pucks are hard on the outside and throwing them VERY hard on the ground just cracks them. The inside is like rubber! Even hitting with a hammer just bounces off. I can with my finger "push" the bottom of the puck like a superball.

What do I do?! IF I redo this, How do I sand back to where I started?! I think it'll be a huge mess, but I'm not sure it's in a good state now. The lamination's on the boat seem kicked off and hard. Jez. YES that's a screw driver easily pushed into the cured "rubber resin"

0
0
0


I ended up with: (1.5oz CSM was used)
Inside: 1 CSM, 3 x 1708.
Outside: 1 CSM, 1 x 1708, 3 x CSM

The strake is going to be a real hassle to get even again.
0
0
0
0


Ben
 

Fastrack

Petty Officer 3rd Class
Joined
Aug 8, 2011
Messages
95
Hey.

I phoned Noah's where I bought the supplies and he said it's because it's unwaxed resin?!!? I doubt it cause the outside of the pucks are quite hard and crystallized. Could it be I didn't stir enough?! But every batch?! Even the 2% batch left in the cup that seemed to cure quickly with the 500W light is soft when I push the bottom, NOT as soft though. I measured the bottom of the mixing cup on that batch at 185F! So I dono, maybe it's okay?!

FYI. The broken piece of resin was crushed in the vice to get the "rubbery resin" to "crack". I could not crack with a hammer!
IMG_8887_1024x768.JPG
 

Fastrack

Petty Officer 3rd Class
Joined
Aug 8, 2011
Messages
95
Well based on my other thread: http://forums.iboats.com/forum/boat-...-on-the-inside

I've come to the conclusion that something is suspect with the Resin OR the MEKP. So I've ordered fresh Resin & MEKP from another supplier (Plastic World - AOC Altek H596). Who says they go through the stock quickly so it should be fresh. The ordering guy new about the shelf life of all the products too, which is a bonus.

But now I gotta grind off what I did, luckily it does grind and is not mush. But should I go back to the knife edge? First thin layer? I don't want to make a massive hole. I know approx how the taper looked using a framing square. The original surface is woven roving, so maybe I'll be able to tell?

The inside will be tricky as the area is quite small, but it's not quite as important as that is the only batch that hardened like a rock (except the outside layer).

Ben
 

Fastrack

Petty Officer 3rd Class
Joined
Aug 8, 2011
Messages
95
Hey all,

So I got the new resin. The person at AOC recommended 1.25% if it was high 70's), so I chose 1.5% as it was 72F or so. Well it gelled and hardened as expected. When cooled back to room temp it was hard as a rock/glass.

You can read it about here:
http://forums.iboats.com/forum/boat-...7#post10424327

IMG_8983_1024x768.JPG

Anyway, Onto round two:

My initial plan two weeks ago (if the resin was in fact bad), was to drill some holes at the corner of the original repair, so I knew when I had ground half way.

Well it stopped raining and decided to just grind away, forgetting my original idea........ bad idea :mad-new::mad-new::mad-new:

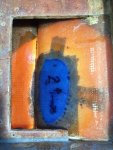
The defective resin ground away quite quickly! Therefore going too deep, making the hole larger. Trust me I was swearing :mad::mad-new:

Points/Issues?:
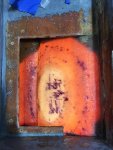
- On the inside I have about 4-5" in all directions but one
- The forward direction towards the bulkhead, I only have 1.5", enough?!
- I have enlarged the outside taper, to compensate for the bigger hole

** The darkness you see in the second photo at the point of the strake is some discoloration in the original Woven Roving, it's paper thin already, so I can't sand it more! IMG_9030_1024x768.JPG
IMG_9039_1024x768.JPG


Ben

 

gm280

Supreme Mariner
Joined
Jun 26, 2011
Messages
14,605
Fastrack, you will repair that like previously stated.

Using material and working from both the inside and out side to get it closed in and smoothed out properly.

I would go with 1708 after taping from the out side with some tape so you can apply the first coat of material and resin from the inside. Once that cures, then go to the outside and apply another coat of 1708 and resin. Once that cures, I would switch to CSM and resin and fill up the hole until you have it a little proud of the hole. That way you will have enough material to sand down to a smooth surface for painting or whatever you decide to go with. And do the say to the inside as well.

If you have any little voids in the resin after sanding, mix up some PB (peanut butter mixture) and use some glass bubbles as a filler in the PB mix. That way you will be able to feather it out really nicely. It will sand very easily.

Oh one more thing. Try, from here on out, to use this thread to post anymore boat issues. Having two threads about the same thing gets confusing. Just a thought. :thumb:
 

Fastrack

Petty Officer 3rd Class
Joined
Aug 8, 2011
Messages
95
Fastrack, you will repair that like previously stated.

Using material and working from both the inside and out side to get it closed in and smoothed out properly.

I would go with 1708 after taping from the out side with some tape so you can apply the first coat of material and resin from the inside. Once that cures, then go to the outside and apply another coat of 1708 and resin. Once that cures, I would switch to CSM and resin and fill up the hole until you have it a little proud of the hole. That way you will have enough material to sand down to a smooth surface for painting or whatever you decide to go with. And do the say to the inside as well.

If you have any little voids in the resin after sanding, mix up some PB (peanut butter mixture) and use some glass bubbles as a filler in the PB mix. That way you will be able to feather it out really nicely. It will sand very easily.

Oh one more thing. Try, from here on out, to use this thread to post anymore boat issues. Having two threads about the same thing gets confusing. Just a thought. :thumb:

Yeah I agree I hate double posters - they should be lined up and shot.. hehe. I started the other thread I wasn't getting any responses to my rubber pucks on this one :) So I figured if no one cared about a hole in the bottom of a 1988 Sea ray they wouldn't see my resin issue! :)

The hull is .328" thick. Your suggesting 1708 and switch to CSM (I know 1708 has .75oz CSM attached to it). But everyone seems to recommend CSM first then switching to 1708? And filling up with CSM until a little proud of the hole, I'm pretty sure the state of the hole I could do 2 layers of 1708 on the outside now :)

I never did in my mind figure out why people say to use CSM first and then 1708, kinda odd to me? Only advantage I see is when you rip CSM it creates nice whisp's (sp?) which would adhere better?

I was hoping the 1.5" space was enough otherwise I'm into the bulk head which of course is another can of worms :) I would say my taper is MUCH better this time, there were a lot more low spots before.

Ben
 
Last edited:

gm280

Supreme Mariner
Joined
Jun 26, 2011
Messages
14,605
Yeah I agree I hate double posters - they should be lined up and shot.. hehe. I started the other thread I wasn't getting any responses to my rubber pucks on this one :) So I figured if no one cared about a hole in the bottom of a 1988 Sea ray they wouldn't see my resin issue! :)

The hull is .328" thick. Your suggesting 1708 and switch to CSM (I know 1708 has .75oz CSM attached to it). But everyone seems to recommend CSM first then switching to 1708? And filling up with CSM until a little proud of the hole, I'm pretty sure the state of the hole I could do 2 layers of 1708 on the outside now :)

I never did in my mind figure out why people say to use CSM first and then 1708, kinda odd to me? Only advantage I see is when you rip CSM it creates nice whisp's (sp?) which would adhere better?

I was hoping the 1.5" space was enough otherwise I'm into the bulk head which of course is another can of worms :) I would say my taper is MUCH better this time, there were a lot more low spots before.

Ben

Fastrack. if you want you can expose the CSM side of the 1708 and WALA you have a smoother surface to work with. I only suggested 1708 because it is a lot stronger then mere CSM for patching things. But either way will suffice. And I will say however you go, when you are finish feathering it all out (on the outside anyways) it will disappear after you refinish it. That is the beauty of working with fiberglass. Again JMHO!
 

Fastrack

Petty Officer 3rd Class
Joined
Aug 8, 2011
Messages
95
Fastrack. if you want you can expose the CSM side of the 1708 and WALA you have a smoother surface to work with. I only suggested 1708 because it is a lot stronger then mere CSM for patching things. But either way will suffice. And I will say however you go, when you are finish feathering it all out (on the outside anyways) it will disappear after you refinish it. That is the beauty of working with fiberglass. Again JMHO!

Yeah I'm using 1708, but what others have suggested is 1 or 2 layer of CSM then 1708 and finish up with CSM (layers required to get proud of the hole). As it sands much nicer.

But to me 1708 right on the hull (the CSM side first) would be stronger vs CSM then 1708 and CSM over top of that.

Ben
 

Fastrack

Petty Officer 3rd Class
Joined
Aug 8, 2011
Messages
95
Hey.

Update to follow with pics :) To paint the inside area I glassed.. I'm going to use the same Glidden Grey Enamel porch paint I used in my 2011 transom rebuild.

How long should the poly "cure" for before painting? My last layer had the Air Dry additive. Is just a light sanding with 60grit/acetone good enough before paint? It's already rock hard and was mid-80s when I did it (yesterday), so it kicked quite quickly.

Ben
 

Fastrack

Petty Officer 3rd Class
Joined
Aug 8, 2011
Messages
95
Hey all,

I hate leaving threads without a conclusion. Just wanted to update it with my final repair photos :) The best part of the boat is now the part I repaired.. HAHA.

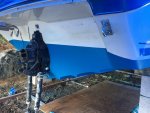
I still haven't launched yet. But I've put 2 coats of Micron CSC bottom paint on it (3 coats on my repair area). First coat was Dark Blue (which is no longer available in Canada). The cans were old so I had to thin them using xylene. The Micron CSC is a very hard paint to roll out! Even the brand new can, you gotta work fast as it surface dries quickly. The final coat is a really nice light blue.

I did the inside glass first (tape on the outside) as I couldn't get the tape to shape properly on the inside (it made the strake too flat).

Layers (CSM - .042", 1708 - .06") +/-
Inside: CSM, 1708, CSM, 1708, CSM
Outside: CSM, 1708, CSM, 1708, CSM, CSM

Based on the estimates on the net (and my own thickness test as a result of those resin tests I did). It's around .53" of glass!

The new resin was 1000x better from Plastic World, that original garbage still is not completely hard, when tapped on a metal tablesaw.

I even have a hard time telling where the damage was !!:joyous::joyous::joyous: The damage was the 2nd strake in from the chine! I made a tool on my table saw and palm sander to match the contour of of the strake, worked well.

The storage floor was CSM layer over the plywood, 1708 little bigger, tabbed using 8" wide 1708, CSM layer on top of that. Painted with Glidden Enamel Porch paint which I had used in my 2011 transom rebuild. An anchor goes in the storage area hence the reason I went with 1708 as well as CSM.

I understand with Micron CSC your supposed to stay away from the outdrive by 1" (at least according to Mercruiser). BUT the previous owner had already painted right up to the drive, so it would have looked like complete trash if I masked it off. IMG_9108_576x768.JPG
IMG_9109_1024x768.JPG
IMG_9110_576x768.JPG
IMG_9114_1024x768.JPG
IMG_9245_1024x768.JPG
IMG_9253_1024x768.JPG
IMG_9283_1024x768.JPG
IMG_9134_576x768.JPG
IMG_9256_576x768.JPG
IMG_9260_576x768.JPG
IMG_9488_1024x768.JPG
IMG_9619_1024x768.JPG


Thanks all for the help,

Ben
 
Last edited:
Top