Re: 1988 Stingray SVB 192 Restoration
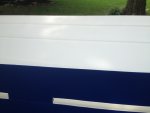
Here's some pictures of sections that I have kind of experimented with to see how it is going to buff out. Scratches are a real pain to get out I think I am going to have to set the bar and call it good. You can also see where I sanded through the orange. Not cool. I am going to have touch up some sections.
There are a few things I have learned along the way that I probably knew but was too hard headed to believe and some that I had not read or heard anywhere. I have outlined some of them.
1. I had 0 experience with a spray gun but have painted plenty. The tip here is to forget what you know about painting. I thought I was laying down nice even coats and maybe I was but they were nowhere near thick enough. If you don't get any orange peel, drips, runs or thick spots, you probably are not laying the gel thick enough. My first coats of gel were very rough and felt like real aggressive non-skid that was very easy to sand through. I sanded back to 120 and started again, laying it on super thick. Much smoother and easier to sand and I don't go through when cutting the peel by wet sanding.
2. I bought my gun at Northern Tool, it was the $40 one with the 2.3 mm tip. This gun got me through 90% of the boat, it finally died of kicked gel. HF does not have a gun with that large of a tip so I kept the internals from the Northern gun and put them in the $9.99 HF gun. All parts are not interchangeable so if you do this, keep all internals of the Northern gun. Used a Craftsman 33 Gallon 6HP compressor I think CFM is 7.5 if I recall.
3. If I could go back, I would not have done the orange, the time it took to mask and tape that section was ridiculous, and I will have done that 3 times before its over. A pinstripe would have sufficed. Its hard to sand and as you can see that it is easy to sand through.
4. I got impatient at the beginning and was hitting the heavy peel with 220 grit. The scratches left behind are tough to impossible to get out. Don't go coarser than 320 grit.
5. I have sanded wet exclusively. When I tried dry, it seemed like the scratches were a lot deeper, may be personal preference.
6. When I laid the gel on thick, it was roughly 35-40 minutes max for it to cure tack free. I sprayed wet on wet so I was doubling back after 15 or 20 minutes.
7. As far as time goes, if I was doing one color, 3 hours of spray time would have been easy to accomplish. My time killer was doing it again and taping the other colors. If you hit one side hard, then that one can cure while you hit the other or the bottom, etc. The spraying part is the easiest because you know you're gonna hit the high spots with paper.
8. I had a helper which I could not have made it without. My first two attempts were only 250 ML and some kicked in the cup, it was about 90 degrees or so. I wound up only doing 150 ML at a time. My helper had the additives mixed in and as soon as a cup ran out, she catalyzed the next batch. We got to the point that we could do 6 150ML batches and then take the whole gun apart and clean it. My helper also cleaned the mixing cups, cleaning brushes etc. We really had an assembly line thing going.
9. Everywhere I read said that you should try not to thin the gel. The first two batches were not thinned, I didn't think it was a problem to get the gel out of the gun but as I said some kicked in the cup so I am not sure if that was one of the reasons it did. While I have seen several suggestions on what to use as a thinner, I used styrene. My mix was 150 Ml gel. 10 Ml Styrene, 15 Ml pigment and when needed 5 ML surfacing agent. This turned out to be a perfect recipe for my purposes, as I said I could do 6 batches and then clean.
I can't think of anything else, If I can answer any questions, let me know I am going to do a post with approximate costs of gel and materials.


