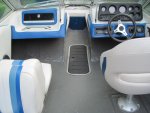
1989 Sea Ray Bowrider 180 Transom, Stringers & Deck

ncbovid

Seaman Apprentice
Joined
Jun 15, 2011
Messages
34
Re: 1989 Sea Ray Bowrider 180 Transom, Stringers & Deck

Been a few weeks since the last post but there's been a lot going on with the Sea Ray.

I ended up soaking the cleats in a good coat of resin and let them cure.
PL'd them to the stringers with clamps and let that dry
Drilled pilot holes through cleats into stringers, filled up with 5200, screwed it together, covered screw head with 5200.
Ended up going with the Red Gard as well - hey why not? And coated the cleats and "external" side of the stringers. I figure it should be plenty good.

So, then I cut the deck out of four pieces - one for the front to about halfway through where the ski locker is, another one to just behind the bilge and then two smaller pieces on either side of the bilge. I coated the bottom of the deck with a layer of CSM and then some more Red Gard for good measure. Around the ski locker area, I notched the stringers and crossed the ski locker and above the gas tank with some 1/8" aluminum to give it some support. The notches were filled with resin and 5200 afterwards and the aluminum was coated with Red Gard. When everything is in there, it's pretty solid with the 1/2" deck and after I get 2 or three layes of glass on top, it should be even better.

This past weekend, I foamed sides of the boat with the 4# foam from US Composites. It was around 50 outside so I pushed the boat back in the garage and turned up the heat until it was about 80. I had made the decision to pour the foam in the areas and trim it afterwards instead of cutting the pour holes. After I had finished it, I wished I had went the other way - it expanded a pretty good bit and I had to do more trimming than I wanted to. So for anyone else reading this, just put the deck down and then do the pour if you're using the two part foam.

The deck went in shortly after, drilling pilot holes, filling with 5200, screws and covered up with 5200. I did go back and mix up some more foam and poured it in the areas where the parts of the deck come together to fill up any spaces that might be there.

Last night I got the edges of the deck PB'd in and I got a layer of CSM down on top of it. Hopefully the weather will hold and I can get some more down on it. The stuff sure cures quickly when it's above 70!
 

ncbovid

Seaman Apprentice
Joined
Jun 15, 2011
Messages
34
Re: 1989 Sea Ray Bowrider 180 Transom, Stringers & Deck

I'm thinking of changing around the seating configuration as well.

Spec Sheet_Page_1.jpg

I think I want to put in a captains chair for the drivers side and go back and build the seat box for the port side. I've done a little searching and I'm amazed how expensive they are. I'm thinking of going with this one:

http://www.boatingseats.com/boat-seats-attwood-avenirs.aspx

Anyone have experience with these? Or maybe can make a better suggestion?

I'm also looking at putting the rear end back on this weekend - well at least the transom plates. How flush does the transom need to be with the keyhole in the hull? I'd assume pretty flush... I anticipate having to remove some of the transom at the top to get the full travel of the steering assembly as well.
 

britisher

Petty Officer 1st Class
Joined
Feb 23, 2012
Messages
369
Re: 1989 Sea Ray Bowrider 180 Transom, Stringers & Deck

Looking good there. I'm some way behind you on my 180. Just finished the transom. My configuration is 2 helm seats and a bench behind that butts up against the full width engine cover/sunpad. I did momentarily consider changing it to a center motor cover, jump seats and back to back seats on the passenger side, but then I woke up and thought..naw. There is argument for doing change while you still have a blank canvas so to speak, but personally, all I want to do is get the thing in the water and enjoy it. To do that it's quicker, simpler and cheaper to keep things te way they are.
On the seats, I just ordered 2 helm seats for $398.00. Shipping free. Check out veada.com Production though is about 7 weeks right now.
 

ncbovid

Seaman Apprentice
Joined
Jun 15, 2011
Messages
34
Re: 1989 Sea Ray Bowrider 180 Transom, Stringers & Deck

Well - I ended up just going with the seat from boatingseats.com. It looks good in the box - I should probably take it out and get a good look at it.

Last weekend I got the kickpanels in and the bow boxes put back together. I drilled holes and filled up the cavities with foam yesterday. Also got the rear end final test fitted before I hit up the transom with paint. Then it's time to put the rear end back together and test fit the motor to get the engine mount dimensions.

photo.jpg

photo2.jpg
 

baloo6049

Cadet
Joined
Jun 10, 2010
Messages
12
Re: 1989 Sea Ray Bowrider 180 Transom, Stringers & Deck

Hey looks good. I am a little late to this thread, but found it interesting since I am restoring an 89 sea ray 160 with an outboard. Stringers are in and putting finishing touches to the new transom. Then finally, onto the floor. Post some pics of the finised product. Thanks!
 

Sunspots

Cadet
Joined
Jul 3, 2012
Messages
11
Re: 1989 Sea Ray Bowrider 180 Transom, Stringers & Deck

Hi, I'm also watching your restoration work. I just purchased a 1989 180 BR with outboard motor with what I think was called an XL model where there's a U shaped seat in the rear and two captain's chairs. I have a small amount of rot on bulkhead just ahead of the fuel tank, otherwise the floor, stringers, and transom look/feel solid. The panel that goes over the fuel tank needs replacing as well.

Good luck!
 

ncbovid

Seaman Apprentice
Joined
Jun 15, 2011
Messages
34
Re: 1989 Sea Ray Bowrider 180 Transom, Stringers & Deck

So, I've been slacking... :redface:

Got to a point, and haven't worked on it since. But, since my last post,
Got the motor mounts in
Glassed floor in
Got the motor in
Rear end back on
Put in captains chair
Rebuild passenger side seat box
Added riser pieces for trim pump and battery holder
Rebuilt rear false wall
Got some paint down - I went with enamel and the hardener like woodonglass (I think it was) has in his signature
Reconnected all wires/sensors/etc

Taken it out several times!

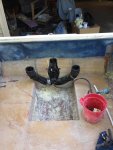
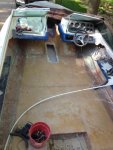
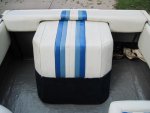
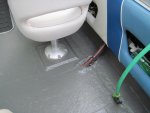
I still need to rebuild the engine cover, add some protection around the fuel lines to the tank (thinking stainless steel panel), rebuild the backing of all the upholstered parts, rebuild the seat boxes on either side of the motor, and then clean everything up. Pretty sure I'm going to go with a subwoofer box on the starboard side. Here are some pictures (I didn't think it worked the first time).
 

Attachments

  • Picture 006.jpg
    Picture 006.jpg
    131.6 KB · Views: 18
  • Picture 002.jpg
    Picture 002.jpg
    128.3 KB · Views: 18
  • Picture 001.jpg
    Picture 001.jpg
    137.1 KB · Views: 18
  • Picture 003.jpg
    Picture 003.jpg
    132.6 KB · Views: 18
  • Picture 004.jpg
    Picture 004.jpg
    130.4 KB · Views: 18

Struc

Chief Petty Officer
Joined
Jul 27, 2011
Messages
409
Re: 1989 Sea Ray Bowrider 180 Transom, Stringers & Deck

Did you decide how you're going to rebuild your seat boxes? I've been thinking about mine, when I do them, and thinking I'll probably glass down some cleats to screw into and make the box removable with a few screws. Just too hard to get at the engine otherwise.
 

ncbovid

Seaman Apprentice
Joined
Jun 15, 2011
Messages
34
Re: 1989 Sea Ray Bowrider 180 Transom, Stringers & Deck

I'm thinking along the same lines there to make them removable to get at the engine.

At the same time though, was thinking about just mounting some cleats to the side of the boat and the engine cover to support the seats and then having nothing underneath the cushions. Then possibly mounting a 2nd set higher so you can move the cushions up and have a flat surface across the back of the boat.
 

britisher

Petty Officer 1st Class
Joined
Feb 23, 2012
Messages
369
Re: 1989 Sea Ray Bowrider 180 Transom, Stringers & Deck

Before I started on my SR Bowrider restoration (nearly finished) I looked at another, newer bowrider with the same seat layout you are talking about. The manufacturer had done exactly the same as you are thinking, but in molded fiberglass. It's a great idea you have.
 
Top