1991 Bayliner Capri - floors and carpet

Cord72

Cadet
Joined
Mar 30, 2013
Messages
16
This is my first post on iBoats after reading for a year. Thanks in advance to everyone for the wealth of knowledge on this site! If you are new here, spend days/weeks reading up on other posts, and you will learn practically everything you need to know about how to work on your own boat, I LOVE IT!

My wife and I bought a 1991 Bayliner Capri with 3.0 Mercruiser I/O off Craigslist in March of 2012 for $4,000, in running order, with trailer and a good kit of accessories (tube, mooring cover, ropes, couple life vests, etc). We enjoyed the heck out of it summer of 2012, despite some early DIY outdrive issues. As a long time boater (grew up in MN) but first time owner I didn't think/know to check the fluid in the outdrive, so we promptly seized the upper unit within 30 minutes during the maiden voyage. Then I went the cheap route and replaced it with used/take-off from E-Bay and had the same problem (this time WITH oil, so it must have been faulty when purchased). But that's another post...

This spring I was dedicated to replacing the carpet...JUST the carpet... because it was worn all the way through in a couple of spots to reveal the cracked and faded/worn/gone gel coat right down to the bare plywood deck. I read and watched lots of posts here, with special shout out to Friscoboater's odyssey as a veritable how-to manual from start to finish. I don't have any soft spots that I can detect, so I'm jumping into the project with aspirations of a couple weekends and not pulling up the deck or stringers. Just a fresh look once May hits and I can enjoy Horsetooth Reservoir here in Fort Collins.

I started a couple weekends ago, so I'm going to put a series of posts together to catch up my progress. This will not be a removal of the deck, but instead just a resurface and replace, so here goes!

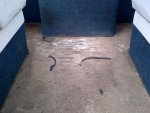
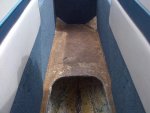
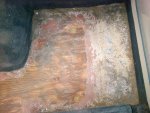
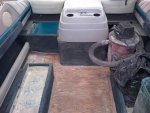
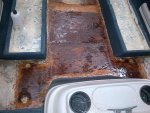
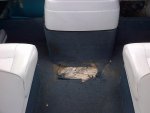
Here is the step-down area in the stern, right where everyone enters the boat. About a 18" x 18' square hole in the carpet.
IMG-20130330-00168.jpg

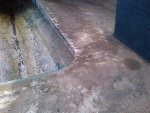
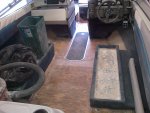
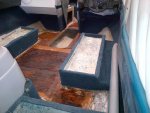
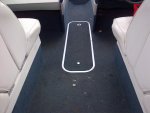
And here is the floor looking forward. A few spotty 2" diameter holes, but the entire footprint in the back of the boat is threadbare and lifts off the floor easily.
Fort Collins-20130330-00169.jpg
 

Cord72

Cadet
Joined
Mar 30, 2013
Messages
16
Re: 1991 Bayliner Capri - floors and carpet

First step is to remove the carpet, and that took all of about an hour. Since the side walls are in fine shape, the deck surface is all I am really concerned about. I had a natural hand-hold with the holes that are in it, and the spray adhesive that was (formerly) holding it down didn't put up any fight at all. The method for putting it down was obviously to use pieces for the floor that fit the 'flat' parts and make seams at the vertical corners for the seat boxes, engine box, and bow boxes. This made it release very clean, and in no-time I was looking at the deck itself.

This was laid down all in one piece, but I made a couple of strategic cuts just to be able to take it out easily. I'll show the pattern later.
Engine box area
Fort Collins-20130330-00170.jpg

Captain's foot space
Fort Collins-20130330-00172.jpg

Co-captain foot space, before
Fort Collins-20130330-00173.jpg

Co-captain foot space, after
Fort Collins-20130330-00174.jpg

Bow foot space after
Fort Collins-20130330-00175.jpg
 

Cord72

Cadet
Joined
Mar 30, 2013
Messages
16
Re: 1991 Bayliner Capri - floors and carpet

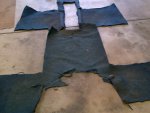
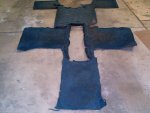
Here is the pattern of the deck carpet, laid out on the garage floor. It measures just over 6' wide and 10' in length, so I'm looking for marine carpet to purchase. I've been to Home Depot and Lowes, and they have materials, but special order and it just doesn't seem right.

So I ordered a carpet sample from ********* catalog, and it arrived in just a couple days. Hindsight tells me that I could have shopped right here on iBoats, but my wife and I looked at the color swatch and decided on a 20 oz Malibu Taupe color with a rubber backing.

We picked a taupe color instead of cornflower blue so that we didn't try to match the sun-faded blue with factory new blue. The taupe should provide a nice 2 tone look, and there is the same color in the accent vinyl/trim already in the boat. Also, we're hoping the taupe isn't as hot underfoot in the summer sun as dark blue...

Here is the pattern that I'll use to make the new pieces:

From the stern, with the gaping hole visible as the half moon shape that should be a straight line across the bottom of the pattern.
IMG-20130330-00187.jpg

From the bow, looking back down the length.
IMG-20130330-00188.jpg

We ordered the carpet glue to use, instead of the spray down stuff. So I'll trowel it down with a very small-notch trowel from the hardware store.
 

Cord72

Cadet
Joined
Mar 30, 2013
Messages
16
Re: 1991 Bayliner Capri - floors and carpet

Here is where the project takes a creative turn, and I'd welcome any experienced input on my decision, because it is reversible.

Previous owners had expanded the storage in this 18.5 foot bowrider by raising the fold-down bench seats with a box made of 2" x 4" lumber, and allowing the seats to pivot over on piano hinges to reveal about 6" of under seat storage. This was always awkward, and not a ton of space, but a certain improvement from the original design that only had side pocket/gunwhale storage to the outward side of the bench seats.

I had aspirations of bow storage, so I looked into that. A pilot hole revealed what I expected, based on research here and elsewhere, which was foam under the bow boxes. Throwing caution to the wind, I decided to remove the bow foam in order to create open storage under the bow seats. I think the boat might be a little noisier on the water, but doubt that the bow foam is truly structural to hold it together. The worst case scenario is that if we swamp the boat then it might not stay at the surface like it is supposed to, and obviously I hope to never test that situation...

At first I was going to open the top of the box to create flip lids, but then changed the design. This bowrider has been fitted with removable vinyl seat cushions that slip under the cap in the bow, and the only way to open a flip lid to storage would be to get everyone to the stern of the boat and then fuss with these cushions. My wife suggested a side access in the footwell channel, and that made good sense. So I templated out some hatches and cot holes in the sides of the boxes.

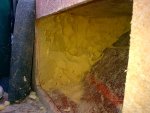
Hole cut in the side, revealing the foam
IMG-20130331-00189.jpg

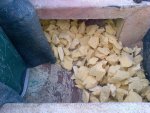
Chipping out the foam is NOT EASY...I settled on a 2" putty knife that I could use to take out chunks at at time. This has been the MOST time consuming part of the project so far, and put me in really weird body positions as I tried to contort myself partly into the hole that I cut so I could reach the back of the box. the 2 seat boxes produced 3 lawn and leaf size garbage bags of foam chunks, and I was absolutely wearing it head to toe. Fine yellow grains of foam everywhere...
IMG-20130404-00195.jpg

A look up into the underside of the seat box
IMG-20130404-00196.jpg

Another one. I almost gave up on this plan several times because it was so difficult to to chip out all this foam. Plus removing the safety flotation had me second guessing how smart I was, but I pressed on knowing that I could always reverse this and fill the boxes again if I decided to.
IMG-20130404-00197.jpg
 

Cord72

Cadet
Joined
Mar 30, 2013
Messages
16
Re: 1991 Bayliner Capri - floors and carpet

Back to the deck inspection, one of the elements of the plan is to strip it down to a smooth surface in order to re-seal it and then install the carpet. Having said that, I have read enough warnings on iBoats to insist that I check for rot. I started by scraping the loosest bits and inspecting as I went, hoping I didn't find anything that made me keep scraping, keep cutting, etc.

Even though the paint or gel coat is from 1991 (probably) it is nearly impossible to just scrape off by hand, and impossible to imagine doing the whole job that way. I quickly realized that I needed to get power tools involved, and the hand held grinders that other posters have talked about came to mind right away.
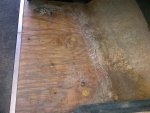
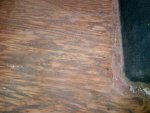
Before I could round one of those up from the neighbor, I did a little hand scraping of the loosest parts, and discovered that Bayliner had covered the fill holes with a spoonful of peanut butter (I think?). This was an obviously different blob of resin with random fibers several inches long that repeated in a pattern about every foot along the length of the deck. Those were actually easier to chip off to reveal the foam, which was a goal of mine.

The foam was not wet to the touch, so I was immediately relieved. Many other posters here talk about foam that is wet like a sponge. This boat was put in and taken out daily last summer (my only time of ownership) and here in Colorado we enjoy a very low relative humidity (usually under 30%, often in the teens). I wasn't worried about current water damage, only historical evidence. Thankfully I didn't see either to a level that would make me want to cut out the deck and drill the stringers.

While the wood looks 'dark' it is not wet and doesn't appear rotten or rotting. I attribute the look to 20+ years age with a substandard recent life, and with no soft spots I decided to forgo even drilling stringers for testing. This was probably an error in hindsight, but if I had found wet or rotten stringers I would have had to deal with the moral dilemma of what to do about it. This is not a life-long boat, so I'm going with the visual evidence on the surface (no obvious rot) and the lack of any soft spots anywhere underfoot. With the repairs and upkeep I'm putting into it, I will be able to pass it along at some point with a clear conscience.

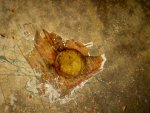
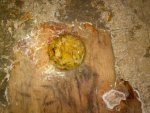
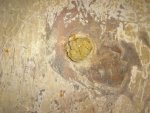
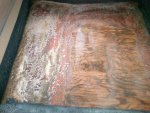
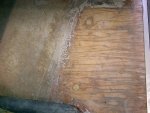
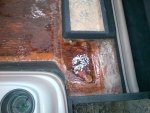
Here are some close-ups of the 1" diameter fill holes up and down the deck. Even the first couple, although discolored, are not soft or wet. They were all covered perfectly until I chipped off the blob of resin and fiber.

IMG-20130330-00179.jpg

IMG-20130330-00180.jpg

IMG-20130330-00183.jpg

IMG-20130330-00185.jpg
 

Cord72

Cadet
Joined
Mar 30, 2013
Messages
16
Re: 1991 Bayliner Capri - floors and carpet

Let the real mess begin...

I removed the seats and all the bow cushions to get them all out of the way, making it much easier to move around. I'm going to re-attach the cockpit seats in a different way (lower, removing the modified storage boxes putting them back to factory height) and I didn't want to expose the vinyl dust storm about to ensue. I borrowed my neighbor's wired/power grinder and proceeded to create an enormous mess.

With the 4" Makita grinder wheel, I floated the hand-held tool back and forth to remove the chipped and damaged gel coat and resin that was beneath (what was left of it). I am only re-carpeting the flat part of the deck, so I had no intention of breaching the seams where the deck was married to the hull, and you can see in the pictures where I left at least an inch any time I approached one of those joints.

Other than the vibration, noise, and dust made my the machine, this was not hard labor. I probably spent a couple hours total removing the remnants that I needed to, and resulted in a raw plywood deck. This was all in the driveway under early April sun in Colorado, so it wasn't bad at all. The hard part was knowing when to stop, not digging into the wood by accident, not approaching a seam or a seat-box base structure, etc.

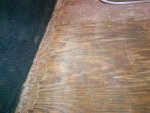
If this is 18" x 18" rear starboard foot-well, I only removed 12" x 15" down to the plywood deck. Some of the gel coat towards the edges was removed as I got carried away, or if it looked like it was already peeling up then I would buzz it off. But I wanted to preserve all the seam integrity.
IMG-20130406-00200.jpg

This is the captains foot-well
IMG-20130406-00201.jpg

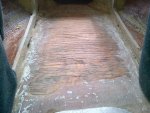
This is the main foot path up the middle of the cockpit
IMG-20130406-00202.jpg

And right up the middle towards the ski locker.
IMG-20130406-00203.jpg

I'm not planning to go down into the ski locker for anything, since this is just a top-side repair project. You'll see some pics that have sightlines down in there, but only because the ski locker cover also has to be rebuilt with new plywood and resin/glass and then re-carpeted. The current ski locker cover is just double sided laminated plywood, with no protection on the edges, so it is shot. Pictures later.
 

Cord72

Cadet
Joined
Mar 30, 2013
Messages
16
Re: 1991 Bayliner Capri - floors and carpet

I thought SERIOUSLY about how power tools could help me, but stuck it out with the hand labor. That could have made it a lot easier, I'm sure. :confused:
 

Cord72

Cadet
Joined
Mar 30, 2013
Messages
16
Re: 1991 Bayliner Capri - floors and carpet

Here is the port side floor grinding results.

Port side rear foot-well. Again not getting too close to the seams, to preserve their integrity.
IMG-20130406-00208.jpg

Foot path up the middle
IMG-20130406-00206.jpg

Co-captain foot-well
IMG-20130406-00205.jpg

Bow foot-well. This area was very exposed, with little to no gel coat or resin under the carpet, much like the deck towards the stern, just in front of the engine box. The result was that the plywood was showing signs of some expansion/cracking/weathering more than the other foot-well areas, and you can see it in the photos. Despite this weathering, the ski locker is beneath it, not stringers, and it is dry and solid. So I'm leaving it in place, and will just sand it down to a smooth surface in prep for resin and glass.
IMG-20130406-00204.jpg

You can also see the storage boxes now that the foam is out. I've got the carpet peeled back out of the way so I can cut the openings and re-adhere it once all prepped and ready. The foam left it's skein on the hull fiberglass, so I'm contemplating how to sand that, how to seal it so all the life jackets and floaties aren't constantly coming out with yellow dust on them, etc.

I'm not sure about how to do that yet, but at my wife's suggestion we did decide to scrap the idea of doors and hinges, in favor of cargo netting to contain the contents. This is a narrow foot-well, so a door/hinge might have been awkward to flip down, and the netting sounds like a good idea.
 

Cord72

Cadet
Joined
Mar 30, 2013
Messages
16
Re: 1991 Bayliner Capri - floors and carpet

You can also see what I surmise is peanut butter at the seams of the deck plywood, horizontally every 4' running from the stern forward. I left that in place, as it is considerably thicker and would have been a lot of grinding to remove it, and it seemed like a good structural component to leave as well.
 

Cord72

Cadet
Joined
Mar 30, 2013
Messages
16
Re: 1991 Bayliner Capri - floors and carpet

At this point I had gel coat and glass fibers everywhere, and I wish I would have sprung for that tyvek suit that some have talked about. ITCHY!!!

So I ran the shopvac for about an hour to clean the entire boat, bow to stern, because everything I touched was dusty. All the remaining carpet on the sides, the side padding, everything. Even inside the glove box...

IMG-20130406-00199.jpg

IMG-20130406-00198.jpg

This was all done with the boat and trailer in the garage, out of the sun. Beautiful day here in Colorado for April 7th, but glad I had it in the shade. This took some creative backing and trailering to get it into the garage at an angle, because I have that 1980's split door garage with the post in the middle. But it fit to the point that I can close the door overnight now, which will be very valuable once I lay some resin and glass and I can let it cure without needing a tarp or the travel cover on and off.
 

Cord72

Cadet
Joined
Mar 30, 2013
Messages
16
Re: 1991 Bayliner Capri - floors and carpet

I have never in my life worked with fiberglass before today, but iBoats gave me the info and confidence to do it. I am not certain of what the best approach would be for my repair, so I went with a generic solution.

I chose 'Bondo' brand polyester resin/hardener combo (just because it was convenient at Walmart) along with sheets of woven cloth. I don't think I need to add lateral rigidity to the middle of the deck, but thought I better do something more than just laying down resin. I thought of the woven cloth as rebar in cement, and it was easy to work with, cutting pieces to fit as needed in my odd shaped areas.

Cut the bow pieces, laying them out to dry-fit.
IMG-20130407-00209.jpg

After another thorough shop-vac session, I wiped the plywood and existing resin edges with acetone to get them as clean as possible.

* * * NOTE - Vinyl gloves absolutely DISINTEGRATE on contact with acetone... I used bare hands and shop rags for the acetone step with no ill effects.

I brushed out the resin/hardener mixture for the piece(s) I had prepped for an area, then laid out the sheet and dabbed on more until it was all whetted and no air pockets visible. I followed the directions on the can (10 drops of hardener per 1 ounce of resin) and used the food scale from the kitchen to tare out a red Solo drink cup as the vessel. The cheapest chip brushes from Home Depot worked perfect for laying down the base resin and for dabbing the top coat on as well.
IMG-20130407-00213.jpg

All the advice says to not brush on the top coat of resin, and instead to use the dabbing technique to push the resin in and eliminate any air pockets. The other problem with brushing resin on top of the cloth is that is moves the sheet out of place and creates air voids by sliding it around. That lesson didn't take long to learn...

The weather was probably 62 degrees F today and I was in the shade of the garage. I never felt the mixture get hot, and it didn't seem to set up faster than I could use it all up, so I was able to work with 4 to 7 ounces of resin and about 4 square feet at a time before I would mix more resin. For the entire deck of my 18.5' boat (what I was covering of it) i used less than 60 fluid ounces of resin in total. That was for one complete coat and one layer of glass sheet. I do plan to go back and lay up a second layer of resin only, just to build up a thicker layer for waterproofing, so that might be another quart of resin.

It was funny to see the red Solo cup kind of disintegrate after about 30 minutes exposure to the resin or maybe the hardener (MEK). I mixed in the Solo cup with a plastic picnic spoon and used some of those multi-purpose rubber work gloves that just saw their last chore before hitting the trash bin at the end of the job.
 

Cord72

Cadet
Joined
Mar 30, 2013
Messages
16
Re: 1991 Bayliner Capri - floors and carpet

Here are some finished looks.

After I was done I remembered people talking about glassing in plywood circles over the foam fill holes. I completely forgot about that until now, what is the best advice? Should I hole-cut out the spot I just filled in, only to glass in a wood puck over the foam?
IMG-20130407-00219.jpg

Extra resin at the starboard foot-well, which is the primary entry point after coming up from the swim ladder.
IMG-20130407-00221.jpg

Long view, with the seat boxes still in place.
IMG-20130407-00231.jpg

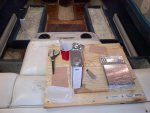
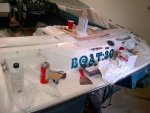
Mixing station.
IMG-20130407-00223.jpg
 

Cord72

Cadet
Joined
Mar 30, 2013
Messages
16
Re: 1991 Bayliner Capri - floors and carpet

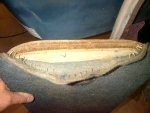
Ski locker cover, improper material and the condition is trashed:


Is that just kitchen counter top?
IMG-20130407-00235.jpg

It is certainly de-laminating plywood, since it was not protected at all.
IMG-20130407-00237.jpg

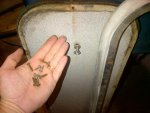
Some stainless steel screws holding it in place, some not so much..
IMG-20130407-00234.jpg

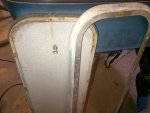
I'll just cut a new piece to fit, and resin and glass it to protect it before carpet.
IMG-20130407-00233.jpg
 

Cord72

Cadet
Joined
Mar 30, 2013
Messages
16
Re: 1991 Bayliner Capri - floors and carpet

Now you are up to speed with my progress. Carpet should be delivered this week, and I'll have more updates next weekend!!

Cleaning up:
IMG-20130407-00224.jpg

Break Time!!
IMG-20130407-00232.jpg
 

Trooper82

Commander
Joined
Nov 21, 2011
Messages
2,648
Re: 1991 Bayliner Capri - floors and carpet

Looks like you are doing quite well on the progress...

resin without any cloth will be brittle and crack...
 

Cord72

Cadet
Joined
Mar 30, 2013
Messages
16
Re: 1991 Bayliner Capri - floors and carpet

resin without any cloth will be brittle and crack...


Thanks Trooper - does this mean that every subsequent layer or coat of resin should always have cloth in it too?
 

skbry

Cadet
Joined
Aug 8, 2011
Messages
19
Re: 1991 Bayliner Capri - floors and carpet

I have the 2050cx version of your boat that I bought last year and spent that summer enjoying it also. Over the winter I have redone the floor (same kind of condition as yours) with blue colored LineX (my kids love jumping in and out all wet) and just finishing a complete reupholstery. I'd pay someone next time, thousands of staples. Trying to keep the original color theme. I'll post photos in the completed project section when I'm done this month. Love the 1990-1992 Capri's.
 

<=M=>

Cadet
Joined
Apr 12, 2012
Messages
13
Re: 1991 Bayliner Capri - floors and carpet

My wife and I are about to do the exact same thing! ^^ Having an extended swim platform installed this weekend as well as the engine tuned for the season. We too have a 91' Bayliner Capri 2050.

Any pointers for reupholstering? Mother-in-law will be helping with the sewing.

Curious to tear up the carpet tonight as I do have a small soft spot in the flooring rear port side. Hopefully it's 'not too deep'. Nervous.

Great work so far on the floor—does one HAVE to reseal the floor with glass or can an epoxy or other waterproofing agent be used?
 

Woodonglass

Supreme Mariner
Joined
Dec 29, 2009
Messages
25,929
Re: 1991 Bayliner Capri - floors and carpet

Thanks Trooper - does this mean that every subsequent layer or coat of resin should always have cloth in it too?

Not speaking for Trooper and I hate to be the bearer of bad news but...

Did you pre-coat the wood first with resin and let it set up? If not the wood will pull the resin out of the glass and cause it to become resin starved. After that did you lay a layer of CSM (Chopped Strand Mant) prior to laying the Cloth? Fiberglass cloth requires CSM to be layed first in order for the Cloth to adhere properly to the wood. Without it, the cloth will not bond correctly and eventually de-laminate. The first link in my signature below has a lot of good info on how to do the glass work you are attempting. Bondo has wax in it so any subsequent layers will require you to sand the previous layers with 60 grit and wash them down with acetone.
 
Top