1991 CABO 204 Centercon Re-Doing... Here it goes!!!

DukesFin

Chief Petty Officer
Joined
Oct 12, 2005
Messages
500
Let me begin by thanking all those that have contributed to this forum and the forum itself. Had it not been for the forum here, there is NO WAY I'd attempt a fraction of what I'm about to do to my boat...

Well, I guess its time I get my own "real" restoration thread started. Hopefully, I'll update this thread appropriately, but I was starting to ask too many questions during what I was thinking was "planning", but in my "planning", I've begun the project.

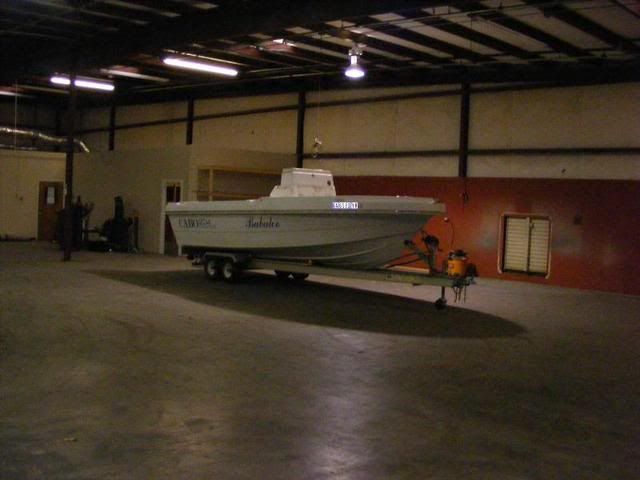
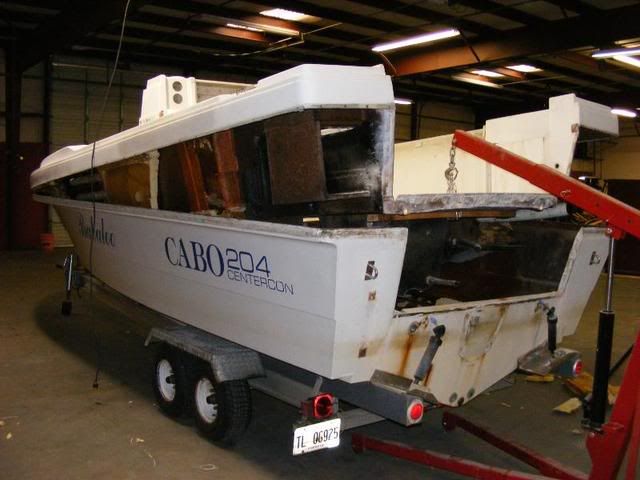
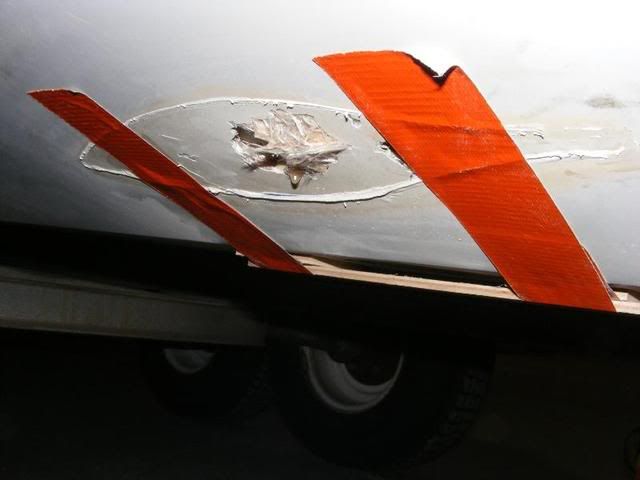
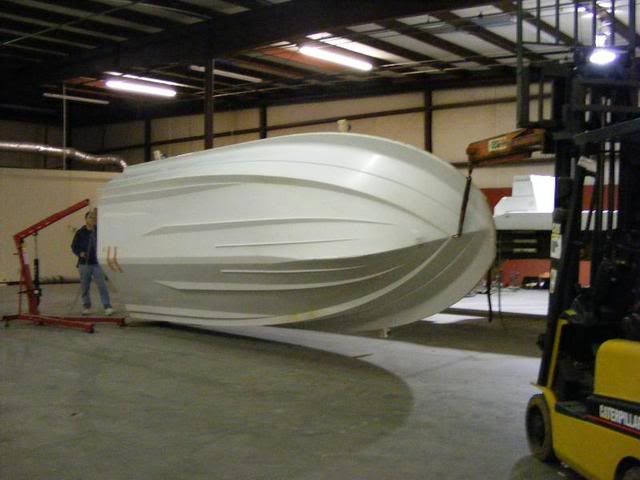
Here's the boat... My wife and I picked this gem up about a year ago, and fished it HARD in the Gulf of Mexico, but I wanted to re-paint it and do some odds and ends, but you know how that little list grows...

Duke.jpg


DSCF1648.jpg


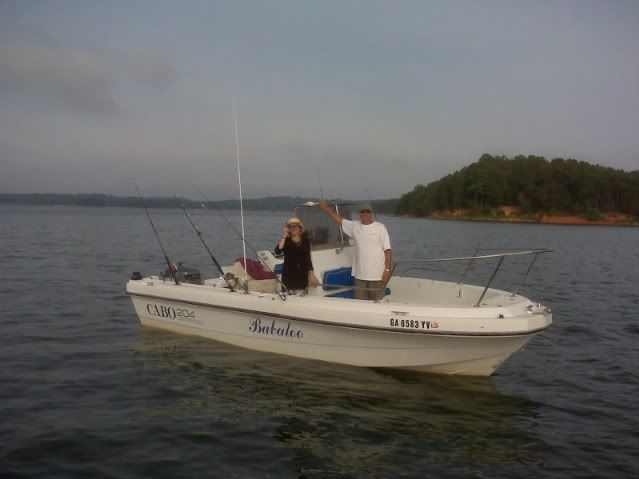
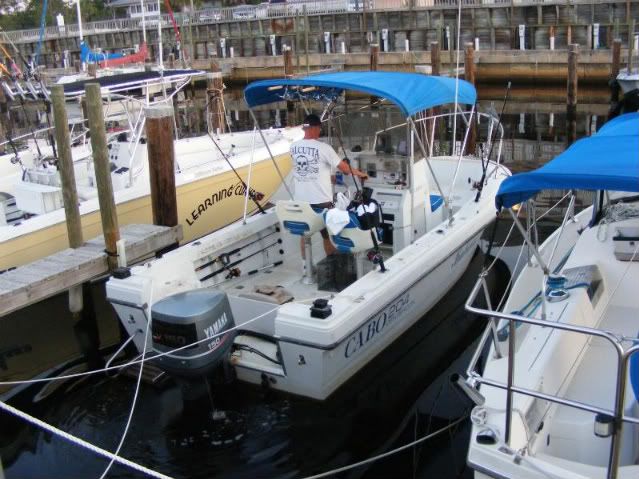
The boat has put many a fish in our freezer, that's for sure, but like I said, there are some things I just don't like about it...

For one, it doesn't "rest" level in the water. I know what that means when all my gear is stowed properly... Something is heavy that SHOULDN'T be!

The boat also seems heavy, though I've never compared actual weight to what the books say I should be weighing in at.

I want a t-top to put my VHF, CD/Stereo and Radar in/on, but I'm not installing the t-top until I fix the small cracks in the deck.

Not sure where/how the front fish boxes were draining. Same goes for the 2 front rod holders and the coolers under the seat in front of the console.

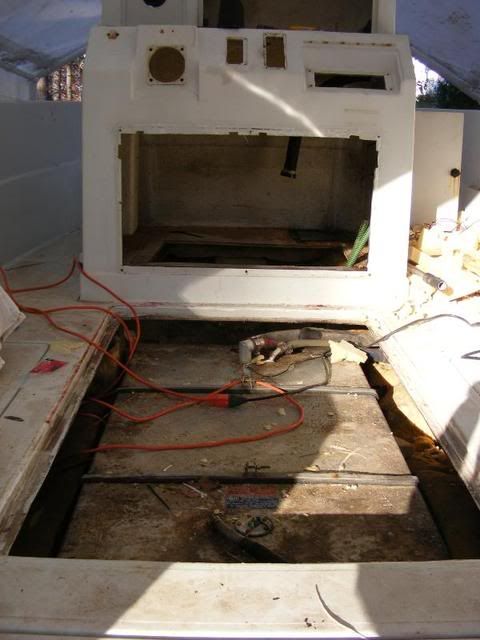
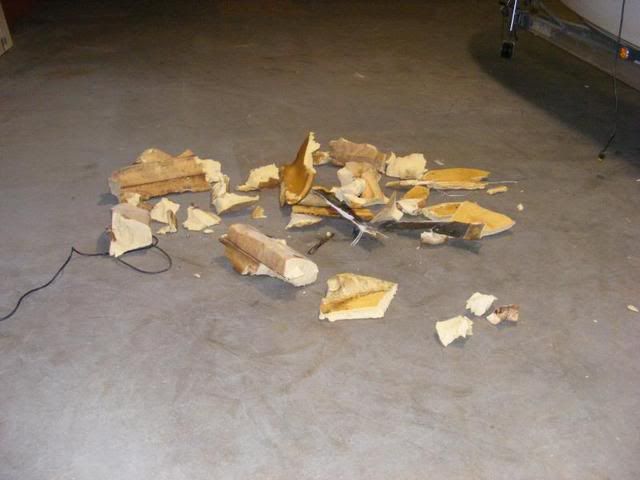
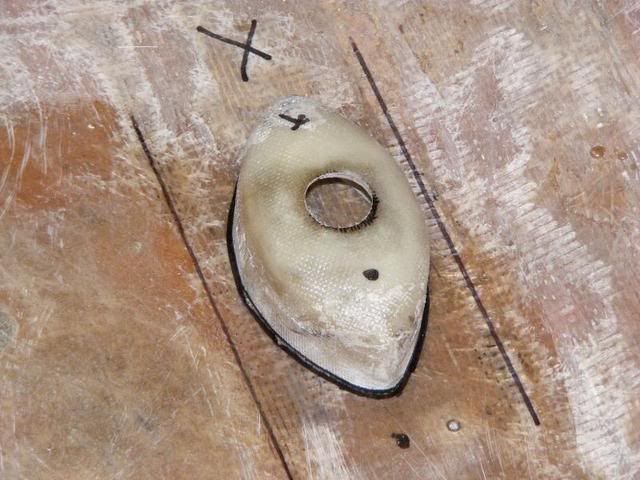
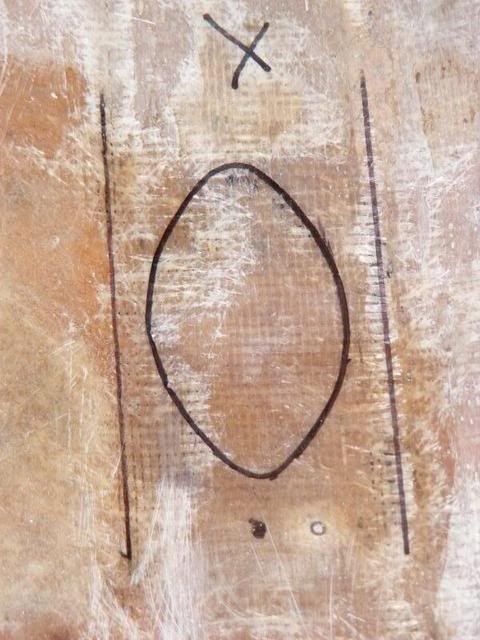
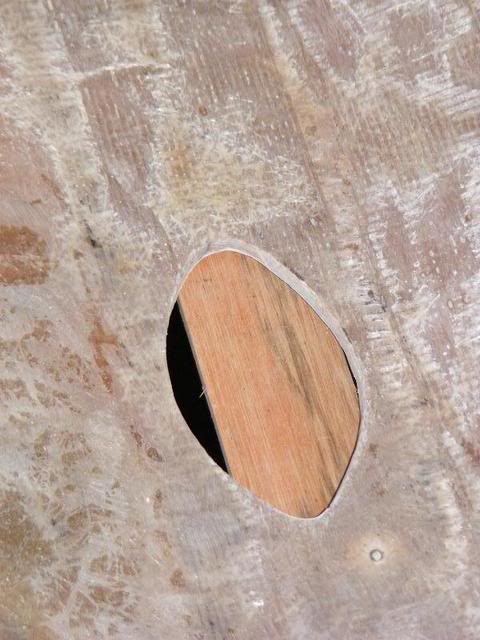
I knew there was space under the console that is glassed in/molded with the deck, so I cut a hole to take a look-see and found a LOT of foam. Started digging out the foam and found water. LOTS of water. Probably a few gallons drained out once I dug out the foam from the center/keel drain.

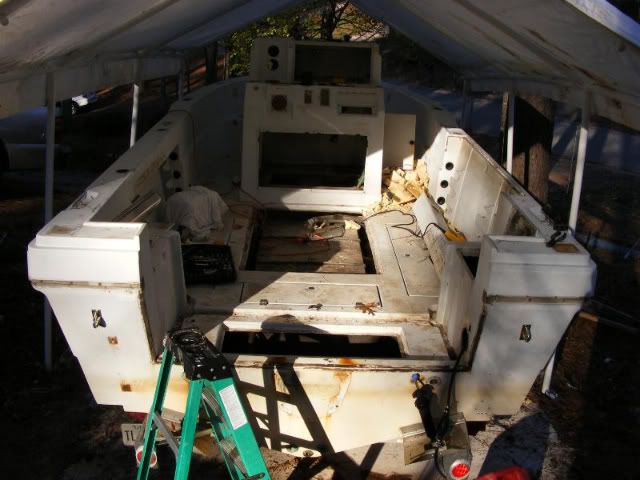
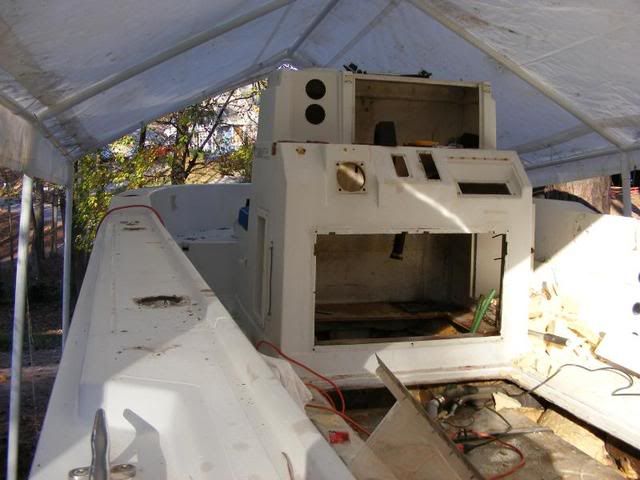
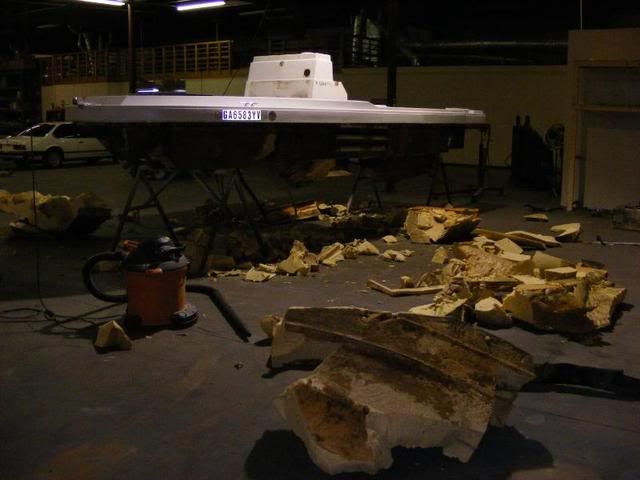
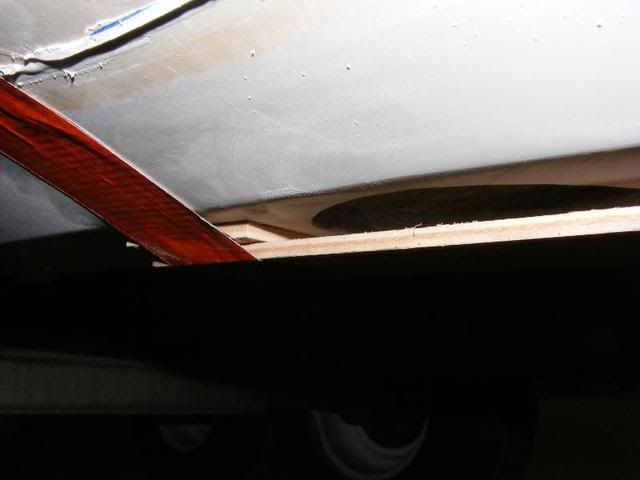
This forced my hand in making the inevitable decision to pull the top cap/console off and begin the investigation.

What I've found so far:
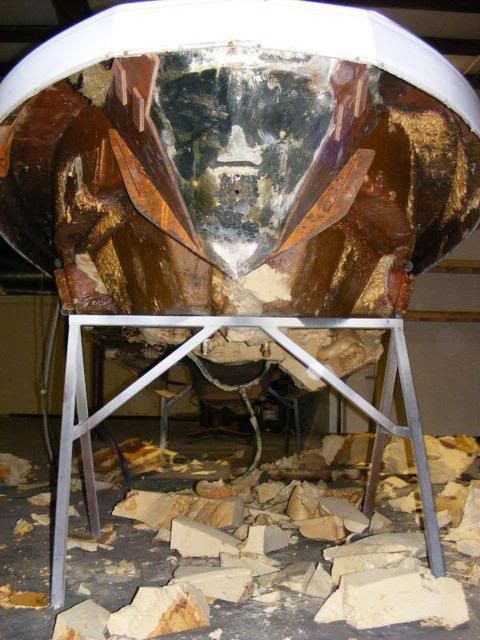
When the boat was built, they did a very good job encapsulating both the stringers and the transom. I've drilled test holes high and low of both and have only found good wood. I know there is some glasswork to do under there once I pull the cap, but I think I'm good on the stringers and transom (but not positive yet until I can get to ALL of it and check it.

I've pulled the engine and removed everything from the console except the steering, throttle and ignition.

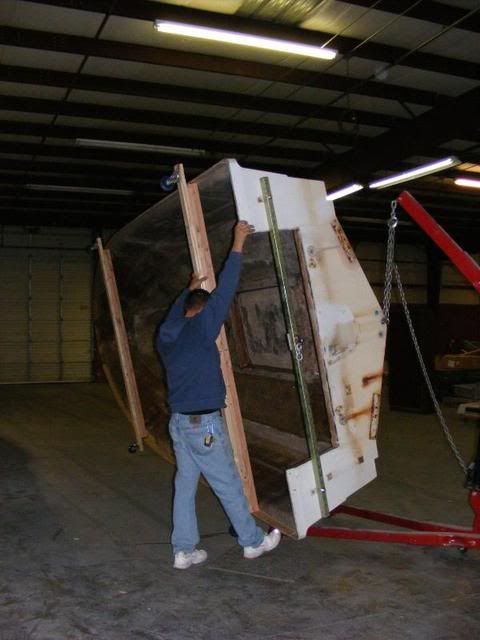
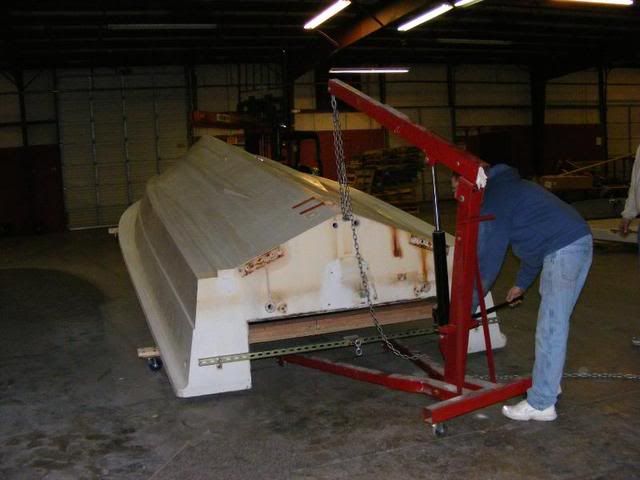
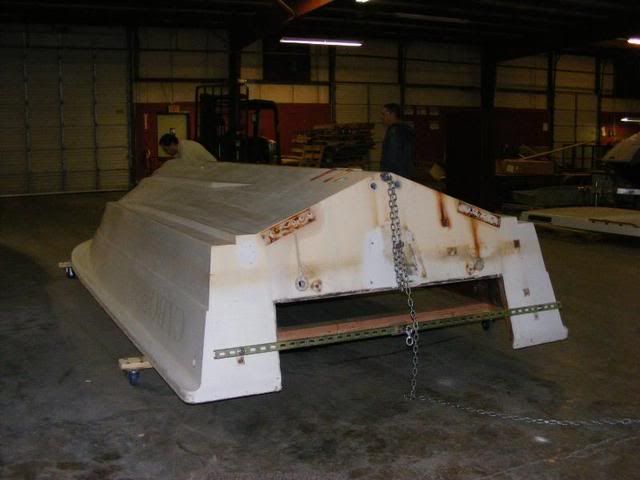
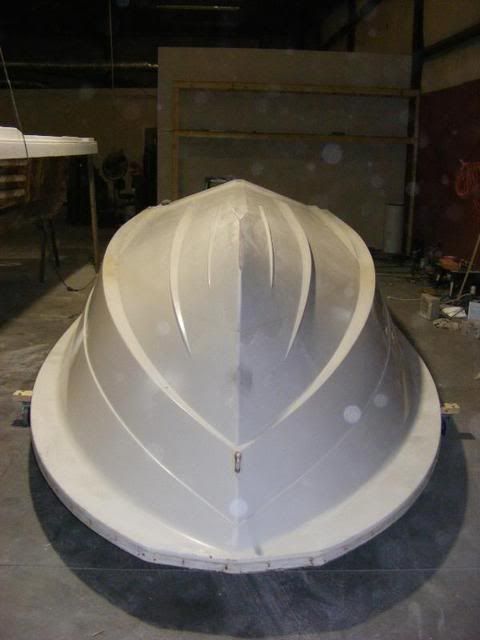
Next steps: Remove the throttle, steering and ignition, then pull wires out of the 4" pvc from the console back to the transom. Remove the trim tabs and pump. I need to cut what I know is bonding the cap to the hull, tow her to a warehouse where I can really get into her and begin trying to pull the cap.

I think this is all for right now. Once I begin pulling the cap, I'll update this thread.

Here are some pictures of the "system" I'm using to be sure I get everything back together right:

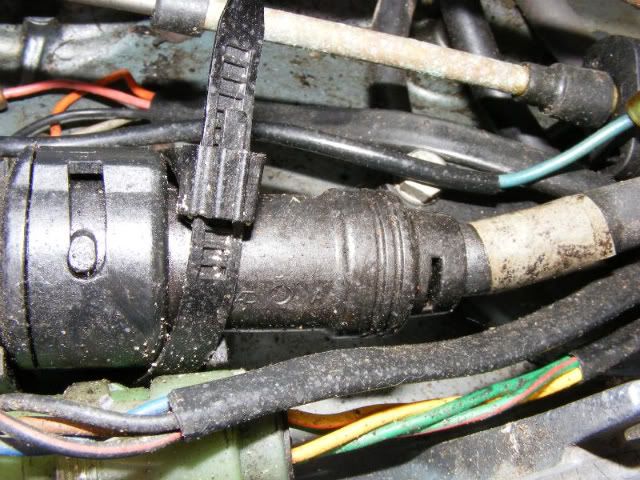
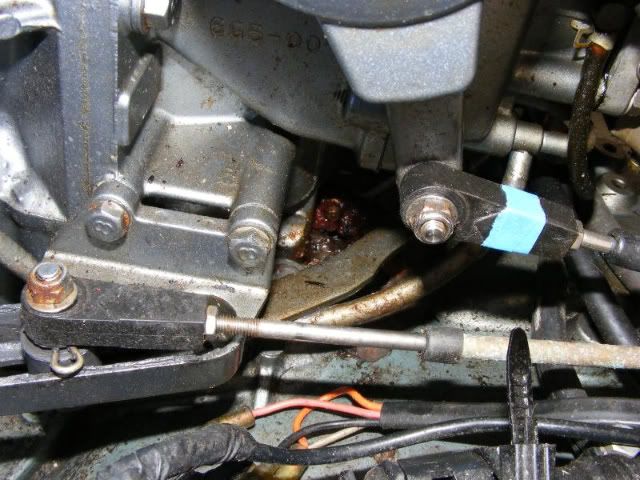
Removing the motor, I needed to be sure I knew what harnesses went where and used a bit of blue tape to note the difference between the throttle and shift cables:
DSCF1102.jpg

DSCF1106-2.jpg


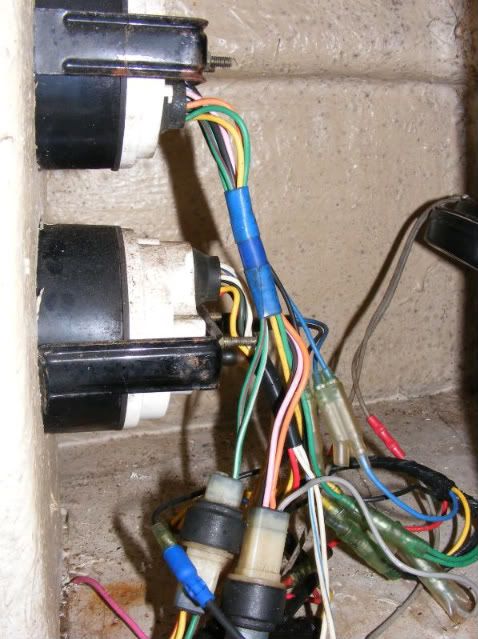
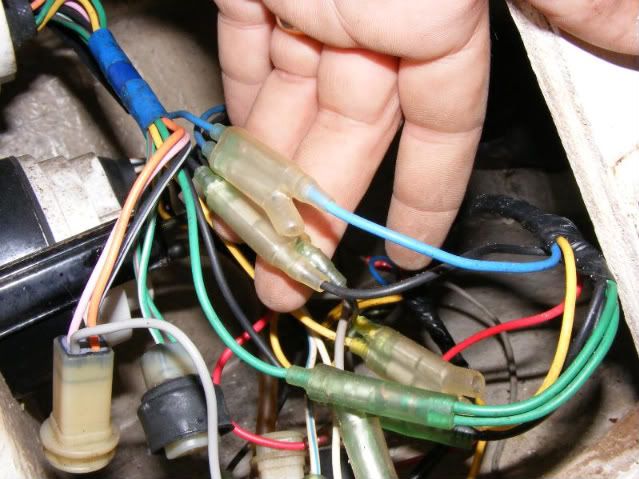
Removing the gauges, I needed to be sure I took pictures of every connection before I disconnected them. Here are just a COUPLE of many, many more that I took:
DSCF1002.jpg

DSCF1006.jpg


I'll update more as I go along. Thanks for helping me with the confidence I needed to get going on this project!!!!
 

bear_69cuda

Commander
Joined
Oct 10, 2008
Messages
2,109
Re: 1991 CABO 204 Centercon Re-Doing... Here it goes!!!

Cool boat!

Sounds like you're off to a good start!

My bet is the listing is due to wet foam...
 

DukesFin

Chief Petty Officer
Joined
Oct 12, 2005
Messages
500
Re: 1991 CABO 204 Centercon Re-Doing... Here it goes!!!

Your bet is mine as well. I'm just praying I get it out before it takes anything else out!

The listing and wet foam opens up so many doors for some modifications that I've wanted since I got the boat... I mean, if I'm going to lift the cap/deck off of the boat, why not REALLY have some fun, right? ;-)

I want to reshape the console, and I'm doing away with the two pedestal seats. Instead of the seats, I'm planning on fabbing a new leaning post with a built in livewell and storage. There is an in-floor livewell, but I really HATE the idea of a huge "bucket" of water below the deck. For off shore fishing, I really want good outflow from the livewell and the best way to get that is a nice large drain going DOWN to the water line. I'm wanting to use the existing thru-hull fitting/clamshell intake for a wash-down pump and put in a new one for the livewell.

Also, not having access to the drains for the two forward storage compartments, anchor locker and storage in front of the console isn't reassuring. I'll reconfigure those drains for better access and repairs in the future.
 

DukesFin

Chief Petty Officer
Joined
Oct 12, 2005
Messages
500
Re: 1991 CABO 204 Centercon Re-Doing... Here it goes!!!

I'm about to make a MAJOR purchase of supplies I think and know I'll need for the project... Here's the list of painting supplies:

Paint & Painting Supplies:
2 Quarts Perfection Oyster White (topsides)
2 Quarts Perfection Royal Blue (hull sides)
2 Quarts Interlux Primekote
8 Quarts Interlux 202 Fiberglass Solvent Wash
2 Quarts Interlux 2333N Brushing Reducer
Bunches and Bunches of sand paper in varying grits from 120 to 320.
More sand paper
Oh, and some sand paper...

Here's the question... I'd like to spray it all on. I've got a 6-gallon tank/compressor and if I've read correctly, with a gravity fed HVLP gun, I can do it, but I'll be going a bit slower due to waiting for my tank to re-fill with air.

I'm thinking of getting this HVLP: Husky Pro Pro HVLP Gravity Feed Spray Gun

Model # HDS89099AV
# Air Requirements: 6.5 SCFM @ 40psi. Fluid Nozzle Size: 0.055 inches (1.4mm) Fluid Delivery Speed: Medium-Fast
# Feed Type: Gravity. Mix Type: External. Bleed Type: Non-Bleeder
# Max HVLP Inlet Air Pressure: 40 psi. Max Inlet Air Pressure: 80 psi. Pattern Size: 1.0 in - 9.0 in
# Air Inlet: 1/4 NPS (M) Fluid Nozzle Material: Stainless Steel. Fluid Needle Material: Stainless Steel

(planning on getting it from one of the big box home stores locally).

Does anybody read anything that makes you cringe or want to say "NO, NO, NO!!!!" out of this?

Did I mention I'd be getting some sand paper? ;-)
 

system-f

Senior Chief Petty Officer
Joined
Dec 3, 2008
Messages
667
Re: 1991 CABO 204 Centercon Re-Doing... Here it goes!!!

Here's the question... I'd like to spray it all on. I've got a 6-gallon tank/compressor and if I've read correctly, with a gravity fed HVLP gun, I can do it, but I'll be going a bit slower due to waiting for my tank to re-fill with air.

Be very careful with that compressor. I have a craftsman 7 gallon OILED compressor and when I read the fine print on the tank it says the compressor pump only has a 50% duty cycle. Well, even with an HVLP gun your compressor will be running more than 50% duty cycle...mine was running darn near 100% and I was just spraying thinned out primmer. After about 15min. my compressor blew the head gasket which was easily replaced with RTV high temp (and is still fine) but I would think you would need more more than this compressor to spray paint, UNLESS it is of course a 100% duty cycle pump.
 

JimbC

Chief Petty Officer
Joined
Jun 30, 2009
Messages
456
Re: 1991 CABO 204 Centercon Re-Doing... Here it goes!!!

DukesFin Nice rig, and lots of luck on the rebuild. Looks like Lanier your on right there.:D
 

DukesFin

Chief Petty Officer
Joined
Oct 12, 2005
Messages
500
Re: 1991 CABO 204 Centercon Re-Doing... Here it goes!!!

Yep... I'm on Lake Lanier for sure! Great lake for stripers or for just cruising, that's for sure...

As far as the compressor goes...

LOOKS LIKE I GET TO BUY ANOTHER TOY (I mean TOOL) :)

There are a few 25 gallon compressors on Craigslist all the time, so I'll start checking those out.

My little compressor drives me nuts with its cycling all the time. I've needed a larger one anyway!!!

GAME ON!!!

Here are a few more pictures of the progress I've made to date with the dismantling of the boat... I think that all I've got left to do is remove the gas tank (and associated plumbing), remove the trillion screws holding the cap on, remove the bow eye and anchor roller, and finally, contort myself so I can try to see how they bonded the cap to the transom... :

Here's a view from the aft:
DSCF1004-1.jpg


Aft/Port Corner View:
DSCF1011-1.jpg


The Console that was actually molded with the cap... That's right... It's all ONE piece!
DSCF1008-1.jpg


And a close up of the helm:
DSCF1010-2.jpg


Sanding this beast is NOT going to be fun, that's for sure. I bet it will be just as much fun as removing all the 5200 and silicone that's on everything!!!

Making progress!!! I'm almost ready to pull her out from under the temporary shelter and into a warehouse where I can pull the cap (or start trying to)!
 

DukesFin

Chief Petty Officer
Joined
Oct 12, 2005
Messages
500
Re: 1991 CABO 204 Centercon Re-Doing... Here it goes!!!

Good news! I found about 1500 square feet of warehouse to do my work in for 2 months @ only $500/month! (I'm sharing an 18,000 square foot warehouse).

I will be moving the boat there tomorrow so I'll be able to update with some progress soon!

The guy next door (other side of the wall in the warehouse) has a forklift I can use, commercial/industrial air with lines all over the warehouse, exhaust system, work tables, power/water included...

Oh, it's a sweet place to do this work for sure!!!
 

DukesFin

Chief Petty Officer
Joined
Oct 12, 2005
Messages
500
Re: 1991 CABO 204 Centercon Re-Doing... Here it goes!!!

Okay, she is in her new home for her 2-month re-hab stint...
DSCF1005-1.jpg


So, first things first... Start pulling that cap. I removed a zillion screws and started prying both the bow and stern:
DSCF1009-2.jpg


The cap came off without too much trouble, but there was some foam to remove:

I went from this:
DSCF1010-3.jpg

to this:
DSCF1023-1.jpg


At least the cap is now removed and I can work on some hull-insides! Do boats always look that much bigger when you look at just the hull?
DSCF1019-1.jpg


Here's a shot of the underside of the deck:
DSCF1022.jpg


Here's what I learned today...

If you have an anchor locker with no drain to the outside, the water will fill up all of your foam.

If you have rod holders that open up to the interior of your hull with no way to drain out, it will fill up your foam with water.

If you have fish boxes in the bow and the drain hoses are broken, they will fill up your foam with water.

Foam is considerably heavier when it is filled with water.

Water soaked foam can and will help a LOT of mold growth in your hull.

Water soaked foam is nasty stuff to remove.

If you think you have a lot of foam on your boat... Think again... I had what your boat manufacturer couldn't fit in your hull! Every bit of space between the deck and hull, hull sides and liner from keel to gunnels was FULL of foam.

I thought about not going back in with the foam when I put it back together but my deck does NOT rest on the stringers. My deck is pretty stout with a lot of hatches, but having all of that foam in there surely helps support the deck to some extent, and I'm sure it cut down on a lot of sound.

The only problem was not a great design on the anchor locker, rod holders and broken drains.

When I put it back together again, those issues will be solved and I'll be very sure that where there's foam, there will be NO WAY for water to reach it!

Carry on. More reports to follow soon. My next step is to start cleaning and sanding/grinding the inside of the hull for some repairs and a new layer of glass, just to tidy it up.
 

DukesFin

Chief Petty Officer
Joined
Oct 12, 2005
Messages
500
Re: 1991 CABO 204 Centercon Re-Doing... Here it goes!!!

here's a progress report:

All major fiberglass grinding work is done and my two new knee braces for the transom into the stringers are fabricated and installed using a "peanut butter" resin mixture. I made the knees about twice the size they were. I've got a long crack to lay 3 layers of glass down onto tomorrow... The PO of the boat had bunks on the trailer that were too short. They stopped about 1' from the transom and the glass paid the bill for that mistake, but she'll be stronger than ever when I'm done fixing that. Mat, cloth, then mat again. I've found that poly resin is pretty forgiving! Cover the knees with 3 layers of glass. Add a 1/4" by 2" strip along the inside of where the cap screws into the hull, then I'll be ready to re-do the pluming under the deck....

After that, it's time to put the cap back on and get ready for the sanding and paint... That is IF I don't decide to paint the planing surface! I'd be a fool not to do it while I can though.

I got the glass work done inside the hull, so now I need to flip the hull and do some minor repairs to the planing surface and then begin prepping for Interlux VC Performance Epoxy paint. Once that's cured, she gets flipped back and the cap goes on!!!

Truckin' on along!

Since I'm flipping the hull and doing some glasswork to the planing surface, I've decided to make a major change in my Furuno's transducer mounting. I'm going to make a plug using plaster of paris and the old high-speed fairing that used to be mounted and FLUSH MOUNT the ducer in the keel of the boat...

What I'm doing is just like this (but on a smaller scale as my ducer isn't as big as the one in the link):
http://www.classicmako.com/projects/xshark/bw27.htm

The previous installation of the HS fairing was a hatchet job to say the least and I was going to buy a new fairing, but decided this would be cheaper and actually work a LOT better at reading the bottom when I'm going any faster than idle speed...

I'll be plugging the mold today and glassing it all up over the next few days. I'll take pictures of the process and post them...

Well, I made the plaster casting last night and it worked beautifully. No need for pictures of that as it's pretty straight forward. Today after work, I'll begin covering the plaster with poly resin and glass... Alternating pieces of CSM and cloth to build it up to be about 1/4 inch thick. Once that's done, I'll pop the plaster out, then grind it on the outside with 36 grit in preparation for the epoxy that I will use to bond it with the hull/keel.

I'll mount it to be about 3/16" below the keel so I can fair it out with epoxy resin and glass, starting with a fillet on both the inside and outside, then alternating layers of CSM and cloth, each layer larger than the previous. The "under side" will go about 5 or 6 inches out and will be faired to the hull, but the inside will go about 8 to 10 inches out. I'm using epoxy to actually mount the piece as I want to be sure I've got as good of a bond as possible between the housing and the hull... Nothing like cutting a 3.5 by 5 inch hole in the keel of your boat! I'm a bit lucky though that my keel is flat (about 4 or 5 inches wide) where I'll be installing this so it's going to be pretty easy for me to be sure I've got it mounted level and plumb.

THEN, I'll be ready to sand and paint the hull! (Unless I find other little "projects" to side-track my plan!!!)

Okay, some progress with pictures!

I had to rig up a way to lift the transom of the hull so I could remove the trim tabs as well as preparation to flip the hull for paint/prep once my transducer shell gets installed... Here's what I came up with:
DSCF1022-1.jpg

You can also see the way I'll be able to move the hull around after the flip (the 4 casters and 2X4's used).

I tested it out with the engine hoist and it works great.

Now, on to the transducer shell...

As I mentioned, I made a plaster cast of the slot the transducer fits into of the high-speed fairing from Airmar. I used that for the mold for fiberglass. I've got about 5 or 6 layers of glass that make up my shell now. The pictures don't show the additional sanding and further layers of glass that the shell now has, but it's installed or rather "tabbed in" with an epoxy "peanut butter" on the inside. Tonight, it will get 5 layers of fiberglass cloth over it, each layer larger than the other with the final piece being about 2' square... Here are the pictures of me laying it out to cut the hole as well as the hole now cut...

I needed to draw an outline of it so I could accurately cut the hole and make sure it's centered well:
DSCF1035-1.jpg

DSCF1038.jpg


And here's the gaping hole I put in the keel of my boat (with the 1/4" ply I used to put the shell 1/4" under the keel for proper fairing and glassing on the planing surface:
DSCF1039-1.jpg


You can see the 1/4" ply system better here:
DSCF1040-1.jpg


Once I flip the hull, I can do all the glasswork needed from the underside without laying on my back. It will be a LOT easier working from on top! Also, you can see where the high-speed fairing was installed using 5200... That stuff STICKS very well! Now I've got some fixing to do on the previous install, but compared to everything else, that fix will be very easy!
DSCF1041.jpg


For the whole transducer shell installation and fabrication, I'm using epoxy instead of poly resin because I want the BEST bond possible and poly resin only offers a mechanical bond. There are some very good debates about using epoxy over poly and really it boils down to surface prep and they both come out ABOUT the same if poly is prepped right, but since this is a big hole in the hull, I didn't want to leave anything to chance, so I went with epoxy resin.

Another note about the bilge area... I'm not done glassing that whole space in. Once I've got the transducer shell completely installed, flip the hull, paint it, then flip it back "right side up", I'll be doing 2 more layers of glass over the whole bilge, then prepping it for paint.

Anyway, more reports to follow!
 

DukesFin

Chief Petty Officer
Joined
Oct 12, 2005
Messages
500
Re: 1991 CABO 204 Centercon Re-Doing... Here it goes!!!

Well, the hull is now flipped and resting in her new home under the light for repairs, fairing, prep, then paint... The process of the flip was a bit hairy at times. You know how you plan, plan and plan some more, then ask for feedback to find what you missed? Everything looks good to go, then once you get into it, you see everything you missed? Well, this was the case. I was worried about the bow and weight transferring as the flip was going on, but it turns out that the problem area was the transom. The bar I put on the transom was much higher than the center of gravity, so we had to fashion a connection for the engine hoist into the drain plug hole. Once we did that, the flip went great. I'll be able to use my "bar" for the flip back upright though...

Here are the pictures of the hull-flip:

Got the fork lift on the bow and engine hoist for the transom and the flip began. I'll let the pictures do the "talking":
DSCF1035-2.jpg

DSCF1037-2.jpg

DSCF1041-1.jpg

DSCF1043.jpg

DSCF1044-3.jpg

DSCF1050-1.jpg


After it was flipped, I sanded and ground-out all the blemishes, problem areas, etc. Tonight, I'll be mixing up more epoxy and cutting/installing new glass where it needs it. Tomorrow I'll begin sanding in preparation for the Interlux VC Performance Epoxy. I just have to figure out how to tape off the areas around the chines so that it's nice and even!!!
 

ezmobee

Supreme Mariner
Joined
Mar 26, 2007
Messages
23,767
Re: 1991 CABO 204 Centercon Re-Doing... Here it goes!!!

Nice work. That boat sure has a lot of chines! I agree with you that my boat looked huge when it was all stripped out. However now that it's flipped, I think it looks tiny. Many of us would kill for that work space you have there. Wow!
 

DukesFin

Chief Petty Officer
Joined
Oct 12, 2005
Messages
500
Re: 1991 CABO 204 Centercon Re-Doing... Here it goes!!!

That's what my warehouse neighbor and I said as soon as we had it flipped: Wow... It's not so HUGE anymore!

I got really lucky on the warehouse... 2 months at $600/month, with all utilities included. I did have to get a $1M (that's MILLION) liability policy though, but for a full year it was only $288.00 and when I'm done, I'll cancel the policy and get a refund (pro-rated)!!!
 

Friscoboater

Captain
Joined
Jul 3, 2009
Messages
3,095
Re: 1991 CABO 204 Centercon Re-Doing... Here it goes!!!

That is really cool to have that much space. Nice boat.
 

sprintst

Commander
Joined
Apr 18, 2009
Messages
2,066
Re: 1991 CABO 204 Centercon Re-Doing... Here it goes!!!

Nice work dude. It's a good thing you pulled the foam when you did. That thing is going to rocket when she is all done up again.
 

DukesFin

Chief Petty Officer
Joined
Oct 12, 2005
Messages
500
Re: 1991 CABO 204 Centercon Re-Doing... Here it goes!!!

Thanks! I'd love to put a 200 or 250 on the transom, but I'm killing my motor budget with this project! Maybe next year!!!
 

SKIBUM1M

Chief Petty Officer
Joined
Jul 17, 2009
Messages
604
Re: 1991 CABO 204 Centercon Re-Doing... Here it goes!!!

If its not too late I would strongly suggest getting a 60 gallon compressor. You can get them for $400 and it is strong enough to run about anything. I paint, DA sand, and even sandblast with mine. The DA will save you soo much work in hand sanding and there is no way a smaller compressor will run a DA. Even with a 60 gal I have to stop and let it catch up
 

DukesFin

Chief Petty Officer
Joined
Oct 12, 2005
Messages
500
Re: 1991 CABO 204 Centercon Re-Doing... Here it goes!!!

If its not too late I would strongly suggest getting a 60 gallon compressor. You can get them for $400 and it is strong enough to run about anything. I paint, DA sand, and even sandblast with mine. The DA will save you soo much work in hand sanding and there is no way a smaller compressor will run a DA. Even with a 60 gal I have to stop and let it catch up

Nah. I don't need one. Reason: The guy that rents the other side of the warehouse has some huge commercial compressor that looks like a yellow coffin type freezer and a dryer/cleaner for the air that is about the same size. He's run air lines all over the warehouse. I've got no less than 4 connections right over the boat alone! I'm telling you... I struck GOLD when I found this warehouse to rent. My neighbor has a machine shop with every tool I'll NEVER be able to own, he loves boating/boats, builds custom racing brakes in his shop for a living and re-builds rare BMW's in there in his spare time!
 

SKIBUM1M

Chief Petty Officer
Joined
Jul 17, 2009
Messages
604
Re: 1991 CABO 204 Centercon Re-Doing... Here it goes!!!

Nice, do you have room in there for my boat project, :D
 

DukesFin

Chief Petty Officer
Joined
Oct 12, 2005
Messages
500
Re: 1991 CABO 204 Centercon Re-Doing... Here it goes!!!

I got the first coat of Interlux VC Performance Epoxy on last night. It was my first time using an HVLP sprayer and it came out pretty good! It's got a little bit of texture to it though. I need to thin it a little bit more so coats 2,3 and 4 go on more smoothly. I went back to it at around Midnight and filled some pinholes with epoxy and did a little more fairing, so after work today I can sand it, then begin the final coats...

I'll take some pictures with the masking removed so you can see the difference. One coat makes it look like a new boat already, so I can't wait for the final coat!!! Meli took some pictures last night, but she missed the actual painting.

The gun I'm spraying with is a HUSKY PRO HVLP gravity feed gun from HD. At $80, it does okay! 40psi at the gun with a 1.4mm tip.

More to come! I'm absolutely DREADING the sanding the topside is going to take... Scroll to the top and look at the pictures again... You'll see that every hatch has gutters... It's the gutter sanding I'm not looking forward to. Everything else will sand pretty easily with the DA, but the gutters are going to be manual with a foam-pad. EGADS!!! It's going to be worth it though! I was happy to realize that I don't need to sand/grind all of the non-skid down in prep for the topsides paint. I just need to take it down to the texture of a used football so I can clean it very well with acetone. It's going to get new non-skid anyway, so I'll be able to use the lines again!
 
Top