Maybe for the fuel filler?
Can't see that since the fuel tank was under the splashwell. I was thinking maybe the livewell pump before they pulled out the livewell. Just strange place since it was covered up.
Munster


Maybe for the fuel filler?
WOW! Have you thought about installing a length of PVC pipe down the center of the hull to run wiring through? I painted the inside of my boat with Rustoleum industrial gray primer and Industrial Gray paint from spray cans. My project is down on page 66 1988 Alumacraft Lunker redo. I'm going to follow this project as it is interesting
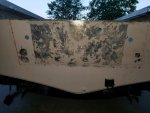
Post #9 shows what I did. The material above the weld line is new. When you take that huge splashwell out it sorta makes you feel like you're going to sink so I built it up a bit! This time I built a slightly taller and wider splashwell because I'm adding a bench seat, the casting deck will be about 4 or 5 " higher. The first splashwell was just a bit too narrow so the steering arm hit it and I lost some turning radius. I also have a 90 hp and have no problems tilting all the way up.
http://forums.iboats.com/forum/boat...redoing-the-ugly-duck-my-18ft-aluminum-sylvan
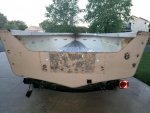
It's hard to tell from the pic but I added about 7 inches to the height so water coming in isn't all that big a deal unless I do something drastic. I wish I would have welded over the old splashwell drain hole and raised it up a couple inches though as with somebody heavier standing on the back deck it's just above the water line.
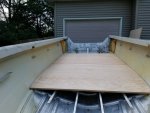
That splashwell takes up a lot of space, I think the deck on mine is 31 inches long minus about 12 in the middle where the splashwell is.