1995 Larson 174 SEI Complete Rebuild

Mechanicalmike08

Petty Officer 1st Class
Joined
Aug 29, 2018
Messages
308
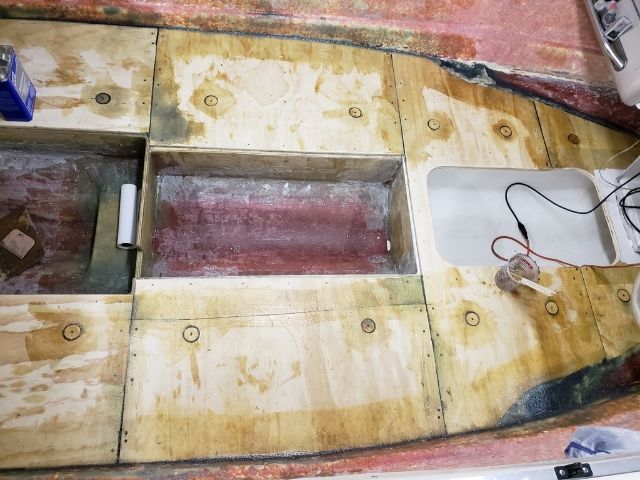
Won't bore you with the same picture again, Not to big of a night, got the third coat on this time with surface wax. I added some more pure white and am much happier with the color match now. Also coated the rest of the material for the cleats.

Ran and got some more PL and stainless screws to put the deck down too.
 

Mechanicalmike08

Petty Officer 1st Class
Joined
Aug 29, 2018
Messages
308
Tonight was a big step forward, all the cleats are in and got the first three pieces of the deck down. These ones are the ones the previous cleats were nice and cured. Should have the rest of the deck down in the mourning. Then going to hopefully foam it Sunday after everything has had a good 24 hours to set up.


Mechanicalmike08

Petty Officer 1st Class
Joined
Aug 29, 2018
Messages
308
Boy am I a happy man. The deck is in. Little bit bigger gaps between pieces than I intended but nothing a little PB cant solve. Also cut the Ski Locker right away. I am very happy with the turn out so far. Going to let the PL cure and drill some holes for foam tomorrow.


oldrem

Commander
Joined
Nov 7, 2013
Messages
2,002
Really looking nice. Always exciting getting things back together.
 

kcassells

Fleet Admiral
Joined
Oct 16, 2012
Messages
8,738
Very nice! Is that wood wet out and csm underside? Just looks so clean/raw. I hate clean stuff. :)
 

Mechanicalmike08

Petty Officer 1st Class
Joined
Aug 29, 2018
Messages
308
Another long day in the boat. Got all the foam poured. I will say I am impressed with power the expansion has, not tabbing before foaming might have been a good thing. If you get your volumes wrong I could see bad things happening. I did the back section first that had no cleats on the back corner near the transom and it pushed up a good 1/2" in the corner even with a 5 gal pale of resin on it. Not the end of the world, I guess it will just drain water to the center real good. I stepped my game up and used a little more weight on the other sections and didn't have another problem. I also liked it allowed foam to fill the crack so I know the cavity is full. I had just enough foam, I probably have 2oz of both left over maybe.

Then I let it sit for hours while I took advantage of the warm temps to clean the vehicles. The I used the multi tool to trim the excess foam. A air die grinder with a 36 grit rollock made quick work to clear out the pour holes.


Mechanicalmike08

Petty Officer 1st Class
Joined
Aug 29, 2018
Messages
308
Man, you are flying! Looking really good. I'm jealous of your ability to be fiberglassing this time of year.

Thanks, yea the wife isn't to happy I'm taking up her nice winter parking spot but it would have killed me to sit on it all winter and probably not have it ready for the season next year.
 

Mechanicalmike08

Petty Officer 1st Class
Joined
Aug 29, 2018
Messages
308
Lookinggood! That foam is interesting stuff to work with, isn’t it?

Yea it is, I could see how you could get into a bad spot real quick. Working in the colder temps seem to slow the reaction time but since I heated the cavity with a hair dryer I think I still got close to full expansion. I can see how people how have tabbed first would hear popping and cracking. I think I can even see a small amount of hull deflection from the expansion on the bottom side.
 

Mechanicalmike08

Petty Officer 1st Class
Joined
Aug 29, 2018
Messages
308
I am going to get the tabbing done before I start working on the back bench design. So tonight I wet out the edges to be tabbed and got the pucks back PB'd in and did the fillets and blend outs at the front. Will have a little touch up to do but should be able to lay some glass tomorrow.

20181217_175607.jpg
 

Mechanicalmike08

Petty Officer 1st Class
Joined
Aug 29, 2018
Messages
308
And just like that I have kicked another 5 gal bucket. I'm at 15 so far for anyone keeping track. I plan on putting a full list of the materials I went through at the at the end for the next guy reading this. Got one side tabbed last night and finished the other tonight. Took the day off Friday so I can pull it out and feather these edges, then I decided I am going to glass the entire floor before building the rear bench and all the add on sacrificial pieces. I thought about it and like the idea of a barrier between the deck and pieces that will be for the seat bases and battery tray, ect.


Chris51280

Ensign
Joined
Jan 24, 2018
Messages
932
I will follow along your build since i want to do the same thing with the doghouse to bench conversion. Also,the parts lost is helpful. I figured on my 20 ft long boat to be close to 30 gal of resin.
 
Last edited:

Mechanicalmike08

Petty Officer 1st Class
Joined
Aug 29, 2018
Messages
308
Took the day off from work today to burn my vacation. Got the boat in the driveway for some more grinding. Feathered the edges on the tabbing, sanded the deck and flattened as best I could the imperfections. After that I got her inside to warm up and then got what should be the final layer of CSM on the transom to bring me just over 2" thick. I was a little shy. Also got the deck coated with resin so I can hopfully get the first layer of CSM down.


Top