1998 Angler 220B - Floor repair, fuel hatch recore, rewire, and other projects...

javiert99

Cadet
Joined
Nov 12, 2007
Messages
24
Kinda stinks to have to do this much to a 1998 boat, but such is life, and the project is well under way.

I'm cross-posting this from the classicmako.com forum.. hoping to get some more feedback on my non-Mako here. They have tons of great projects over there and learned quite a bit when I had my old Mako :)

Here's the story:

Found the corner of the floor by the console and ttop was soft due to improper sealing of the ttop feet on the starboard side and the rigging opening in the deck having exposed wood by the factory (thanks Angler). It was never glassed over from what I can tell. I would like to change this design as well. The rest of the floor seems solid, and I will be using this post as my inspiration for repairing this part of the floor (although my repair should be smaller, of course depending on what I find).

http://classicmako.com/forum/topic.asp?TOPIC_ID=13745&SearchTerms=floor


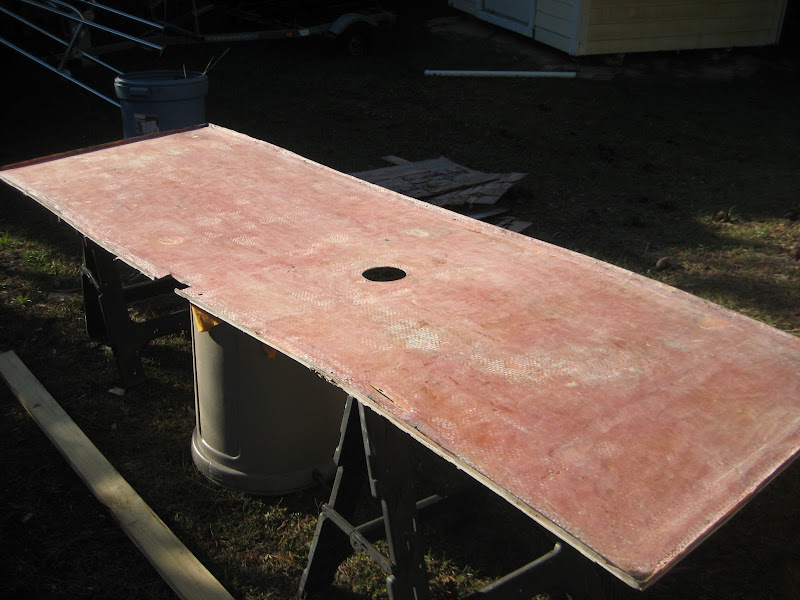
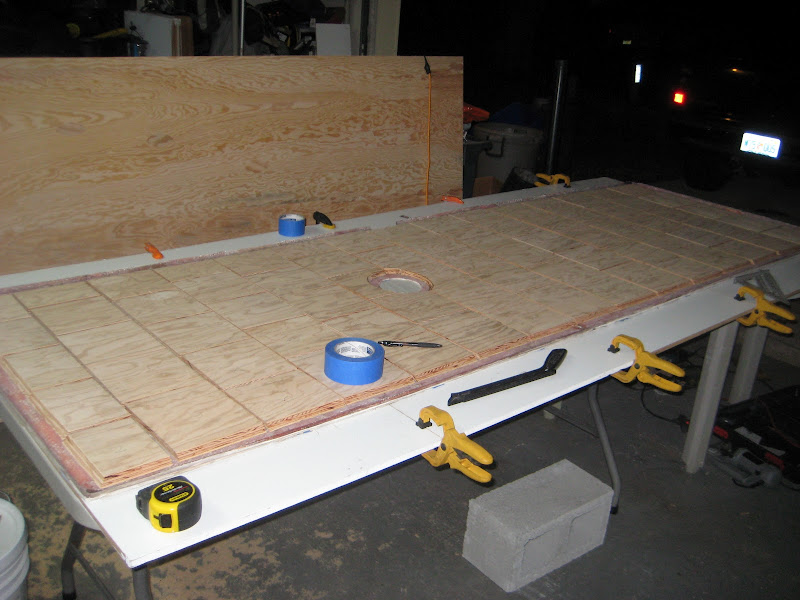
The fuel tank hatch appears to be completely drenched and will need to be recored. Not sure what happened here as it mostly seems pretty well sealed off, but it's soft and spongy.

The fun part? I've never glassed a thing in my life. Yikes.. but I plan to try my best to tackle this and make it look as good as possible. I have picked up the first Will Borden fiberglass video and learned a bit from that.

I will start with the tank hatch and learn from there.

The fuel tank will be removed for inspection (top looks ok), and the three starboard tank tabs need to be sent to a tank welder to be welded back on as they seemed to have had a poor weld and have broken off.

Anywho, here's some pics of the ttop removed / hatch opened up for inspection, and console/rigging removed and out of the way. I will also be sprucing up the electrical somewhat, but at least most of the wiring is in good shape. Everything is covered back up now and am looking into storing the boat in a closed location while the work is being done.

Excuse how dirty it is, had some hydraulic steering fluid spill and it tracked all over the boat, i've cleaned it up since but didn't get pictures:

Before:

IMG_1603.JPG


279633_2306316418886_1278541168_2883676_1772853_o.jpg


Problem area:

IMAG0488.jpg


Deconstruction:

IMG_20120218_180347.jpg


IMG_20120218_180409.jpg
 

javiert99

Cadet
Joined
Nov 12, 2007
Messages
24
Re: 1998 Angler 220B - Floor repair, fuel hatch recore, rewire, and other projects...

Rot on the starboard side, from a tap test this seems to extend about a foot out towards the gunnel, and possibly about two feet in length around. I won't find out till I cut but I'm crossing my fingers.


Rot by the rigging:

IMG_20120218_180459.jpg
 

javiert99

Cadet
Joined
Nov 12, 2007
Messages
24
Re: 1998 Angler 220B - Floor repair, fuel hatch recore, rewire, and other projects...

Got my "first cut" Saturday, got quite a bit done. Removed the fuel hatch lid and was able to cut around the perimeter with an air side cutter and rip most of the bottom layer of glass off. It was in very poor shape as you guys can see in the pictures, pretty much completely delaminated. Not sure what Angler was thinking when they built this hatch but there was really nothing between the gaps in the small plywood chunks.

Was able to just lift a few of the pieces off the top layer, and the rest I chiseled off. I still have to grind the original glass lip around the wood down, and do a cleanup grinding of any remaining wood. I'll get it down to fresh glass and rebuild from there.

My layup plan is as follows based on what I've read:

A fresh layer of 1.5 oz mat before the new core to fix up any low spots.

Core will be made from Marine A/B plywood, I'm going to stagger the cuts unlike how it was from the factory, I think that will add to less flex overall. I might put some small "stringers" to reinforce similar to how the factory had them, but run them long ways as well.. this is a BIG hatch and a large part of the floor, can't hurt.

Core will sit atop of resin / cabisol mix, and I'll be sure to add the mix between the small pieces as well.

On top of the fresh core I'm thinking a layer of 1708, followed up by 2 layers of 1.5 oz mat.

Does this layup sound OK? I can add more if you guys think I should. This is my first glass project so all input is welcome!

Plenty of pics below:

IMG_1899.JPG


IMG_1900.JPG


IMG_1901.JPG


IMG_1906.JPG


IMG_1908.JPG


IMG_1915.JPG
 

javiert99

Cadet
Joined
Nov 12, 2007
Messages
24
Re: 1998 Angler 220B - Floor repair, fuel hatch recore, rewire, and other projects...

A few hours of cutting the lip off the old inner skin and grinding away and I feel pretty good about the result. I used a 40 grit flap wheel on my 4" grinder to get this done.

I have a few low spots, so I figure I'll add a little mat in those areas before running a couple layers of 1.5 oz mat over the whole thing. Then core.

Going to start picking up supplies this week.

IMG_1916.JPG
 

javiert99

Cadet
Joined
Nov 12, 2007
Messages
24
Re: 1998 Angler 220B - Floor repair, fuel hatch recore, rewire, and other projects...

Layup plan based on TONS of searching for previous projects:

Clean freshly ground glass with acetone
Fix up small low spots with 1.5 oz glass
Run layer of 1.5 oz chopped mat before the core
1/2" marine plywood core cut into "jigsaw" puzzle pieces, set back about 1.5-2" from the edge, cut at a 45 bevel.
Weigh everything down, let cure.

Do I need to grind the resin on the top of the glass before I lay resin down for the next layer of glass?

Two layers of 1708 on top of the fresh core
One layer of 1.5 oz chopped mat to top it all off

In Florida 75-80* weather, how long does it take for the layers of glass to cure? How much time can pass before I have to bust out the grinder between layers of glass?

Trying to put together a shopping list for the supply store tomorrow. How much resin should I expect to purchase, I was thinking 4 gallons? The area to be done is 9'x3'
 

javiert99

Cadet
Joined
Nov 12, 2007
Messages
24
Re: 1998 Angler 220B - Floor repair, fuel hatch recore, rewire, and other projects...

Well, I'll be hitting Glue Products in West Palm Beach today to pick up the above supplies. :)

Looking forward to starting. Will probably test on some scrap wood to practice a bit at first.
 

Cadwelder

Lieutenant Commander
Joined
Aug 30, 2010
Messages
1,780
Re: 1998 Angler 220B - Floor repair, fuel hatch recore, rewire, and other projects...

Your plan sound okay to me. As far a how much time can pass.....just as soon as the first layer kicks you can start the second. Acutally I would lay the whole thing up at once. In an open area like that with good support under the lid, you shouldn't have much heat problems during curing with three layers of glass. 4 gallons should be plenty for that hatch. I don't think you'll need quite that much.

Keep in mind most people try to use too much resin, just a good wet out is all you need, extra resin doesn't add anything, acutally takes away. Roll everthing good with your air roller and you'll be good.

Make sure you support the lid good....it'll get really flimsy outside of a mold and it'll stay warped when you glass it all in if not flat to start with.
 

javiert99

Cadet
Joined
Nov 12, 2007
Messages
24
Re: 1998 Angler 220B - Floor repair, fuel hatch recore, rewire, and other projects...

Thanks Cadwelder.

It's definitely pretty flimsy with the core out and ground down.. I screwed a 2x4 to the backside of it through existing holes to move it from the yard to my garage, was afraid it would crack.

I'm going to pull the 2x4 off and probably just work on it directly on my garage floor with some type of cover for it to sit on.. It's pretty long at 9' so I don't want to build a table specifically for it. I'll make sure that part of my garage is nice and level. :)

Glad to hear I won't need to use that much resin for that overall, I do need some more for other projects so it'll be good to have some extra. I watched Will Borden's video on fiberglass repair to get a general idea of how to start :D

I'll have wait to lay up the top skin over the core right? I was going to set weights on top of the core once dropped into a resin/cabisol mix to make sure it adheres well. Since the top core will be primed with resin all around, and the edges of the glass around it will have then cured, I imagine i should do a quick clean up grind on the whole thing and then adhere the layers over the core...
 

javiert99

Cadet
Joined
Nov 12, 2007
Messages
24
Re: 1998 Angler 220B - Floor repair, fuel hatch recore, rewire, and other projects...

The rain really screwed with me all weekend. I didn't want to saw inside the garage but ended up having to. I had to rearrange the entire garage to make it work, and clean up a lot as I went. Also had to built a makeshift table to hold this huge hatch as it is over 9' long and 3' wide. I used two tables, leveled them out, and topped them off with some formica covered pressboard I had laying around.

Got all my pieces cut to size, gave all the outer edges a 45* bevel, and cut the hole for the fuel sender access hatch to size, also beveled to a 45* by hand with a grinder. Left a 1.5" gap from the edge all the way around. The gap between boards is a compromise from different projects I've seen on the web. I'll be filling those gaps with cabisol thickened poly resin.

I've not glued/resined anything into place yet, ran out of time, so ignore any weird lines you see as nothing it set in yet. [8D]

IMG_1919.JPG


IMG_1921.JPG


1708 and 1.5 mat waiting to go in, along with other supplies.

IMG_1922.JPG
 
Top