21' ProLine CC Rebuild Progress with Pics

83ProLine

Petty Officer 2nd Class
Joined
Mar 23, 2008
Messages
105
Re: 21' ProLine CC Rebuild Progress with Pics

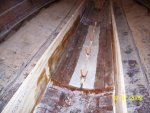
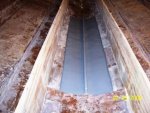
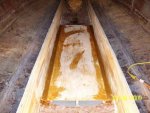
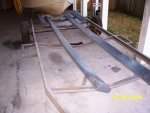
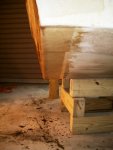
While installing the sections of my two inside stringers, I realized that the stringers may not be tall enough to accommodate my fuel tank. Before I solve this mystery, however, I need to first determine if my existing tank is even worth restoring. If it isn?t worth restoring, I will just replace it with a new poly tank specific to the size I need. But in these economically challenging times, if I can avoid the cost of a new poly tank with a few hours of restoration labor, I will.

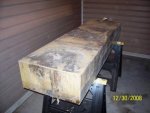
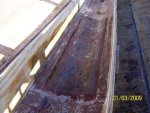
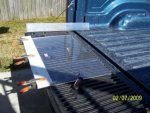
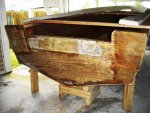
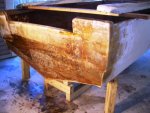
Here is the background on the tank: it is a very common tank. Made by Spicer Industries, Inc. in 1983, it has a 69 gallon capacity and is made of 5052 Aluminum Alloy. I pulled it from the boat when I gutted it back in spring 2008. It had about two gallons of old gas sitting in it when I got the boat. I am certain the boat had been sitting for a couple of years with that old gas in the tank. Also, the tank had been painted at one time, as it had remnants of some type of yellow paint.

To start the process, I read. . . . and read. . . . and read threads on ?Aluminum Fuel Tank Reconditioning?. :D:D

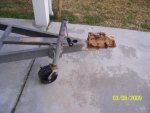
Next, I took off the fuel sending unit and dumped the old fuel out ? I don?t even need to tell you what it looked like! :eek: Trust me when I say I didn?t put it in my truck!

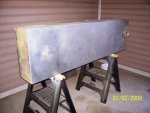
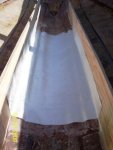
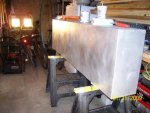
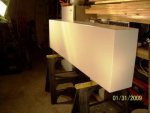
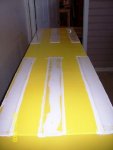
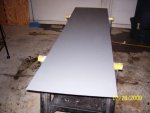
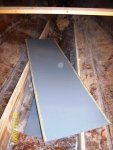
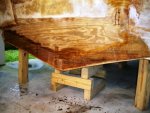
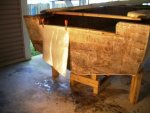
I then took a palm sander and some 150 grit to the old paint on the top and bottom of the tank. I sanded it real good and then checked for exterior pits. I wiped the bare aluminum down with a protection spray when I was done.

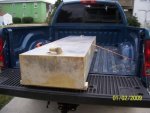
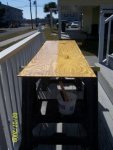
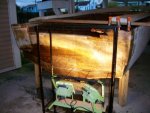
Grabbed a 3? section of link chain, and put some 2? bolts, teeth washers, and nuts, through the links ? that will be my agitation device. Next, I mounted the tank into the back of my truck, put 5 gallons of gas into the tank, and then dropped the chain rig in. I have been driving around with it for a day or so. Might hit the beach tomorrow ? that always shakes things up a bit!

This weekend, I will dump the gas out and see if I can see any pits in the interior of the tank. I guess a mag light and stick mirror are the way to go there.

By the way - I searched around for E85 or E100, but couldn?t find any. I am not convinced that gas is the best cleaning agent, so if I have to repeat the process I will probably use SeaFoam, Grease Away, or some other type of solvent next. The funny thing, is all this work doesnt get me squat yet - IF there are not pits on the inside, I still need to see if it meets the USCG 3psi pressure test. :rolleyes:

65 degrees here today. . . unbelievable for the 2nd day of January!

Max, you better not have any weather-related excuses about getting out to work on your project! :D

Regards,

James

**EDIT - the first pic is before I sanded the top and bottom. The seond is after.
 

Attachments

  • 1. Tank Before.jpg
    1. Tank Before.jpg
    36.4 KB · Views: 0
  • 2. Sanded.jpg
    2. Sanded.jpg
    36.4 KB · Views: 0
  • 3. Tank Chain.jpg
    3. Tank Chain.jpg
    38.6 KB · Views: 0
  • 4.Going for a ride.jpg
    4.Going for a ride.jpg
    39.6 KB · Views: 0

jcsercsa

Captain
Joined
May 21, 2007
Messages
3,401
Re: 21' ProLine CC Rebuild Progress with Pics

looking good there james !! john

ps 21 here today
 

83ProLine

Petty Officer 2nd Class
Joined
Mar 23, 2008
Messages
105
Re: 21' ProLine CC Rebuild Progress with Pics

So the project list looks like this right now:

I still need to finish glassing in the interior and exterior of my transom - nothing more on this yet. . .

I have started to install my two interior stringers - but I halted that process when I discovered that the stringers may not be tall enough to accomodate the existing fuel tank. I need to know if my existing fuel tank is the one I will be using. . .

I have to assess the fuel tank first to determine if it can be restored - that project is in progress now.

Need to start filling holes in my center console - nothing more on this yet. . .

So today, I hit the beach a couple times with my two black labs so that the chain rig in the fuel tank strapped to the back of my truck got a good workout. :D Man I love letting my dogs play on the beach - its probably the best thing about living at the beach! :D

While I continue to assess the fuel tank for possible restoration, I spent a couple hours sanding, sanding and then sanding the area in between the stringers were the fuel tank will sit.

After all that sanding, it felt really smooth! After a quick wipe with Acetone, I dry-fitted a six foot piece of 1708 into place. Mixed up some good stuff and left the whole thing out in the January sun to dry.

Another 65-degree-day here. . . pulled the boat out from under the house to let the dust blow away in the wind. Im sure the neighbors love that! :eek:

Hope everyone is having a great weekend and making progress on their projects! More tomorrow. . .

Regards,

James
 

Attachments

  • 1. My Life.jpg
    1. My Life.jpg
    54.4 KB · Views: 0
  • 2. Grinding.jpg
    2. Grinding.jpg
    53 KB · Views: 0
  • 3. Cloth.jpg
    3. Cloth.jpg
    34.4 KB · Views: 0
  • 4. Wet.jpg
    4. Wet.jpg
    43.8 KB · Views: 0
  • 5. Beach Work.jpg
    5. Beach Work.jpg
    36 KB · Views: 0

83ProLine

Petty Officer 2nd Class
Joined
Mar 23, 2008
Messages
105
Re: 21' ProLine CC Rebuild Progress with Pics

Tomorrow's forecast for Carolina Beach is. . . .

I cant believe I am saying this. . . .

Snow. :eek:

Yes, the white fluffy stuff I hear you guys talk about getting up north, is, indeed, the stuff that is set to fall onto our plam trees tomorrow. North Carolinian's across the State are flooding into grocery stores. . . schools have already been closed. . . and tonight's six-o-clock news should have been re-titled "an hour of panic". . . because we are set to get some snow.

They are predicting. . .

Wait for it. . .

1"-2" inches. :eek:

In the meantime, you can find me grinding away, creating some "snow" of my own.

James
 

Attachments

  • iBoats Pic (i).jpg
    iBoats Pic (i).jpg
    32.9 KB · Views: 0

maxum247

Lieutenant
Joined
Sep 18, 2007
Messages
1,363
Re: 21' ProLine CC Rebuild Progress with Pics

Got a little snow here on the OBX this morning!
 

83ProLine

Petty Officer 2nd Class
Joined
Mar 23, 2008
Messages
105
Re: 21' ProLine CC Rebuild Progress with Pics

Man ? I had to go back to the 10th page to find my thread! :eek: Its been a long and unusually cold winter here in coastal North Carolina ? and I am definitely ready for warmer temps!

To give everyone an update on where I was last - I had to assess my fuel tank to determine if it was worth keeping. After a week or so of cleaning the inside and outside of the tank, everything looked fine with what is essentially a 25 year-old tank - the real test, however, was to have the thing pressure tested. So, I did just that.

I found a local radiator shop that pressure tested the tank for $50 bucks. They ran it up to 10psi with no problem. :D In comparison, the USCG standard is somewhere around 3psi (I think??) Anyway, the darn tank is just in fabulous condition ? no leaks ? holds great pressure ? and the aluminum looks smooth and free of pits in and out! You don?t find too many 21? boats that hold 69 gallons of gas, so I am eager to reuse a huge tank and save a few dollars on the rebuild in the process.

So, now it is time to focus on properly mounting the tank. After a ton of reading on the subject, I decided that the best system for me was creating a shelf for the tank to sit on. The tank will sit up off the shelf with plastic risers.

After I got the back from being pressure tested, I stripped down the rest of the tank to the bare aluminum and wiped the metal clean with Acetone. I then rolled on a couple coats of Rust-Oleum ?Clean Metal? white primer. Each coat was allowed to cure overnight. Next, I rolled on two coats of Rust-Oleum latex paint ? the color is ?sunbird yellow?.

While the paint was curing, I picked up a 30?x36? sheet of plexiglass from Home Depot for $20 bucks and cut it into 3 ?? strips using an acrylic glass cutter. I think the sheet was .93 thick. I used a tube of 3m 5200 to glue the strips to the bottom of the tank, while also sealing the edges of the strips ? I definitely do not want water getting in between the strip and the tank.

So when I started, the tank was, at best, a giant piece of scrap aluminum - and now I feel very confident it will last just as long as the rest of my rebuild! :D:D

More posts to follow. . .
 

Attachments

  • 1. Stripped Tank.jpg
    1. Stripped Tank.jpg
    41.3 KB · Views: 0
  • 2. Primed Tank.jpg
    2. Primed Tank.jpg
    33.4 KB · Views: 0
  • 3. Painted Tank.jpg
    3. Painted Tank.jpg
    40.7 KB · Views: 0
  • 4. Plexiglass Prep.jpg
    4. Plexiglass Prep.jpg
    46 KB · Views: 0
  • 5. Plexiglass Strips Installed.jpg
    5. Plexiglass Strips Installed.jpg
    28.9 KB · Views: 0

83ProLine

Petty Officer 2nd Class
Joined
Mar 23, 2008
Messages
105
Re: 21' ProLine CC Rebuild Progress with Pics

Next up, I needed a support to prevent the shelf the fuel tank is going to be mounted on from sagging ? basically, I needed a non-structural, mini-stringer. So I ripped down a pressure treated 1?x6? to 3 ?? and used Liquid Nails to seat it to the hull. Once the glue had cured, I used a palm sander and some 60grit to rough up my previous glass work. I then cut out a sheet of 1708 and used clamps to form the cloth for a few hours before glassing it into place.

Once the min-stringer was glassed into place, I used cut out another larger three or four sheets of 1708 and used them to tie the mini stringer into the larger hull stringers.

While the stringer glass work was curing, I cut out a piece of ?? plywood that will serve as shelf to mount my fuel tank on. I mixed up about 12oz of the good stuff and brushed it on to what will be the underside of the shelf. I intend to fully glass the topside of the shelf, and with the bottom side being coated and soaked with resin, the chance of the shelf rotting away is minimal.

Finally, I went back today and sanded down all the layup. I whipped up and used a creamy peanut butter mix to smooth out the imperfections of the glass layup on the hull. Once I glass the shelf into place, I will not be able to sand under the shelf - so I really want the area to be super smooth so that if any water does get in that area, it just rolls right on out.

Regards,

James
 

Attachments

  • 6. Tank Mount Stringer.jpg
    6. Tank Mount Stringer.jpg
    45.3 KB · Views: 0
  • 7. Shelf Coated with Resin.jpg
    7. Shelf Coated with Resin.jpg
    37.1 KB · Views: 0
  • 8. Tank Stringer Glass.jpg
    8. Tank Stringer Glass.jpg
    46.8 KB · Views: 0

maxum247

Lieutenant
Joined
Sep 18, 2007
Messages
1,363
Re: 21' ProLine CC Rebuild Progress with Pics

Good to hear the news on the gas tank 83. Those babies don't come cheap! Looks like you gott'er back on track!
69 gallons of gas is a lot of weight, sur'er up good while your in there! max!:)
 

likefish

Cadet
Joined
Jan 25, 2009
Messages
23
Re: 21' ProLine CC Rebuild Progress with Pics

nice refurb on the tank! I am in the process of doing the same thing to my 1982 Wellcraft V20. I took the tank out and have done a quick scrape so far. i dave some pitting and an unsure of what to do next. you said you went to a radiator shop for a pressure test.

If my tank holds pressure and i clean it up, prime and paint it can you think of any reasons it wont last another 5-10 years? I havent looked inside the tank. not sure how i can do that with the 90 fill valve.

Would love to not replace my tank but i am putting anew floor over it and would hate to have to pull the tank in a few years.

Great work on your boat and great pics! thanks.
 

83ProLine

Petty Officer 2nd Class
Joined
Mar 23, 2008
Messages
105
Re: 21' ProLine CC Rebuild Progress with Pics

i dave some pitting and an unsure of what to do next. you said you went to a radiator shop for a pressure test. If my tank holds pressure and i clean it up, prime and paint it can you think of any reasons it wont last another 5-10 years? I havent looked inside the tank. not sure how i can do that with the 90 fill valve.

Start a thread and post a pic of your tank - somewhere you have a sending unit that can be removed. Someone will show you where it is.

I used a mirror on a pole and a mag light to look inside the tank after I used a chain rig to get the gunk out. A radiator shop will run a pressure test to make sure it passes USCG requirements - if they find any pin-hole leaks, they could spot-weld them right on-site.

I am glad I went through the process - even more glad it turned out great. Having a 69gallon tank I can run offshore with is a big bonus.

Good luck. . .

Regards,

James
 

83ProLine

Petty Officer 2nd Class
Joined
Mar 23, 2008
Messages
105
Re: 21' ProLine CC Rebuild Progress with Pics

Gentleman,

It was 80 degrees and blazing-sunny in Southeast North Carolina this weekend ? the island was flooded with tourists and all I could think about was diving ? so back to the business of amateur boat-building! :D

Since last time, I was able to get the bottom of the hull where the fuel tank shelf gets glassed in sanded fine and painted. I rolled on a few coats of Rust-Oleum oil-based paint with a 4? nappy roller. While I had the paint out, I hit the bottom of the shelf ? it has already been soaked with resin, but a couple coats of paint cannot hurt.

Once everything was dry, I used Liquid Nails to adhesive the shelf to the flat edges of the hull, and a bead of Liquid Nails and six stainless steel screws to screw the shelf down to the stringer. After curing over night, I glassed the top layer of the shelf with a little over-lap to run up the sides of the stringers. After the first layup was cured, I filled in the edges with peanut butter.

More to come. . .
 

Attachments

  • Painted Bottom.jpg
    Painted Bottom.jpg
    45.5 KB · Views: 0
  • Shelf Underside Painted.jpg
    Shelf Underside Painted.jpg
    35 KB · Views: 0
  • Shelf Installation.jpg
    Shelf Installation.jpg
    40 KB · Views: 0
  • Shelf Glassed.jpg
    Shelf Glassed.jpg
    49.3 KB · Views: 0
  • Shelf Peanut Butter.jpg
    Shelf Peanut Butter.jpg
    44.7 KB · Views: 0

83ProLine

Petty Officer 2nd Class
Joined
Mar 23, 2008
Messages
105
Re: 21' ProLine CC Rebuild Progress with Pics

I hit the top of the fuel tank shelf with another full layer of 1708 that overlaps to run up the stringers and over to the other side.

In the midst of all this, I built a couple stands and went through the ridiculously-tedious process of pulling the trailer out from under the boat. My buddy Brandon generously lent his time to help me with the process, even though UNC and Duke were battling it out for the number 1 spot.

The trailer is a beast - one of the heaviest trailers I have ever towed. Without the boat even on the trailer, I can still really feel the thing behind my Ram.

By the way - about pulling a trailer off a boat - you can read up all you want on this one but until you do it you will never understand what a giant pain-in-the-*** of a process it is. :eek:

It was a full day - and with that I am out of 1708 and resin, so US Composites will be getting a call first thing tomorrow. :D

Stay well everyone,

James
 

Attachments

  • Trailer.jpg
    Trailer.jpg
    40 KB · Views: 0
  • Trailer Tongue.jpg
    Trailer Tongue.jpg
    38.9 KB · Views: 0

maxum247

Lieutenant
Joined
Sep 18, 2007
Messages
1,363
Re: 21' ProLine CC Rebuild Progress with Pics

I've been wanting to take my boat off the trailer but I haven't cause I know it ain't gonna be easy so I keep putting it off. max!
 

83ProLine

Petty Officer 2nd Class
Joined
Mar 23, 2008
Messages
105
Re: 21' ProLine CC Rebuild Progress with Pics

Hey Max,

Taking it off is definately a process! I had to get it off so I can finish tabbing the transom to the bottom of the hull. That and I can work on the trailer after dark and early in the morning when grinding is not exactly the most "neighbor-friendly" thing to do.

I built my stands using 2' sections of 4"x6" Pressure Treated lumber bolted together with 10" 3/8" lag bolts. I need to shore the sides up with a few additional braces next time I get out there before I try to get back in the boat.

Regards,

James
 

Attachments

  • Boat Stands - 1.jpg
    Boat Stands - 1.jpg
    34.1 KB · Views: 0
  • Boat Stands - 2.JPG
    Boat Stands - 2.JPG
    32.5 KB · Views: 0

83ProLine

Petty Officer 2nd Class
Joined
Mar 23, 2008
Messages
105
Re: 21' ProLine CC Rebuild Progress with Pics

Gentlemen,

Well, another long summer has passed in coastal North Carolina and with winter temps here for the next couple months, it?s time to get back at my 83? ProLine rebuild. The whole boat has been sitting under my house, which is on pilings, so it has been out of the elements and dry.

Saturday was productive ? I decided to pick back up finishing the exterior glasswork needed on the transom. Previously, I had seated a new transom into place with peanut butter and started the tabbing process.

So to get started, I roughed up the area with a palm sander and some 40-grit. I cut out and dry-fitted some small sheets of 1708 bi-axle mat and then mixed up some resin. I am using B-440 Premium Poly resin from US Composites. Since the temp is down in the high 40?s, I poured out about 36ounces of resin at a time and used the halogens to heat it up before adding the hardener.

I then saturated the back of each sheet with resin ? while the resin is soaking into the sheet, I brushed resin onto the working area. By the way, I use disposable 2? el? cheap-o brushes from Home Depot ? I think a contractor 12-pack runs like $7bucks.

So I tabbed the entire lower end of the transom, running the sheets up under the transom about 5 inches. Then, I repeated the process for the right side where the transom meets the hull. At the top of the transom, I used clamps and plastic to keep the mat tight on edges and curves.


More to come. . .

James
 

Attachments

  • Before.jpg
    Before.jpg
    69.4 KB · Views: 0
  • Heating Up.jpg
    Heating Up.jpg
    38.5 KB · Views: 0
  • Lower Transom Tabbing.jpg
    Lower Transom Tabbing.jpg
    73.7 KB · Views: 0
  • Bottom Hull Tabbing.jpg
    Bottom Hull Tabbing.jpg
    63.1 KB · Views: 0
  • Glasswork Curing.jpg
    Glasswork Curing.jpg
    75.8 KB · Views: 0

83ProLine

Petty Officer 2nd Class
Joined
Mar 23, 2008
Messages
105
Re: 21' ProLine CC Rebuild Progress with Pics

I started Sunday with my old friend, Mr. Grinder. Together with some 50-grit discs, I lightly sanded all of Saturday?s cured work, evening out areas where possible and checking for pockets of dry glass. I then wiped the whole area down with Acetone.

Cut some more sheets of 1708 bi-axle to fit, and poured out some more resin. Sunday was pretty cold for this area ? day time temp was in the high 30?s, so I really made sure the resin was warm under the halogens before mixing in the hardener.

Regards,

James
 

Attachments

  • Cured Work.jpg
    Cured Work.jpg
    60.2 KB · Views: 0
  • Grinded Out.jpg
    Grinded Out.jpg
    73.4 KB · Views: 0
  • Pre-Cut Sheets.jpg
    Pre-Cut Sheets.jpg
    71.7 KB · Views: 0

cajuntim

Recruit
Joined
May 15, 2010
Messages
1
Re: 21' ProLine CC Rebuild Progress with Pics

Any updates to report on this project? I am about to start a 20' Proline restore and was familiarizing myself with your accomplishments thus far.

I'm most curious to see your step by step on your console.

Thanks
 
Top