420 Damaged by Falling Tree, please help

amylem

Recruit
Joined
Sep 11, 2015
Messages
5
Hi there,

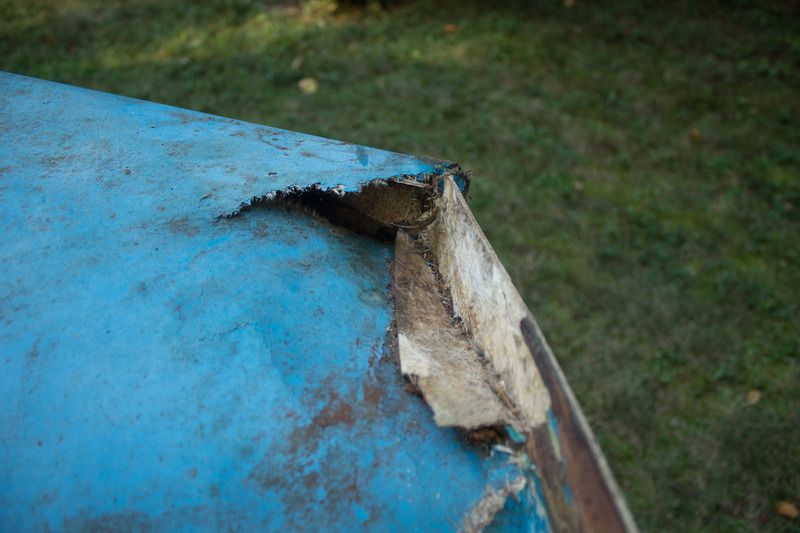
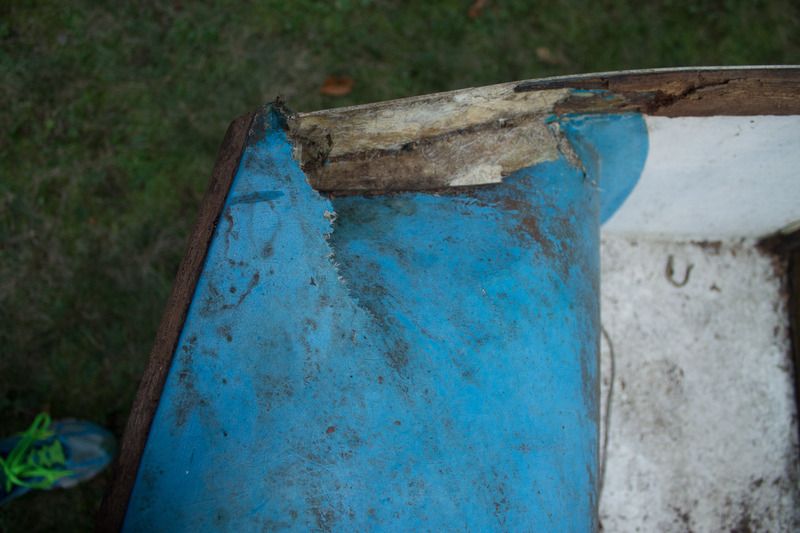
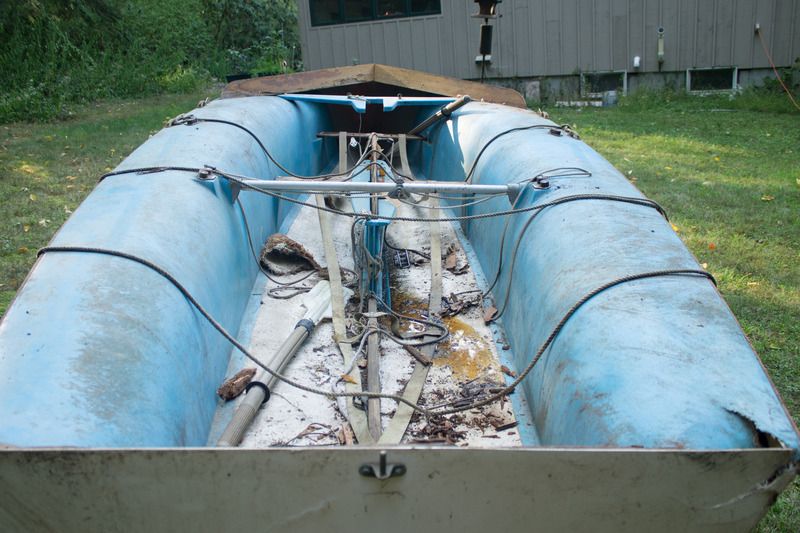
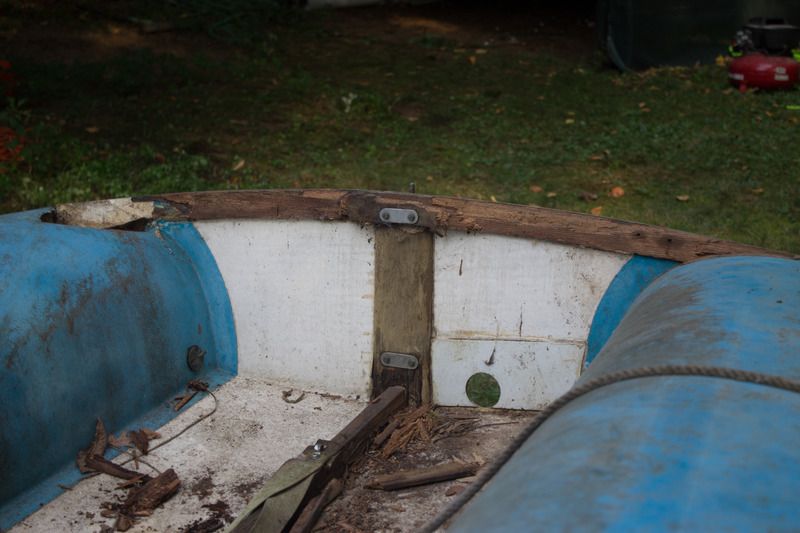
I have a 1968 Lanaverre International 420, and sadly its not in great shape. Its been neglected for a few years after a tree came down on it and damaged some of the deck (hull?). I am attempting to revive it and bring it back into sailable condition. There are other issues like rotting wood that needs to be replaced and missing parts that need to be found, but I'm most concerned with whether this hole can be fixed and how to go about fixing it.

I've watched many videos on fiberglass repair, but I haven't come across a situation like this, where the deck/hull is supposed to butt up against the stern (transom?). Is this salvageable or am I looking at a serious structural issue? My current plan of action is based on this video. Thoughts? https://www.youtube.com/watch?v=V6EnxtqwBsQ


Woodonglass

Supreme Mariner
Joined
Dec 29, 2009
Messages
25,929
Appears to be a pretty simple and straight forward repair. If all the pieces are there then screw some scews into the glass thats falling down so you can tie some wire to it and pull it up and get it alligned and pulled into shape and then glass it back. Won't be to hard to do.
 

tpenfield

Moderator
Staff member
Joined
Jul 18, 2011
Messages
18,150
That looks like a real old style 420 . . . not much to the fiberglass, but it probably keeps the weight down. Anyway, the repair technique on that damage is going to use some similar techniques as those used in autobody repair or patching holes in drywall.

If I were to take on this repair, I would make a fiberglass 'backing plate' out of a couple small pieces of fiberglass cloth . . . put a small hole in the middle of the plate and put a string through the hole and tie a knot in the end of the string. Then I would 'goop' up the plate with epoxy and adhesive filler, . . . shove it through the crack in the fiberglass . . . get it centered over the damage area and then pull the backing plate upward with the string, making it tight to the underside of the fiberglass hull and pulling the indented area of the hull back to where it should be. Then let it cure while keeping tension on it.

This would be similar to dent pulling on a car fender . . . or putting a backing strip in a drywall hole that needed to be patched.

Once you have the backing plate secured and cured, you cut the string off flush, and then add a layer of fiberglass on the outside (I would use epoxy resin rather than poly resin for good adhesion). Make it all pretty with some sanding and gelcoat to match.

I'd come over and help, but I'm going boating today (sorry). :)
 
Last edited:

pauloman

Petty Officer 3rd Class
Joined
Sep 8, 2005
Messages
89
not a big deal to fix and make sailable. Nothing structural.. adding an inspection port would allow you to repair from the inside. etc.

paul oman
progressive epoxy polymers inc
 

sphelps

Supreme Mariner
Joined
Nov 16, 2011
Messages
11,475
Kinda looks like the corner of the transom is torn a little .... You should fix that first then work on the round side cap .. If it was me ,I would cut the top blue section out right where is looks like it starts to dive down .. Almost looks like it got creased at that point anyway .. Save the piece to glass back in after you fix the transom from the inside ....
Btw , I know nothing about sail boats .. What is the big round hole at the bottom of the transom for ?
 

amylem

Recruit
Joined
Sep 11, 2015
Messages
5
No Title

Kinda looks like the corner of the transom is torn a little .... You should fix that first then work on the round side cap .. If it was me ,I would cut the top blue section out right where is looks like it starts to dive down .. Almost looks like it got creased at that point anyway .. Save the piece to glass back in after you fix the transom from the inside ....
Btw , I know nothing about sail boats .. What is the big round hole at the bottom of the transom for ?


The hole is to drain water out the back of the boat when it's on in incline.
 

Attachments

  • photo230505.jpg
    photo230505.jpg
    78.5 KB · Views: 0
  • photo230506.jpg
    photo230506.jpg
    111.3 KB · Views: 0
  • photo230507.jpg
    photo230507.jpg
    85.1 KB · Views: 0
Top