'74 21ft Chieftain

Watermann

Starmada Splash of the Year 2014
Joined
Jan 12, 2013
Messages
13,822
Re: '74 21ft Chieftain

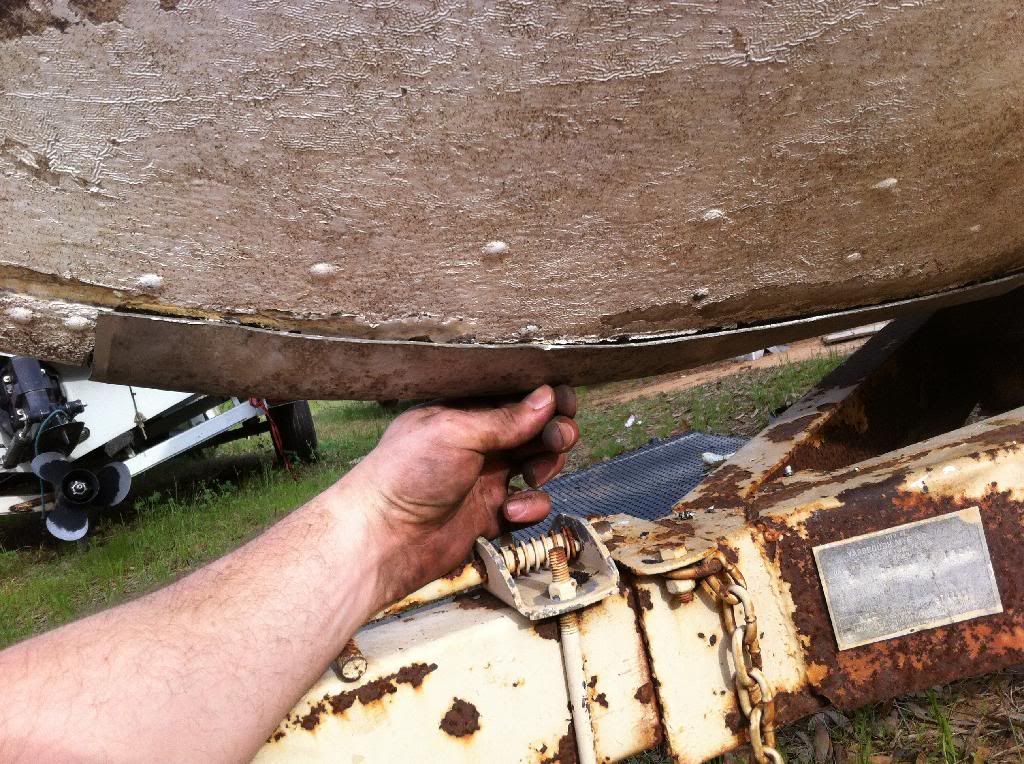
Looks like a good fit to me, it's a pretty important piece of tin and leaving the mangled piece on there would have been the easy way out. Your just like the rest of us here with the gumption to tear into one of these tin beasts, we go the extra mile to make it right. :thumb:

I see your next dilemma, hammering those rivets home when there isn't enough room between the keel and the trailer for the air hammer.

Yeap 5200 AKA 'Seagull poop'. I'm ready to start on my second tube and not even close to being finished. I also have some 4200 but haven't even had the need to use it yet since it costs twice as much maybe... :D
 

doubleud

Seaman Apprentice
Joined
Dec 26, 2013
Messages
31
Re: '74 21ft Chieftain

Thanks for the encouragement! Looks like I'll be picking up some 5200. As for the trailer in the way of driving rivits dilemma, I already have a solution. I'm going to slide the boat forward about 2 feet on the trailer. And use the tilt mechanism to drop the tongue out of the way. Of course I will be supporting the front triangle section of the trailer with jackstands before I remove the tongue. Thats my plan for now. Of course as you all can see, this trailer will be replaced eventually. But for now I think it'll do for the 5 mile round trip to te boat ramp from my house.
 

Weep'n Willy

Master Chief Petty Officer
Joined
Jun 12, 2012
Messages
831
Re: '74 21ft Chieftain

Tin fabrication looks spot on! Will be watching for the windshield install.
 

classiccat

"Captain" + Starmada Splash Of The Year 2020
Joined
Dec 20, 2010
Messages
3,412
Re: '74 21ft Chieftain

5776C491-3328-49D0-8D98-3E0C24515408_zpscyuzvdgu.jpg


24575647.jpg
 

classiccat

"Captain" + Starmada Splash Of The Year 2020
Joined
Dec 20, 2010
Messages
3,412
Re: '74 21ft Chieftain

May I make one suggestion?

Rather than overlapping the bow plate, I would suggest butting it up against the existing bow plate (where you made the cut)...

...then cap the butt-joint with an external patch.


I've done some work in this area myself...IMO they're doing the job intended for a double-rivet seam...using a single-rivet seam + a healthy slathering of brown goop.
 

doubleud

Seaman Apprentice
Joined
Dec 26, 2013
Messages
31
Re: '74 21ft Chieftain

Thanks for the kind words blue, yes I was planning to trim the piece down and do a butt-joint, then add a piece behind to help seal the seam. It is only overlapped in the pic because I cut it too big so I could trim it to fit after I got it formed. I may take your advice and do an exterior patch over the seam if it doesnt look like I can make an inside patch.
 

barato2

Commander
Joined
Dec 7, 2010
Messages
2,956
Re: '74 21ft Chieftain

wow----nice work! you know your way around metal.
 

doubleud

Seaman Apprentice
Joined
Dec 26, 2013
Messages
31
Re: '74 21ft Chieftain

Finally got a chance to do a little work on the Chief I have been sanding the sides and roof for paint almost ready to lay some paint on it for the last time hopefully. Also got some work on the new keel.


^Nevermind the scrap metal in the background, It was an engine donor for another project and hasnt made its way to the scrap yard yet.

As for the white paint, guess it is gonna stay for now, i hate to do it, but it is stuck real well and if I spend the time trying to strip all of it off I'll probably loose motivation and It'll be years before I hit the water. Maybe after a little time on the river I'll get the motivation to attack that project. Next up I'm going to get that windshield installed, do some painting and hopefully start putting things back together.
 

Watermann

Starmada Splash of the Year 2014
Joined
Jan 12, 2013
Messages
13,822
Re: '74 21ft Chieftain

Glad to see your making some headway on that paint, it's a tough job alright. You need a resto buddy to keep you motivated!

Man those are some gnarly looking cleco's you have there.
 

doubleud

Seaman Apprentice
Joined
Dec 26, 2013
Messages
31
Success!!! Got my new bow plate installed and sealed. Gonna put some water in it and do a leak test soon. I ended up taking Blue Fin's advice and making a doubler panel for the seam at the top. I coated it with sealant, wedged it behind the old bow piece between it and the hull sides, then riveted it from inside. I'll make sure I climb back inside and take a pic to explain it before I put the new floor down. I did a little testing on the brown stuff covering the bottom and most of it comes off with a pressure washer. I may try adding a little bleach to the water and see if that takes the rest off. I would love to strip it bare and repaint the bottom right now, but the whole point of this boat is to spend time with the family. I'd rather have crappy looking bottom paint out on the river with the family than spend my time under the boat stripping and painting.
 

GA_Boater

Honorary Moderator Emeritus
Joined
May 24, 2011
Messages
49,038
Hey Doub - That looks really good. You got the curve perfect. :thumb: Now about the part held on with masking tape. :eek: :lol:
 

cj8mule

Senior Chief Petty Officer
Joined
Apr 7, 2012
Messages
660
great work there double. Some of these guys used a rotating nozzle on the pressure washer with good luck.
 

doubleud

Seaman Apprentice
Joined
Dec 26, 2013
Messages
31
Wow! Over a year since I last posted any progress. There has been alot of work done and now I'm to the point that I'm spending the weekends out on the water enjoying the new boat rather than working on it. As with any project I have a few changes I am going to make and a few things need finished. I didnt have the spare money to spend on carpet so I just painted the floor with porch paint, i actually really like the finish the paint gave the decks so I'm leaving it. I am going to carpet the inside of the cabin though. I also need to hook up guage lights and add some lighting to the cabin and deck area. But despite the finishing details, we couldnt be happier with the boat. After a day on the river there is ZERO water in the bilge! The 165 gets impressive mileage, although I dont have a way to measure fuel consumption I can now spend a full day on the river with some cruising and some floating and still burn less than 8 gallons of gas.
 

doubleud

Seaman Apprentice
Joined
Dec 26, 2013
Messages
31
Anyway here are some pics for the starmada. I'll try to keep them in order, but photobucket has been giving me fits with uploads lately

The hull painted!


Cabin wall installed


Seat box being built, i reused both original 16 gal fuel tanks and put both under my new seat box. I like having the door offset and the bench seat to drive from. With this setup, my wife and daughter can sit beside me as we cruise instead of being against the opposite side gunwale. With this setup I have one tank pretty much centered in the boat and one tank in its original position. Balance seems okay although with the right tank full it does list slightly when everyone is sitting on the bench.


The only completed photo I can upload at this time, I'll have plenty more once I get photobucket working correctly.


And finally here are some photos from last weekend. We ended up staying out until around 10:30PM, thats how I figured out I need to add some interior lighting.


laurentide

Lieutenant Commander
Joined
Jul 24, 2011
Messages
1,869
Awesome! I really like the bench seat layout and offset cabin door. It's nice to be able to have the door open but not in the way. I left my door off for this reason. The swim platform is a nice touch, too. I'm glad you're enjoying time on the water with your Chief.
 

Watermann

Starmada Splash of the Year 2014
Joined
Jan 12, 2013
Messages
13,822
Thanks for stopping in and giving as update on your Chief, everything looks great! Nothing better than being on the water enjoying a Starcraft brought back to being beautiful and seaworthy once again. :thumb:
 
Top