Alpha One Gen II Gimbal/U-Joint Replacement Underway

Capn G

Cadet
Joined
Jun 29, 2009
Messages
28
OK folks, I've read the sticky's (great info), I've searched the threads and read hundreds of posts which have saved me countless hours getting the outdrive off correctly, and finally today the bell housing....

I'm pushing a 2004 Stingray 190LX with a 4.3L engine with Mercrusier Alpha One Gen II. I had been experiencing "growling" in all positions of the outdrive (up/down/left/right/load/idle). Nothing really made it worse or louder, and I could feel vibrations (slight) through the boat deck...

Problem started last winter while boat was in dry storage. When I parked it, I pulled the plug and apparently left it sitting on the swim deck. Some "nice guy" thought I had forgotten to put it in, and reinstalled the plug. When I pulled it out of storage this spring, I noticed an odd waterline (debris) in the engine compartment and partly into the seating area... then I noticed the plug has been screwed back in loosely.... ARGGHHH!!! Anyway, I'm guessing the water got up to above the shift entry point of the coupler....

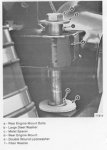
When I got the bell housing off today, "brown" grease and water... so I know that's adds up to bad things... gimbal and possibly U-joints. Shaft has some "blueing" at the part where it begins to flare out before reaching the U-Joints. Figured that was from HOT gimbal smoking it.... (correct?)

Anyway... once everything was apart and prior to attempting to remove the gimbal bearing, I cleaned up all the grease (yuck) on the gimbal and it moves freely with my fingers... no resistance at all... however, I do hear some "scuffing sound" when i rotate it left/right... I figure it shouldn't make ANY sound... but it's not loose, no play, and moves very easily.

U-joints on the shaft articulate to full deflection in all directions with no sound, no resistance, no "catches". They are the GKN permaseal type, so I'm guessing if grease doesn't need to go in, water can't get in? Probably a bad assumption and I'm prepared to replace both, but with no evident damage to them, am I wasting money on this part?

My concern is growing that the amount of "growl" I was hearing at idle, drive in any position wasn't just the gimbal... I know, Water+Gimbal=Rust thus replace. I have alignment tool in transit now, so will most definitely get that right once new gimbal is in, but I'm wondering now if it's possible that the Couple could be growling???

I overcame my urge to crank up the boat without the outdrive installed today until I had time to research on here if that's good/bad/stupid thing to do... I would love to KNOW if having the outdrive out of the equation, would the coupler produce a "growl" in this situation, and is it safe to run the engine like this?
 

Capn G

Cadet
Joined
Jun 29, 2009
Messages
28
Re: Alpha One Gen II Gimbal/U-Joint Replacement Underway

Update: Cranked up engine without outdrive... no growling... smooth-running engine. :) Gimbal bearing gets yanked tomorrow...

7/17/11: Gimbal bearing out today. When all grease wiped away, NO rust found on either side of the bearing, or around the outside perimeter. Some darkening on the stern side of the bearing. It moves very easily, no play, and holding it with two fingers through the bearing, very little audible sound produced. I can feel very slight scuffing as i rotate the bearing, not really "grabbing" just not a perfect, fluid feel...

On the transom, LOTS of clean grease behind the bearing, none of the brown cake-like stuff that was in the bellows. I wiped all of that down and the seal at the back of the hole looks fine, some grease between the hole and the back of the coupler. No water behind the gimbal either.

Once I get it cleaned up, I could see into the hole to be bottom end of the coupler. Appears to be a clean, metal part, about the size of a dime and clear of any rust or grease. I can see grease on the splines.

Now here's the BAD part. With just visual alignment, the coupler appears to be moved significantly towards the 10-O'clock position... it is NOT aligned at all with the hole, it's way off. When I installed the new engine two years ago, I did NOT align it, I pulled old engine by detaching the mounts from the boat and reinstalled the mounts to the new engine and returned it to boat. My thought was if I put it back that way, the alignment would stay pretty close... wrong :-(

New engine has barely 20 hours on it since installed. Would this amount of time running with bad alignment cause the coupler to be bad? Other than the noise it was producing, I never noticed any issues with performance. What's the recommendation for testing the coupler without first pulling the engine again?
 

Capn G

Cadet
Joined
Jun 29, 2009
Messages
28
Re: Alpha One Gen II Gimbal/U-Joint Replacement Underway

Sorry to bump this again, but can anyone tell me how to check the coupler for damage after running the outdrive out of alignment for about 20 hours? I have the alignment tool in transit, but before I waste time trying to align it, I want to be sure I haven't destroyed my coupler running it this way. These is no visible wear on the driveshaft splines, all machine-marks are present on every part of the splines... I wiped some grease from the grooves and when I spread it on my fingers in the sunlight, I can see some "shiny" stuff, but very, very, small particles and very few of them.
 

Capn G

Cadet
Joined
Jun 29, 2009
Messages
28
Re: Alpha One Gen II Gimbal/U-Joint Replacement Underway

HELP!!!!!!!!!!!!!!!!! Please!!!!!!!!!!!!!!! :-(

Alignment tool/bearing driver came in. I got everything cleaned up, installed the bearing, being very careful to align the slot in the retainer ring and hole in the bearing with the grease tube in the transom assembly... I "seated" the bearing by hitting it with a rubber mallet up/down/left/right as instructed in the sticky notes.

Prior to installing the new bearing, I took the retainer ring off of the old bearing and checked the grease marks on the splines to make sure how bad the old bearing was (curiosity). Noticed a LOT of the grease being wiped off leaving good, clear, tracks between the grease on the BOTTOM of the alignment tool and the RIGHT side of the tool. The grease on the top and left have very, very faint indications that the splines were touching the alignment tool.

Curiosity over, I removed the old bearing, took the retainer ring off the new bearing, put it in place and tested the alignment again. "Some" improvement with the grease marks, but again mostly bottom and right grease being scaped off and nothing on top and left side. NO adjustments made to engine mount at this point, nothing loosened...

Installed the new bearing with the retainer ring, used the bearing driver to ensure bearing was firmly seated and even all around... Gimbal bearing installed accurately and aligned properly.

First test of alignment with installed bearing had same bottom/right grooves, none on top and left. Loosened the nuts on the top of the front engine mounts on both sides and gave the engine a few good kicks on both sides to move it left/right. checked alignment again, still same bottom/right. Came back to the forum and read AGAIN about which way to adjust front mounts. First adjustment was to RAISE the front mounts 1/2 turn on both sides, then rechecked. Did a total of eight 1/2 turns (4 full rotations) and the alignment tool insertion got tougher. Tool a forceful punch to get it seated into the couple. Very hard to pull out as well.

Stopped there. Move the front mounts BACK to original starting position, gave engine a couple of more kicks, and started DOWN with the front mounts. Same situation, good grooves of grease on bottom and right, zip on the top/left. Move the front mounts down four 1/2 turns (2 full rotations) and once again the alignment tool got harder to insert and remove with out effort.

I stopped here...

When I installed the new engine three years ago, I was (or thought) I was careful to reinstall the engine back in the boat as I removed it. I looked at the inner transom assembly diagram and I see the exploded view of the bolt, spacer, and washers (part #'s 4,5,6,7,8, and 9 in the exploded view). Underneath this area of the inner transom, are the two "lord" mounts and caps that secure the bellhousing of the engine to the inner transom assembly.

Here's where I need some help. From what I can understand from the exploded view in the manual, parts 4 through 8 are installed on the TOP side of the inner transom assembly, and the lord mount and it's "washer" are installed UNDER the lip extending off of the bellhousing, and the assembly is secured together with the nut (part #9) on the bottom.

When I look at the Bolt head, spacer, washer on the top side of the inner transom assembly, I only see these three things. I do NOT see a washer underneath the spacer. There appears to be a "groove" around the bottom area of the space wider than the spacer in diameter.

My question is what is the RIGHT order of parts 4 through 8 relative to top/bottom/middle of the inner transom assembly and engine bell housing cover and the lord mounts?

Second question, is it possible that because of the order of washer/spacers, I could have "raised the back of the engine enough to cause the bottom of the coupler to be higher? I have NOT rotated the engine yet, and was wonder if I should do this first to see if the coupler moves down if I rotate 180 degrees, and if so, does that indicate a bad coupler???

Thx for any advice...
 

tyler9953

Cadet
Joined
Jul 14, 2011
Messages
19
Re: Alpha One Gen II Gimbal/U-Joint Replacement Underway

Looks like your not getting any help...
 

Fishermark

Vice Admiral
Joined
Oct 19, 2003
Messages
5,617
Re: Alpha One Gen II Gimbal/U-Joint Replacement Underway

Capn G. If anyone else is like me..... you might want to hire an editor! Your posts get a little "long winded." I'm thinking people get tired of reading and give up before they see your question(s). ;)
 

Capn G

Cadet
Joined
Jun 29, 2009
Messages
28
Re: Alpha One Gen II Gimbal/U-Joint Replacement Underway

Thx Fishermark... you could be right... but I guessed that the MORE info I provided the less you guys would have to post that I didn't provide enuf information to be useful... Not interested in writing the next great american novel about boat repair, just looking for a little help. I'll figure it out myself...
 

Bt Doctur

Supreme Mariner
Joined
Aug 29, 2004
Messages
19,344
Re: Alpha One Gen II Gimbal/U-Joint Replacement Underway

does this help, manuals are in the "Adults Only" section
 

Attachments

  • rear mount setup(from stractor).jpg
    rear mount setup(from stractor).jpg
    8.7 KB · Views: 1

Capn G

Cadet
Joined
Jun 29, 2009
Messages
28
Re: Alpha One Gen II Gimbal/U-Joint Replacement Underway

yeah, seems if you don't post enuf info, you get some S.A. responses about the lack of details. Oh well... i'll get it worked out myself...
 

Capn G

Cadet
Joined
Jun 29, 2009
Messages
28
Re: Alpha One Gen II Gimbal/U-Joint Replacement Underway

Thx Bt Doctur.... I found it in a service bulletin later on last night after my post. My drive is a 0M55xxxx model, so I didn't need to remove the lock washer... I did start over by removing the new gimbal and re-checking the steps. Think the problem was that I didn't VERIFY that I had fully seated the new gimbal. I think it was tilted out at the top. The alignment tool I purchased came with a bearing drive tool, and I didn't drive it home. After resetting it, the alignment bar went in much better... got the engine raised up today and there is very little resistance getting the tool in and out, spline marks on the grease is consistent all around the end of the bar... so started installing new bellows today. Got everything attached BUT the bell housing side of the exhaust bellows. Other than buy that tool, any suggestions for getting that on easily?
 

Fishermark

Vice Admiral
Joined
Oct 19, 2003
Messages
5,617
Re: Alpha One Gen II Gimbal/U-Joint Replacement Underway

Glad to hear you got it solved!

On the exhaust bellows, there is no easy way without a tool. You can either buy one, or there are some great suggestions for homemade tools in the sticky at the top of the page.

(I wasn't trying to bust your chops - just suggesting why you weren't getting more responses). That's why it helps to add a little smiley. ;)
 

Capn G

Cadet
Joined
Jun 29, 2009
Messages
28
Re: Alpha One Gen II Gimbal/U-Joint Replacement Underway

Thx Fishermark... I was on this forum a few years ago with questions about installing a 4.3 truck engine instead of the mercruiser, then a question about the "cut-off" switch and I got flamed for even considering the truck engine and then that I got the engage/disengage order of the cut-off wrong... SO... I just thought more was better.....

I welded up my own bellows expansion tool after a trip to the "home" store. About $5 bucks later, I'm trying to figure out if this thing I made will handle hot dogs on the grill, since after getting the bellows on it a couple of minutes.... I'm not sure what to do with it... but it's way cool...

Not sure if this qualified as a "valid" tip or not, but during my engine/coupler/gimbal alignment tasks.. I loosened the bolts to the engine mounts on the floor of the boat. I saw that the mounts were slotted, so I figured some left/right adjustment was possible. I left these bolts loose while I moved the engine up to get good gimbal/coupler alignment. Once I had that, I tightened the mounts to the deck first.... checked alignment... then locked down the top nuts... checked alignment... all is good...
 

Capn G

Cadet
Joined
Jun 29, 2009
Messages
28
Re: Alpha One Gen II Gimbal/U-Joint Replacement Underway

Outdrive re-installed today, no noise other than the engine running. Didn't turn the outdrive left/right to check U-joints, will later this week at the lake. I did notice that when drive in neutral, prop turns left and right and "dull" clicking sound both ways. Will check threads for shift adjustment..
 

Capn G

Cadet
Joined
Jun 29, 2009
Messages
28
Re: Alpha One Gen II Gimbal/U-Joint Replacement Underway

Boat lake-tested this weekend, no leaks, no noise, outdrive turns full in both directions, up and down, no noise from gimbal or U-joints. Speedo tube fixed during repairs and was getting 48 mph at about 4000 rpms. Slight adjustment in shift cable makes easier to get in/out of gear with less noise.
 
Top