JordyOutboard
Seaman
- Joined
- Aug 16, 2015
- Messages
- 50
CApTaInGoOfy that's rough! At least I got 10 minutes before I broke down! Just enough to build an addiction hahaha. Best of luck to you! Hope everything goes smoothly


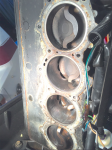
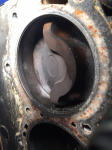
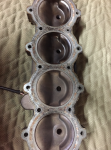
I checked my compression again and came up with these numbers. Not looking good here...
My battery was rather low. Not sure if that effects things. Also, my engine seemed to turn a lot "better" when one spark plug was removed.
120
90
45
85
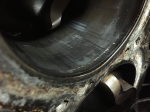
Clymer should be here tomorrow and I will take the head off.
Edit: forgive my ignorance but how do you properly check compression? I have been leaving all spark plugs in and just pulling the each one individually when I check. I have been researching older posts and it seems that people take all of their plugs out when checking compression.
Thanks for the tips for compression checking guys.
When you say ground the wires, do you mean leave the spark plugs in them and make sure they spark off grounded engine?
Thanks!!
Side Note: Saw some guys in here posting from Pennsylvania! Nice to see local guys on the site!