Chrysler Project Motor

Frank Acampora

Supreme Mariner
Joined
Jan 19, 2007
Messages
12,004
Re: Chrysler Project Motor

The rotor and shaft are an assembly, epoxied together and not serviceable. You must replace the shaft, cam, and rotor.

The pulley can be held with a cloth over the belt and a water pump pliers to hold it. The top nut is nylock and while tight, it will come off rather easily after it is broken free. The pulley is a tight clearance fit on the shaft, held in place with a woodruff key. It slides straight up off the shaft.

Since the drive dogsmust have clearance to properly engage while rotating, In gear, the prop will turn about 30 degrees either way. This may seem excessive, but is completely normal.

Don't bother removing the distributor from the mount now that it seems to be functioning smoothly.

Props are usually matched to the hull and engine. There is not a lot of choice for these engines. Just go by the general guides I wrot in an earlier answer.
 

DavidW2009

Petty Officer 1st Class
Joined
Sep 12, 2009
Messages
272
Re: Chrysler Project Motor

I'll leave the distributor as it is, for now. Thanks for the info on the rotor.

A Clymer's manual is on order. I should get it by Friday. That should give me a lot of info. I already have one for my 1997 Force, and I see some similarities in that manual, to the old motor I'm working on. But really need the Chrysler manual.

Thanks for the input on the prop rotation freeplay. Did not know that.

I had an engine hoist ring fixture fab'd at a shop today. Used a 3/4-16 UNF hex nut and a large eyebolt welded to the top of the nut. The end of the eyebolt loop was welded to the shank, also, to ensure it wouldn't bend and open up. Screwed it on the exposed thread of the crankshaft and picked the motor off of the stand to work on the Tilt/Lift parts. The hoist ring works fine. A lot faster than rigging with straps.

For the broken tilt/lift mount, I'm going to design, and have fab'd, a new bracket, using the OEM mount holes and strap the tilt/lift motor to the bracket with a S.S. clamp of sorts. This will be easier than mounting to the transom of whatever boat this goes on.

I R&R'd the starter and cleaned it up. The cable terminal was facing in towards the engine block. In the Force manual, the terminal is facing out (easier to get to). I don't know if it makes much difference. Have to see what the Chrysler manual shows. One differnce I noticed was on this old 90 HP, the starter is supported by a lower bracket that uses one of the motor block bolts to hold it as well as one smaller bolt. On the Force motors, there is just the smaller bolt holding the bracket to the motor.

I loosened the block bolt to allow the bracket to swing out of the way in order to remove the starter. Is this the proper technique? The bolt was retightened after the starter was installed.

I'm going to rework the motor stand with ignition control, tilt/lift controls, battery box and a small fuel tank. Do I need to buy a Chrysler priming bulb or will a generic one due for testing this engine?

Thanks again for your help, Frank.
 
Last edited:

Frank Acampora

Supreme Mariner
Joined
Jan 19, 2007
Messages
12,004
Re: Chrysler Project Motor

Yeah, that's correct. BUT: be certain to re-torque the block bolt. It not only holds the block halves together, but supports the center crank bearing. (between cylinders) Even though they are 3/8 diameter, 9/16 head, I THINK the correct torque is the same as the head bolts-225 inch pounds. Check your Clymers when you recieve it.

Generic fuel line and primer bulb are OK. I use them all the time. I do like the Chrysler/Force quick-connect fuel fittings though. If you can afford it, use 3/8 fuel line, otherwise, 5/16 is OK. AND definitely put a disposable fuel filter BETWEEN the pump and carbs.

I put the starter terminal in whichever position moves me at the time--Personally, I feel that the cable and terminal are a bit more protected facing the block--but it really doesn't matter.
 

DavidW2009

Petty Officer 1st Class
Joined
Sep 12, 2009
Messages
272
Re: Chrysler Project Motor

Imh (amateur) opinion, it would have been better if Chrysler used a stud bolt with a 1/4-20 stud to hold the starter bracket. Putting a bracket UNDER the head of a major block bolt, is not good engineering. I don't believe I've ever seen that done on a modern automobile. Always seen the stud bolts.

**********************
I noticed some small galvanic pitting on the lower end, which led to a little sleuthing on the history of this old Chrysler. I finally took notice of the dealer decal. It says "Jones Chrysler, Sylvania, Georgia". A look at a map shows the closest water is 50-60 miles, Savannah or Charleston. I don't know if the Savannah River is navigatable for small craft, but the brackish water and the ocean further down is. So I figure the motor has spent some time in salt water. And may be the cause of the pits and other residue found behind the prop.

Removing the lower end will tell if there is any damage due to salt water and the PO not flushing properly. The pits are minor and will disappear after painting.

An Internet search turned up nothing on "Jones Chrysler". Another one bites the dust.
 
Last edited:

DavidW2009

Petty Officer 1st Class
Joined
Sep 12, 2009
Messages
272
Re: Chrysler Project Motor

Frank,

Will a 1991 Force 150 HP controls work with this Chrysler 90 HP? I found a complete control set for $50, but want to verify it before buying.

(Edit: Looking at my '97 120 HP Force, it's not the same cable connections.)

(Edit: From the iBoats store:

Chrysler: Universal Type Control Cables for use with after market control heads or OEM control heads accepting a 10-32 threaded end

For Chrysler engines these cables require engine connection kits; clamp type fittings

Match both cable ends


I was not able to locate the clamp type fittings at the iBoat store. The control cables offered for Force look just like the ones for Chrysler, minus the adaptors.)
 
Last edited:

Frank Acampora

Supreme Mariner
Joined
Jan 19, 2007
Messages
12,004
Re: Chrysler Project Motor

Yes, they should work--that is, unless someone has mis-advertised them. Merc did not change to Merc style controls until later--around 94 or so.
 

DavidW2009

Petty Officer 1st Class
Joined
Sep 12, 2009
Messages
272
Re: Chrysler Project Motor

Tested the choke solenoid today, on the motor. It didn't work with 12 VDC at the terminal.

Scribed lines on the solenoid housing where the bracket is located. That way I could re-install it and know where to tighten it down.

R&R'd solenoid and cleaned everything with a fine wire wheel. Cleaned the solenoid mounting area on the block. Cleaned the soenoid bore. Tried solenoid again and it worked fine. Just needed a good ground.

I've read elsewhere on this forum, these solenoids last forever and usually it's the ground that goes bad.

I found the small cotter and the flat washer (choke rod) hard to work with, as well as the inside 1/4-20 screw that holds the housing bracket. I now realise it may not be necessary to remove the cotter pin and washer. Just drop the solenoid down to clear the plunger.

The carb number is 481061. (edit: correct designation for this carb is Tillotson #WB 21 A1) I plan on getting kits and cleaning the carbs. The plan is to run the motor next week some time.
 

Attachments

  • 2010 06 Mar Carbs Rebuilt 018b.jpg
    2010 06 Mar Carbs Rebuilt 018b.jpg
    104.5 KB · Views: 0
Last edited:

DavidW2009

Petty Officer 1st Class
Joined
Sep 12, 2009
Messages
272
Re: Chrysler Project Motor

Got the Clymers manual for Chrysler o/b's. Do I have an early production 90 HP? The manual has nothing in the starter R&R section on the type of lower starter bracket that is on my project motor. No references or photos about the main block bolt being used to fasten the bracket. (???)

And.....

The Chrysler fuel pump kit parts listing on iBoats does not have a Sierra part number for the 90 HP. The lists has a 18-7806 P.N. for both the 85 and the 105 HP motors.

Will that P.N. work on the 90, also? (Visually, it looks like the same pump.)

EDIT: Called iBoats.com about the Sierra fuel pump kit P.N.. "Josh" in technical said that P.N. would work with the 90 HP.
 

DavidW2009

Petty Officer 1st Class
Joined
Sep 12, 2009
Messages
272
Re: Chrysler Project Motor

Tried to start the Chrysler today. It won't start. (I got impatient and thought I'd try it before rebuilding the carbs.)

Got fuel to the pump and spark at the plugs, but probably no fuel getting into the carbs. Probably the needle valves are stuck. I'll have to rebuild the carbs (or at least clean them) and fuel pump, and then try it again.

Today I bought a used U.S. Marine contol with tilt/trim button on the handle, both cables (very good condition) and a wiring harness/bundle, all from a junked 1991 Bayliner. $50.
 

Frank Acampora

Supreme Mariner
Joined
Jan 19, 2007
Messages
12,004
Re: Chrysler Project Motor

Same fuel pump used for all three and four cylinder engines if it is the one that mounts on the bypass cover. The pump with the glass bowl uses a diaphragm with smaller holes because the screws holding the pump together are12-24 instead of 1/4 -20. BUT If you are careful, either diaphragm will work in either pump.
 

DavidW2009

Petty Officer 1st Class
Joined
Sep 12, 2009
Messages
272
Re: Chrysler Project Motor

I didn't get the motor started last week. Waiting for parts to arrive that are on order.

This project will be on hold until I get the carbs and fuel pump rebuilt.
 

DavidW2009

Petty Officer 1st Class
Joined
Sep 12, 2009
Messages
272
Re: Chrysler Project Motor

The carbs came off tonight for cleaning and inspection. The fuel bowls were coated on the inside with old, solidified 50:1. It looked like hardened varnish. I also need to find out how to remove the stuck float pivot pins. Clymer's says nothing about that. (Edit: My error. Clymer's does have a paragraph on removing the pins)

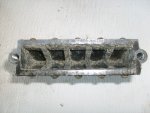
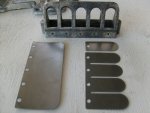
The reed valves are a cruddy mess (see photo) and will have to be cleaned or replaced.

So, off came the intake manifold and reed plate. Had to carefully use a thin putty knife to break the seal in as many places as possible, so as to not damage the flatness of the plates or knick the aluminum.

The reed valves are really glued to the reed plate. I'm going to try soaking the sub-assembly in carb cleaner before trying to pry on the reed valve housings. Yes, I took the screws out.

A look inside the crankcase revealed the bearings and crank are also coated with this film of dried fuel. I'm not sure how to clean it other than to do a de-carb on it once it's running.
 

Attachments

  • 2010 18 Feb Reed Valves 017b.jpg
    2010 18 Feb Reed Valves 017b.jpg
    80.3 KB · Views: 2
Last edited:

DavidW2009

Petty Officer 1st Class
Joined
Sep 12, 2009
Messages
272
Re: Chrysler Project Motor

DavidW: "I also need to find out how to remove the stuck float pivot pins. Clymer's says nothing about that."

Oops. My bad. Clymer's does had a paragraph on the knurled pivot pins and driving them out with a small punch.

This is a learning experience. That's why I bought a cheap, discarded outboard, to practice. Then when I have to work on the good O/B (Force 120 HP), I'll have a little knowledge and some techniques to do it without damaging anything.
 

DavidW2009

Petty Officer 1st Class
Joined
Sep 12, 2009
Messages
272
Re: Chrysler Project Motor

Here are some photos of the "project motor":

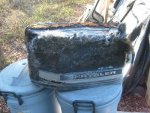
The first photo shows the burned condition of the cover.

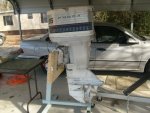
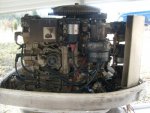
The second shows the motor on a modified Northern Tool engine stand. (I turned the pedistal around and had to drill one new hole and use a lock nut. But it was easy to modify). The "new" cover is one purchased from a boat boneyard.

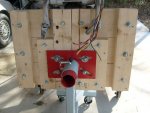
The third photo is the motor mount I built to go on the engine stand.

The fourth photo is the motor, cover off. Have a lot of clean up to do because of the external fire. Fortunately, the fire didn't damage any components except the paint.
 

Attachments

  • 2010 05 Jan 009b.jpg
    2010 05 Jan 009b.jpg
    108.3 KB · Views: 2
  • 2010 20 Jan 90HP Motor 004b.jpg
    2010 20 Jan 90HP Motor 004b.jpg
    91 KB · Views: 2
  • 2010 20 Jan 90HP Motor 005b.jpg
    2010 20 Jan 90HP Motor 005b.jpg
    83.9 KB · Views: 2
  • 2010 20 Jan 90HP Motor 016b.jpg
    2010 20 Jan 90HP Motor 016b.jpg
    93.5 KB · Views: 1
Last edited:

DavidW2009

Petty Officer 1st Class
Joined
Sep 12, 2009
Messages
272
Re: Chrysler Project Motor

The reed plates came off easily after soaking the reed plates/adaptor plate sub-assembly for a couple of days in carb cleaner. About half of the paint came off the adaptor plate, too.

Disassembled a reed plate. Noticed (4) reeds are cut from one piece of material and one reed is separate and of a different, lighter shade of material.

The reed plate has small pits in it from the corrosion. I don't know if this will hurt performance or not since the spec allows up to .010" gap in the reed-to-plate.

The reeds cleaned up well and have no cracks or splits. I re-assembled one reed plate and about half or the reeds (5 reeds) are right at .010" gap. Both reed stop plates were in spec at ,270 - .280" gap.

I tried flipping the reeds over and got most reeds to lay flat. Still have (3) reeds with a .010" gap.

Questions:
Is it okay to flip the reeds to achieve a smaller gap?
Will the pits in the reed plate hurt anything?

(Sorry this project is taking so long. The weather has been bad. Can't work on it too well in 25-30 mph winds and freezing temps.)
 

Attachments

  • 2010 18 Feb Reed Valves 007b.jpg
    2010 18 Feb Reed Valves 007b.jpg
    79.8 KB · Views: 0
Last edited:

Frank Acampora

Supreme Mariner
Joined
Jan 19, 2007
Messages
12,004
Re: Chrysler Project Motor

Every manual I have seen advises against flipping reeds. HOWEVER: I remove a lot of reeds and store them. Then when i go to re-use them I don't know what the original orientation was. Haven't had problems yet. NEVER try to bend reeds to get them to lay flat though.

Pits will probably fill and seal when enough oil collects in them--as long as they are not too deep or large.

Reed stop plate opening specification is a joke! later reeds only have a half plate to stop them.
 

DavidW2009

Petty Officer 1st Class
Joined
Sep 12, 2009
Messages
272
Re: Chrysler Project Motor

Thanks for the information, Frank.

I disassembled and cleaned up the other two reed plates. It went very well and all the reeds are flat on those two, before and after. I now realise I was probably too rough on the first set of reeds and may have bent them. That's why I have three that don't seat. I'm not going to try and bent them back, unless there is no other alternative.

The reeds were first soaked in carb cleaner, then disassembled. The reeds and stop plates were polished with fine steel wool. The reed plate body was brushed with a fine wire brush to get the corrosion off, then polished with the steel wool. After assembly, the reed plates were sprayed down with WD-40 and put in plastic bags.

I'd like to replace the reeds that don't seat with good used or new.

I didn't see any reeds for sale in iboats.com/Chrysler motor parts. I need to know a source for reeds (good used will due) and the gaskets for the reed plates and reed plate adaptor. Didn't see these gaskets on iboat, either. (Maybe they come in an overhaul set??)
 

DavidW2009

Petty Officer 1st Class
Joined
Sep 12, 2009
Messages
272
Re: Chrysler Project Motor

Playing around with the first reed plate, I found by slightly bending the stop plate approx. .020", I got the (3) reeds that were at .010", down to about .005" gap.

The stop plate gap is now: .25", was: .27". I don't know if this is a good technique, but if it works, no new reeds will be necessary.

Disassembled one of the carbs and have it soaking in carb cleaner. The float pivot pin was driven out with a small punch from the smooth (non-knurled) end of the pin, and was driven in the direction of the knurled end. Came out without much trouble. The needle and seat looked real good and were not gummed up like I thought they would be.
 
Last edited:

DavidW2009

Petty Officer 1st Class
Joined
Sep 12, 2009
Messages
272
Re: Chrysler Project Motor

Completed cleaning the top carb. I reused the existing gaskets because I still don't know if this motor is any good. If I can get it started, and run it for a few minutes, and it doesn't knock or have a project killing problem, then I'll go back and buy $120 in carb kits. The existing gaskets and seals were in good condition.

edit: The needle had no rings or wear marks in the critical area. The seat also looked good, so I reused them.

The Tillotson WB type carb appears to be the simplest to rebuild of the carbs for 90 HP motors. The float level was set too lean and the tab had to be bent to achieve the .4062" spec. All the passages were blown out and dried with compressed air and seem to be clear.

The carb was sprayed down with WD-40 and bagged in a freezer bag.

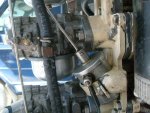
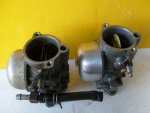
The photo below shows a lower carb before cleaning and the top carb after.
 

Attachments

  • 2010 22 Feb Carbs 004b.jpg
    2010 22 Feb Carbs 004b.jpg
    77.8 KB · Views: 1
Last edited:

DavidW2009

Petty Officer 1st Class
Joined
Sep 12, 2009
Messages
272
Re: Chrysler Project Motor

OOPS.

Working on the second carb, I realised I did not remove the main nozzle on the first one, before soaking.

The main nozzle has a brass tube in the center, that extends below the screwdriver slots.

Question: Does it take a special spanner tool to unscrew the main nozzle?
 
Top