Do it yourself

grilling

Cadet
Joined
Apr 6, 2010
Messages
15
Hello,

We had a tornado about two weeks ago through our town and I received some damage to my boat. I was wondering if any could give me a step by step or a good place to start on fixing the damage shown in the pictures.
 

Attachments

  • Boat 1.jpg
    Boat 1.jpg
    5 KB · Views: 0
  • Boat 2.jpg
    Boat 2.jpg
    4.9 KB · Views: 0

Doernuth

Petty Officer 1st Class
Joined
Jul 6, 2010
Messages
332
Re: Do it yourself

Flip through the threads here. many have fixed much worse.
 

tburda

Seaman
Joined
Jul 15, 2010
Messages
69
Re: Do it yourself

First off, I hope thats the only damanage you and your family incurred during the storm, glad you're ok.

Those are some awful small pictures so it's hard to see detail. Is the fiberglass still there as in, is it just the gel-coat chipped? If so there are a few places that sell gel-coat repair. If the glass is chipped you're going to need to get to it from the inside to do some repair. Not a super challenging repair, with some minor research and a little work, I give it a difficulty of 4 on a 1-10 DIY repair scale.
 

Woodonglass

Supreme Mariner
Joined
Dec 29, 2009
Messages
25,929
Re: Do it yourself

Hard to tell from the small pics, but it appears it is just the gel coat. That is what your boat is made out of, fiberglass resin and gelcoat. Get a Gel Coat repair kit (similar to this one)...

http://www.bottompaintstore.com/Gel-Coat-Repair-Kit-4oz-FIB668.htm

Follow the instructions, sand it, buff it, and you'll be back in business in no time. NOTE: White is NOT white in Gel coat. I may not MATCH your gel coat EXACTLY so if you want it too, you may need to get some coloring, which they have, and try mixing it until you get it close.

I'm just sayin...:D
 

Yacht Dr.

Vice Admiral
Joined
Feb 26, 2005
Messages
5,581
Re: Do it yourself

Welcome to Iboats Grilling..

OUchies.. Althogh to me the " damage is minamal ( Look VERY closely for cracks coming from that area above and below the Rub-rail ).

The one thing that bothers me about this kind of repair is that it is a Triple-radius-repair. meaning that you have two outside radia and one inside radia..all in one small 7.5"x1" repair. One suggestion I have is if you take this on then make your OWN sand block for that .. shape it to fit B4 you start..

Dont use the 1hr patch paste.. The repair is AT your rubrail and will/possibly fail on slighter then normal impact ( meaning your gonna have to do the repair again ).

IMHO .. Remove the rubrail..grind out the bad gel/glass .. mix some Glass filler ( resin/cabosil/mat ) and fill it with that ( unless there are more cracks coming from that location then ..thats another reply ).

Sand it and spray it with color matched gelcoat. ( there is an art to color matching gelcoat m8.. you dont want to just start adding pigment colors to make it closer color.. ) well..you can but that patch will most likely look like crap next year without proper reductions/additives/clears..etc..

IF you had the tools and materials it still looks like an ez repair..

YD.
 

grilling

Cadet
Joined
Apr 6, 2010
Messages
15
Re: Do it yourself

Thanks for the suggestions so far...

I didnt want to cut out the previous glass...maybe I will take it in and have it professional done.
 

Bondo

Moderator
Staff member
Joined
Apr 17, 2002
Messages
71,082
Re: Do it yourself

Ayuh,.... While YD is tellin' ya the Right way to do it,...

The Quick, 'n Easy is to laddle it full of Marinetex, 'n sand it back to shape....
Marinetex is already White I believe,+ being Epoxy, it'll be plenty strong...
 

Yacht Dr.

Vice Admiral
Joined
Feb 26, 2005
Messages
5,581
Re: Do it yourself

Thanks for the suggestions so far...

I didnt want to cut out the previous glass...maybe I will take it in and have it professional done.

Hello Grilling..

err.. I did not suggest that you cut out anything..just get a dremel and get grind out All the bad Gel/glass ( though we should see some closeups ) .

Then repair as I stated above..

The One thing about non-reinforced glass fillers .. they dont have much strength..especially at rub rail points..

So If you Do get someone else to "fix".. then make sure they "repair".. meaning 100 bucks is a fix.. 500-1000 is a repair..(depending if they remove the rub rail which IS Needed ).

YD.
 

grilling

Cadet
Joined
Apr 6, 2010
Messages
15
Re: Do it yourself

Close up. (click on it, I think that will make the damage more visible) Thanks for the clarification. I went and got an estimate on this damage...1,500 for the one spot alone. I think I will try it myself first.
 

Attachments

  • Boat Dam Com.jpg
    Boat Dam Com.jpg
    125.3 KB · Views: 0

tburda

Seaman
Joined
Jul 15, 2010
Messages
69
Re: Do it yourself

it WAS a tornado, was the boat in the driveway? Maybe try homeowners if you dont have a very high deductible?
 

Yacht Dr.

Vice Admiral
Joined
Feb 26, 2005
Messages
5,581
Re: Do it yourself

Heya Grill...

Thats an Air void lol..

No need for removing the rubrail..

Get your gel matched..make some putty from that..fill..fair..prep..spray..sand and buff done..

YD.

Ill bet dimes to dollars thats an air void.. you dont get that kinda of repair from damage to a radius that close to the rail without some kind of other damage ..
 

RobbyA

Petty Officer 1st Class
Joined
Jun 5, 2010
Messages
306
Re: Do it yourself

Heya Grill...

Thats an Air void lol..

No need for removing the rubrail..

Get your gel matched..make some putty from that..fill..fair..prep..spray..sand and buff done..

YD.

Ill bet dimes to dollars thats an air void.. you dont get that kinda of repair from damage to a radius that close to the rail without some kind of other damage ..

YD, can you explain "air void" a little more in depth? Thanks.
 

grilling

Cadet
Joined
Apr 6, 2010
Messages
15
Re: Do it yourself

Thanks everyone...

I have bought:
A dremel tool
A good power buffer
A sprayer
Gel coat compound off of Iboats
Tints

I will start as soon as the gel coat arrives from Iboats...any last comments before I tear into this.....

I think I will remove the rub rail it appears some of the cracks go below the rail.
 

grilling

Cadet
Joined
Apr 6, 2010
Messages
15
Re: Do it yourself

Hello,

I received my much anticipated package from Iboats yesterday. As I was reading through the instructions on how to use the product is said only apply 20 mills thick..my question is can I apply twice when it hardens or should I feel with some other material until I am about 15 mills from the surface?
 

allpoints360

Petty Officer 1st Class
Joined
Jul 23, 2009
Messages
342
Re: Do it yourself

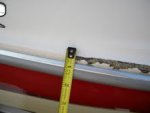
You will probably want to remove the rubrail, at least enough to repair this correctly.

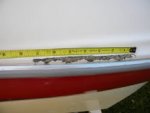
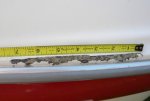
Then tape the area, just about an 1/8" outside the damaged area. No need in making the project bigger than it needs to be.

The only glass you'll need to grind out is this loose stuff. It sometimes turns white when air gets underneath. But it doesn't look like much is bad there.

Sand carefully with an aggressive grit until you get the bevel you need from the edge of the repair to the middle of the damage. 45 degrees is a good rule of thumb. The repair has to have a good land to hold.

Pull the old tape and retape.

Clean with acetone before you apply any resin.

You may need to apply a layer of mat with resin, but probably not.

Color match your gelcoat to an area of the boat that you've sanded lightly. That's the color you want to match. Mix enough for the entire job, add catalyst to a small amount in a separate cup according to the gelcoat instructions and mix thoroughly.

Add cabosil and mix till consistency of smooth peanut butter.

Spread into area with plastic spreader. It looks like an outside radius you're working with, so try to go from end to end as you spread. You'll want to get the basic shape with the first coat. Be sure to press it down into the area, then light stroke back over to smooth. Don't waste a lot of time trying to get it perfect, just get it close

Carefully remove tape before the paste dries. Let it cure completely, at least 24 hours. You can remove ridges in your work while it is partially cured with a grater. This will save you much sanding time.

Retape and sand carefully with a 120 grit until smooth and slightly depressed from original gelcoat.

You will probably have to repeat a couple of times, but sand with 180 next time, then 220. Always sand so that area is slightly depressed. If there is wax in your gelcoat, rinse with acetone between applications.

Lastly, spray with color matched gelcoat until you have a very slight buildup.

Let cure, wet sand with 320, 600, then 800 grit.

It will take a few days, but mostly wait time.

Not really difficult, just take it a step at a time.

Good luck!
 
Top