fiberglass relic restoration

Scott Chinsota

Petty Officer 1st Class
Joined
Apr 18, 2011
Messages
216
Re: pics...

Re: pics...

perfect pic to show where the sun did its damage. when i saw i was in trouble, i cut the csm off just past the center line and tried to salvage what i could. sorry i ground off the nasty before i pulled out the camera. the curvature wrinkled the biax going up the side and it hardened like that. there are still a few small bubbles but i ground of most of it and i'm going to patch in the biax i ground off, csm over it and live with it. the biax tabbing is intact. i just wanted to beef up the bow transition cuz originally it had a thick build up there. not my best work but i got 2 layers of biax where i wanted it.

after looking at the pics, i realize the dust and the sun's reflection make it look worse than it is...but i'm sure most on here can tell whats what.

2011_1115mycardfirst0032.jpg2011_1115mycardfirst0041.jpg2011_1115mycardfirst0040.jpg2011_1115mycardfirst0045.jpg2011_1115mycardfirst0046.jpg
 

Scott Chinsota

Petty Officer 1st Class
Joined
Apr 18, 2011
Messages
216
Re: pics...

Re: pics...

transom pics...csm over biax...around the corners and onto the deck. had to put a seam in the csm. i'm okay with it. gotta drill the hole to install the drain tube. just a layer of biax and two more layers of csm. the bilge has so many layers of glass in it that i lost count. it got tabbed in with the stringers, the transom repair, the deck install, all over the 2 layers it got in assembly. it would probably stop a deer slug!
2011_1115mycardfirst0033.jpg2011_1115mycardfirst0034.jpg2011_1115mycardfirst0035.jpg2011_1115mycardfirst0036.jpg2011_1115mycardfirst0049.jpg
 

Scott Chinsota

Petty Officer 1st Class
Joined
Apr 18, 2011
Messages
216
Re: pics...

Re: pics...

pics are kinda mixed up. tried to drag them around, didn't work. unsanded patch from outsideof the livewell patch (thumbnail)...so thick you can barely see daylight through it...see last pic2011_1115mycardfirst0019.jpg
2011_1115mycardfirst0060.jpg2011_1115mycardfirst0048.jpgprime coat on rotton well lid and rotten wood under helm...gotta fix that...2011_1115mycardfirst0047.jpg
 

Attachments

  • 2011_1115mycardfirst0050.jpg
    2011_1115mycardfirst0050.jpg
    144.3 KB · Views: 0

Scott Chinsota

Petty Officer 1st Class
Joined
Apr 18, 2011
Messages
216
Re: pics...

Re: pics...

2011_1115mycardfirst0055.jpg2011_1115mycardfirst0056.jpg2011_1115mycardfirst0057.jpg2011_1115mycardfirst0058.jpg2011_1115mycardfirst0059.jpg
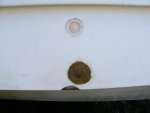
wells...sanded for install and gelcoat. taped up for filling all of the pop rivet holes. previous owner did a number on one of them...looks like he tried to install some kinda seal. gunna fill the holes with resin left over when i do the last of the bow layup and install them the following day.
 

Scott Chinsota

Petty Officer 1st Class
Joined
Apr 18, 2011
Messages
216
Re: pics...

Re: pics...

a few scuffs and scratches to dab some resin on2011_1115mycardfirst0051.jpg2011_1115mycardfirst0052.jpg2011_1115mycardfirst0053.jpg
hydro-electric shift control box...needs a slight adjustment, starts in forward :eek:...refer to pic# 3 :facepalm:2011_1115mycardfirst0054.jpg
$100.00 worth of suppies and a wasted piece of biax tabbing. that reminds me, it's trash day. 2011_1115mycardfirst0061.jpg
 

zopperman

Lieutenant Commander
Joined
Jun 22, 2011
Messages
1,551
Re: pics...

Re: pics...

I'd fill those cracks with thickened gel or resin depending on how yer painting the boat
 

Scott Chinsota

Petty Officer 1st Class
Joined
Apr 18, 2011
Messages
216
Re: pics...

Re: pics...

I'd fill those cracks with thickened gel or resin depending on how yer painting the boat

thanks. havent given it a minutes thought yet. you do mean the cracks, not the scrapes, gouges, chips right?
 

Scott Chinsota

Petty Officer 1st Class
Joined
Apr 18, 2011
Messages
216
Re: pics...

Re: pics...

the pics didn't turn out so well. alot of relflection, dust and tree leaf interference. i'll take more when i get a little farther...and i'll clean up first.
 

Woodonglass

Supreme Mariner
Joined
Dec 29, 2009
Messages
25,929
Re: pics...

Re: pics...

Ok, sooooo, I guess you HAVE been doing some work. The pics prove it. Like Zoop says most of the hull damage looks like simple gelcoat paste fixes. You have the Same Selectric Shift as mine, just a newer model. Let me know if you need info on it. The push button mechanism can be taken apart and cleaned and repaired. I did it on mine and it works perfectly. I did a LOT of research on that thing a couple of years back and learned a lot. Happy to share the knowledge if and when you need it.
 

Scott Chinsota

Petty Officer 1st Class
Joined
Apr 18, 2011
Messages
216
Re: pics...

Re: pics...

some looked like just gel damage..

the big cracked spot lookes like inpact damage to me. eventually gunna gelcoat the outside too. probably touch up the chips and fish as is til i have to move. i sealed the inside of the shell with resin left in the rollers during the stringer install. doubt it will take on water.
the crack repair would just be sand and gelcoat over?
 

Scott Chinsota

Petty Officer 1st Class
Joined
Apr 18, 2011
Messages
216
Re: pics...

Re: pics...

Ok, sooooo, I guess you HAVE been doing some work. The pics prove it. Like Zoop says most of the hull damage looks like simple gelcoat paste fixes. You have the Same Selectric Shift as mine, just a newer model. Let me know if you need info on it. The push button mechanism can be taken apart and cleaned and repaired. I did it on mine and it works perfectly. I did a LOT of research on that thing a couple of years back and learned a lot. Happy to share the knowledge if and when you need it.
much obliged. i've been in the control box, i just didnt slide the assy far enough to prevent starting in gear. scared the hell out of me when it lunged and hit the dock at the ramp. thankfully the throttle was near zero when it happened.
i have a manual for it but it's been a few years. probably have a few questions in a week or so.
nice to know someone else who owns one. thanks in advance.
 

Scott Chinsota

Petty Officer 1st Class
Joined
Apr 18, 2011
Messages
216
Re: more pics...

Re: more pics...

i'm happy with it. finally figured out my little "pinhole" bubbles are either from aerating the resin with the drill when i mix it of off-gassing of the chemicals...maybe both. i would get a section flawless, start another area and the bubbles just appear seemingly from nowhere. i think the resin skins on top and traps the gas from the reaction. got most of them. had to live with a few. more resin doesn't make them go away. roller gets them but some come back. i now refer to them as "freckles". ya might see a few small tree leaves made it into the layup too. picked out a dozen...rolled over a few. resined in a few moths and mosquitos installing the stringers. more soon...
 

Scott Chinsota

Petty Officer 1st Class
Joined
Apr 18, 2011
Messages
216
Re: obstacles=no progress

Re: obstacles=no progress

sis-in-laws car needed some attention. wheel bearing chewed a groove in one axle. u-joints were iffy and the pinion bearing is so bad the flange flops around almost comically.

tried a pull it yourself junkyard. 1st trip yielded a punkin full of glitter...uhhh no. didn't bother to pull the axles to check them. 2nd trip yielded cleaner fluid but two grooved axles. tomorrow i will disassemble the 3rd rear end before it leaves the yard.

it's flattering to be the one everyone turns to when the s#!+ hits the fan but it sux being the one everyone turns to when the s#!+ hits the fan.
 

Scott Chinsota

Petty Officer 1st Class
Joined
Apr 18, 2011
Messages
216
Re: obstacles=no progress

Re: obstacles=no progress

in law's car done. back on track...but it's raining. more to come in a few days.
 

Scott Chinsota

Petty Officer 1st Class
Joined
Apr 18, 2011
Messages
216
need advice...

need advice...

tried gelcoat in a small area with a foam roller. thin spotty coverage. don't have the tools to spray. not looking for a mirror finish. application is interior and cap. going to local west marine to look at roller options. any suggestions?

gotta break out the camera. both livewells and one seat stand is in. repair of well lids almost complete. have to add wood blocks in well cavities to install drain tubes. trying to gelcoat the helm, bilge and repaired areas prior to drain tube installation. also pulled hardware out of transom, drilled out the holes (oversize) and filled them with pb. steering bracket bolts broke...glad i pulled them.

pics in a day or two. gotta go shopping.
 

zopperman

Lieutenant Commander
Joined
Jun 22, 2011
Messages
1,551
Re: need advice...

Re: need advice...

gelcoat any resin containing styrene (poly's) will eat up a foam roller. I would say roll n tip, sand sand sand, roll n tip, sand sand sand, nice and smooth. Buff.
 
Top