fishKILLER1987
Petty Officer 3rd Class
- Joined
- Mar 22, 2010
- Messages
- 86
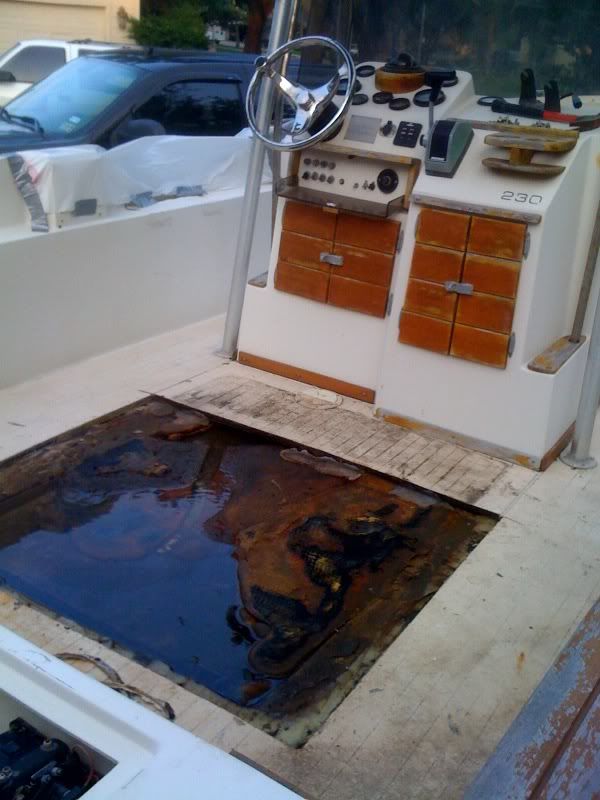
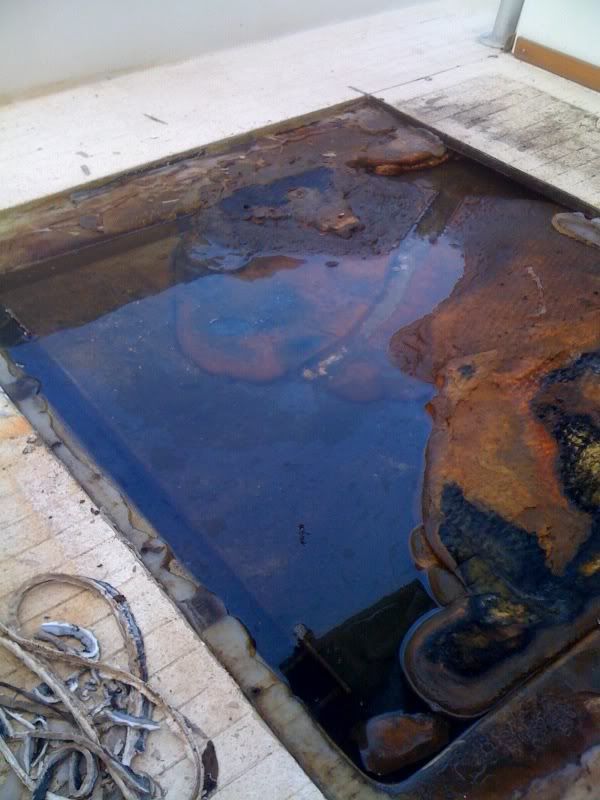
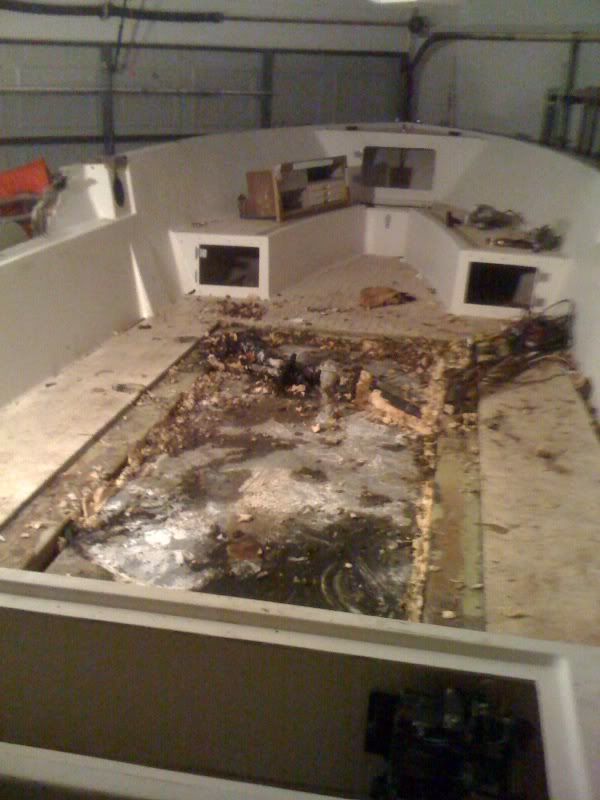
I have finally began my summer project of restoring my 1978 Robalo 230. I was originally only going to fix a portion of the boat where it had been damaged in a hurricane. But, after a ton of research, and carefull examination of the hull, I think it would be best to go ahead and bite the bullet and do a solid ground-up restoration job.
The hull seems solid as a rock, and when I bounce up and down on the motor the transom doesnt budge an inch. However, if you look down at the transon from inside the boat it is easy to see that it bows outward from years of supporting a heavy motor. Also, one of the hooks on the corner of the transom has almost pulled through the outside of the hull which indicated rotten wood. This also leads me to believe that the stringers are rotten as well and will probably need to be replaced.
So, I figure if I'm willing to work this hard and sink a ton of money into this thing to get it on the water, then I should do things right the first time so that after all my hard work I dont end up spending another summer off the water because I didnt replace rotted wood when I should have.
This may sound crazy but after all my years of boating I've never really understood how things function on a boat underneath the deck.
Here are my questions:
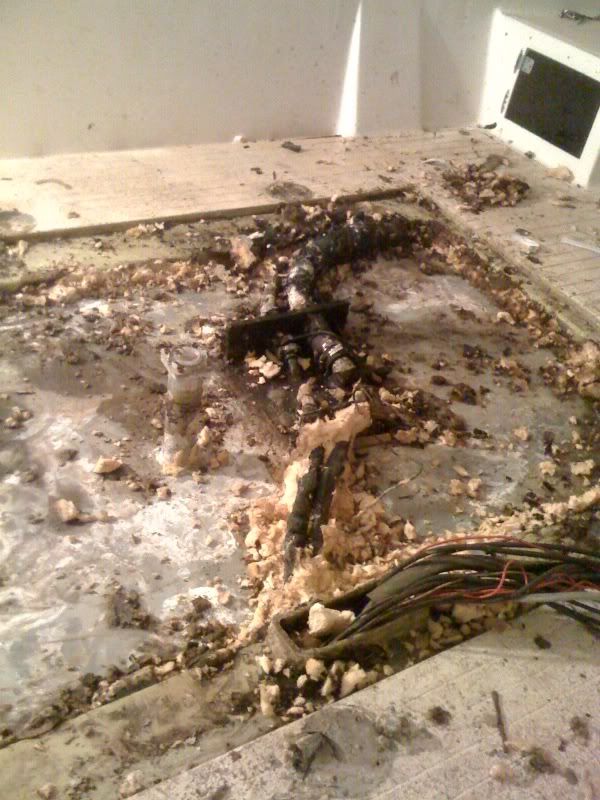
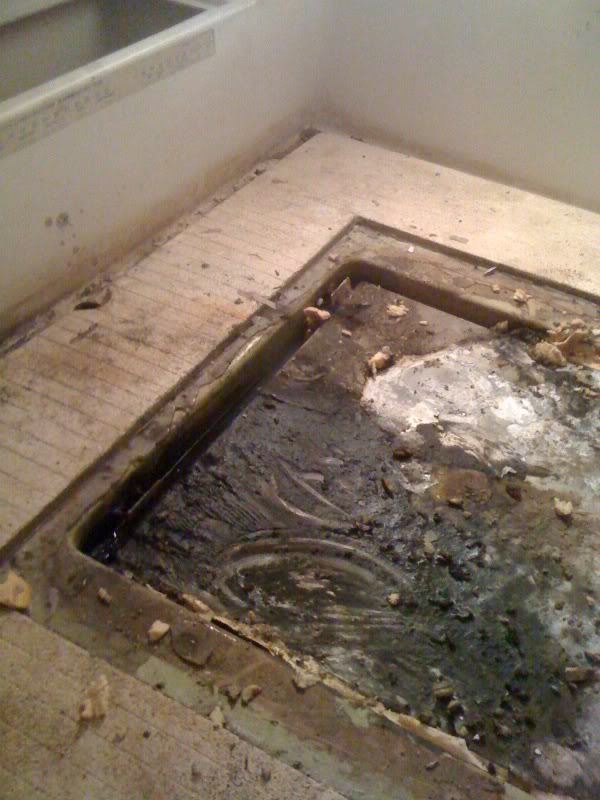
1) Between the deck and the hull there are stringers and compartments for support. Within these compartments there is foam and of course wiring, a gas tank, ect... I was always under the impression that water should never get in this area between the hull and the deck. However, I am beginning to understand that water does from time to time get in this area and that is why there is a drainage system to help get rid of this unwanted water. But, isnt it bad for that foam under the deck to get wet? Does it ever dry once wet? If there is no way for water to seep into the boat from underneath, then how does water get into this area between the deck and hull?
2) On my boat I have a gigantic rectangle piece of deck that is under the seat and center console and is probably 15ft long X 4ft wide. It seems to be attached to the deck with screws and caulking. I would imagine that this is designed for the instance in which you have to service the gas tank. So, if I remove my seat and center console and pop this deck piece out, will it expose my stringers, foam, and hull bottom?
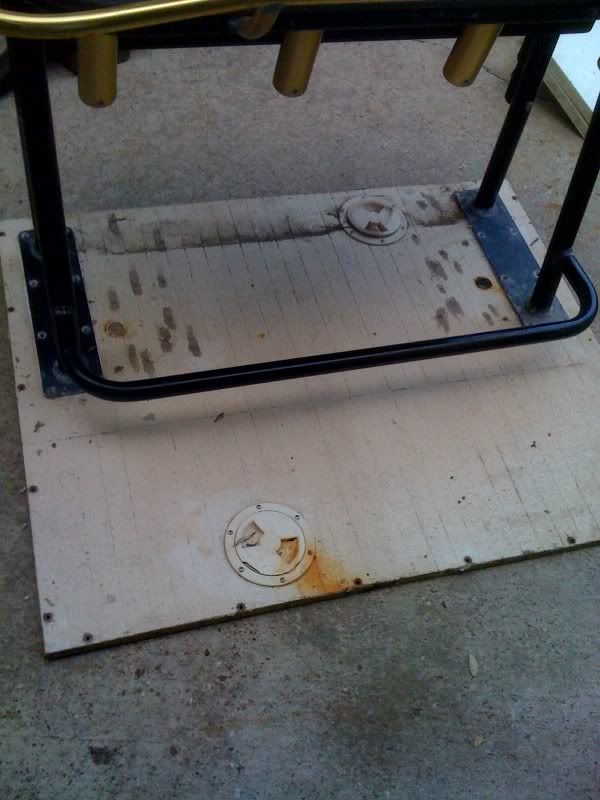
3) I also have small holes cut in the deck with a screw on cap. I would think that these are some kind of inspection device. But, when I uncap these holes all I see is a small section of gas tank. Are these inspection devices after all?
I know my posts can be pretty long sometimes but I'm full of questions. And it seems like the more I do to my boat the more questions I get.
Thanks in advance for any input. God knows I need all the help I can get.
The hull seems solid as a rock, and when I bounce up and down on the motor the transom doesnt budge an inch. However, if you look down at the transon from inside the boat it is easy to see that it bows outward from years of supporting a heavy motor. Also, one of the hooks on the corner of the transom has almost pulled through the outside of the hull which indicated rotten wood. This also leads me to believe that the stringers are rotten as well and will probably need to be replaced.
So, I figure if I'm willing to work this hard and sink a ton of money into this thing to get it on the water, then I should do things right the first time so that after all my hard work I dont end up spending another summer off the water because I didnt replace rotted wood when I should have.
This may sound crazy but after all my years of boating I've never really understood how things function on a boat underneath the deck.
Here are my questions:
1) Between the deck and the hull there are stringers and compartments for support. Within these compartments there is foam and of course wiring, a gas tank, ect... I was always under the impression that water should never get in this area between the hull and the deck. However, I am beginning to understand that water does from time to time get in this area and that is why there is a drainage system to help get rid of this unwanted water. But, isnt it bad for that foam under the deck to get wet? Does it ever dry once wet? If there is no way for water to seep into the boat from underneath, then how does water get into this area between the deck and hull?
2) On my boat I have a gigantic rectangle piece of deck that is under the seat and center console and is probably 15ft long X 4ft wide. It seems to be attached to the deck with screws and caulking. I would imagine that this is designed for the instance in which you have to service the gas tank. So, if I remove my seat and center console and pop this deck piece out, will it expose my stringers, foam, and hull bottom?
3) I also have small holes cut in the deck with a screw on cap. I would think that these are some kind of inspection device. But, when I uncap these holes all I see is a small section of gas tank. Are these inspection devices after all?
I know my posts can be pretty long sometimes but I'm full of questions. And it seems like the more I do to my boat the more questions I get.
Thanks in advance for any input. God knows I need all the help I can get.
")