Floor replacement question

62cruiserinc

Petty Officer 1st Class
Joined
Oct 30, 2009
Messages
295
Re: Floor replacement question

Thanks, WOG,

Today I finished the transom core. It's ready for the resin and then the CSM layer on each side.

Two questions concerning the drain hole:

1) My drain hole is about an inch above the bottom of the bilge (to the bottom edge of the hole). Is this OK or should I try to fill the bilge area with glass so the hole is at the bottom?

2) Has anyone done what Friscoboater did in his video with the drain hole area on the transom core? I am referring to cutting off the wood core above the drain hole and filling the missing core area with resin. I think he did this so the wood core is always above the top of the drain hole and there is never standing water next to the wood core (even though the wood core would be encapsulated in glass).

Today I bought a full-face 3M respirator at NAPA on sale for $142. After taking it home and using it to finish the glass grinding for the transom, all I can say is that I wish I had bought one long ago. It works so well and is so easy to put on compared to a separate respirator and goggles. That was money well spent. Thanks to 93bayliner1800 for his post which convinced me to spend the $ and get one.


Thanks
Steve
 

93bayliner1800

Petty Officer 1st Class
Joined
May 9, 2011
Messages
239
Re: Floor replacement question

I did my transom that way. I stopped it about 3 inches above the bottom. It is just above where my bilge will pick up water. I filled everything below with PB.
 

62cruiserinc

Petty Officer 1st Class
Joined
Oct 30, 2009
Messages
295
Re: Floor replacement question

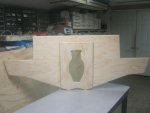
Thanks, 93bay. That's what I did to my transom also. Here is a picture of the transom core ready for resin:

IMG_4027.JPG

Yes, i know that the top of the cutout is slanted, but that is how the outer skin is cut out. I removed the outdrive and engine a long time ago and wasn't sure which side of the tilt was correct, so I cut it out the same as the glass.

This is a picture after coating it with resin:

IMG_4028.JPG

I am going to drill 5 rows of 3 holes (1/2" diameter) to allow the PB to ooze out when attached to the skin. I am actually thinking of "wobbling" the drill bit so the hole is a little larger diameter on the side away from the skin, creating a conical shape. This would give even more mechanical strength as the PB would lock the core to the skin since it couldn't pull out of the hole.

This was my first resin mix and I got a feel for how the resin, MEKP, etc flowed and handled. The mix was intentionally slow to give me extra time. If I did it again, I would have added more MEKP (I used 1% to allow the resin to soak into the wood longer) as it took over an hour and a half for it to harden. A more useful working time would have been a half hour. These are the things you learn as you go and get a feel for the materials and project. Next step is to mix up the first batch of PB to fillet the center ply piece to the main core. This will be practice making PB, if I mess up it will only be in a small amount.

I also ground away more of the hull for tabbing of the core to it. Originally, I had a strip about 5" wide, but I made it about 10" wide to accommodate two strips of 1708 tabbing, plus the CSM and the 1708 on the whole transom. If I tab the transom with two layers of 1708, will one layer of 1708 on the whole transom be sufficient? Or should I tab with only one strip of 1708 and put two complete layers on the transom core (which would also extend onto the hull)?

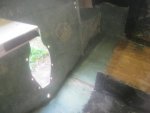
Here is a picture of the transom skin area ready for the core

IMG_4024.JPG

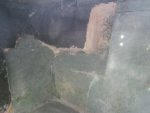
A picture near the hull/transom area:

IMG_4026.JPG

Note the foam layer on the hull that is lightly glassed over. I removed the inner glass layer and the foam so I could tab directly to the hull, unlike the factory which tabbed to the inner glass layer (that is on top of the foam). I'll figure out later how to blend those areas together so it looks smooth.

Anybody know a cheap online source for the 4 1/2" 24-grit discs for the grinder? They are about $2 each at Lowes and I went through about 6 just for the transom. I figure I'll need a few dozen to finish the boat at that rate.

Thanks
Steve
 

Woodonglass

Supreme Mariner
Joined
Dec 29, 2009
Messages
25,929
Re: Floor replacement question

Not sure where you're located by my Harbor Freight carries them.
 

62cruiserinc

Petty Officer 1st Class
Joined
Oct 30, 2009
Messages
295
Re: Floor replacement question

WOG, have you used the HF discs? Are they pretty good quality? The reason I ask is that I often buy the tools at HF, but in general have found their consummable items (sandpaper, grinding wheels,etc) of lower quality and need to use more of them, which cancels cost savings.


Yesterday I mixed up my first batch of PB, another milestone! I used the PB to fillet the added piece in the center of the transom core. Next step is to add a layer of CSM to both sides of the core. Then on to attaching the core to the outer skin with PB.


Steve
 

93bayliner1800

Petty Officer 1st Class
Joined
May 9, 2011
Messages
239
Re: Floor replacement question

I bought a big pack of 24 grit sanding discs from HF, and did not notice any difference from the ones at Lowes other than the price. Any grinder will burn up it you do not keep it blown out of fiberglass dust. I always blew tool out with air nozzle everytime I changed discs....grinder still running well from HF. Also a fine particle bag to put in shop vacation saves a lot of time cleaning filter. I used two bags for my entire build and only cleaned filter in-between changes bags. So much better than cleaning after every use.
 

Woodonglass

Supreme Mariner
Joined
Dec 29, 2009
Messages
25,929
Re: Floor replacement question

Yep, I use em and like em. No noticable difference. The HF tools usually have problems with the brushes. I keep em lubed and cleaned and they work fine for me
 

62cruiserinc

Petty Officer 1st Class
Joined
Oct 30, 2009
Messages
295
Re: Floor replacement question

93bay, good idea on the fine particle bag in the shop vac. Its really a pain to clean the filter so often.

WOG, you are right about the brushes being the source of the problem for HF tools. My HF 4 1/2" grinder quit on me last week and I bought another HF one to replace it. A few days later I was checking the failed one over and found out that the plastic screw holding one of the brushes had backed out and the brush contact was intermittent. After tightening the screw, it works good as new now. The new HF grinder did come with an extra set of brushes.


It's off to HF again for the 24-grit discs after the good reviews on them.

Steve
 

Woodonglass

Supreme Mariner
Joined
Dec 29, 2009
Messages
25,929
Re: Floor replacement question

TIP: An Old Tennis shoe will "DEGUM" the discs if they get gummed up with resin. Just grind the rubber sole.
 

62cruiserinc

Petty Officer 1st Class
Joined
Oct 30, 2009
Messages
295
Re: Floor replacement question

I went to my local HF but they only went down to 36 grit in the 4 1/2" size. I checked the HF online site and they also did not list 24 grit 4 1/2" discs. They did list 24 grit resin discs in 5" diameter, which might fit on the 4 1/2" grinder if you remove the guard.

I covered both sides of the transom core with a layer of CSM. Also, I "patched" the transom skin (on the inside) where I pulled off a layer of CSM that remained attached to a piece of the original wood core. Now the skin is level and ready for the next step, which is a big one - attaching the transom core to the skin with PB. I still have to make the clamps (2x4s and allthread) before I can do this.

Steve
 

Woodonglass

Supreme Mariner
Joined
Dec 29, 2009
Messages
25,929
Re: Floor replacement question

I checked my discs and they ARE 36 grit. They work well for me.
 

62cruiserinc

Petty Officer 1st Class
Joined
Oct 30, 2009
Messages
295
Re: Floor replacement question

I'll try the 36 grit disks from HF when I run out of the 24 grit I already bought. Also, thanks for the de-gumming tip to clean the discs.

I noticed that some forum members recommend using CSM between layers of 1708. The 1708 already has a layer of CSM attached to it. Is the reason for adding layers of CSM between 1708 due to the attached layer being too thin (0.8 oz) compared to the regular CSM (1.5 oz)? In his videos, Friscoboater put two layers of 1708 on his transom without an extra layer of CSM between them.

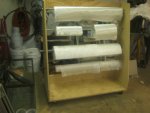
I took some time this weekend to build a fixture to hold the CSM, 1708, 1708 tape and 6oz cloth rolls to make it easier to dispense when needed. Here is the fixture, made from OSB, particleboard, pipe, and casters that I had laying around in the shop:

IMG_4080.JPG

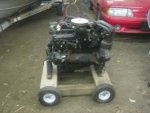
Also, here is a picture of the engine dolly made with HF tires, two 5/8" axles, and some assorted wood:

IMG_4081.JPG

The large pneumatic tires allow it to easily roll on the dirt floor in the barn without bogging down in the dirt.

I have rounded up the 2x4s and threaded rod for making the clamps to attach the wood core to the transom skin.

I am planning on attaching the core and tabbing it in the next few days. Then it will be on to the stringers for removal and replacement.

The goal is hopefully to be done by the end of July so it can be put in the water and enjoyed some this season.

Steve
 

Woodonglass

Supreme Mariner
Joined
Dec 29, 2009
Messages
25,929
Re: Floor replacement question

You are correct in your assumptions about the CSM. Much better bonding occurs with the increased mat thickness. Your last two layers on the transom are fine without the added layer of CSM. Nice Motor Cart!
 

93bayliner1800

Petty Officer 1st Class
Joined
May 9, 2011
Messages
239
Re: Floor replacement question

Nice looking cart and glass stand! Man, if those look that good cannot wait to see the rest of the boat work! The only place I used csm was on installing transom. I put it on hull and on back side of transom before installing. Other than the bottom and top of my floor and front boxes to waterproof....I used 18708. I did do all my tabbing in 1708 and in one layup. I also wrap the tops of my stringers and bulkheads in 1708. Adding 2x2 deck cleats cutting a 45?and on side away from stringer etc helps a lot when capping.
 

62cruiserinc

Petty Officer 1st Class
Joined
Oct 30, 2009
Messages
295
Re: Floor replacement question

Thanks for the answer, guys!

Also thanks for the kind words on the fixtures.

A couple of questions I need answered as I get ready to attach the transom core:

Several members have said that about 3 quarts of PB will be needed to attach the core. Does this mean starting with 3 quarts of resin and then ending up with more volume as you add cabosil and chopped fibers?

Also, should I make the PB a little less thick than I made the PB for filleting? I don't want it to be so thick that it becomes hard to squeeze it out and I end up with a thick glue line between the core and skin.

I am hoping to take a vacation day tomorrow and attach the core.

Steve
 

Woodonglass

Supreme Mariner
Joined
Dec 29, 2009
Messages
25,929
Re: Floor replacement question

I mix mine just shy of Creamy Peanut butter but a bit thicker than Mayonaise. Don't want it to ALL Squeeze out. Use just medium clamping pressure. 3 Quarts resin BEFORE adding the cabosil and fibers. I would only use about 1/8 cup of fibers per quart Maybe 1/4 cup but they go a long way. Mix a quart at a time just in case you have issues. A helper would be nice. Someone to mix and stir while you are applying. That way you can tell them when to mix the next batch just before you finish off the first one. No danger of "Losing a Batch" this way.
 

93bayliner1800

Petty Officer 1st Class
Joined
May 9, 2011
Messages
239
Re: Floor replacement question

I mixed mine just like normal pb...1/4 cup fibers per quart. Mine is smaller than yours and it took 2 quarts. I took a trowel and spread it as evenly as possible. I know an I/O is different as your final thickness is very crucial. More so than an outboard at least. Of course I guess you would just add some glass on final transom to get thickness you need.
 

BigLee324

Petty Officer 3rd Class
Joined
May 13, 2011
Messages
89
Re: Floor replacement question

Thanks, 93bay. That's what I did to my transom also. Here is a picture of the transom core ready for resin:

View attachment 155183

Yes, i know that the top of the cutout is slanted, but that is how the outer skin is cut out. I removed the outdrive and engine a long time ago and wasn't sure which side of the tilt was correct, so I cut it out the same as the glass.

This is a picture after coating it with resin:

View attachment 155185

I am going to drill 5 rows of 3 holes (1/2" diameter) to allow the PB to ooze out when attached to the skin. I am actually thinking of "wobbling" the drill bit so the hole is a little larger diameter on the side away from the skin, creating a conical shape. This would give even more mechanical strength as the PB would lock the core to the skin since it couldn't pull out of the hole.

This was my first resin mix and I got a feel for how the resin, MEKP, etc flowed and handled. The mix was intentionally slow to give me extra time. If I did it again, I would have added more MEKP (I used 1% to allow the resin to soak into the wood longer) as it took over an hour and a half for it to harden. A more useful working time would have been a half hour. These are the things you learn as you go and get a feel for the materials and project. Next step is to mix up the first batch of PB to fillet the center ply piece to the main core. This will be practice making PB, if I mess up it will only be in a small amount.

I also ground away more of the hull for tabbing of the core to it. Originally, I had a strip about 5" wide, but I made it about 10" wide to accommodate two strips of 1708 tabbing, plus the CSM and the 1708 on the whole transom. If I tab the transom with two layers of 1708, will one layer of 1708 on the whole transom be sufficient? Or should I tab with only one strip of 1708 and put two complete layers on the transom core (which would also extend onto the hull)?

Here is a picture of the transom skin area ready for the core

View attachment 155189

A picture near the hull/transom area:

View attachment 155190

Note the foam layer on the hull that is lightly glassed over. I removed the inner glass layer and the foam so I could tab directly to the hull, unlike the factory which tabbed to the inner glass layer (that is on top of the foam). I'll figure out later how to blend those areas together so it looks smooth.

Anybody know a cheap online source for the 4 1/2" 24-grit discs for the grinder? They are about $2 each at Lowes and I went through about 6 just for the transom. I figure I'll need a few dozen to finish the boat at that rate.

Thanks
Steve
You can do a light cleaning the old disc with acetone to get the caked up glass off, it won't hurt them and they will last longer, you will find that there is still grit there , as they usually gum up before wearing out.
 

BigLee324

Petty Officer 3rd Class
Joined
May 13, 2011
Messages
89
Re: Floor replacement question

TIP: An Old Tennis shoe will "DEGUM" the discs if they get gummed up with resin. Just grind the rubber sole.

also and old trick , get some clear silicone caulking, poke hole in the tube, allow it to harden to solid rubber, then cut the tube from around it and sand the silicine with your elected sanding tool, it will clean all you sanding disc, orbital sander etc.
 

BigLee324

Petty Officer 3rd Class
Joined
May 13, 2011
Messages
89
Re: Floor replacement question

I'll try the 36 grit disks from HF when I run out of the 24 grit I already bought. Also, thanks for the de-gumming tip to clean the discs.

I noticed that some forum members recommend using CSM between layers of 1708. The 1708 already has a layer of CSM attached to it. Is the reason for adding layers of CSM between 1708 due to the attached layer being too thin (0.8 oz) compared to the regular CSM (1.5 oz)? In his videos, Friscoboater put two layers of 1708 on his transom without an extra layer of CSM between them.

I took some time this weekend to build a fixture to hold the CSM, 1708, 1708 tape and 6oz cloth rolls to make it easier to dispense when needed. Here is the fixture, made from OSB, particleboard, pipe, and casters that I had laying around in the shop:

View attachment 155804

Also, here is a picture of the engine dolly made with HF tires, two 5/8" axles, and some assorted wood:

View attachment 155805

The large pneumatic tires allow it to easily roll on the dirt floor in the barn without bogging down in the dirt.

I have rounded up the 2x4s and threaded rod for making the clamps to attach the wood core to the transom skin.

I am planning on attaching the core and tabbing it in the next few days. Then it will be on to the stringers for removal and replacement.

The goal is hopefully to be done by the end of July so it can be put in the water and enjoyed some this season.

Steve

the engine pic looks like a go-cart waiting to happen, put a seat on the spark arrestor and hook the wheels up to the trans , hold on!!!
 
Top