Floor replacement question

62cruiserinc

Petty Officer 1st Class
Joined
Oct 30, 2009
Messages
295
Re: Floor replacement question

the engine pic looks like a go-cart waiting to happen, put a seat on the spark arrestor and hook the wheels up to the trans , hold on!!!

Boy, that would be some high power-to-weight ratio!

Though I suspect the high center of gravity would be a downer during any turns!

Steve
 

62cruiserinc

Petty Officer 1st Class
Joined
Oct 30, 2009
Messages
295
Re: Floor replacement question

Thanks for all the advice and suggestions.

I am looking forward to attaching the core and then tabbing it so I can move on to the stringers and deck. Hopefully the experience with the transom will allow me and my son to complete the stringers and deck in a timely manner. I have gained a lot of "feel" for glassing while doing the transom and now I feel pretty comfortable mixing and glassing.

These kind of projects when completed really give you a sense of accomplishment and something concrete you can point to and say "I did it". Also my son (16yrs old) is learning a skill that relatively few others know. I have always enjoyed working with my hands and so has my son. My profession is an electrical engineer but I find the hands-on stuff like carpentry and boat repair/building more satisfying than doing paper electrical designs.

Steve
 

62cruiserinc

Petty Officer 1st Class
Joined
Oct 30, 2009
Messages
295
Re: Floor replacement question

OK, more progress!

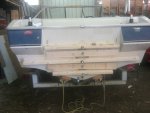
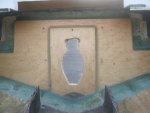
Here's a picture of the transom core installed on the boat with the clamps, outside view and then inside view:

IMG_4082.JPG


IMG_4086.JPG

It came out pretty good but not perfect. If I was doing it again I would have put more PB around the edges so it could ooze out more than it did for filleting immediately. Only a few places did this. I used a 1/4" notched trowel, a cheap model that I threw away after using it as it probably would have cost more for the acetone to clean it.

Here is a picture of the transom after removing the clamps and using PB to fillet the edges:

IMG_4113.JPG

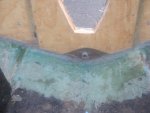
A closeup of the drain hole area:

IMG_4114.JPG

I used a piece of 3/4" PVC pipe for the drain hole, like Friscoboater did in his videos. I may leave it in there or might drill it out later if I use something different.

Now the last two steps are the tabbing with 1708 (two layers) and covering the transom in 1708 (two layers). I'm hoping to tab tomorrow and get both layers in at once. Then put on the full layers of 1708. Is it possible to put both full layers of 1708 on in one shot?

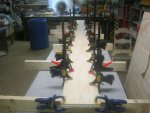
I decided to get a jump on the stringers by gluing up a 9" x 12' stringer from two 1/2" layers of Arauco plywood. I offset the joints of the 8' pieces and the 4' pieces to make the 12' length. I just finished gluing and clamping one of the stringers. Here's a picture of the stringer in progress:

IMG_4116.JPG


Hopefully more progress tomorrow.

Steve
 

Woodonglass

Supreme Mariner
Joined
Dec 29, 2009
Messages
25,929
Re: Floor replacement question

Looks likea nice job on the Transom install. How much PB did you use?
 

62cruiserinc

Petty Officer 1st Class
Joined
Oct 30, 2009
Messages
295
Re: Floor replacement question

I used 3 quarts exactly, my son mixing them 1 quart at a time while I applied it to both the skin and the core.

Steve
 

Woodonglass

Supreme Mariner
Joined
Dec 29, 2009
Messages
25,929
Re: Floor replacement question

That's par for the course!!! I think you did a great job. You can do the tabbing and as soon as it Tacks up you can do the full layers or 1708. Do you have a bubble roller for the glass? If not I'd really recommend you invest in one.
 

62cruiserinc

Petty Officer 1st Class
Joined
Oct 30, 2009
Messages
295
Re: Floor replacement question

Thanks for the encouragement!

Sometimes, especially at the beginning, I look at the job ahead and ask myself "what have you gotten yourself into?". But as you move along and become more comfortable glassing the job doesn't look so daunting after all.

Yes, I have a bubble roller I bought from US Composites.

One question:

Do I tab the 1708 directly to the hull, or do I add a CSM layer to the hull around the perimeter of the transom before tabbing?

Thanks
Steve
 

Woodonglass

Supreme Mariner
Joined
Dec 29, 2009
Messages
25,929
Re: Floor replacement question

Either way. I usually use CSM first and then the 1708. Others don't. Up to you. Tabbing should be 8" strips and then run the deck glass up 6" to 8" over the top of the tabbing.
 

62cruiserinc

Petty Officer 1st Class
Joined
Oct 30, 2009
Messages
295
Re: Floor replacement question

Lots of progress this weekend.

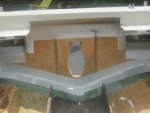
A picture of the transom with the first layer of 1708 tabbing(8" wide) dry-fit:
IMG_4117.JPG


The transom after tabbing the first layer:
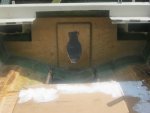
IMG_4121.JPG

The transom after tabbing the second layer of 1708 (12" wide):
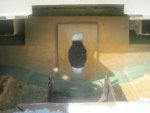
IMG_4127.JPG
As you can see in the above picture, the tabbing has covered the "wings" and much of the transom.

Finally, a picture of the transom after two layers of 1708 on the whole thing:
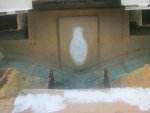
IMG_4130.JPG
I did it the full coverage layers the way Friscoboater did in his video. The first layer is about 2" smaller on all sides than the core, then the second layer is the full size so that the edges don't line up over each other. There is a lot of 1708 on the transom, the "wings" have up to 6 layers in some places due to overlap of the tabbing pieces.

I felt comfortable enough to try attaching both full layers of 1708 with one resin mix. It worked out well, the resin didn't kick until about 10 minutes after I was finished.

The transom glassing is now done. Tomorrow I'll cut out the outdrive hole and the drain hole. Then it's on to the stringers.

The stringer that I was gluing up also was ready this weekend. There was some unused resin left after the second tabbing, so I used it to coat the stringer with. I found that its good to have something ready to take any extra resin that is left over instead of throwing it out.

Here's the first stringer blank after gluing and resin coating:
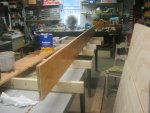
IMG_4135.JPG
 

jbcurt00

Moderator
Staff member
Joined
Oct 25, 2011
Messages
25,109
Re: Floor replacement question

Transom install & stringers look great!

Where'd the 'What did I get myself into' guy go? Well done!
 

rickryder

Commander
Joined
Jun 24, 2010
Messages
2,722
Re: Floor replacement question

Wow that looks fantastic! Your doing a great job!!
 

62cruiserinc

Petty Officer 1st Class
Joined
Oct 30, 2009
Messages
295
Re: Floor replacement question

Thanks for the encouragement, guys!

I'm looking forward to removing the old stringers and grinding away the tabbing. I'm starting to see some light at the end of the tunnel.

Steve
 

62cruiserinc

Petty Officer 1st Class
Joined
Oct 30, 2009
Messages
295
Re: Floor replacement question

Yesterday I removed the two bulkheads and the two flat pieces that laid across the bulkheads/stringers. The only things left are the stringers themselves.

I am still debating removing both stringers vs removing and replacing one at a time.

There would definitely be less chance of hull flex/twist by removing and replacing one stringer at a time.

However, I would rather get the "dirty work" of removing the stringers and grinding off old tabbing out of the way and then the rest of the job is "clean" (at least compared to grinding!).

Any opinions on removing one stringer or both?

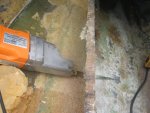
I have been using the HF multi-tool with a bimetallic blade in it to cut through tabbing. It takes about twice as long as using the grinder, but it cuts down on dusting enough that I don't need to wear the Tyvek suit, only the full-face respirator. This is better given the 90 degree temps we have had here the last few weeks. I will still need the whole setup for the grinding after removing the stringers.

Steve
 

62cruiserinc

Petty Officer 1st Class
Joined
Oct 30, 2009
Messages
295
Re: Floor replacement question

Any opinions on removing one stringer at a time (to keep the hull shape) vs doing both?

Thanks
Steve
 

62cruiserinc

Petty Officer 1st Class
Joined
Oct 30, 2009
Messages
295
Re: Floor replacement question

This weekend will only allow a few hours here and there for working on the boat unfortunately (soccer tournament for two sons and a graduation party), so I got up early this morning and worked on removal of a stringer.

After trying several methods, I settled on using a sawzall to cut the stringer off close to the hull. The blade slides along the hull and is unlikely to cut into it. The factory tabbing was very erratic. There were some spots with almost no tabbing and then there were spots with large (1-2" Diameter) blobs that looked like they had extra resin and fibers and just dumped it there. The sawzall cut was therefore wavy up and down as it followed the tabbing inconsistency. There is a thin layer of the wood still attached to the hull. I am going to use a wood chisel to remove the wood out of the slot and then grind down any lip left from the tabbing.

I had asked about removing and replacing one stringer at a time for hull shape integrity, but when I removed the stringer this morning my question was answered. With the stringer out, there was almost no hull movement when I walked on the stringer area. To get any visible deflection, I had to jump up and down slightly. Apparently the flat 2x6s I put on the trailer roller supports are working. So I am going to remove both stringers and grind down the hull.


The glass is hard on the sawzall blades so I have to buy a few more to do the job. I hope to have both stringers removed by the end of the weekend. I have taken monday and tuesday off from work to grind off the old tabbing, fab the new stringers and hopefully install them with PL by the end of tuesday. Then I will have to wait the 48 hours for the PL to cure before adding the PB fillets.


Steve
 

93bayliner1800

Petty Officer 1st Class
Joined
May 9, 2011
Messages
239
Re: Floor replacement question

sounds like you are doing well! I would suggest using PB to bed stringers in my opinion...i did some test and the PB held so much better when attaching a piece of wood resin coated to fiberglass. Also you can fillet at the same time...even do tabbing 15 min after fillets are down, all one layup without sanding, and it really bonds well. The biggest thing I did not like about PL is even removing as much excess as possible it still bubbles up slightly. You have to wait 48 hrs to sand down and then PB fillet. I took and shot finish nails into bracket pieces to hold my stringers in place, and even took my sharpie and marked each side in case I bumped them.

Figured you had already thought about all this, but wanted to give you what I learned while doing it.
 

62cruiserinc

Petty Officer 1st Class
Joined
Oct 30, 2009
Messages
295
Re: Floor replacement question

Thanks for the advice, 93bay.

I am tempted to use PB instead of PL because of the 48 hour wait time and other issues with PL. I already bought the PL but can easily return it to Lowes. The best part of using PB is that I can fillet as I go along and then start tabbing a little while later. The boating season is not forever here and I want to get it into the water this season.

I'll probably need to buy more Cabosil. US Composites sells 5 qts for $7.50, while the local place is 1 gal (4 qts) for $22.50!

Also, the Cabosil at USC weighs about half of the Cabosil at the local place. I asked a coworker who was a paint and adhesive chemist at a large company about this and he said there are two weights of Cabosil available and one weighs about twice the other.

I'll probably just buy the local stuff as I can't wait for an order to ship from USC. I have the next two days off from work and need to maximize the amount of work I get done on the boat.

Thanks everyone for the ongoing advice. You have all saved me a lot of money and lost labor.

Steve
 

93bayliner1800

Petty Officer 1st Class
Joined
May 9, 2011
Messages
239
Re: Floor replacement question

Fyi....I used PB for just about everything.....and I used 4-5qt containers of cabosil and almost 2 -4quart containers of 1/4" fibers.

I have found the key to PB is getting it as smooth as possible. I will use a large spoon on my fillets and dip it in acetone after each stroke. Man, it gives it a smooth finish. That way if you do not layup glass before it dries....just a light 60 grit by hand on the fillets and you are good to go.
 

62cruiserinc

Petty Officer 1st Class
Joined
Oct 30, 2009
Messages
295
Re: Floor replacement question

I have now removed both stringers.

First I cut through the stringer close to the hull with a sawzall:

IMG_4277.JPG

Then I used a 3/4" wood chisel to remove the remaining wood in the slot, usually about 1/4" to 1/2" high. The factory used foam to fill in any stringer-to-hull gaps.

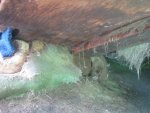
Some of us get upset when we get a small air bubble when glassing. On my boat there are huge air gaps, in some places the glass was 3/8" away from the wood! This picture shows a spot where (if you look carefully) you can see the glass on the stringer bulged away from the wood and then there is no glass at all at the end of the stringer:

IMG_4274.JPG

Some of the slots looked a little rough where the stringer sat:

IMG_4281.JPG

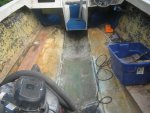
A picture of the hull with stringers removed and awaiting grinding:

IMG_4280.JPG


Steve
 
Top