Force 125 rebuild

redstrat

Petty Officer 1st Class
Joined
Dec 29, 2011
Messages
202
Ok, I just got my 1989 block back from being machined. They took it .020 over with diamond honing for a cost of $200. Seems mine was the first outboard motor to be done on their new $50k machine. I hope this is a good thing. I was going to send pictures but I can't seem to manage attachments anymore. Anyone else having this problem? I am making a list of parts and I have a few questions for those who have done this before.
1. I pressed out the wrist pins without the special spacer tool. Have I buggered up the bearings and/or the connecting rods?
2. All of the connecting rods appear to have been installed upside down ( V notch facing down with the intake baffle on the right. Have you guys encountered this and does it matter?
3. I plan on using Wisco pistons. Will the bearings I have service this application?
4. One connecting rod is slightly blue. Should I be looking to replace it?
5. Should I have ported before having it honed, or can I still proceed?
6. Frank, I know I read somewhere your recommendations about cutters and speeds for porting but I can't seem to find them now. If you could refresh my memory I would appreciate it greatly. I want to square the bypass side and slightly chamfer the exhaust.

I guess that's it for now. Thanks to all for your anticipated help. I'll keep updating this thread as I go which may take some time (two kids in college). I am also putting energy into the resto/mod of my 16' Checkmate as the weather allows me to work outside. Hoping to hit the water next season. Thanks, Mark
 

Frank Acampora

Supreme Mariner
Joined
Jan 19, 2007
Messages
12,004
Re: Force 125 rebuild

Pressing out the wrist pins without the tool will dent the spacers on each side (and possibly bend the piston. This is OK, because if you buy Wiseco pistons, you will need to buy a bearing kit with new spacers (different thickness) and needles. You will not have damaged anything else.

I have found engines with the rods incorrectly installed. Factory recommends V notch up so excess oil will drain through the square notches easier--in reality it really doesn't matter. Main lubrication is from the slit in the bottom of the cap. The engine will run just as well either way. However, I do follow the recommendation when I rebuild.

Unless the rod is really blued from heat and damaged, you probably need not replace it. Without a photo, I can not give a definite opinion.

It is better to port before honing because then the machine shop can deburr and possibly chamfer for you. Now, you just need to do a little more work.

I use the triangle shaped cutter for aluminum and the straight carbide for the steel. Medium speed and use plenty of cutting oil. The aluminum tends to gum up and clog the bits.

Now, back a while ago, instead of squaring the ports, I used a drill press and end mill to remove the center web. I have not yet assembled and run this engine but later Force (150) also had this center web removed so it should work well. EDIT: Not the center web but the two side webs leaving two large ports instead of four. Still should work.

And, yes, I can't post photos either but I guess the webmasters are working on it.
 

redstrat

Petty Officer 1st Class
Joined
Dec 29, 2011
Messages
202
Re: Force 125 rebuild

Once again, Thanks Frank, and best of luck to you and the Mrs.
 

redstrat

Petty Officer 1st Class
Joined
Dec 29, 2011
Messages
202
Re: Force 125 rebuild

Dear Frank, I started porting my motor today, working slowly, so far so good. I've been studying a photo you posted on a previous post http://forums.iboats.com/showthread.php?t=443656&highlight=force+porting. It appears that by squaring you also pushed the edge of the bypass port toward the top of the cylinder. Is this accurate or am I just seeing the taper in the aluminum? Also, On both sides of the bypass chamber there is about an 1/8" casting ridge. Any thoughts on whether I should smooth this to a taper? As always, thanks very much for your help. Mark P.S. new pistons are here.
 

Frank Acampora

Supreme Mariner
Joined
Jan 19, 2007
Messages
12,004
Re: Force 125 rebuild

That is an illusion due to the taper of the aluminum.

Raising the ports will increase the timing and also increase horsepower BUT---at a higher RPM. Since I am not setting up a race engine, rather just trying to get the engine to deliver better horsepower at useable recreational RPM, I do not raise the top of the ports. That way, I am not changing port timing, just allowing the engine to pump more air. (In fact, by squaring the ports you could argue that you are effectively changing timing because everything --fresh charge inducting and spent gas exhausting happens faster.)

Too much fuss for me to get rid of the ridge and I don't believe it hinders performance any. You can burr it out if you want to do so.
 

redstrat

Petty Officer 1st Class
Joined
Dec 29, 2011
Messages
202
Re: Force 125 rebuild

Thanks for the clarification. I'll get back to work. I have a new appreciation for my dentist. I'll post pics when I think I'm finished for comments and review before I reassemble.
 

redstrat

Petty Officer 1st Class
Joined
Dec 29, 2011
Messages
202
Re: Force 125 rebuild

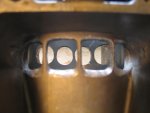
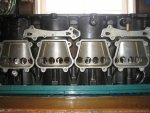
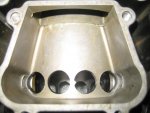
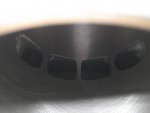
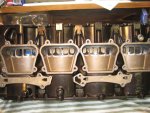
OK, It's taken a while (having a hard time getting to the bottom of the honey-do list this spring) but i have finally finished opening up the bypass ports on my motor. Here are some before and after picks. Feel free to comment. I will buy a gasket set with my next pay check and start the assembly.IMG_5008.jpgIMG_4984.jpgIMG_4987.jpgIMG_5001.jpgIMG_5006.jpg
 

redstrat

Petty Officer 1st Class
Joined
Dec 29, 2011
Messages
202
Re: Force 125 rebuild

I started working on ring gap today and here is what I have. Wiseco says it should be .004 per inch of bore, with an increase if the motor is modified. My pistons are 3.332. The Force manual says .006 to .016. Right out of the package my new ring are showing a gap of .015.
Seems I remember reading that more is better for these motors. What do you guys think?
 

redstrat

Petty Officer 1st Class
Joined
Dec 29, 2011
Messages
202
Re: Force 125 rebuild

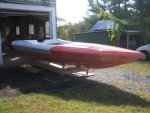
IMG_4785.jpgI have three of these motors but none were in running condition when I got them. So, I won't really be able to talk about performance gains. Here is a photo of the boat I plan to strap it to (after paint and upholstery). Maybe when I'm finished I'll bring it down to PA and race that 14 footer of yours. Just to see if it holds up. :) Thanks for your help
 

redstrat

Petty Officer 1st Class
Joined
Dec 29, 2011
Messages
202
Re: Force 125 rebuild

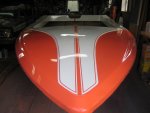
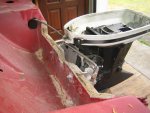
Sorry I've been away for so long. I got wrapped up in the boat restoration during the summer. I thought it was going to be a paint job and an interior. After closer inspection it was deck off, partial floor and new transom. I just finished painting it this past week end. Over the winter I'll build the interior and get back to the motor assembly. IMG_5183.jpgIMG_5176.jpgIMG_5171.jpgI'll definitely be putting the older style chrysler hood on the motor.
 

emoney

Commander
Joined
Jul 19, 2010
Messages
2,551
Re: Force 125 rebuild

That's gonna be one sweet ride. Keep us posted as you progress.
 

jerryjerry05

Supreme Mariner
Joined
May 7, 2008
Messages
18,074
Re: Force 125 rebuild

Great paint job!!!
You should have filled the holes on the transom and test mounted and drilled the new holes??
Hate to see you cut into the shiny!!!
 

redstrat

Petty Officer 1st Class
Joined
Dec 29, 2011
Messages
202
Re: Force 125 rebuild

Great paint job!!!
You should have filled the holes on the transom and test mounted and drilled the new holes??
Hate to see you cut into the shiny!!!
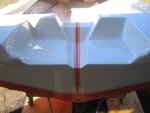
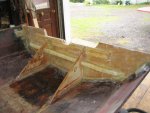
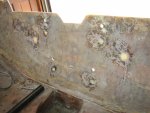
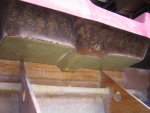
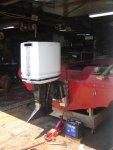
That's exactly what I did. That's how I discovered that my transom had to be dealt with before i went any further. I decided to add knee braces and modify the splash well while I was at it. You can see I've set it up for a set back/jack plate. This is why it's taken me so long to get back to my motor build. I had to get this work completed before the weather turned cold. It's good to be back on the forum. You guys are the best. Here are a couple of picsIMG_5065.jpgIMG_5055.jpgIMG_5152.jpgIMG_5033.jpgIMG_5034.jpg
 

jerryjerry05

Supreme Mariner
Joined
May 7, 2008
Messages
18,074
Re: Force 125 rebuild

Good!!
Saw the holes and knew they wouldn't line up with the Force.
Again GOOD job!!!
Wish I could paint like that!
 

redstrat

Petty Officer 1st Class
Joined
Dec 29, 2011
Messages
202
Re: Force 125 rebuild

Thanks, Painting really isn't that hard. Like everything else... do a bit of homework, and accept the fact that You'll make mistakes along the way.
 

emoney

Commander
Joined
Jul 19, 2010
Messages
2,551
Re: Force 125 rebuild

Technically, redstrat, I'm the "best". The rest of these guys are "pretty good fellas". Big difference......huge.
 

redstrat

Petty Officer 1st Class
Joined
Dec 29, 2011
Messages
202
Re: Force 125 rebuild

Technically, redstrat, I'm the "best". The rest of these guys are "pretty good fellas". Big difference......huge.
We all know that Frank is the Sensei here. But I appreciate your modesty.;)
 
Top