From broken to beautiful in 180 days...

BSnB

Petty Officer 1st Class
Joined
Jan 8, 2007
Messages
281
Re: From broken to beautiful in 180 days...

Wow, 77 Mariner! Great looking boat! looks to be quite a project. It surprises me a bit to hear about tube sand to correct a list. Is this common? I've got a slight list to Starboard. I hope mine is because the fuel tanks both have been empty and the weight of the black water tank is on that side
 

proshadetree

Lieutenant Commander
Joined
Jul 19, 2008
Messages
1,887
Re: From broken to beautiful in 180 days...

You really dont want to fix that let me take it off your hands. Wait mama will shout me in the head dangit. Carvers are one of the best looking boats out there. Going to be watching this one. Cant wait to read more.
 

Cap’n Ray

Petty Officer 2nd Class
Joined
Jul 1, 2011
Messages
103
Re: From broken to beautiful in 180 days...

25th: thanks for following the thread, your input is welcome and appreciated!! You are correct, she is aesthetically very good, and aside from the hole, in great condition mechanically and structurally. Definately a worthy project!! As for the teak, I plan to remove the strips, sand lightly to smooth, treat with whatever is ultimately decided on, then put em back on- sealed properly of course.

BSnB: thank you! The sand kinda caught me off guard too... Don't know how common it is, but they are 50# each, so fairly easy to move around, and easy to fit into smallish spaces. I'm betting your list is due to the tank arrangement. If it's not too bad just filling one tank more than the other will likely correct it.

Proshadetree: thank you very much! I do appreciate the compliment. And the Admiral here would likely shoot at you before you got too close- she loves our new project!! Thanks for watching the thread, suggestions are always welcome and appreciated!!


And now for a small update; the plan this weekend is to remove the tubes of sand (photos to be included), scrub the oil and gunk from the rear bilge, dry and clean the mid bilge, open up the fuel tank and check for water then pressure test, investigate my port raw water pump issue, and finally- fire up atleast the starboard engine again, port too if I can solve the raw water pump issue. Progress photos to be included where appropriate and possible. I will also post some more detail photos tomorrow evening- got em on the pc, just gotta upload em here. Thank you all for reading, and please feel free to comment and make suggestions any time!!

Thanks for reading, stay tuned...
 

Cap’n Ray

Petty Officer 2nd Class
Joined
Jul 1, 2011
Messages
103
Re: From broken to beautiful in 180 days...

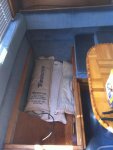
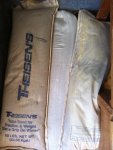
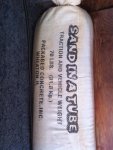
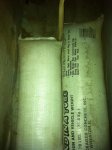
Well... better late than never I guess! This weekend wound up being a little less productive than I hoped, but I DID make a little progress. I got the rear bilge partially cleaned, mid bilge is clean and dry, sand 'tubes' are out (380# of sand!!), and started the starboard engine. I did NOT get to troubleshoot the port raw water pump, but I did discover a complete spare raw water pump in a storage compartment I didn't even know existed! SO, if the pump IS bad, I already have a replacement- that I will replace asap so I always have a spare, I think a raw water pump is a good thing to carry as part of the spares kit. Anywho... here are a few photos of the sand tubes and their hiding spots, as well as some interior shots. Will keep the pix and updates coming as much as possible, as usual- suggestions are welcome and appreciated!!

Sand tubes under dinette seat (50# x2 and 70# x2):
025.jpg
026.jpg
027.jpg

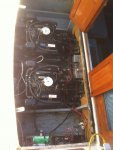
Sand tubes in transom space (70# x2):
030.jpg
032.jpg

More photos in next post...
 

Cap’n Ray

Petty Officer 2nd Class
Joined
Jul 1, 2011
Messages
103
Re: From broken to beautiful in 180 days...

And a few more photos...

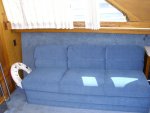
Couch/ bunk:
DSCI3071.jpg

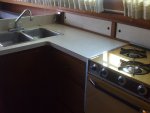
Galley:
DSCF2316.jpg

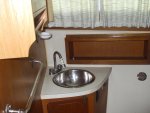
Sink in head:
DSCF2317.jpg

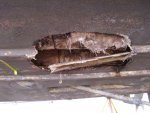
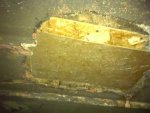
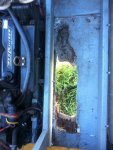
Another pic of the hole compliments of the insurance adjuster:
DSCI3078.jpg

The hole with my 'shipping protection' covering:
image.jpg


Thanks for reading, stay tuned!
 

Cap’n Ray

Petty Officer 2nd Class
Joined
Jul 1, 2011
Messages
103
Re: From broken to beautiful in 180 days...

Time for a little update... I haven't been able to do much work, but I did get the rear deck off, and did a little cutting and cleaning. Here are a few pix:


Found a nice note from my neighbor one morning:
037.jpg

Here's how much access I usually have:
043.jpg

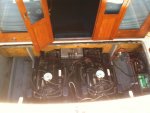
Here's how it looks with the cockpit sole removed:
044.jpg

Another view... LOTS more room:
046.jpg

And a view of the hole following a little trimming:
047b.jpg

I still have a LOT to do, taking the process one little bite at a time until I can order my supplies. As usual, your ideas and suggestions are welcome and appreciated!!

Thanks for reading, and stay tuned!!!
 

Luhrs28

Chief Petty Officer
Joined
Jul 14, 2010
Messages
423
Re: From broken to beautiful in 180 days...

Those look like Paragon transmissions/V-drives - same as in my boat. Do you know if they both work OK? They're pretty heavy duty, but if one needs rebuilding parts are tough to come by as Paragon is out of business.

Regarding the hole, since you have access to both sides you should be able to do a real solid repair on it.

Good job so far.
 

Cap’n Ray

Petty Officer 2nd Class
Joined
Jul 1, 2011
Messages
103
Re: From broken to beautiful in 180 days...

Im fairly sure the drives are Borg Warner Velvet drives (10-17) and both work perfectly. Ultimately it looks to me like everything is in fully functional condition EXCEPT the hull. I keep finding wiring I want to replace (mostly standard romex for the 110ac system) and those blasted wire nuts, but mechanically Shes totally sound and system wise mostly functional. Hole in the hull aside, I got a VERY nice boat. Thanks for the input and compliment!

Thanks for reading and stay tuned!!
 

Luhrs28

Chief Petty Officer
Joined
Jul 14, 2010
Messages
423
Re: From broken to beautiful in 180 days...

If they're Velvet Drives you're in good shape. They still make them so parts aren't a problem.
 

oops!

Supreme Mariner
Joined
Oct 18, 2007
Messages
12,932
Re: From broken to beautiful in 180 days...

ok ok.....enough of this dry dock stuff.......lets get you on the water this weekend bud. :D

sorry it took me so long to get to this thread....i have the time now....there is a slow down in our area right now.

ok....that damage is simmelar to the big 30 foot regal i just did.

i would use poly for that reapir.......iboater robj and i used epoxy on a surf ski the other weekend and i hate the stuff,, :mad:,,,too long cure time. you have to wait 8 hours between each 10 mins of work !!!!:mad:

btw...i highly suggest you bottom paint it while its in dry dock....at 300 bux each time you take it out of the water....now is the time. (you will have to bottom paint the repair area any how.

lets get rolling.
the cloth i suggest is 1708 bi axe...get lots....10 yards by 60 ins if you can....those hulls are thick. you will need the same amount of 1.5 oz of csm.
5 gals of unwaxed poly resin....(this is more than you need but thy sell it cheaper by 5 gals than individual gallons,)
you need a bucket of milled fibers...(the powder kind) and a bucket of 1/4 inch short fiberglass strands.
of course...mekp.
as far as the core....you can repalce it or just leave it out...the glass area you are going to do will be super strong.

lets start from the out side.....get your grinding safety gear on.....grind the area around the hole back till you have got all the de lamination out. the hull will have de laminated bas much as a foot from the actual hole.
when you are grinding.....(24 grit disc on a 4 inch rubber backing pad) grind the area back from the hull....you will see a crack between the layers of fiberglass......this is the de lam....you have to take it out...so grind back till the glass is solid ....this will give you a very large repair area...about twice as large as the hole. after you have ground till you are sure you have got every thing.......grind off the gellcoat till you have a rectangular
area clear to the glass.....at least 8 inches from any repair area...
this is for the final layer of glass.....you dont want to glass over the gellcoat...but glass the glass. :facepalm:

once you have the area ground out, clean with acetone......double check for the de lam by pushing against the hull or by blowing air past the featherd grinding edge (if you have a compressor)

after that is done....go top side and grind out the area around the hole ...grind back as much as 2 feet or as far as you can....grind the gellcoat off the stringer because you are going to glass up the side of the stringer as well...........clean that area with acetone....
this little job will only take an hour......2 at the most.

you are going to need a backing plate to glass over the hole.... i suggest arbourite.....or even wax paper covered cardboard....if you use arbourite....take turtle wax and wax the stuffing out of it...about 3 or 4 times....you want this material to come off the glass after cure....the wax is a release agent.

place the backing plate over the hole.....either from the inside or the out side...it does not matter...but i suggest the out side as the stringer will not get in the way.

now.....lets glass.
take some chopped strand matt....and cut it so it is one inch larger than the hole.....that it...just an inch....mix up some resin at 2% mekp and glass the csm into place and walk away...
let that cure about 2 hours.....
now you have a hard surface to glass to.

if the weight of the csm has caused the backing material to drop...(like a dish) below the exterior of the hull....its a pita...but dont worry about it.
just fill the dish with the peanut butter im going to give you the recipe for at the end of this lay up schedule/instructions....fill it up so its flat on the surface ...(just screed it on with a bondo spreader) let that stuff cure till its hard and most of the heat has gone out of the mix.

cut another 3 pieces of csm patch..each one inch larger than the last and a matching sized 1708. for each csm. (i hope thats not confusing.....3 csm and 3 1708...each layer slightly larger than the last.....dont worry if you start going up the stringer.... (if you are starting to go up the stringer.....cut the 1708 so the weave is legnth wize across the stringer...not up, or it will fray and be a mess.

glass on the 3 layers ...csm....1708...csm...repete with a layer of csm between each knit layer. while that is curing...cut another 3 sets of the stuff just like you did before....this time...2 inches larger...with a matchinf peice of 1708 for each csm.

wait till most of the heat has gone out of the cure of the 3 layers of glass.....and then glass the next 3 layers on....let cure till the heat has gone out of the cure.

cut a 2 large layers of csm with a matching size piece of 1708 .....this large layer should go all the way up the entire stringer and all the way over the area...this is a final layer....make the peices big enough to cover the whole area you have scuffed up with the grinder.....the larger the area .,...the better.

glass that in. and let cure.
remember....this is a hull.....so make sure you use your resin roller on each piece of glass...you dont want any air.....if air is un avoidable.....and you get some.....take your sizzors and cut the glass so the air is out and the glass lays flat again.

ok...im not done yet......gotta run out side...brb
 

oops!

Supreme Mariner
Joined
Oct 18, 2007
Messages
12,932
Re: From broken to beautiful in 180 days...

ok....im back......when you glass in the big layer....csm 1708 and the final csm over the 1708..

let cure and roll waxed gellcoat over the entire area.
the inside is done !

outside.

remove the backing plate.

take a straight edge.....and see if the backing plate dipped below the line of the hull.....you dont want a pregnant bump in the hull.
if it did dip......take a grinder and grind it out....(you will be grinding you new glass...dont worry about it.)

mix up some more peanut butter and screed it on to the edges of the hole...you are doing this to get a flat surface to glass to....let the pb cure till the heat is out of it.

now.....repete the glass cutting process....1 csm and one 1708.....
the out side hole will be larger and a different shape then the inner hole....this is due to the de lam that you will see....cut each layer to totally cover the area you ground out. it will be a weird shape.

ok......depending on how deep you had to grind.....thats how many layers you need to put on....each 1708 and csm is about 1/8 inch thick cured.
repete the glassing process till you are even with the hull or slightly below.

let cure till the heat has gone out of the glass.
if you find the surface to be really uneven with lots of dips. fill that area with pb.....then glass over the pb.

do a final layer of csm-1708-csm over the entire area this final layer should cover the hole by at least 8 inches of good hull contact.... this peice should be large and fill the rectangular area you ground out earlier.


one side note....glassing the bottom is not easy....the glass will want to fall off. its frustrating at best bud.....your going to swear like a sailor !
if a peice of csm falls off.....just throw it away.....you wont be able to save it, due to the fact that the styrene will break down the binders of the csm in about 30 seconds after contact with the resin....the csm will tend to fall apart...so if it falls off.....take that layer off and throw it away....cut another piece.. the 1708 can be saved....just dont let it drop in the dirt. the 1708 will be very heavy when you glass it...so it will want to fall all the time.

for glassing up side down........Yacht Doctor has suggested to wet out each piece of glass on a piece of wax paper....and tape the paper to the hull....then roll the air out....the excess resin will want to make the wax paper stick to the hull
i have not tryed this but the idea sounds good.

the inner hole will take about 4 hours to glass including cure times....depending on how the glass sticks to the hull and the number of layers...the out side will take about the same.

make sure you are wearing your safety goggles....the resin will run down your arms and drip on your face and eyes....its a messy job....
if you can get help glassing....it will be a real bonus to have someone help keep the glass up on the surface of the hull.


after this whole area is cured......take a 8 inch orbital DA sander and sand the area with 80 grit till its flat and smooth. take sepcial attention to the edges of the glass....you want to knock down that ridge.

dont worry if the area is slightly higher than the rest of the hull....the bump wont be that noticeable after you fair the gellcoat.

gellcoating....

even though you are bottom painting.....you still want to match the gellcoat color....
this is a real dark art.....white is not too bad....usually there is some grey in the white...or tan....keep trying till you have it somewhat close...if you get too dark....throw half of it away and add more white.
when you are mixing the pigment....it takes a long time to mix it....you think its mixed...then you will see a strand of pigment in the pail.....mix it till you know its mixed....then mix it for another 2 full minits !

if there are un even areas....or slight dips.....mix up some gellcoat paste.....use the milled fibers...and some gellcoat.....you want this mix a wee but thinner than tooth paste....take a bondo spreader and screed this stuff all over the surface. fill any little holes and make sure you get any pin holes.
let this stuff tack.....but not cure.
from here you can spray gellcoat on using a pressure pot or using a paint brush...just brush it on......if you use a brush....wait till it tacks....and then take a bondo spreader and spread more gellcoat over the brush marks...the lows in the brush marks will magicaly dissappear and you will be back to a flat surface.


because you are bottom painting......you will just want to leave it at that stage and paint over the area with bottom paint.......dont. .....finish it. start with 320 grit and start sanding...then progressively all the way up to 1500 grit.....then polish it.....

now you can bottom paint.
 

oops!

Supreme Mariner
Joined
Oct 18, 2007
Messages
12,932
Re: From broken to beautiful in 180 days...

bottom painting......

bottom paint is nasty stuff.....make sure you have full safety gear including the tyvec or paper coveralls and full resporator/goggles. your gear should be the same as for grinding, including tapped gloves at the wrists.

the key to a great bottom paint....is in the prep !

if the boat has tons of layers of bottom paint on it....and some are flaking off.....you need to sand the bottom. get all the edges of the flaked area till there is no sharp edge from the old layers.
i use a 8 inch orbital sander with a 120 grit paper...sand at low speed...... sand the whole hull includiung the ridge line where the paint line is.

after your sanding job,,,,look over every inch of the hull.....no mistakes...and sand again.

you dont need to take off the old bottom paint....just sand the flaked edges and make sure the old stuff is scuffed.

then tape your lines and paint with a roller. do 2 coats. let the paint partially cure between coats....cure till you can put your hand on the painted area with out any paint on your hand.
 

oops!

Supreme Mariner
Joined
Oct 18, 2007
Messages
12,932
Re: From broken to beautiful in 180 days...

ok.....here is the peanut butter recepie.

what you are trying to do ....is get a 75 percent filler to resin ratio.....this stuff is thick.

pour off some resin....and catylize it at 2 %
you catylize the resin first...because you will never get a good resin to cat mix after the filler is added.

25% resin
50% milled fibers
25% 1/4 inch short strand fiberglass.

add the short strand fibers first.....mix it well till each fiber is wet/ or saturated
now add milled fibers.....the powder kind......this is actually ground up fiberglass...
and mix that till its all wet. there should be no dry powder in it....it will be really thick...your arm will get sore....but keep mixing....

remember....the resin is hot.....so mix fast...you will only have about 5 mins mixing time and 10 mins working time...so mix small batches till you are comfortable with the amount you are working with.


gellcoat paste
milled fibers only (powdered)

you are looking for about a 40% fiber to 60 percent gellcoat ratio.

catylize the gellcoat at 2%
add the milled fibers till you have a thinner than tooth paste consistancy...mix till there is no dry powder in the paste
 

Cap’n Ray

Petty Officer 2nd Class
Joined
Jul 1, 2011
Messages
103
Re: From broken to beautiful in 180 days...

Oops! you are a bonafied guru!! Thanks SO much for taking the time to look at my project and set me on the right path. I will be ordering my first batch of supplies in a week or two now so your advise comes at a perfect time. I have some other small issues to work on in the mean time but will surely need more advise once the glassing starts. I will order the materials you suggested and dive in as soon as my $$$ is available!! Lookin forward to a great experience here. Thanks again Oops! Talk to ya more down the thread!

Thanks for reading, and stay tuned!!
 

JBF 1962

Chief Petty Officer
Joined
Oct 29, 2010
Messages
533
Re: From broken to beautiful in 180 days...

Those were amazing instructions Oops! I've printed them out and put it in my book for future reference. Looking forward to seeing your sucess with your hull repair Mariner. Best of luck, you've got an amazing boat :)
 

Cap’n Ray

Petty Officer 2nd Class
Joined
Jul 1, 2011
Messages
103
Re: From broken to beautiful in 180 days...

Thanks JBF!! I'm cautiously optimistic that she'll BE an amazing boat, right now she's just a really expensive guest house with engines and an interesting pet door lol!


Oops!... One question, actually it's really for everyone to chime in on... If I skip the balsa core and just go solid FG, will that set up a stress line where the slightly more flexible balsa cored areas meet the solid FG repair areas? I'm actually leaning toward leaving the balsa out for the extra strength and reduced rot concern, just wanna be sure I'm not creating a new problem.

Next thought- anyone have suggestions for 110v wiring- I've found some standard romex in the boat and want it gone, just not certain what to use to replace it. I've heard 'SO' wire, and have also been told good quality heavy duty extension cord wire will work??? Gettin some odd recommendations around here, I want to do a good SAFE repair, but would also like to keep the expenses realistic- no problem spending the $$$ if it's mandatory, but would like to save a few if there is an ACCEPTABLE and safe alternative.

And finally- I've found a ton of those damn wire-nuts in the engine 'room', I've begun just replacing whole runs of wire instead of using a different splice method down there. Where I have to go all the way to the helm, I've put in a small junction block for now but I'm considering a water-proof plug of sorts- think car firewall, just have one custom harness for all the dc wiring down there. I will entertain all suggestions for this little issue as always!!

Thanks for reading and stay tuned!!
 

oops!

Supreme Mariner
Joined
Oct 18, 2007
Messages
12,932
Re: From broken to beautiful in 180 days...

couple of things.......first off......i have not worked on any balsa core boats.....(i like on a lake and dont see to many at all) but the nature of the puncture and the layup schedule dictates that the repair will be solid without stress points.......

short story.......i did the exact repair on a 05 3060 regal........it hit a log boom at 43 mph and sank. i conducted the repairs on several places on the hull......when loading for the boat show.......someone jacked the bottom of the boat up amid ships right on my repair.....this was the worst lift spot on the entire boat......i saw how they were lifting the boat and cam out yelling. one big honkin floor jack.....right in the middle of a 10,000 lb boat !!!!!! directly on my repair......no bulkhead...no forward or aft piviot point......

it held perfectly..........now that is a good repair.

on the wiring issue......replace what the manufacturer had. replace with the wires with factory gauge and color.....not black or white for everything.....the wire nuts are a total hack job. these are illegal......you can crimp and shrink wrap the crimps. but the wire nuts are a short in the bilge waiting to happen.
marine bus bars are cheap and will work for several connections......go back to factory as much as you can......and make sure the wires do not move...that they are properly clamped every foot.

another short story.......i did a outboard motor swap for a guy.......had to re run his cables and a lot of the wires.....i took one look at the boat...and knew it was wired by an aircraft mechanic......it was beautiful !......
i replaced the motor and re did all of the wiring.....and made sure it was exacticaly like it was before.
i asked the owner about the wiring....he didnt know who did it originally.... i told him it was done by an aircraft mechanic.......
as fate would have it.....another customer came into the shop for something or other....as we were walking thru the yard....he saw the boat i had just finished.....and yelled...thats my boat !!!!.....well the two owners started to yak........turns out....this guy is the person that built the boat.....i asked him (in front of the other owner)
what he did for a living.......he said "im an aircraft mechanic for alpine helecopters".......
the current owner just looked at me and shook his head.

moral of the story........if the boat is done right.....every wire is properly tied down ....clearly marked for what it is for....each wire has its own place......your motor cage will be a thing of beauty. shorts just wont happen....and you will not break down on the water.......this alone can sell a boat when it comes time.


what are you running ?........a gennie? or air cond? several invertors?
 

Cap’n Ray

Petty Officer 2nd Class
Joined
Jul 1, 2011
Messages
103
Re: From broken to beautiful in 180 days...

Thanks again Oops! Kinda confirms alot of my thoughts. As for the aviation mechanic, you shoulda seen the last jeep I built- whole harness was floss tied, tight and very neat- I grew up with a buncha EAA guys and my dad was building a 'plane in the garage.

The boat has a sea-air ac/heater, hot water heater, and some 'after market' outlets that were added at some point and they're all wired with standard romex. As for the other stuff, I'm matching size and color on all the OEM stuff and trying to make sense of the aftermarke stuff. Thanks again for all the input, your help is deeply appreciated!! I will be posting pix of the before soon, after pix may be a bit :)


Thanks for reading, and stay tuned!!
 

Luhrs28

Chief Petty Officer
Joined
Jul 14, 2010
Messages
423
Re: From broken to beautiful in 180 days...

We use a lot of SO and SJO cable where I work, and in my opinion it's a good choice for 115VAC boat wiring. It's much more flexible than Romex and has a tough rubber outer jacket. You could leave it in a wet bilge for 30 years and it would be fine. You can buy it in 2 conductor, 2 cond + ground, whatever you need.
 

Cadwelder

Lieutenant Commander
Joined
Aug 30, 2010
Messages
1,780
Re: From broken to beautiful in 180 days...

We use a lot of SO and SJO cable where I work, and in my opinion it's a good choice for 115VAC boat wiring. It's much more flexible than Romex and has a tough rubber outer jacket. You could leave it in a wet bilge for 30 years and it would be fine. You can buy it in 2 conductor, 2 cond + ground, whatever you need.

Yep on the SO, if you ever go on a cruise ship, look at what feeds ALL the lighting and most of the other power.
 
Top