How to match a compressor with an HVLP paint gun

sphelps

Supreme Mariner
Joined
Nov 16, 2011
Messages
11,475
Re: HVLP and paint additives

Re: HVLP and paint additives

You can use 2 rollers or just 1 . If just 1 roll about 3 sq ft at a time keep working it until the bubble are gone and it starts to lay down. It will make a sticky sound when about done . Use very light strokes to get it to lay down. And I would thin the primer a little.
 

Jonboat2Bassboat

Petty Officer 3rd Class
Joined
Jul 27, 2012
Messages
89
Re: HVLP and paint additives

Re: HVLP and paint additives

You can use 2 rollers or just 1 . If just 1 roll about 3 sq ft at a time keep working it until the bubble are gone and it starts to lay down. It will make a sticky sound when about done . Use very light strokes to get it to lay down. And I would thin the primer a little.

Thanks. All primed now with two coats. Will sand smooth with 220. Using Aquagard Alumi-Koat, a water based anti-fouling bottom paint. Will thin with 10% water and try the one roller method. If that is not smooth enough will sand again and spray on the bottom paint, unless most people recommend against it.
 

Yacht Dr.

Vice Admiral
Joined
Feb 26, 2005
Messages
5,581
Re: HVLP and paint additives

Re: HVLP and paint additives

Dont spray your BP ..

YD.

PS. dont you love the how to's without any how toos'
 

Jonboat2Bassboat

Petty Officer 3rd Class
Joined
Jul 27, 2012
Messages
89
Re: HVLP and paint additives

Re: HVLP and paint additives

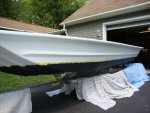
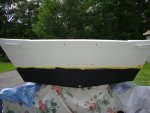
Here is the first coat of bottom paint. Tried to use the roll and roll method but it didn't work for me. The more I rolled the more air bubbles I got. Seemed to me the "sound" was sticky from the get go. Oh well, used the roll and tip method with foam roller and foam brush. Photos are of the first coat. As you can see from the close up it didn't cover to well. Thinned with 10% water but may go back to full strength. Anyone recommend more than 2 coats of bottom paint?

Who knows about ablative bottom paint? Did not think this was ablative paint as it not say so on the can. Then I read on the mfg web site it is. One thing I had read about ablative paint is it "wears out" and has to be applied, maybe yearly. Didn't want to use an ablative bottom paint for that reason but it's what's on there now.

001.jpg002.jpg003.jpg
 

Jonboat2Bassboat

Petty Officer 3rd Class
Joined
Jul 27, 2012
Messages
89
Re: HVLP and paint additives

Re: HVLP and paint additives

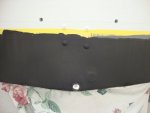
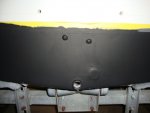
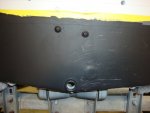
Here is the second coat of bottom paint. The big mistake I made was not sanding the 2nd primer coat to create a very smooth finish before applying the bottom paint. As it turns out the prime coat was not smooth so when you run your hand over the finish bottom coat you break the underlining bumps on the prime coat, exposing the gray primer coat through the black bottom coat. VERY noticeable. In this case, 2 photo's (before rubbing the bottom coat and after) are worth 1000 words.

Will lightly sand the bottom coat in the morning, re-apply a final coat of bottom paint and shoot the color top coat on the above waterline part of the boat.

23.jpg24.jpg
 

Tail_Gunner

Admiral
Joined
Jan 13, 2006
Messages
6,237
Re: HVLP and paint additives

Re: HVLP and paint additives

Dont spray your BP ..

YD.

PS. dont you love the how to's without any how toos'
.......:D


Just trying to keep it simple because it is so simple..However i believe perception come's into play here...You are not painting with a gun and spraying rules do not apply..its vastly different in the fact that spraying rely's heavly on techniqe experience product and tool's for a final fisnih.. Think about a experinced painter has his a whole protocol worked out before he even picks a can of paint...thats not so with rolling and rolling get that out of the thought process. The protocol is as simple as laying down a nice even coat of paint with a roller...No tip size...no air pressure...no lapping..well ok lapping but you can correct your mistake on the fly...;)...Spraying does not give you that option.

Let's use a paint formulated for rolling as a example one that uses a leveling agent..Now that's the big word here... built in... leveling.... the paint does all the... finess.... all the painter does is to give the paint a... fighting chance.... by rolling on the paint with a roller... not to thin not to thick...Just like painting a wall with latex no differnce. Now if you cant do that then avoid it and let someone who can roll out a bathroom wall do it...the paint will take of the rest that is all there is to it.

Most everyone know's about nap roller's if not...http://paintgurus.typepad.com/blog/2011/05/choosing-the-right-roller.html...It should be apparent a foam roller is going to leave the finest finsih with on difference latex does not self level...Leveling paint does..thats the big difference

http://www.homedepot.com/webapp/wcs...talogId=10053&productId=100167382&R=100167382

That product works nicely doesnt fall apart with either single stage or two part urethane's.

Now rolling out the first coat... just like latex make sure your ready to go Roller up and ready paint mixed.. and in a rolling pan.. rags at a arms reach...Good lighting..Just as if you were going to paint a wall roll out the paint not heavy just enough to cover the area..now it will bubble or stipple dont worry about that in a few minutes you will clean that up just make sure you get a even coat that doesnt run and if it runs your laying it on to heavy..just like latex drag the excess to a fresh area and distrubte it evenly...That is all the skill you need remeber the paint does the rest.

Ok here's a rule i use... roll out the first coat for two minutes..that give's the paint time to settle the bubbles and stippling are pretty much gone the sags are apparent and the paint is beginning to tach up just a bit... the rerolling flatten's the the sag's bubbles and irregularities reroll it out as best you can from your orignal start point to finish once done.... dont go back again for some small imperfection...LET IT BE. It takes 3-4 coat's to finish a boat your BUILDING a paint job..

Anyone who paints with a roller will tell you never let it get dry.. it will lift the paint..(rerolling) always keep it wet..that's does not mean driiping wet full of paint just mosit...Very important here that is why one uses just one roller during a roll and reroll project..Using two one will dry out and lift paint...Its very easy to roll out 15' of paint then come back and pick up a dry roller and watch it pull up the paint you laid out for the 3 minute's. Use the same roller you have been using it wet fresh and will not pickup the paint

Sanding between coat's is a big thing as alway's 400 grit is very good and one little detail...after 24 hours sand it do not let it harden dry. That will allow you to use a slight pressure.. use a foam sanding block and be carful the paint should flake off almost like chalk. runs or bubbles takes the real skill to cut out just be patient each time you will get better

Final coat or the money shot....By now you should be well aware how the rollers and paint work...Take your flowing agent and mix it up to 25%..you want the paint to flow like milk and repaint..:D Hopefully youve laid it out evenly....flattened it out uniformly and it dries to a hard shing gloss

OK iv had enough writing was not nor will it ever be something i relish
 

Jonboat2Bassboat

Petty Officer 3rd Class
Joined
Jul 27, 2012
Messages
89
Re: HVLP and paint additives

Re: HVLP and paint additives

Thanks for the detailed input. I can see where self leveling paint will provide the best finish. As you mentioned, latex paint does not self level and that is what I am using, a water based bottom paint. The biggest mistake I made was not sanding each coat before applying a new coat. Since the second coat of bottom paint is already on will sand that down this morning, re-roll using your advice, and paint the color coat on the rest of the boat this afternoon. Will post photos when that is done.

One question, mfg of X-O Rust, an oil based enamel similar to Rust-Oleum, said to wait 24 hours before applying a second coat. Someone here said to only wait until the first coat gets tacky and lay on your second coat. That seems like good advice to me.

Does anyone here think it is better to wait the 24 hours or lay on the second coat when the first becomes tacky?
 

Yacht Dr.

Vice Admiral
Joined
Feb 26, 2005
Messages
5,581
Re: HVLP and paint additives

Re: HVLP and paint additives

Contact the mfg for questions considering prep and application ..

YD.
 

Tail_Gunner

Admiral
Joined
Jan 13, 2006
Messages
6,237
Re: HVLP and paint additives

Re: HVLP and paint additives

Thanks for the detailed input. I can see where self leveling paint will provide the best finish. As you mentioned, latex paint does not self level and that is what I am using, a water based bottom paint. The biggest mistake I made was not sanding each coat before applying a new coat. Since the second coat of bottom paint is already on will sand that down this morning, re-roll using your advice, and paint the color coat on the rest of the boat this afternoon. Will post photos when that is done.

One question, mfg of X-O Rust, an oil based enamel similar to Rust-Oleum, said to wait 24 hours before applying a second coat. Someone here said to only wait until the first coat gets tacky and lay on your second coat. That seems like good advice to me.

Does anyone here think it is better to wait the 24 hours or lay on the second coat when the first becomes tacky?


Sanding times will vary by the mfg....Interlux product's take up to 7 days to fully cure is the word i am going to use. Again with interlux product's after 24 hours they are not fully cured and cutting out imperfections...well it is very easy to sand the paint..it is like chalk..Vs a fully cured paint that is very hard and very thin..in that state it is extremely easy to cut thru a imperfection and your down to bare material..

I build one layer of paint at a time and cut before it cures..your talking about building or laying down two layers then sanding there is one danger here that 's called solvent entrapment google it.

http://rustoleum.com/CBGProduct.asp?pid=4


Applying two or more coats in one day or applying excessively heavy films will lead to insufficient drying of paint.


DRY TIMES @70?F (21?C)
and 50% RH
TOUCH 2-4 hours
HANDLE 4-7 hours
RECOAT After 24 hours

On the surface it seems to dry like interlux..Heres a thought since it is not a two part.. just paint out a 1x1 square let it dry for 24 hours and sand it...the paint should cut very easy...hmm use a test patch on the boat it will not hurt anyting.. sand paper in hand cures anything
 

Jonboat2Bassboat

Petty Officer 3rd Class
Joined
Jul 27, 2012
Messages
89
Re: HVLP and paint additives

Re: HVLP and paint additives

Well sometimes the mfg gets things wrong. They said to wait 24 hours, which maybe I should have done, but they also said to thin with not more than 10% mineral spirits. Had to thin to 25% to get it to spray well. So who knows.

Painted the boat today. First and second coat. Applied first coat and as soon as the boat was painted shot the secons coat as the first coat was "dry". Maybe I should have waited the 24 hours for the second coat but who knows?

Plan right now is to sand what is on the boat with 340 and put on a 3rd and 4th coat, one right after the other, tomorrow.

The bottom coat did the same thing, even after sanding the "final" coat of bottom paint and re-applying the "final" coat. Rub you hands on the paint and the primed coat shows through. Don't know what is going on but it is what it is. Hopefully will get the boat in the water before the end on Sept and see what happens.

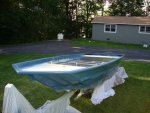
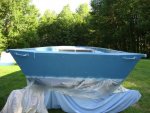
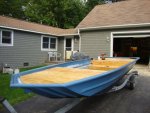
Photos of color paint attached.

25.jpg26.jpg27.jpg
 

Tail_Gunner

Admiral
Joined
Jan 13, 2006
Messages
6,237
Re: How to match a compressor with an HVLP paint gun

Opps thought you were rolling it out..and your spraying. Good luck...

http://www.rustoleumibg.com/images/tds/CBG_TDS Marine Paint 1207.pdf

Stir thoroughly. Thinning not needed for brush or roller. If sprayed, thin up to 15% with acetone. Apply with good quality brush, roller or spray gun.

Ive did a little spraying in my time...Your under pressure and tip size is wrong @ 25% for a base coat.. atomization play's a critical role and not easy to achieve with some paint's. This thread is a bit confusing peace out.
 

Jonboat2Bassboat

Petty Officer 3rd Class
Joined
Jul 27, 2012
Messages
89
Re: How to match a compressor with an HVLP paint gun

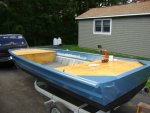
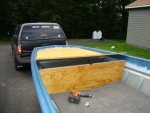
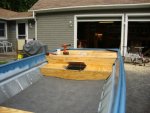
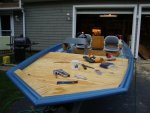
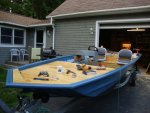
Photos are of some of the plywood decks cut and fitted. The floor is carpeted just to see what it would look like but is not glued down yet. Plan to cut all plywood, fit it, spar urethane the sides, carpet and install. In the mean time will re-wire it.

28.jpg29.jpg30.jpg
 

Bama Hound

Seaman Apprentice
Joined
Jul 30, 2012
Messages
47
Re: How to match a compressor with an HVLP paint gun

I am probably real late in the game here but I worked in a furniture factory and corrected things that were previously done wrong. I also did an air line job at my residence that I have a shop. I had a Sears air compressor, 5hp 20 gal. I have enough air to sandblast with and sandblasting will use way more air than you will ever need for anything else. One thing you don't do is use PVC, or CPVC, you will get somebody maimed, blinded or killed. I used black iron. I did it in 1985 still using same set-up. One way you can use a kind of lame air compressor is to make up in volume what you can't in pressure. I had access to some old like 1930's galvanized water heaters. I tied them all together with 3/4 black iron it totals about 150 gal of air. I would go to salvage yards and get all the old junk air tanks off of old air compressors I could find mount them from floor joist of home, mount them to basement walls or whatever works mount around furnaces or areas what are "dead space", don't have any thing on the floor except air compressor. Run pipe on floor joists. I have an air outlet on two corners of the house. I went through the foundation of the house and have a plug in 3/4' pipe when I get ready to paint house, I take plug out and install quick disconnect. Keep in mind water seeks it's own level when installing tanks. Make a drain to where it is the lowest thing in system. With all the pipe and tanks you have lots of reserve. Make a loop with your pipe. This is important that way your air feeds from both ways and you don't have as much pressure drop. Do this in the winter so you aren't blowing your time on the water. The thing is you are here and now needing air. On your air compressor you are going to have a box on top with your electrical wiring. take the cover off (UNPLUGGED) There will be a set of points in there. There will be a screw with a spring around it. Crank down on the screw it will make your air compressor come on with very little drop in pressure and go to a higher pressure before kicking off. This will allow you to not "get in the hole" before your air comes on. If you have ever messed with water well pumps (above ground), it is the same kind of box you are looking for. I use all kinds of air tools and have sprayed many gallons of lacquer on cabinets and furniture, but have only one boat under my belt. I can tell you this without any reservation. The glossier the finish the more the mistakes show. The darker the color, the more the mistakes show. I hope this is of some help to sombody, because this is a great website and the people on her have helped me a bunch and I want to be able to return the favor
 

Jonboat2Bassboat

Petty Officer 3rd Class
Joined
Jul 27, 2012
Messages
89
Re: How to match a compressor with an HVLP paint gun

Thanks for the input. Someone else mentioned not to use PVC, (never too late for good advice) even though it is rated for 600 PSI. Apparently the constant pressurizing and draining causes the PVC to flex, leading to bursting. Have not priced out copper, black iron, ABS or PEX but will do so. Don't want to use this system in the winter when it is cold. I assume 3/8" ID is what is required, no matter what material is used, correct?

The "on / off" adjuster has been adjusted. Set it so the compressor shuts off at 125 PSI. Think the compressor is rated for more but it is old and didn't want to max it out. Have a 59% duty cycle when painting continuously, pressure at the gun stays at 40 PSI. If painting intermittently (stop painting while compressor recovers) can get a 38% duty cycle.
 

Bama Hound

Seaman Apprentice
Joined
Jul 30, 2012
Messages
47
Re: How to match a compressor with an HVLP paint gun

Thanks for the input. Someone else mentioned not to use PVC, (never too late for good advice) even though it is rated for 600 PSI. Apparently the constant pressurizing and draining causes the PVC to flex, leading to bursting. Have not priced out copper, black iron, ABS or PEX but will do so. Don't want to use this system in the winter when it is cold. I assume 3/8" ID is what is required, no matter what material is used, correct?

The "on / off" adjuster has been adjusted. Set it so the compressor shuts off at 125 PSI. Think the compressor is rated for more but it is old and didn't want to max it out. Have a 59% duty cycle when painting continuously, pressure at the gun stays at 40 PSI. If painting intermittently (stop painting while compressor recovers) can get a 38% duty cycle.

I cranked my on/off all the way. It does 150. That is what the tank is rated for. I think if you had tank failure it wouldn't burst like a balloon it would split.
I can tell you copper is going to be cost restrictive and you are subject to come home one day and the copper thieves will have relieved you of your system.
Black iron comes in 20ft. lengths so it is a trick to get from supplier to your place. I used 3/4' dia. It becomes part of your total of CFM you have in reserve.
I used to keep my system on all the time. It is ready to go for all kinds of things. Having air on hand is kind of like a microwave oven. You wonder how you ever made it this far without. However if yours is where it will freeeze you had better leave 'er off. mine is in basement with3 sides mostly underground so it stays around 50 deg., what with heat duct leakage and heat transfer from floor above. I don't spray much in the winter but I use many pneumatic sanders. A random orbital sander is what you need for your boat projects. They don't leave swirls in projects. They are a huge and I mean huge, time and effort saver.
Air for sandblasting rusty boat trailer is also a time saver. Cleaning stopped up vacuum cleaners, all kinds of things, build it and they will come.
 

Jonboat2Bassboat

Petty Officer 3rd Class
Joined
Jul 27, 2012
Messages
89
Re: How to match a compressor with an HVLP paint gun

So here is today's work. Not a lot to show but measuring, cutting, fitting and re-working every piece of plywood takes time. I am amazed when a panel can be measured, cut and the thing fits the first time.

Photo's show all the panels in place, except the side panels, and the storage with hatches open under the front deck extension and between the seats. The panels under the seats (left and right seat panels) will flip forward for more storage.

31.jpg32.jpg33.jpg34.jpg
 

Jonboat2Bassboat

Petty Officer 3rd Class
Joined
Jul 27, 2012
Messages
89
Re: How to match a compressor with an HVLP paint gun

Well here is the next installment. What a lot of work cutting and fitting each panel, not to mention installing the piano hinges. Took forever, then when you think all is aligned with a neat 1/4" spacing between panels to allow for carpeting, WHAM! Install the hinges and nothing is straight and aligned as it had been. What gives?

Question: Anyone have tips on installing piano hinges so they are aligned and provide enough clearance so the plywood hatches do not bind?

Also, once you get the plywood hatches and hinges set up, how do you locate the hinge screw holes you already drilled after the hinges have been removed for carpeting? Thinking of installing a screw from the back side so the tip sticks out a 1/4". That way the screw tip can be felt through the carpeting. On panels where the hinge was installed on the edge of the panel, thinking of using a double pointed screw (there is a name for these but don't know what they are called), leaving a 1/4" sticking out.

How do you locate previously drilled holes under carpeting? Would it have been better to carpet first and then try to install the hinges?

35.jpg36.jpg37.jpg38.jpg
 

Jonboat2Bassboat

Petty Officer 3rd Class
Joined
Jul 27, 2012
Messages
89
Re: How to match a compressor with an HVLP paint gun

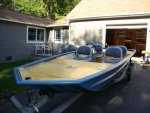
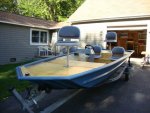
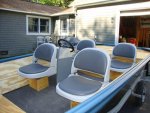
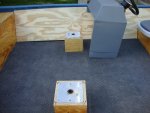
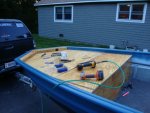
OK, here is the latest work done. Cut and fitted the side panels, mounted the front and rear pedestal seat bases and installed the passenger seat bases. Next step is to remove all panels, spar varnish the cut edges, carpet and re-install.
39.jpg40.jpg41.jpg42.jpg
 

sphelps

Supreme Mariner
Joined
Nov 16, 2011
Messages
11,475
Re: How to match a compressor with an HVLP paint gun
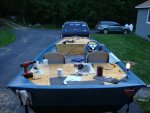
Nice work ! Looks like there are plenty of seating options .LOL!
 
Top