Re: Info Needed - Painting Outboard...
Well, I guess it depends on what you are doing. If you want a good "20 footer" job, break out a couple of cans of engine degreaser, followed by a couple of cans of carb cleaner, followed by a trip to the car wash, and have at it. The job you get will usually be in direct proportion to the time and effort you expend. This is what I do, and it seems to work pretty good. However, this is just the beginning.
Used to work on Mercs a lot. Quicksilver Phantom black is the only black I use. Covers well, dries fast, and no black can match it. Has purple pigments in it that gives it that 3"'s deep shine.
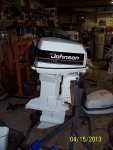
I only work on Johnnyrudes anymore and that is a different story. Evinrude colors are a pain in the Butt. Many different shades, runs if you look at it wrong, and takes several coats to get it right. Johnson is the easiest, especially for the mid '70's to whenever if they are still white. If I redo an Evinrude for myself, it becomes a Johnson real quick. I use Rustoleum epoxy appliance paint in Biscuit.


Paint is easy to apply, very forgiving, and hard as a rock when cured. Coolest thing is that no primer is recommended or needed. I shoot over it with Martin Senour clear acrylic. The biscuit says it is only for indoor use, but I have had it set in the sun and winter for 7 years with no flaking, fading, or peeling.
As far as HOW? The first thing I do is get a block to midsection gasket and new pan seal. I pull the power head and strip off the ignition, carbs, fuel pump, etc. etc. (If you do this right, by the time you are done, you will be very intimate with your motor). I shoot the engine block and flywheel with a good ceramic black engine enamel. Don't worry too much about getting all the old paint off. Just pay attention to flaking and greasy areas. If black isn't your thing, shoot it pink, purple or green; what ever turns you on. Just use engine enamel.
While you are at it, rebuild your carb's and fuel pump. Like I said, the more you do, the more familiar you'll be
when (not if) something screws up on the water.
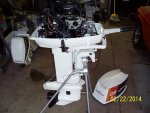
Separate your lower unit from the midsection. Replace your water pump impeller. Again, cheap insurance. Sand out with 280 wet paper, (the black stuff). fill gouges with JB weld and block out. Disassemble mid section completely. Clean, wire brush, whatever, all parts individually. Takes a little while but well worth the effort. Don't worry about cutting through to bare aluminum unless you let it set for a few days prior to painting. If it has to set for more than a few days, resand lightly with 320 wet prior to painting. Where ever you use JB, shoot over it with primer/sealer before applying the epoxy.
Shoot everything, and let it set for AT LEAST 3 days @ 70 degrees. Single part epoxy, (the stuff in spray cans) hardens by curing, not by evaporating of the thinner like spray paints. The paint will feel dry until you put pressure on it. The FBI will always know who the engine belongs to because your finger prints will be imprinted on your parts.
Reassemble your motor. I know that most here say to get a MFG's service manual. If you can, that is good advice. I've tried them all. As for technical data, the MFG manuals are best. However, just for reassembly, the parts breakdown from various retailers are much clearer. What ever you do, if you change a setting on carbs, ignition, or timing, GET A MANUAL. There is nothing that gives you that sinking feeling more than getting your masterpiece back together than seeing that one funny looking screw still sitting on the bench.
Now, this is all predicated on painting engines for fresh water. For painting the aluminum on a boat hull, forget everything after HELLO! Completely different alloy, and a completely different process. Also, if you are going to operate your engine in salt water, or leave it moored for a couple of weeks in your favorite lake, use zinc chromate primer on all bare aluminum. (the greenish yellow stuff) Do not hose it on. ZC is a self etching conversion coating. It's purpose is to convert the aluminum surface into a non corrosive oxide. The primer part of it is for adhesion of the top coat. The ZC part of it is to provide a barrier to oxygen reacting with the base aluminum. A lighter coat is much better than heavy coats. On castings, use just enough to get the streaks out of the part.
Well, that's about it. Again, your efforts will have a direct impact on the finished job. When you're finished, not only will you have a motor you'll be proud of, you'll know a heck of a lot more about your motor than you did before you asked this question.


