It's Alive... It's Alive!!

*EdC*

Senior Chief Petty Officer
Joined
Oct 31, 2007
Messages
661
As some of you guys know, I'm restoring a '68 MFG Edinboro. Well.... being convinced that I must have a vintage motor to go with it..... I decided to re-power her. I had a 50 horse Evinrude on it, And it was ok. But, My intent is to return it to "show room " condition.
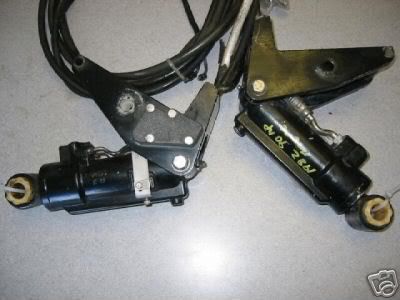
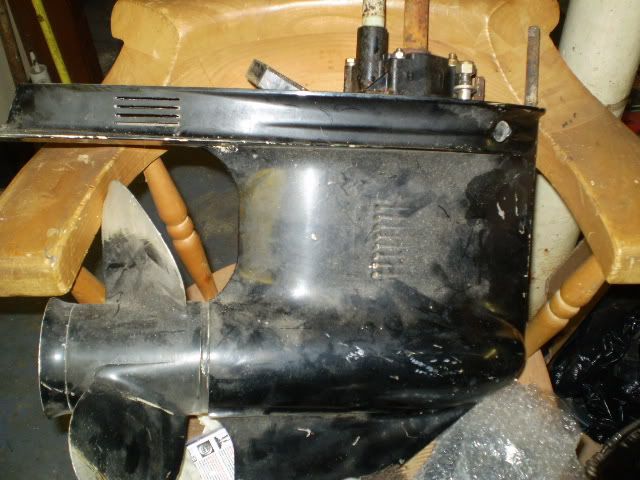
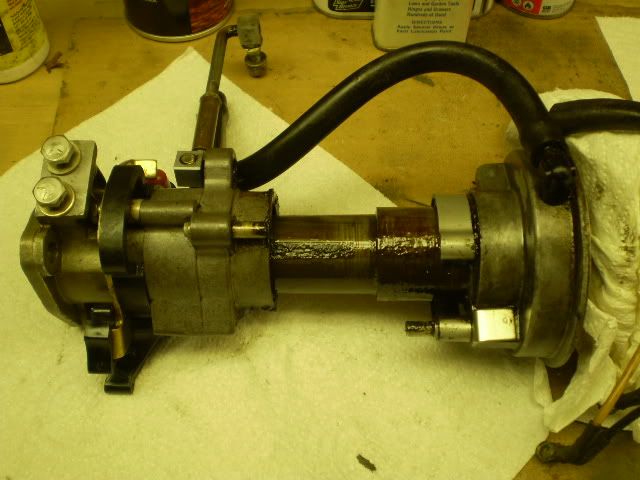
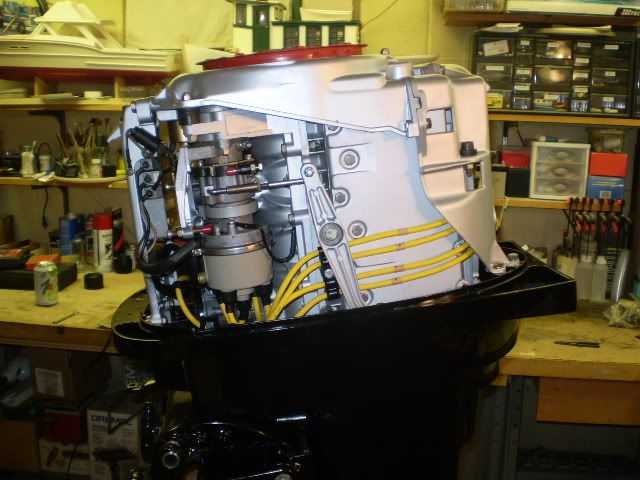
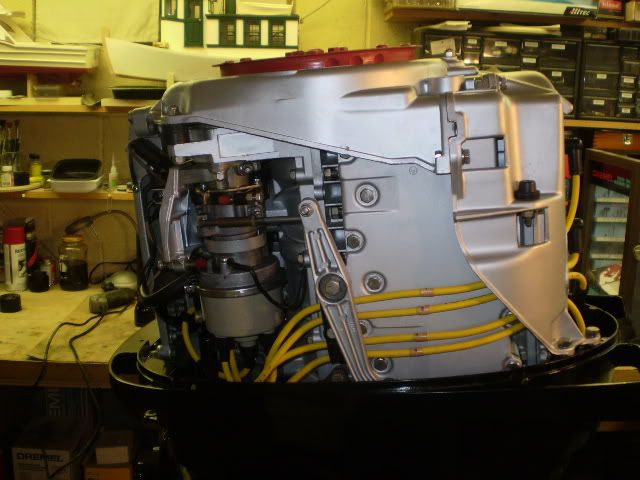
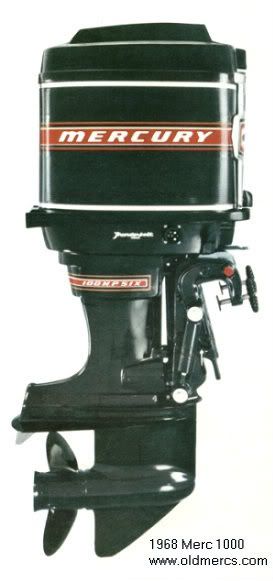
I was able to determine she had a Mercury on it originally. So, off I went, looking for a good running 65 or 80 horse motor. Below is a pic of a similar looking motor.

196820Merc201000-2.jpg


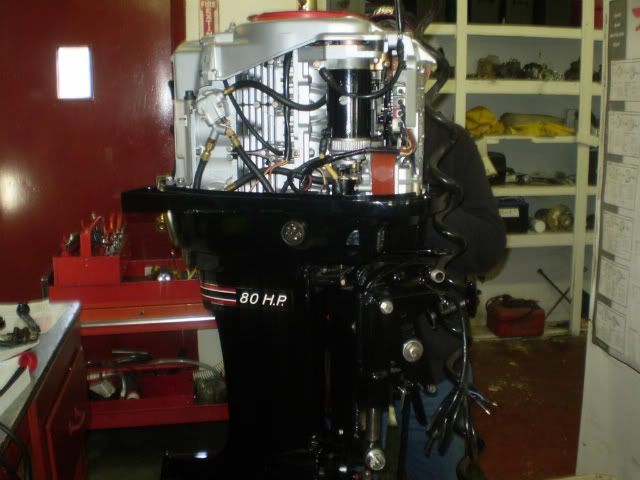
After a long search, I found one that would fit the bill... Well, sometimes you get lucky, and sometimes you don't. This time I didn't. Although it ran ok, I knew it wouldn't stand the test of time. I decided that it needed to be rebuilt.
Now, I gotta say, I NEVER have rebuilt an outboard before. I thought "what the heck" I'll do it! Especially after getting a price of $3800.00 to have it professionally done.
I hope the moderators don't move this... After All It was rebuilt specifically for my MFG. So, I'm gonna post it here.
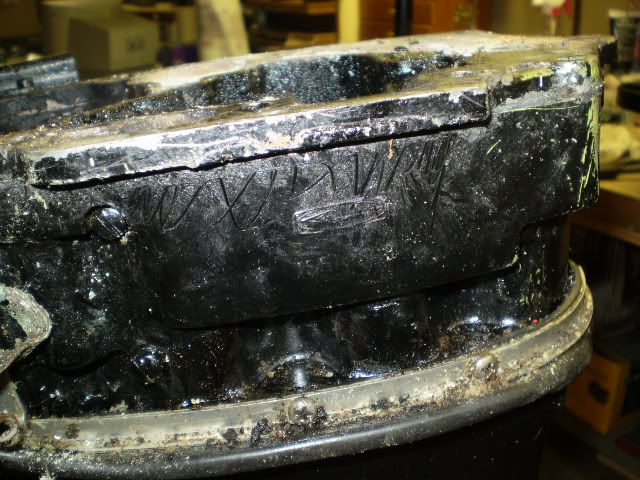
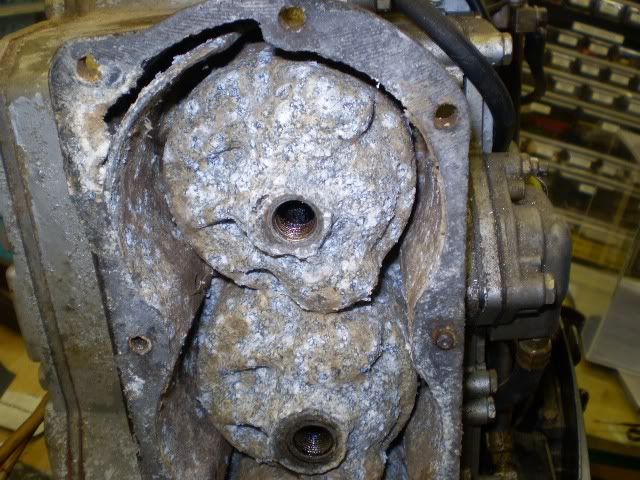
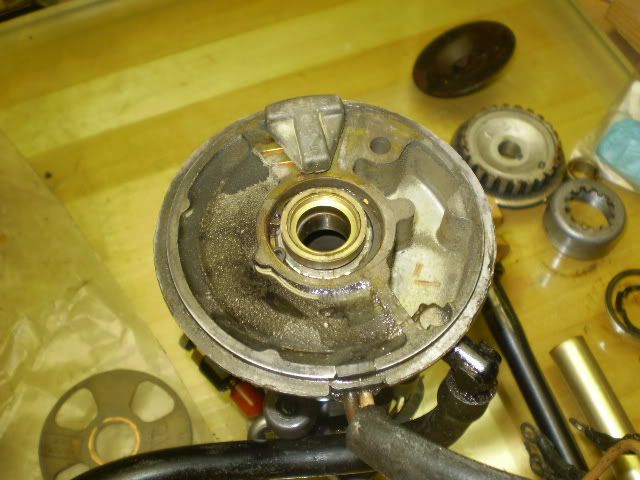
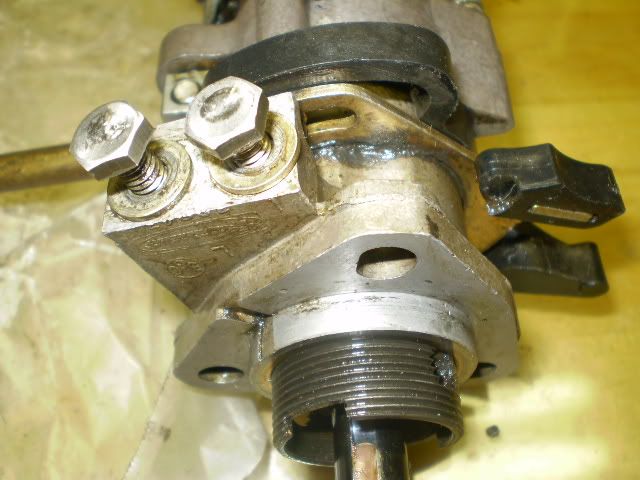
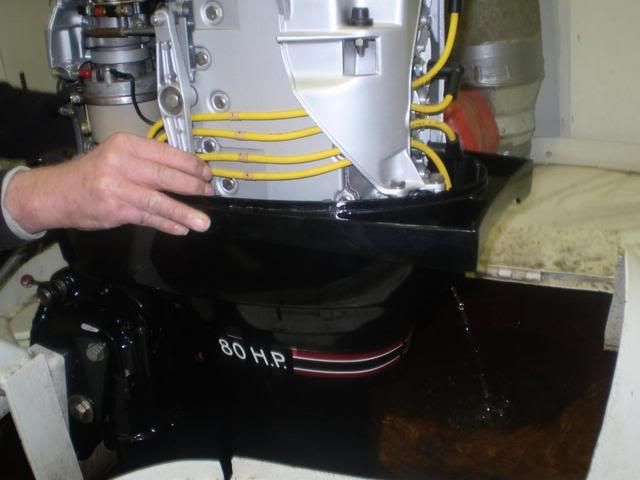
I spent about a month and a half tearing it down, photographing it as I went.
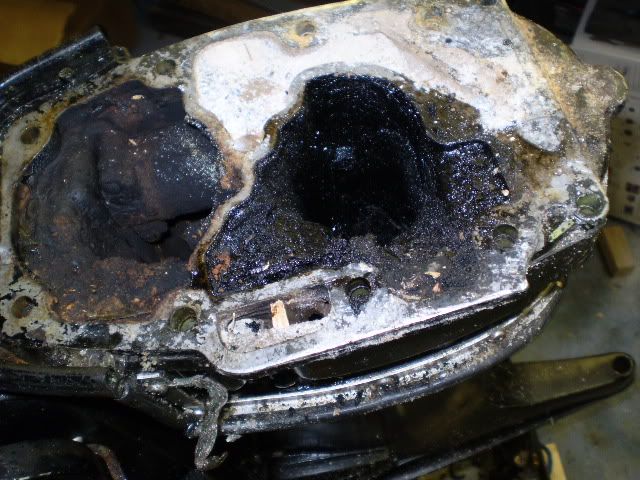
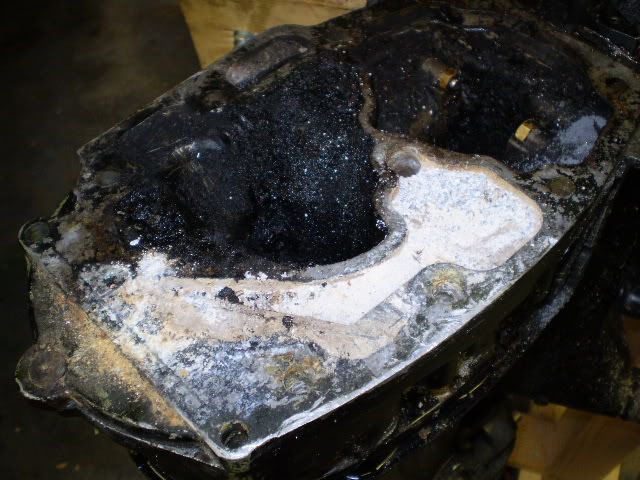
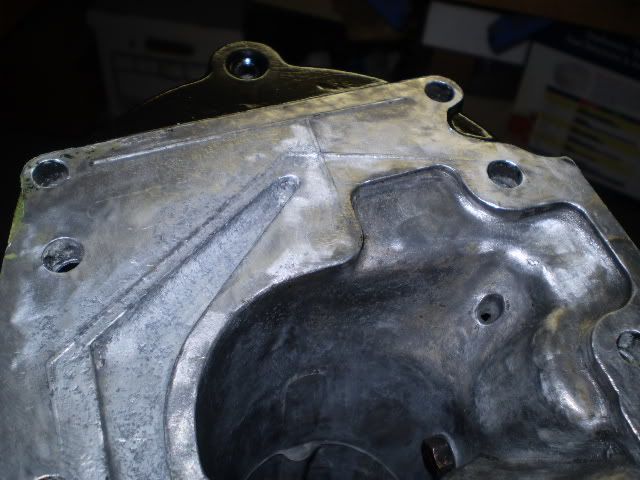
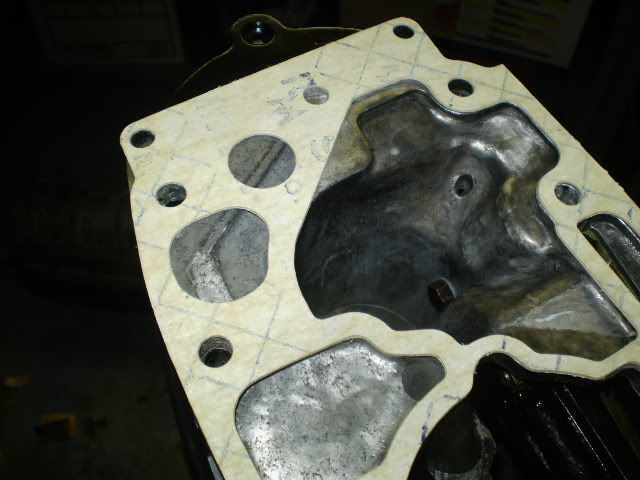
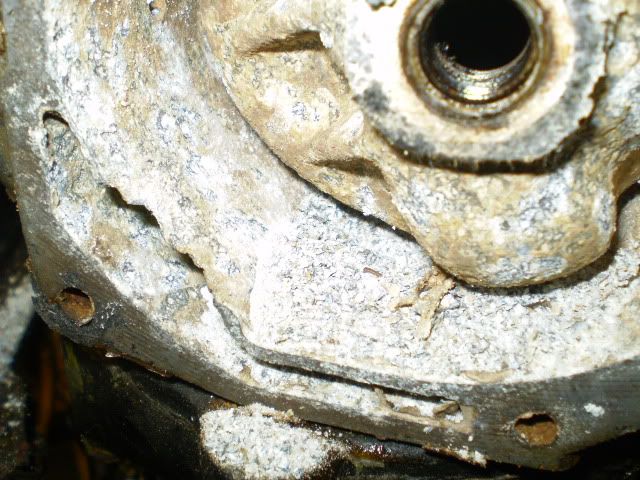
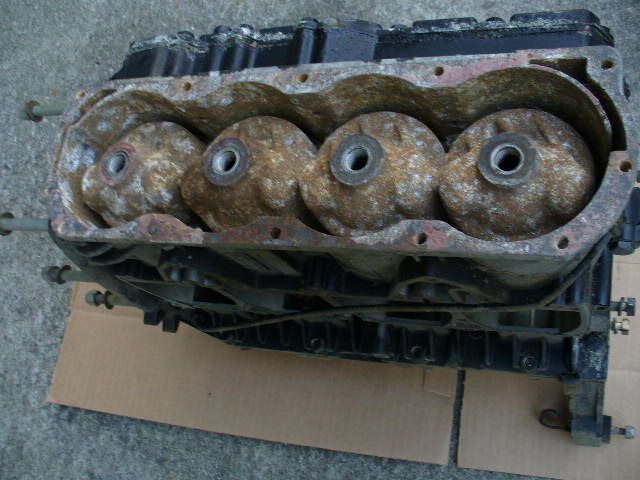
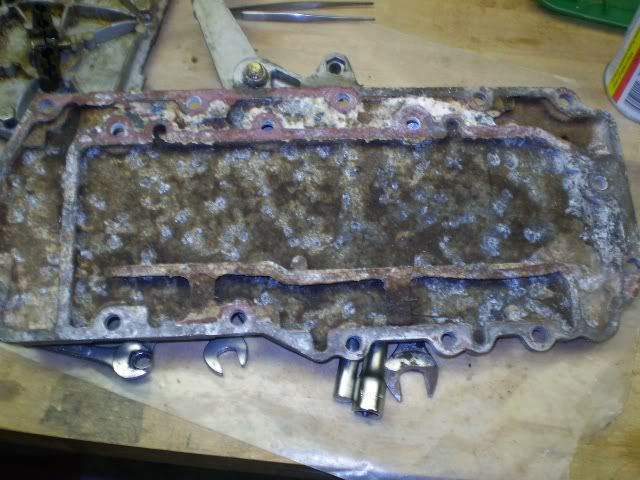
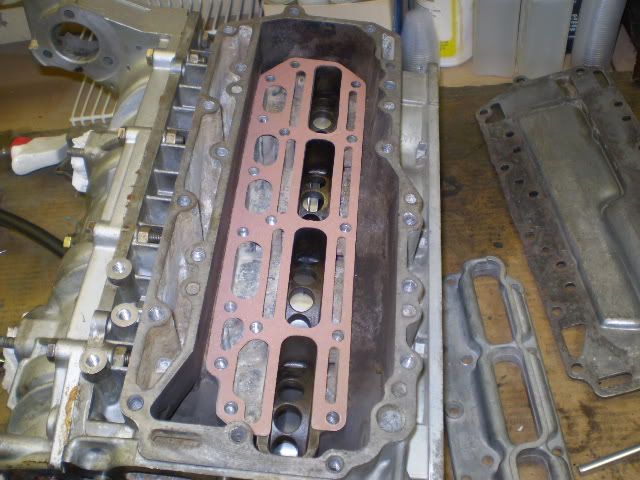
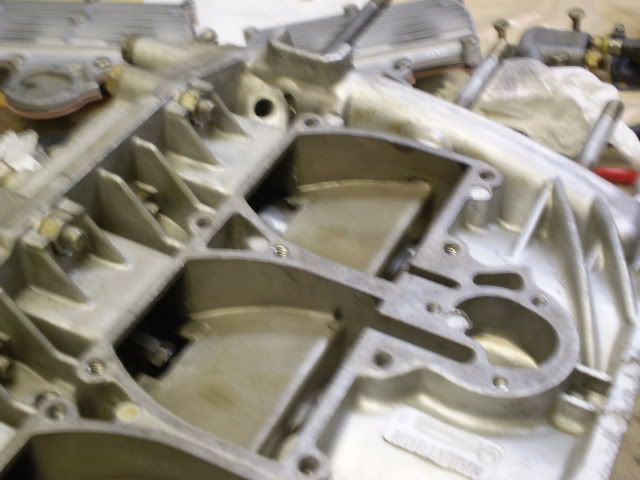
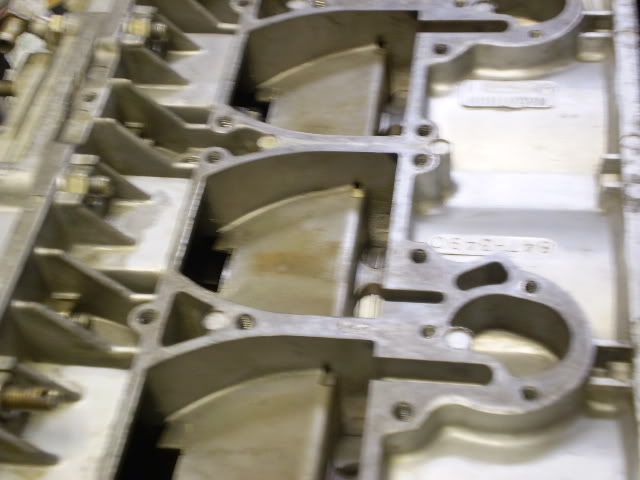
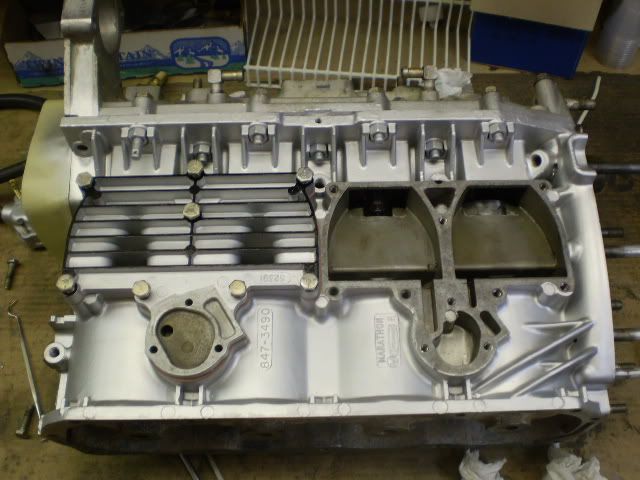
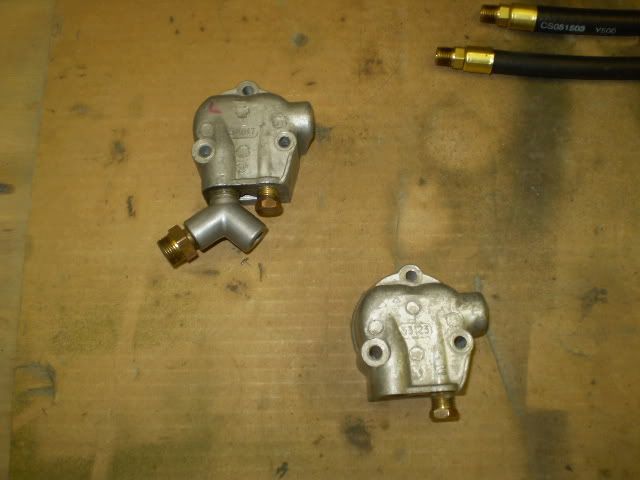
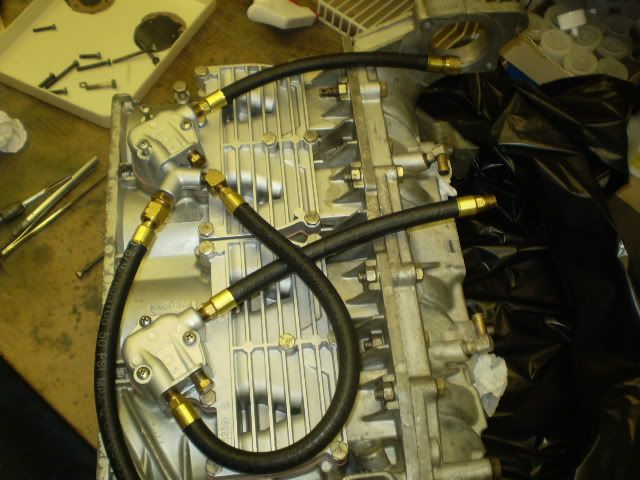
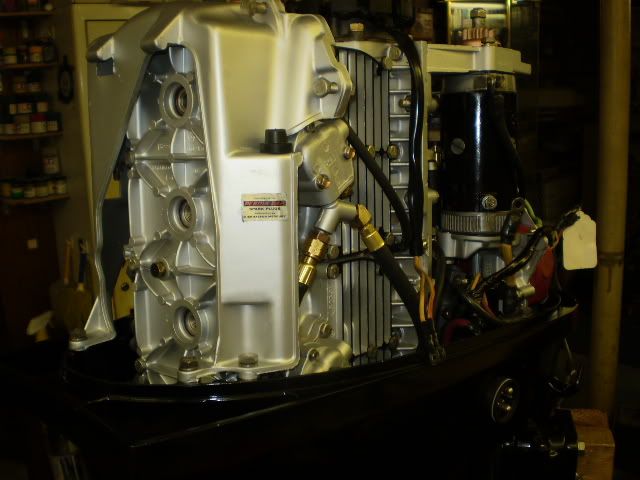
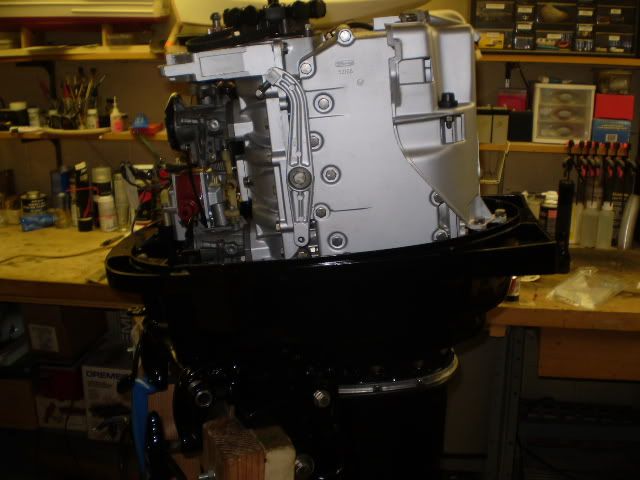
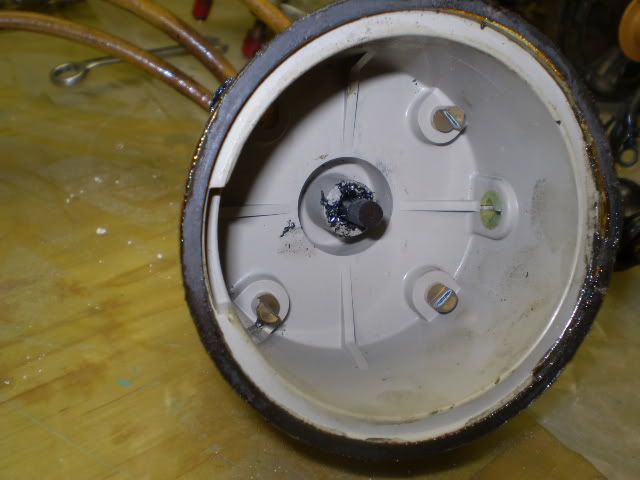
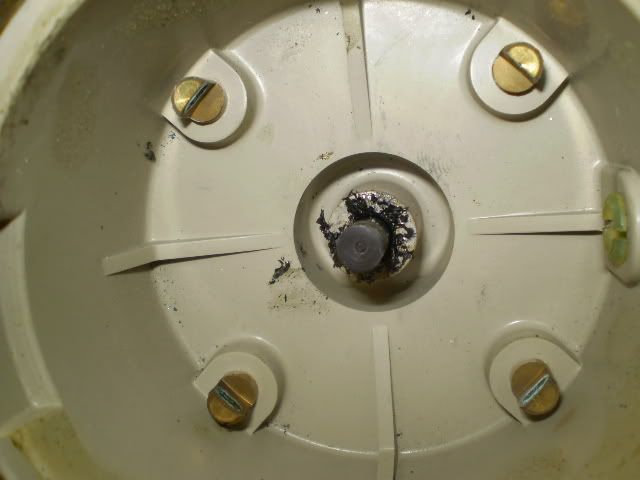
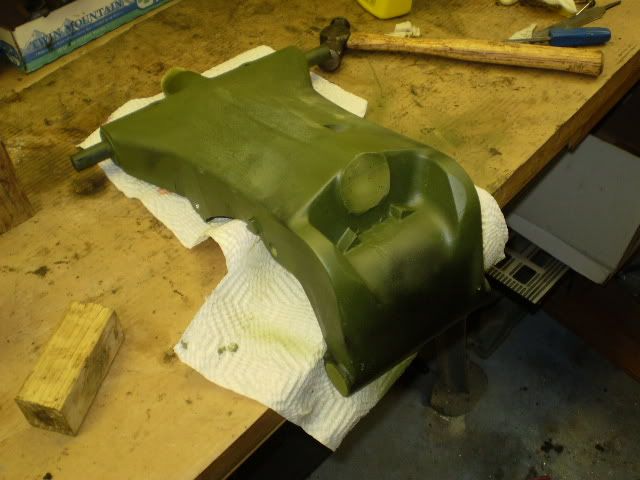
Hours and Hours of degreasing. Except for the starter motor, I can honestly say that I rebuilt, restored, repaired or replaced every nut ,bolt, washer, gasket, seal and screw in it! Not to mention all the larger assemblies. Here is the start of the rebuild.

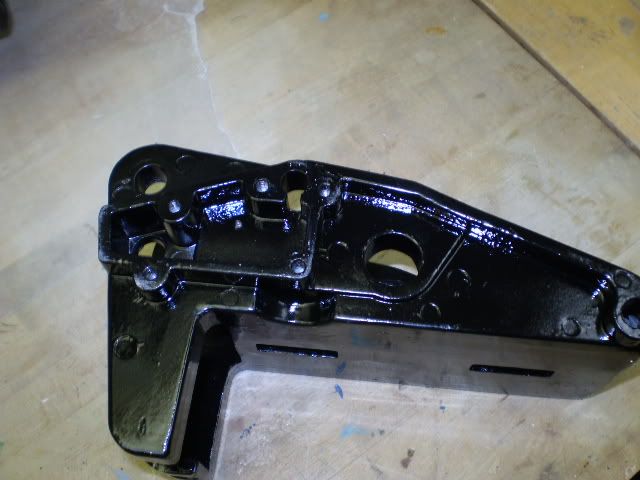
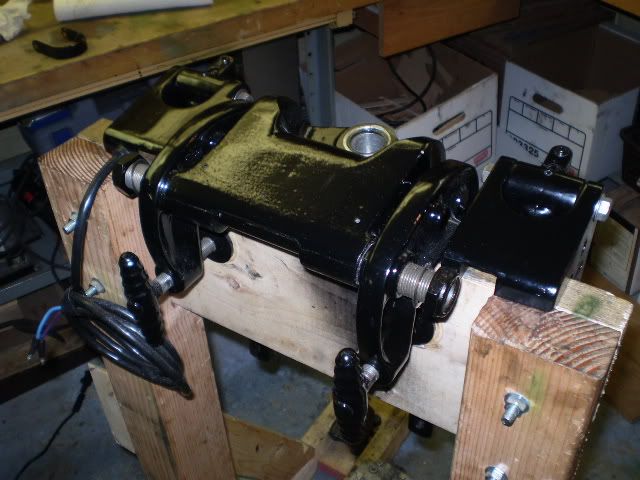
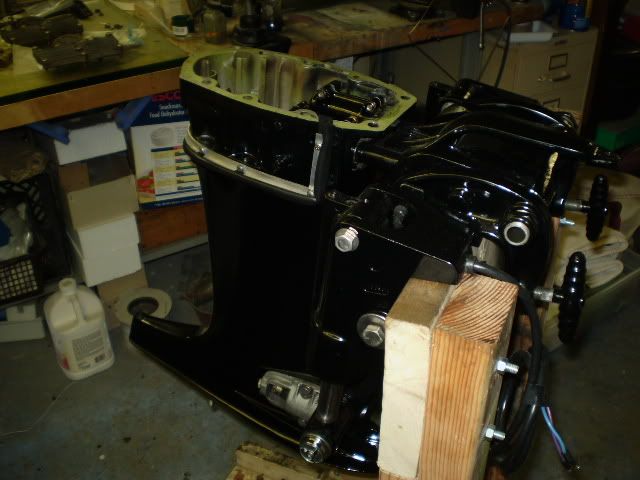
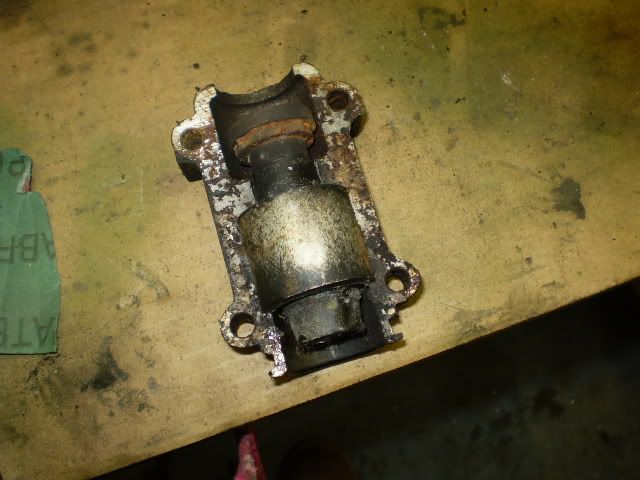
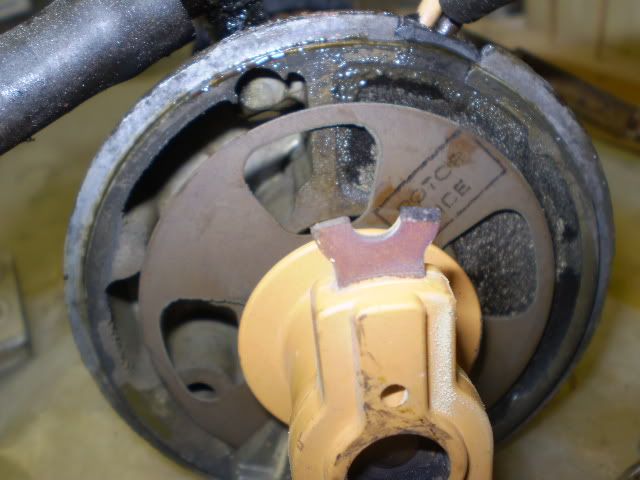
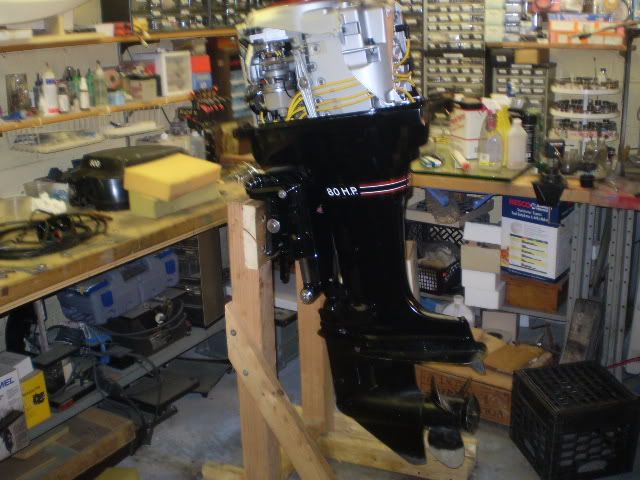
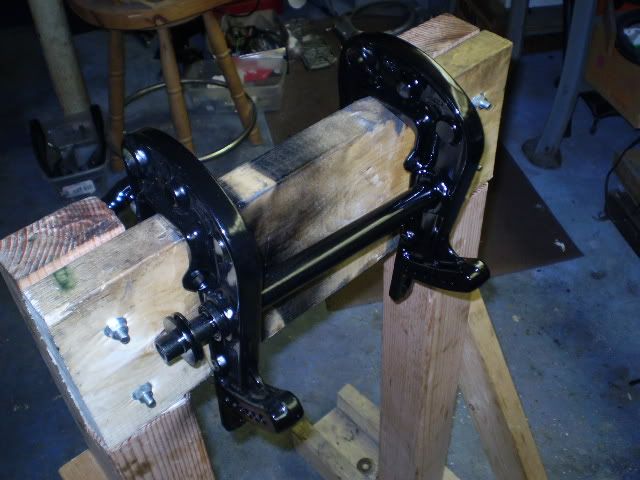
The transom bracket. Sandblasted and zinc chromated.
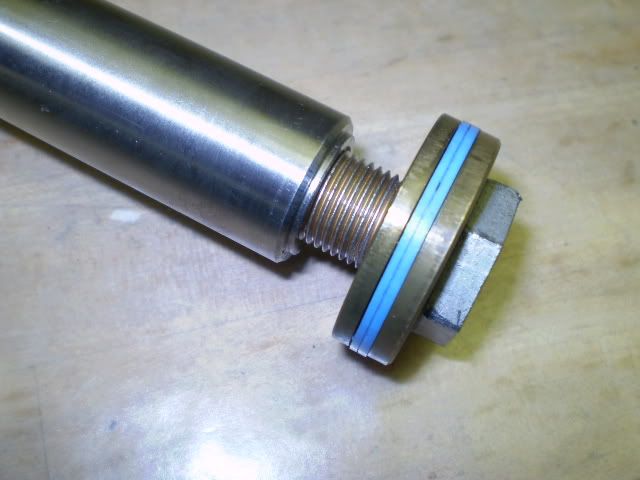
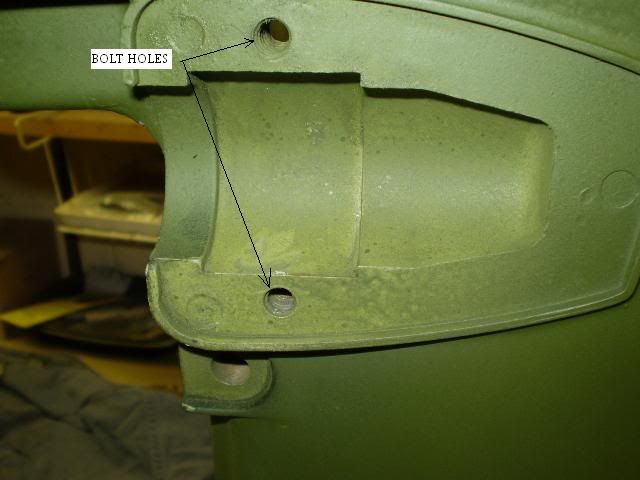
P3300289.jpg


P3300288-2.jpg


All painted up!

P4170331.jpg


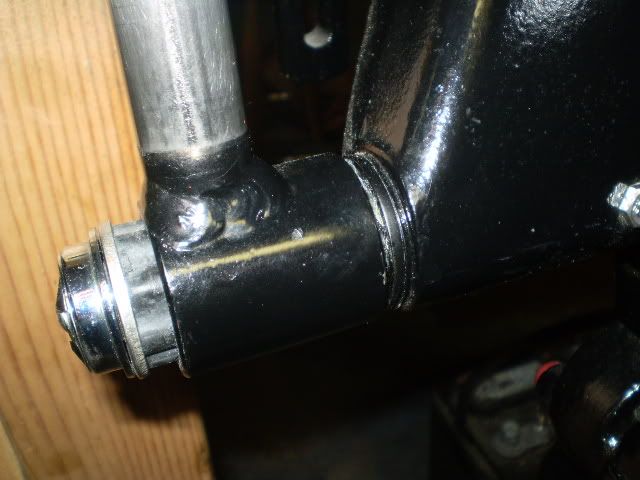
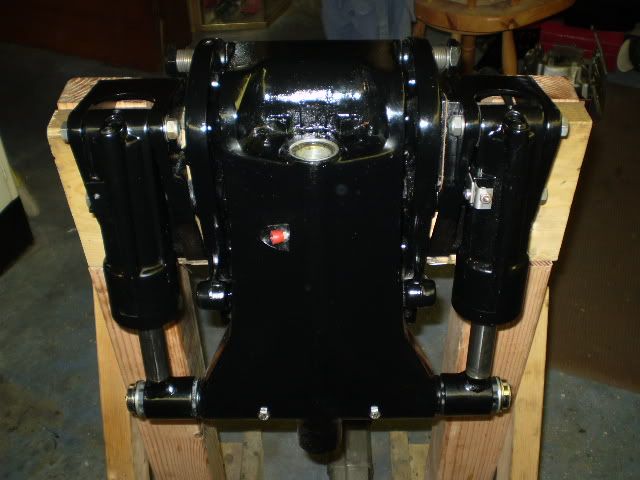
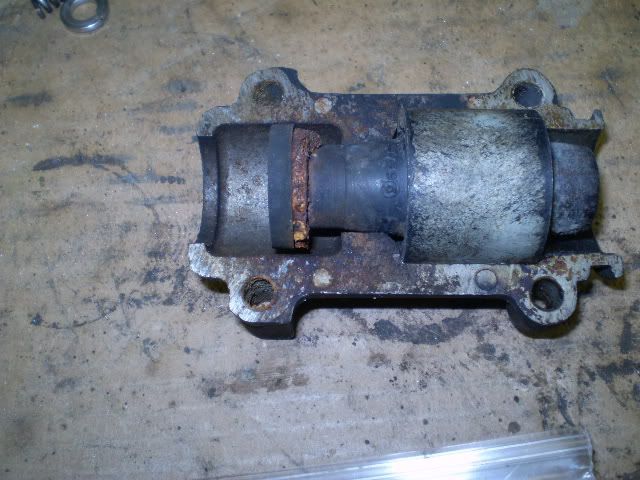
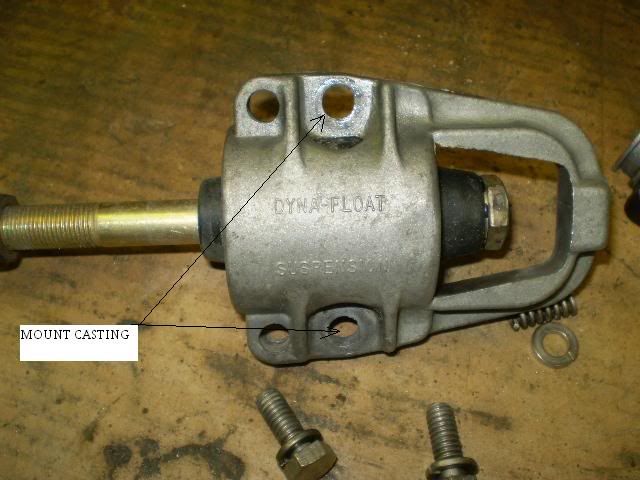
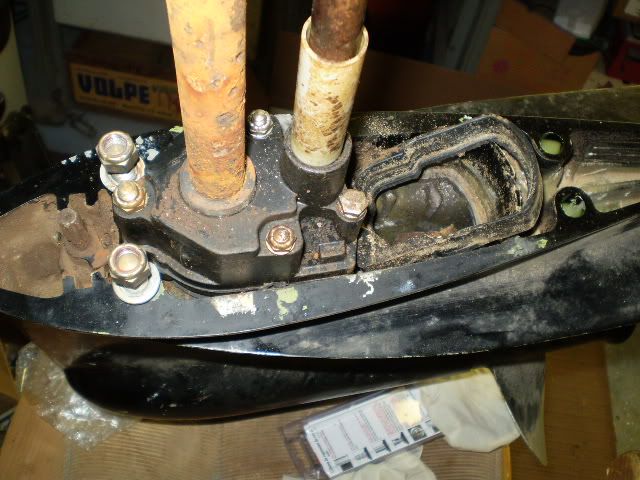
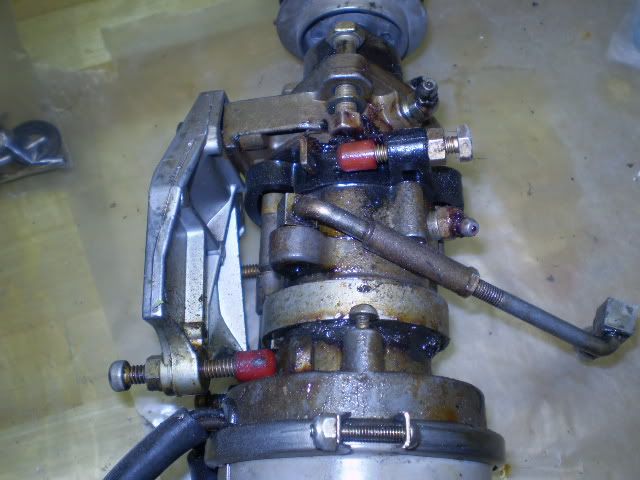
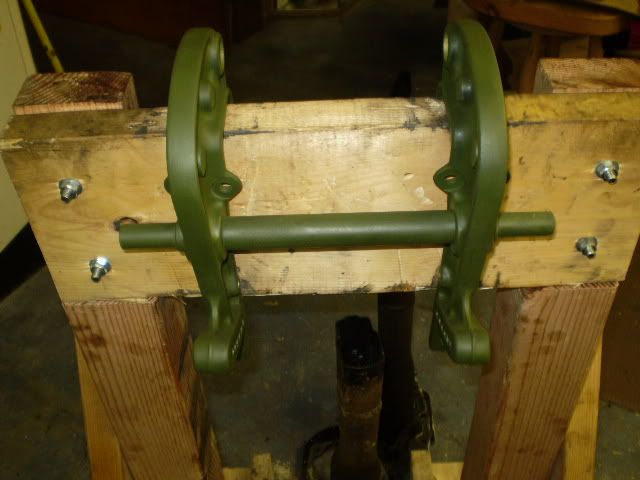
Next, the swivel bracket.

P4170330.jpg


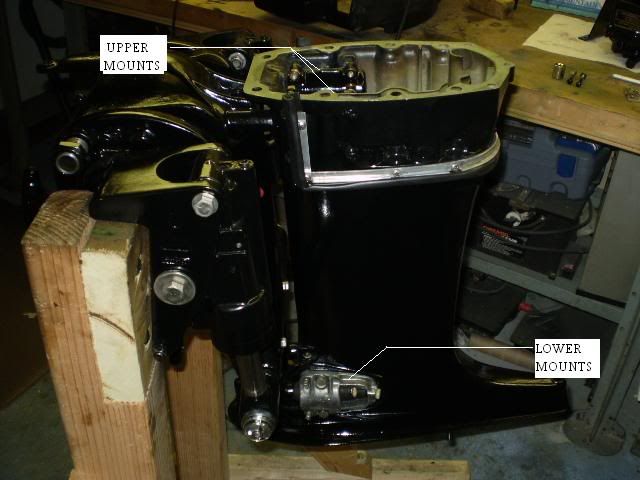
More in the next post
 
Last edited:

*EdC*

Senior Chief Petty Officer
Joined
Oct 31, 2007
Messages
661
Re: It's Alive... It's Alive!! Updated! w/more pics

Re: It's Alive... It's Alive!! Updated! w/more pics

Moving on.....

This motor didn't have Tilt/Trim. So, I decided I had to have one! I found most of what I needed on eBay and the rest at a salvage yard in New Hampshire.
Tore everything down, degreased it all, rebuilt both cylinders and then new paint.

3542_1.jpg


This is a Type I setup. It is distinguised buy having four hoses and the limit switch is on the starboard side


P1160229-1.jpg


Here is the starboard side bracket with the cavity for the limit switch. All new switch components were installed.


P1240230.jpg


New Scrapers on the inner cylinder piston.

PA090482.jpg


New Bushings throught.

P4240332.jpg


P4240333-2.jpg


Making progress......
 
Last edited:

*EdC*

Senior Chief Petty Officer
Joined
Oct 31, 2007
Messages
661
Re: It's Alive... It's Alive!! Updated! w/more pics

Re: It's Alive... It's Alive!! Updated! w/more pics

More.....
The center drive shaft housing was next. This was a real mess. Lots of degreasing!!

P3010262.jpg


P3040265.jpg


I tried alot of degreasers. The cheap stuff at "Wally World" (walmart) worked as well as any of the expensive ones.

P6020381.jpg


Of course, new gaskets throughout.

P6020382.jpg


P5090340.jpg
 
Last edited:

*EdC*

Senior Chief Petty Officer
Joined
Oct 31, 2007
Messages
661
Re: It's Alive... It's Alive!!

Hi Bob,
Glad you like it. It's been a "labor of love" so to speak. :rolleyes:
The wrap around cover and top are on my bench getting a make over. Currently, I am sanding, filling and doing some touch up primer. Rather not spray the black Lacquer paint down there.. The furnace is close by.. If you know what I mean... :eek::eek:
As soon as I can get a warm day or two I'll put the finish on it...outside :D

Regards,
Ed
 

pduquette

Ensign
Joined
Jun 22, 2007
Messages
999
Re: It's Alive... It's Alive!!

Wow ! fabulous Ed !!!
Hey , I've got an old evenrude and johnson and a 9.8 merc ....... naa ,nevermind , I know your busy.:D:D Peter
 

*EdC*

Senior Chief Petty Officer
Joined
Oct 31, 2007
Messages
661
Re: It's Alive... It's Alive!! Updated! w/more pics

Re: It's Alive... It's Alive!! Updated! w/more pics

The Dyna float mounts............
I hope I never have to do these again. They are not difficult to do, just difficult to get out and split apart! The upper ones especially. Lots of cursin" (@#$%&)


P5040334.jpg


P5060337.jpg


All cleaned up! and Zinc Chromated

P5040335.jpg


P5040336.jpg


Ready for installation!


P5090338-2.jpg


The mount assemblies were tuff to find. Especially the upper ones. Expensive too!
 

*EdC*

Senior Chief Petty Officer
Joined
Oct 31, 2007
Messages
661
Re: It's Alive... It's Alive!! Updated! w/more pics

Re: It's Alive... It's Alive!! Updated! w/more pics

The lower unit was in good shape! So, not much work here. I replaced the entire water pump assembly. That included the impeller and pump housing. I also replaced the shift shaft bushing, and some othe odds and ends

P3300284.jpg


P3300286.jpg

Cleaned up the shaft. It was in better condition than I expected. From what I've read, these can get pretty corroded. The LU got a good cleaning, new fluid, drain plugs and seals. Then paint
 

Huron Angler

Admiral
Joined
Apr 7, 2009
Messages
6,025
Re: It's Alive... It's Alive!!

Nice work Ed, I've got the same outboard only mine is a 1970 so I really appreciate you posting these pictures. I need to do the same for mine, but the boat comes first for me.

Mine came with a '79 Starcraft and a CMC trim and tilt bracket but the OB has trim as well I believe it just might have broken.

Look forward to seeing the rest of your work on the old Merc:D
 

*EdC*

Senior Chief Petty Officer
Joined
Oct 31, 2007
Messages
661
Re: It's Alive... It's Alive!! Updated! w/more pics

Re: It's Alive... It's Alive!! Updated! w/more pics

Next up was the power head. First let me say ... getting this apart form the mid section riser was a real task! I soaked the nut and bolts with PB Blaster for a couple of days. That helped alot. Once off, the process of separating the two began. Here's how I did it,
First, I cut the gasket between the two away using a utility knife, and getting in as far as I could.
Next, I made small wooden wedges and tapped them in all around. Slowly it moved up, by working the wedges evenly. I made bigger wedges as needed. Once again, tapping them in evenly all around. Never doing this before, I wasn't quite sure what to expect. Eventually it came up enough to lift it off and on to the bench

P3030264.jpg


Aaaah separation complete!

On to the block. As luck would have it... this block was in poor shape!

P2090236.jpg


Notice the amount of metal around the spark plug holes. The top cylinder has corroded right down to where the plug's compression ring sits... not good compared to the second cylinder


P2150259.jpg


P2150260.jpg


Well, needless to say this block got gutted and stashed under the bench.
I found a replacement online, and started fresh!

P1030310.jpg


Notice the difference around the plug holes. Much better!!
I sent this block out to be cleaned and honed. I was real lucky to be able to work with a guy who knew these engines inside and out. He let me work along side of him when we replaced the pistons and rings. and moved the original crank assembly into the reconditioned block. What an education I got! :D
 

backyard mechanic

Petty Officer 1st Class
Joined
Jan 6, 2009
Messages
203
Re: It's Alive... It's Alive!!

This old 65-80 Hp motor(?) has the look of a log bronc engine. Acidic water pitting, clogged exhaust ports... mud around water pump housing especially around the SS where they silt in because they don't "shift" those motors, they just "barge" ahead turning the engine around if needed. They sit deep in the water and idle a lot. Unburned fuel, carboned up everywhere... Brings back memories! ALWAYS a treat to work on them. :eek: :rolleyes:

Worked on many of those engines in the 1970's that came from Hamilton Lumber in Washougal. They were 50 hp manual starts. :cool:

You've done a lot of work... looks good!
 

*EdC*

Senior Chief Petty Officer
Joined
Oct 31, 2007
Messages
661
Re: It's Alive... It's Alive!! Updated! w/more pics

Re: It's Alive... It's Alive!! Updated! w/more pics

On to the assembly
I started with the water jacket cover. Broke a few bolts here! But, I got it off and cleaned up,

P1080225.jpg


Getting the broken bolts out of the block was a real challenge. Had to re-tap a couple of holes, but everything worked out well. Once again, a new gasket. I also purchased a new exhaust port cover. Mercury upgraded the lower port on these, seems the original design allowed too much water to back up into the exhaust while underway.

P6270390.jpg


Up next, I turned the block over and started in on the transfer ports.

P6220387.jpg


P6220385.jpg

Each of these ports has a small plastic "pellet" called restrictors. They help regulate fuel. Still available, but getting harder to find.

P6290391-1.jpg


Ok... on to the fuel pumps......
Not much to say about these. Rebuild kits a readily available and very easy to do.

P6190383.jpg
 

*EdC*

Senior Chief Petty Officer
Joined
Oct 31, 2007
Messages
661
Re: It's Alive... It's Alive!! Updated! w/more pics

Re: It's Alive... It's Alive!! Updated! w/more pics

With the fuel pumps rebuilt, It's time to add new fuel lines.

P6220384.jpg


Special thanks to Doug Brooks at Vintage Outboards for these new OEM style reproduction fuel lines.

Finally, the powerhead is ready to be bolted back on.


P7100392-1.jpg


Here we go....... went on real nicely. I have also installed the starter, coil, and rear cowl support, along with some wiring. They need to go in before the carbs.


P8220447.jpg


Notice I tagged some of the wiring. I'm glad I did. I don't think I would have remembered were they all went! :rolleyes:
 

woosterken

Lieutenant
Joined
May 18, 2005
Messages
1,431
Re: It's Alive... It's Alive!!

WOW
Ed,thats going to be to purdy to stick in the water, :) just put it in your living room!!

woosterken
 

*EdC*

Senior Chief Petty Officer
Joined
Oct 31, 2007
Messages
661
Re: It's Alive... It's Alive!! Updated! w/more pics

Re: It's Alive... It's Alive!! Updated! w/more pics

With the Starboard side of the motor pretty well set, I turned my attention to the port side.

P8220445.jpg


Before I get into the Distributor, a word about the Carburetors.
I didn't do a lot of pics here, wish I did. Anyway...... With my rebuild kits and my trusty factory manual, I sat down at the bench.
Working on one carb at a time, I started dis-assembly. Laying each part out in a row, following the manual and the instruction sheet that came with the rebuild kits. Once apart I cleaned everything well. Re-assembly was just working backwards, installing new parts as I went. The second carb was much easier. Particular attention should be paid to the Floats. If there is ANY doubt of their condition, replace them! Also make certain to measure the Float arm's travel, It needs to be right on the mark!
If you are like me, and have never done this before, expect to devote a couple of hours of uninterrupted attention to get this job done.

P8220444.jpg


On to the Distributor. I was a bit reluctant to tear this down...... I knew I wanted to replace the cap and wires so that's were I started.

P8220452.jpg


P8220453.jpg

As you can see... the contacts had arc marks on them. Not wanting to risk any problems, I replaced the cap. Unfortunately, The rotor had the same problem!

P8220454.jpg


Up to this point, I used only genuine Mercury parts, But the cost of a new rotor was a real wake up call! Mannnn. A couple of hundred bucks! I bought an aftermarket one for about $125.00

Next up, the distributor tear down.
 

*EdC*

Senior Chief Petty Officer
Joined
Oct 31, 2007
Messages
661
Re: It's Alive... It's Alive!! Updated! w/more pics

Re: It's Alive... It's Alive!! Updated! w/more pics

The distributor tear down begins...... I was really in foreign territory here!

P8220448.jpg


P9040463.jpg


P8280460.jpg

Rotor removed. I also replaced the bearings.

P8280459.jpg


Sorry, I don't have alot of photos of the re-assembly. It was one of those things that I had to stay focused on!
PA100484.jpg


Here it is all installed! Along with the new wires, the flywheel and cowl supports. I had just finished up the timing in ths photo.

More photos.....
 

*EdC*

Senior Chief Petty Officer
Joined
Oct 31, 2007
Messages
661
Re: It's Alive... It's Alive!! Updated! w/more pics

Re: It's Alive... It's Alive!! Updated! w/more pics

Making good progress now......

PA080479.jpg


PA080478.jpg


PA080481.jpg


I spent the next several evenings wiring up the rectifier, solenoid and switch box. I also finished up the linkages, choke and throttle.

ALL DONE! YEEPIEE! :D :D

Next it was off to be Baptized!
 

*EdC*

Senior Chief Petty Officer
Joined
Oct 31, 2007
Messages
661
Re: It's Alive... It's Alive!! Updated! w/more pics

Re: It's Alive... It's Alive!! Updated! w/more pics

Here we are, just off my truck, hanging on the hook!

P3070700-2.jpg


Going up! Into the tank it goes!

P3070701-3.jpg


The tech in the photo grew up working on these motors. I was lucky to have him working on mine. He is a real Downeastern Yankee! Soft spoken, and a man of few words.... When I first brought my motor in, he said to me, with a strong Maine accent, "You do dis son?"... Yep I said. "Good, looks like I ain't gettin' greasy today" (with a slight grin).

Once into the tank we did the hook ups. I used AV fuel with a 16:1 oil mixture for the initial start up.
About this time, I was getting a bit nervous...In my head, I was going over all the work I did and wondering if I missed anything. I must of looked spaced out, because the tech yelled at me... "Get over here boy"... "This is wat we gonna do" .. "I'm gonna crank her over first, get some fuel up ther' " ..... "Then we gonna see just how good you done" Fearing possible detonation, :eek: I moved back! So, he cranked it over for a few seconds, all seemed ok. Then he barked at me again, "Get here and hold the motor, she's gonna want to torque to the side wins I start her"
With the turn of the key, an what seemed like eternity... VVaaarooom...... Yipeee! I was really, really excited. :D


P3070705-2.jpg


Whew!...... In this pic the tech is revving her up! I felt like a new Father!! We ran it for awhile, idled nicely, The tech tweaked the timing and adjusted the carbs a bit.
Shut her down, and loaded it back on my truck. The Tech says to me "you get her on the boat and come see me, I wanna do some on the water adjustments"
As I was about to get into my truck, another comment from the tech! "Ya done good Boy!" I was smiling all the way home! :)
 

*EdC*

Senior Chief Petty Officer
Joined
Oct 31, 2007
Messages
661
Re: It's Alive... It's Alive!!

Nice work Ed, I've got the same outboard only mine is a 1970 so I really appreciate you posting these pictures. I need to do the same for mine, but the boat comes first for me.

Mine came with a '79 Starcraft and a CMC trim and tilt bracket but the OB has trim as well I believe it just might have broken.

Look forward to seeing the rest of your work on the old Merc:D

HA,
Thanks for your kind words.. It has inspired me to update the entire thread!
 

Huron Angler

Admiral
Joined
Apr 7, 2009
Messages
6,025
Re: It's Alive... It's Alive!!

Ed I really appreciate this thread, it's one of the coolest I've seen on here. Glad I could encourage you a bit, that's what these boards are all about:D

I think I may have to print out a copy of the entire thread and laminate it and use it as a guide, thanks for doing all the documentation...and glad to see she runs after all that hard work.

Sounds like you're mechanic is like the shark hunter from Jaws LOL probably a great guy to have look at the Merc too:)

Mike
 
Top