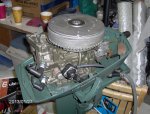
Re: Johnson 6hp 6RL76A Motor Not Starting
Assuming the flywheel nut is torqued properly and the flywheel key is not sheared, and you have compression...... are both the points set properly? (as follows)
(Point Setting Of Magneto Models)
(J. Reeves)
Set the points as follows. Have the flywheel key aligned with the fiber rubbing portion of the ignition points. Adjust the gap so that a .020 gauge will pass thru but a .022 will not. Should there be any question of the points being dirty (touching the contact with your finger would cause them to be dirty), clean them with a small brush and acetone or lacquer thinner.
NOTE 1: Should the operating cam have a small portion on it with the word "SET" imprinted, align this portion with the fiber rubbing portion instead of the flywheel key.
NOTE 2: Should the cam have the word TOP imbossed on the top of it, that is a cam that could be installed upside down and this is simply telling you which side is up. It is not a position where one would set the points.
Check the fuel for water (it happens). The spark plugs should be either J4C or J6C plugs, gapped at .030. The J6C is slightly hotter and may provide improved performance either at idle or full throttle.
Is carburetor set properly? (As follows)
(Carburetor Adjustment - Single S/S Adjustable Needle Valve)
(J. Reeves)
Initial setting is: Slow speed = seat gently, then open 1-1/2 turns.
Start engine and set the rpms to where it just stays running. In segments of 1/8 turns, start to turn the S/S needle valve in. Wait a few seconds for the engine to respond. As you turn the valve in, the rpms will increase. Lower the rpms again to where the engine will just stay running.
Eventually you'll hit the point where the engine wants to die out or it will spit back (sounds like a mild backfire). At that point, back out the valve 1/4 turn. Within that 1/4 turn, you'll find the smoothest slow speed setting.
When you have finished the above adjustment, you will have no reason to move them again unless the carburetor fouls/gums up from sitting, in which case you would be required to remove, clean, and rebuild the carburetor anyway.
Not a good idea to be applying sealer on "all" of the gaskets as small passageways may be blocked by that substance.
(Gasket Sealers)
(Usually available at any reliable automotive parts type store)
(J. Reeves)
Do Not use any type of sealer on outboard carburetor or intake manifold gaskets as this would cause blockage of various fuel/air passageways. Also, there are new type gaskets, including head gaskets, which are used through out the engines that are coated with a substance that gives a shinny appearance to them. These gaskets are coated with a self sealer and are to be installed as is.... no sealers! Older style head and fuel related gaskets that are not coated with this substance are to be simply coated with oil.... nothing else.
All other gaskets (hopefully I've not overlooked anything above) should be coated with Gasket Sealer (the type that comes in a can that has a small brush in its screw off cap). This also pertains to some water pump installations that use a gasket between the plate and the lower unit housing.
Marprox Sealer 1000 or OMC Adhesive or Boat Armor Sealer 1000 (same substance)[See Below Note] should be used on any metal to metal (Unless GelSeal Is Called For) or metal to plastic surface (such as impeller hsg to plate, and plate to lower unit surface) to eliminate air leaks. It should also be used on the Spaghetti tubing that is used on many powerhead crankcase halves, lower unit skegs, etc. I have found that this substance works quite well on various "O" Rings such as what are found on lower unit carrier and upper driveshaft bearing housings (Note that this substance is obviously not to be used on all "O" Rings). This substance also works quite well in sealing the surfaces between the lower unit and the exhaust housing to which it attaches, eliminating the unsightly water spray between the two after completing a water pump installation.
NOTE 1: I am under the impression that Marprox Sealer 1000 and Boat Armor Sealer 1000 is no longer available.
NOTE 2: OMC Adhesive is now Bombardier 3M Product #847 .
DO NOT use any sealer on the large "O" Rings that are used on the upper and lower crankcase heads (The housing/heads that slide over the top and bottom of the crankshaft). On those "O" Rings, use only a coating of grease.
The exception of surface to surface contacts pertains to the later model matching crankcase (block) halves (which does not incorporate spaghetti tubing) which call for "Gel-Seal", or any other surface that calls for Gel-Seal. This substance seals in the absense of air, and if called for, must be used. One other form of Gel Seal that can be substituted is "Loctite #518". Nothing else that I know of will do!
I advise against using silicone or permatex on a outboard engine. It simply will not function properly. The exception to this (as per OMC's recommendation), is to use the black Permatex (heavily) on the gasket 306242 which seperates the inner exhaust tube from the exhaust housing on the 1959 35hp and 1960 to 1970 40hp OMC outboards.


