Hi Guys,
It's finally time for my big thank you thread. In this thread I'll go over the complete history of the engine, and what we did to it, and what we still have to do. I'll also be adding pics and movies of it later on, I'll explain the details later in the thread.
First off - Thank yous
I want to thank everyone on this board that helped with this old engine. This forum is active that you always get an answer in a couple of hours. It's the only human interface we used to get the motor to where it is today. I have collected a couple of documents along the way that I put together via links supplied by you guys. A couple of people I do want to single out:
Clams Canino
Laddies
Chris1956
MotorBoaterBill
AMDRules
You guys had the most input, and I thank you for that.
History
My name's Leon, live in South Africa. I used to fly Ultra-Light aircraft and had my instructor's rating. I didn't own the UL, just like the boat they're actually my old man's. I just use them most often and do the hand work on them. My old man is a mechanical design engineer with over 40 years' experience. I followed in his foot steps and have just over 10 years experience myself. The ultra light was swopped for the boat just over a year ago (Late 05). With just me + 1 passanger having fun on the ultra light at a time while everyone else was sitting on the ground watching us and waiting their turn for a flip just didn't make sense anymore. The old man did have a boat years ago, like 25 years ago. A big cabin cruiser that he built himself with 2 old red band (1960s) Mercs on.
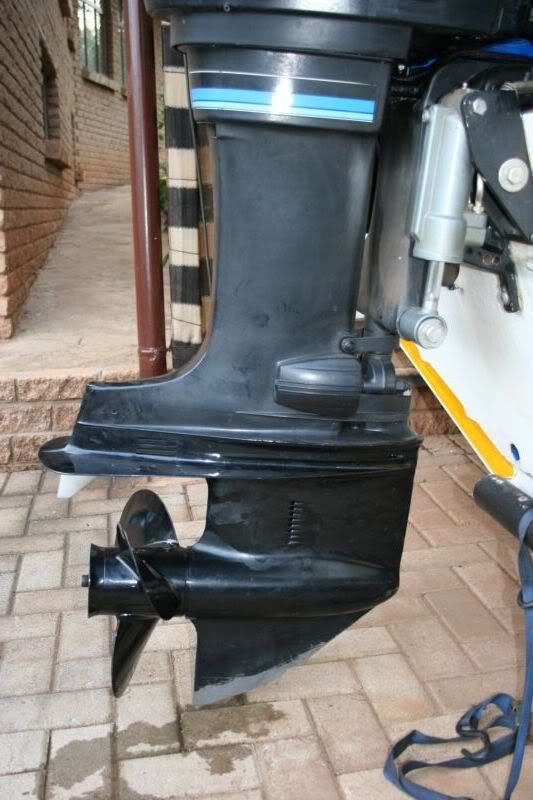
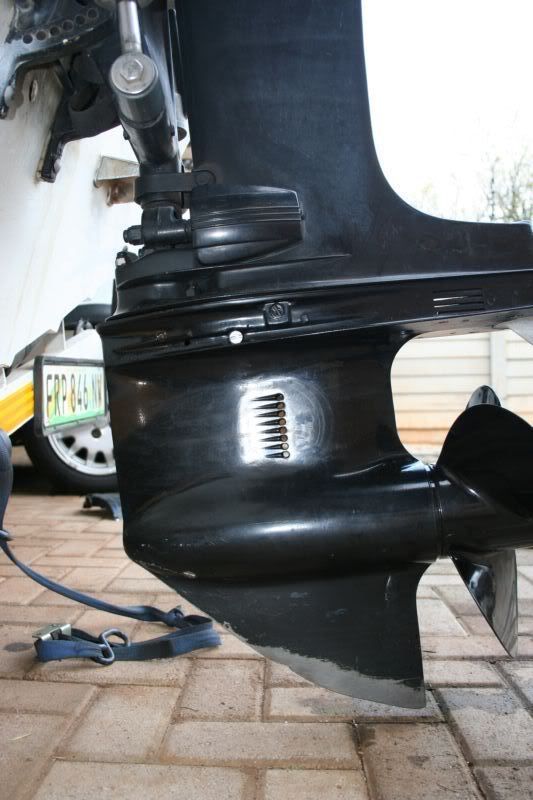
So we got the boat. The engine did start, and the guy said he used the boat often enough and that it was mechanically sound. The first thing that caught my eye was the prop. It seemed very small and showed evidence of either extreme wear or the prop blades being ground to almost nothing. We assumed that he probably had a prop strike, and chipped a chunk out of one of the blades, and hence all the blades were ground with an angle grinder to atleast look the same. So the first thing we knew we needed was a new prop. All this happened in a very short space of time. Since I collected the boat and we went away on holiday was only a day, maybe 2. So while we were discussing the whole prop issue we were actually on holiday. Eventaully we agreed that the only way would be to replace the prop. So we phoned my "lil" (21 years old) brother and gave him all the dope to go and buy the prop so long so it'll be there when we get back. We know that the prop has a 17" pitch and we just wanted a replacement. That he got for us.
So back home we fit the prop and took the boat out to the dam, and that's where the fun started. It took us the better part of 4 months(Or was it 1 year and 4 months already?) to get the motor sorted, and last week we replaced the final part. The prop. Yes, the 17P was over propped, and the boat actually needs a 15P.
Now lets get to the stuff we did to the engine. I hope this will help others out there to give an indication of what to look for.
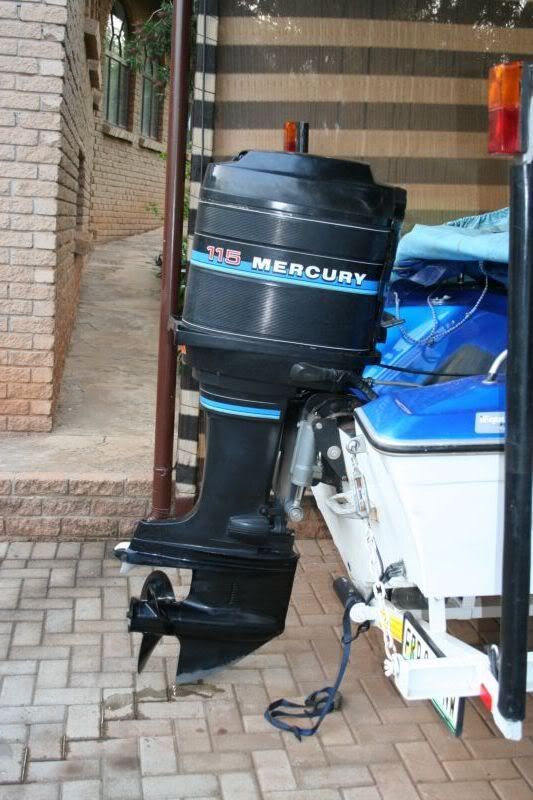
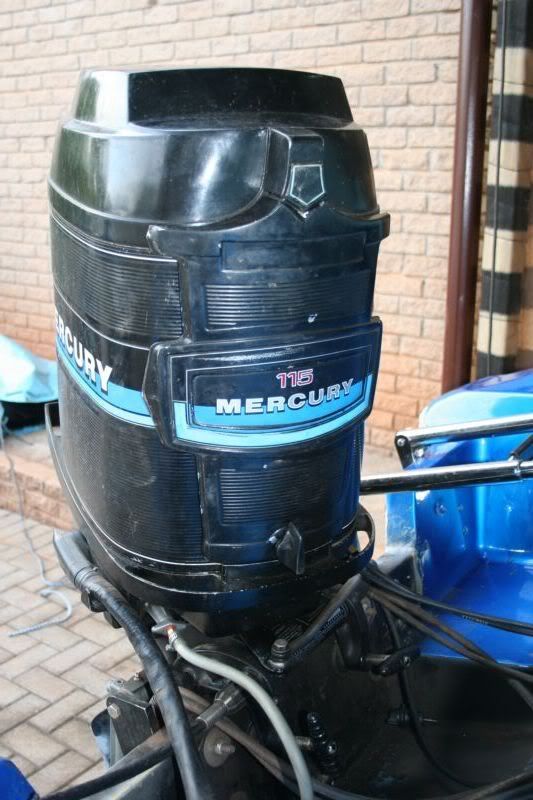
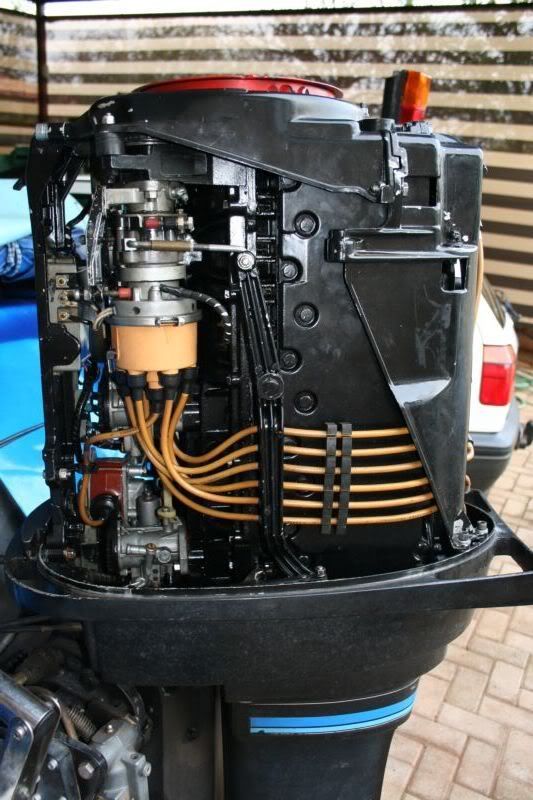
First off, the serial number. Our serial number falls in a range that indicates both a 1970 1150 and a 1970 1350. All the cowlings and covers are from a 198x Merc though (Blue bands with red 115 on). They theory now goes that it's probably 3 assemblies put together, if we're lucky only 2. Engine 1970, LU and Engine brace with timing marks 196x, Cowls 198x.
Second, starting the bloody thing. Being ever vigilant to not flood the engine we went through regimens of pumping the primer bulb only 3 times, then attempting a start with choke, then without choke. then 3 more pumps and so on. Then removing a spark plug to check that it hasn't flooded etc etc. You can imagine what it went like.
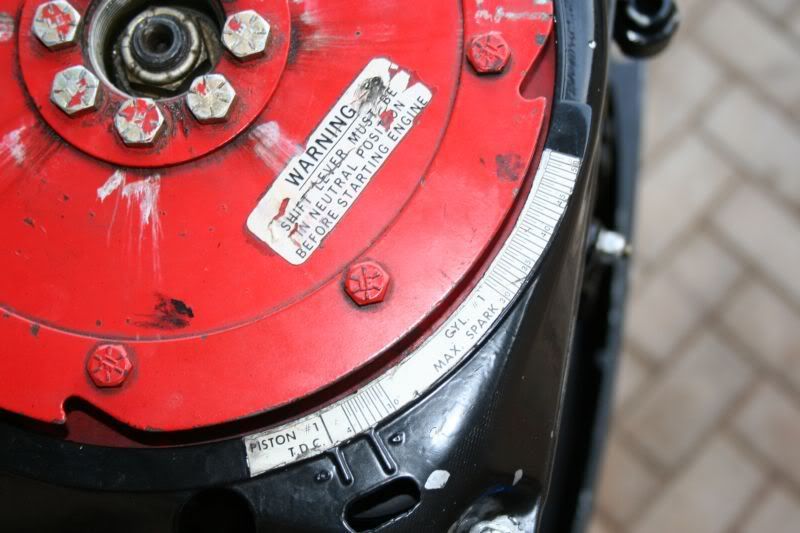
Third - We had the additional handicap of an incorrect engine brace that had the completely wrong timing marks on. We had to extrapolate our own timing marks.
Fourth - No manual, not even a Seloc.
So we failed miserlably on our first outing and realised that with the old prop everything probably felt fine, but we definitaly had to take a look at every little detail abd tune the engine from scratch. That we did, every week end we'd find something wrong, take the boat out and come back knowing that we eliminated one more problem. I'll remind you that all this took place over a period of over a year (Season and weather permitting. Probably around 20 outings).
Things we found wrong with the engine:
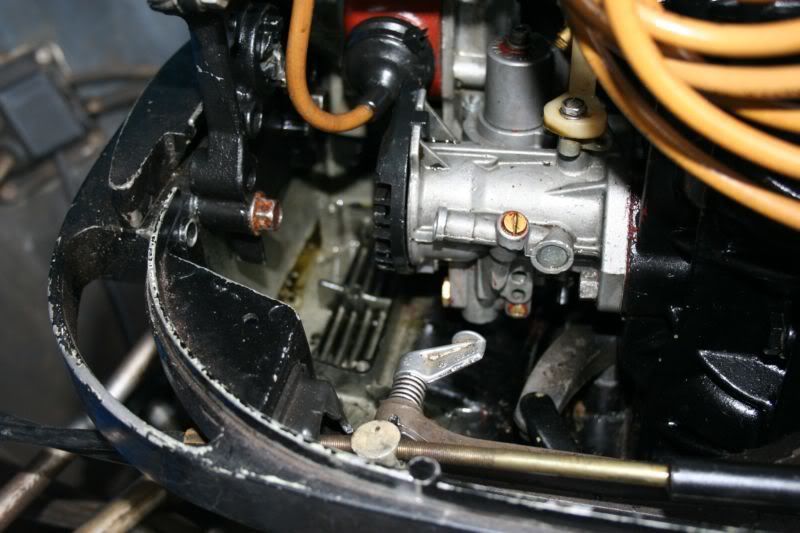
Carbs not synced.
Primer bulb shot
Float levels all over the place, some high, some low.
Jetting suspicious
Electrics a mess
Blown rectifier
Paint under the stator causing it not to earth properly
Leaky float
2 different float styles in the 3 carbs
Idling mixture settings all over the place
Link + Sync done totally wrong. Timing pickups way off.
Low oil in trim unit
Dirt in float bowls
Blocked fuel strainers
Incorrect connection of manual choke lever
Metric bolts
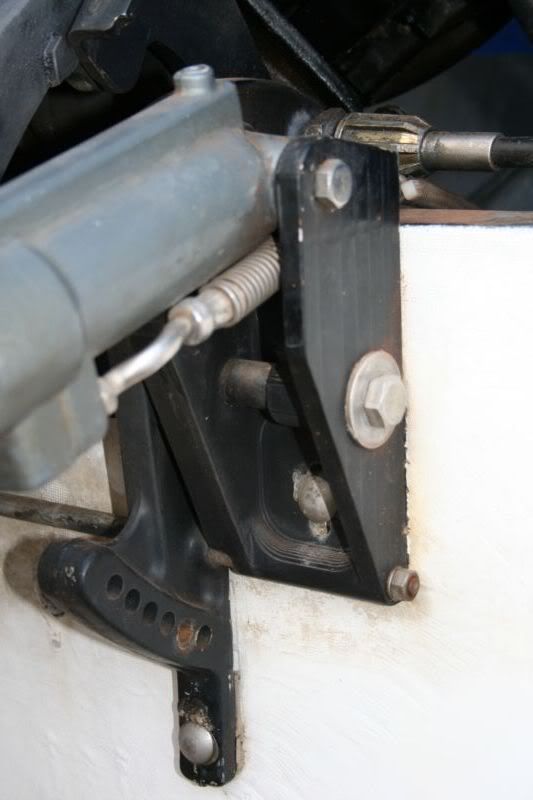
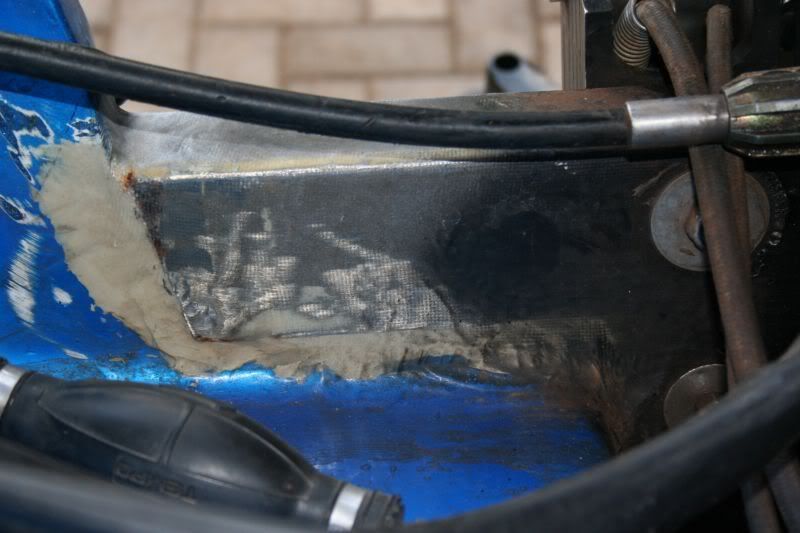
Motor mounted approximately 1 in. too low on the non adjustable transom
Fuel pump non-retuns leaking
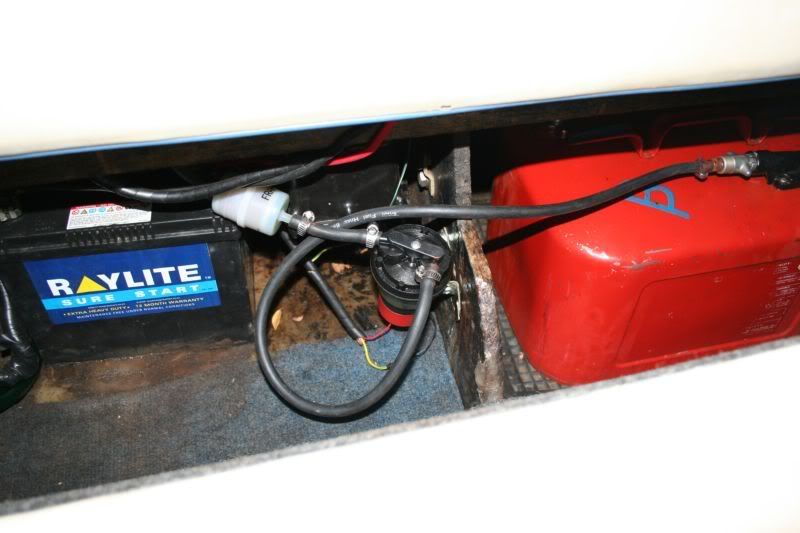
Battery too small
Over propped
Fuel tank strainer blocked
Fuel connector at engine's seal shot
Fuel lines perished
Air intake below drip tray blocked
What I broke during this period
Fuel pump casing (Over tightened)
Trim cylinder mounting brackets. Lifted the engine out of the water using the trailer button and then applied throttle.
Needle and seat casing (Over tightened the center screw that bolts the fuel strainer cap down)
Destroyed 1x plastic fuel strainer in an engine fire
Blew 2 Tachos due to over voltage
Blew 1 electric diaphram pump due to over voltage
Well, after all that it turned out that the engine did have most of those problems, but some things we did were redundant, but we're glad we did them anyways.
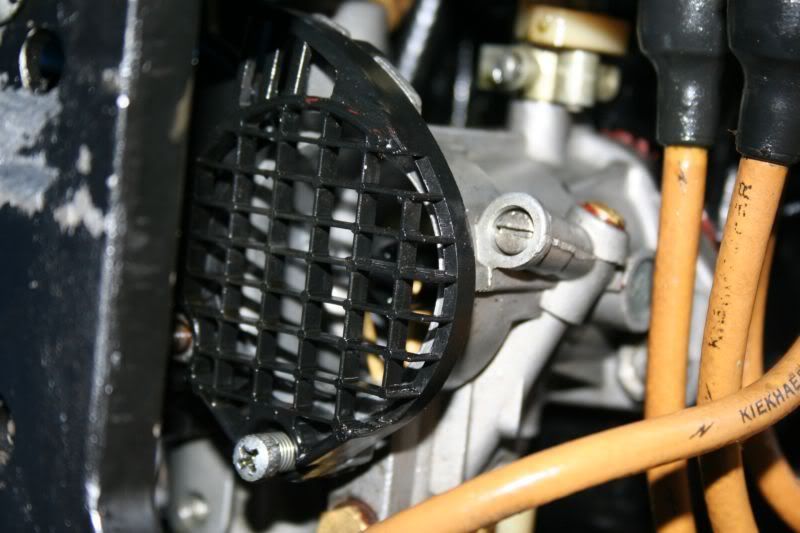
The most important thing we did was a link & sync. The old man couldn't remeber how to do it, and Clam's post is a miracle worker there. The biggest problem that yielded the most performance gain was the blocked air intake below the drip tray in the front of the engine. I do see that Merc does have a little foam rubber part there, but ours probably swelled up. We discovered that when I removed the shield while the old man was trying to keep the boat going and there was a huge huge difference in the engine the moment I unclipped the shield. We discarded the foam rubber and removed the drip tray. We also trimmed the foam rubber on the back of the shield a bit so air can enter behind the shield as well.
We also ported the prop to compensate a bit for the 17P on hole shot. It did help lots when the boat wasn't heavily loaded, but not as much as a 15P helped.
So last week-end I took the boat out for the first time this season (Summer just started here). We didn't change a thing since I had it out last in April/May except the prop. I did prepare properly though. Checked impeller function, charged batteries, and did a startup at home the week before.
And I'm glad to report that it goes like a dream. Got the boat upto just over 70km/h with me and a passenger. I get a bit scared at that speed since the river was busy and I don't want to flip the boat on a wake. I'd guess I'd make almost 75km/h alone.
Other things of note:
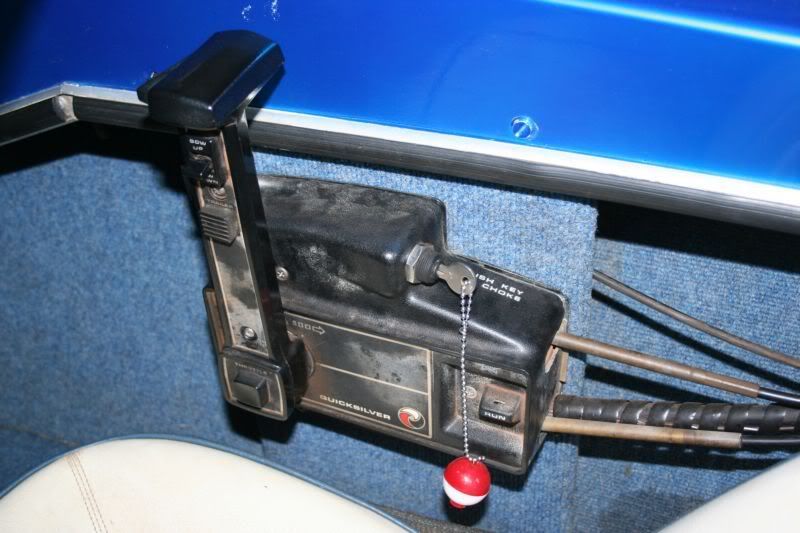
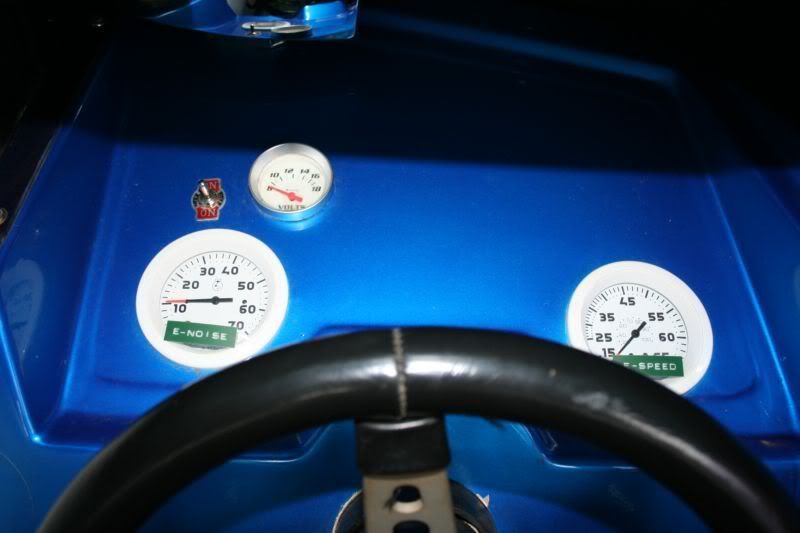
I blew 2 tacho's and a electric diaphram pump due to over voltage. The single battery that came with the boat isn't big enough to absorb the extra juice from the unregulated system. I didn't help either by always charging the battery. Also we don't believe the engine has ever seen the better side of 5000rpm before in it's life. We installed a 2nd bigger battery on the opposite side of the transom. I also have automotive fog lights below the dash that I can sitch on to curb run-away voltage. I also have an automotive volt meter installed in the dash. But as of late that I don't charge the batteries that often I havn't had to use them again.
We also installed an automotive electric diaphram pump (low pressure). We still have the bulb in the line and the merc fuel pumps on the engine, but the pump does make everything a lot less complicated. It simply lifts the fuel from the tank and delivers to the 2 merc pumps. We also re-verified the float levels after installation, and there's no change. The most important thing to note is that it has to be specified as a low pressure diaphram pump (Not a gear pump or something else). You don't want to force fuel into the float chambers past a needle and seat that are actually closed.
Installed a Sony MP3 player with 6x9 220w speakers for tunes.
And that's about all I can think of at the moment.
Thanks for reading! I'll add some more if I can remember anything else of note!
Edit:
Oh yes, we also added an inch to the transom to get the anti-vent plate to it's correct position.
It's finally time for my big thank you thread. In this thread I'll go over the complete history of the engine, and what we did to it, and what we still have to do. I'll also be adding pics and movies of it later on, I'll explain the details later in the thread.
First off - Thank yous
I want to thank everyone on this board that helped with this old engine. This forum is active that you always get an answer in a couple of hours. It's the only human interface we used to get the motor to where it is today. I have collected a couple of documents along the way that I put together via links supplied by you guys. A couple of people I do want to single out:
Clams Canino
Laddies
Chris1956
MotorBoaterBill
AMDRules
You guys had the most input, and I thank you for that.
History
My name's Leon, live in South Africa. I used to fly Ultra-Light aircraft and had my instructor's rating. I didn't own the UL, just like the boat they're actually my old man's. I just use them most often and do the hand work on them. My old man is a mechanical design engineer with over 40 years' experience. I followed in his foot steps and have just over 10 years experience myself. The ultra light was swopped for the boat just over a year ago (Late 05). With just me + 1 passanger having fun on the ultra light at a time while everyone else was sitting on the ground watching us and waiting their turn for a flip just didn't make sense anymore. The old man did have a boat years ago, like 25 years ago. A big cabin cruiser that he built himself with 2 old red band (1960s) Mercs on.
So we got the boat. The engine did start, and the guy said he used the boat often enough and that it was mechanically sound. The first thing that caught my eye was the prop. It seemed very small and showed evidence of either extreme wear or the prop blades being ground to almost nothing. We assumed that he probably had a prop strike, and chipped a chunk out of one of the blades, and hence all the blades were ground with an angle grinder to atleast look the same. So the first thing we knew we needed was a new prop. All this happened in a very short space of time. Since I collected the boat and we went away on holiday was only a day, maybe 2. So while we were discussing the whole prop issue we were actually on holiday. Eventaully we agreed that the only way would be to replace the prop. So we phoned my "lil" (21 years old) brother and gave him all the dope to go and buy the prop so long so it'll be there when we get back. We know that the prop has a 17" pitch and we just wanted a replacement. That he got for us.
So back home we fit the prop and took the boat out to the dam, and that's where the fun started. It took us the better part of 4 months(Or was it 1 year and 4 months already?) to get the motor sorted, and last week we replaced the final part. The prop. Yes, the 17P was over propped, and the boat actually needs a 15P.
Now lets get to the stuff we did to the engine. I hope this will help others out there to give an indication of what to look for.
First off, the serial number. Our serial number falls in a range that indicates both a 1970 1150 and a 1970 1350. All the cowlings and covers are from a 198x Merc though (Blue bands with red 115 on). They theory now goes that it's probably 3 assemblies put together, if we're lucky only 2. Engine 1970, LU and Engine brace with timing marks 196x, Cowls 198x.
Second, starting the bloody thing. Being ever vigilant to not flood the engine we went through regimens of pumping the primer bulb only 3 times, then attempting a start with choke, then without choke. then 3 more pumps and so on. Then removing a spark plug to check that it hasn't flooded etc etc. You can imagine what it went like.
Third - We had the additional handicap of an incorrect engine brace that had the completely wrong timing marks on. We had to extrapolate our own timing marks.
Fourth - No manual, not even a Seloc.
So we failed miserlably on our first outing and realised that with the old prop everything probably felt fine, but we definitaly had to take a look at every little detail abd tune the engine from scratch. That we did, every week end we'd find something wrong, take the boat out and come back knowing that we eliminated one more problem. I'll remind you that all this took place over a period of over a year (Season and weather permitting. Probably around 20 outings).
Things we found wrong with the engine:
Carbs not synced.
Primer bulb shot
Float levels all over the place, some high, some low.
Jetting suspicious
Electrics a mess
Blown rectifier
Paint under the stator causing it not to earth properly
Leaky float
2 different float styles in the 3 carbs
Idling mixture settings all over the place
Link + Sync done totally wrong. Timing pickups way off.
Low oil in trim unit
Dirt in float bowls
Blocked fuel strainers
Incorrect connection of manual choke lever
Metric bolts
Motor mounted approximately 1 in. too low on the non adjustable transom
Fuel pump non-retuns leaking
Battery too small
Over propped
Fuel tank strainer blocked
Fuel connector at engine's seal shot
Fuel lines perished
Air intake below drip tray blocked
What I broke during this period
Fuel pump casing (Over tightened)
Trim cylinder mounting brackets. Lifted the engine out of the water using the trailer button and then applied throttle.
Needle and seat casing (Over tightened the center screw that bolts the fuel strainer cap down)
Destroyed 1x plastic fuel strainer in an engine fire
Blew 2 Tachos due to over voltage
Blew 1 electric diaphram pump due to over voltage
Well, after all that it turned out that the engine did have most of those problems, but some things we did were redundant, but we're glad we did them anyways.
The most important thing we did was a link & sync. The old man couldn't remeber how to do it, and Clam's post is a miracle worker there. The biggest problem that yielded the most performance gain was the blocked air intake below the drip tray in the front of the engine. I do see that Merc does have a little foam rubber part there, but ours probably swelled up. We discovered that when I removed the shield while the old man was trying to keep the boat going and there was a huge huge difference in the engine the moment I unclipped the shield. We discarded the foam rubber and removed the drip tray. We also trimmed the foam rubber on the back of the shield a bit so air can enter behind the shield as well.
We also ported the prop to compensate a bit for the 17P on hole shot. It did help lots when the boat wasn't heavily loaded, but not as much as a 15P helped.
So last week-end I took the boat out for the first time this season (Summer just started here). We didn't change a thing since I had it out last in April/May except the prop. I did prepare properly though. Checked impeller function, charged batteries, and did a startup at home the week before.
And I'm glad to report that it goes like a dream. Got the boat upto just over 70km/h with me and a passenger. I get a bit scared at that speed since the river was busy and I don't want to flip the boat on a wake. I'd guess I'd make almost 75km/h alone.
Other things of note:
I blew 2 tacho's and a electric diaphram pump due to over voltage. The single battery that came with the boat isn't big enough to absorb the extra juice from the unregulated system. I didn't help either by always charging the battery. Also we don't believe the engine has ever seen the better side of 5000rpm before in it's life. We installed a 2nd bigger battery on the opposite side of the transom. I also have automotive fog lights below the dash that I can sitch on to curb run-away voltage. I also have an automotive volt meter installed in the dash. But as of late that I don't charge the batteries that often I havn't had to use them again.
We also installed an automotive electric diaphram pump (low pressure). We still have the bulb in the line and the merc fuel pumps on the engine, but the pump does make everything a lot less complicated. It simply lifts the fuel from the tank and delivers to the 2 merc pumps. We also re-verified the float levels after installation, and there's no change. The most important thing to note is that it has to be specified as a low pressure diaphram pump (Not a gear pump or something else). You don't want to force fuel into the float chambers past a needle and seat that are actually closed.
Installed a Sony MP3 player with 6x9 220w speakers for tunes.
And that's about all I can think of at the moment.
Thanks for reading! I'll add some more if I can remember anything else of note!
Edit:
Oh yes, we also added an inch to the transom to get the anti-vent plate to it's correct position.
Last edited: