Good day, gents.
I have been a lurker here on the forum for about the past 6 months since I started my project but decided today I would register and join the conversation. I am about 85-90% complete on my 1955 (or so) Lone Star Cruisemaster restoration and you guys have been instrumental in helping me get the job done. I thank you for the advice and information as I near completion of my first SOLO boat restoration. I have restored a number of air cooled VWs and an Austin Healy but this is the first boat I have owned or restored by myself. I grew up helping my dad on countless basketcase-to-beauties boat projects. I bought a bare hull that sat on a boat hoarding neighbor's lot for @ 30 years. I was told it was a 1960s Star Craft, but after months of internet searching to identify the model, I discovered it is actually a Lone Star Cruisemaster from @1955.


STRIPPING: To start, I removed and trashed the1950s flotation foam and went to town stripping several layers of crappy white and aqua blue paint by hand using Jasco and Klean Strip brand strippers and a sharpened putty knife. Stripping took several months as I was working on it only after work and on weekends. I went around each and every rivet by hand with Scotch Brite red and green pads, sandpaper, wire and plastic bristled brushes until all the paint was removed. Suffice to say I am now intimately familiar with every rivet on this boat. The original green paint was the hardest part to remove and speaks to the quality of materials used by the manufacturer.


PRIME & PAINT: Once stripped, I sanded with varying grits and more red and green pads until I achieved a nice shine. I then applied Rustoleum clean metal primer to the interior and the exterior cabin and decks followed by thinned Rustoleum enamel which I mixed using 50/50 Safety Yellow and Safety Red for an eye popping orange. Primer and paint were applied using 4" foam rollers. Thus far I have applied 4 coats and plan on several more for maximum durability. [I know how some of you feel about using paint other than marine topcoats on boats so it is unnecessary for you to reiterate your feelings on the matter. I have used Rustoleum enamel on other projects and found it to hold up well to the elements. I was meticulous in my prep so I am not worried.]


RIVET SEALING: I applied Gluvit generously to every rivet inside the hull in the floor and along all the interior seams. I filled the hull with water 2 weekends ago to test for leaks and discovered a pinhole in the floor that was the result of pitting and only one leak along the starboard seam back aft. That discovery led me to purchase another quart of Gluvit. This morning I brass wire wheeled the entire exterior deck until I saw either shiny metal or until the pit opened into a pinhole. I only found one more pinhole. I will Gluvit the entire exterior deck this afternoon.
DECKING: For exterior decking, I used untreated pine 1x4 furring strips with untreated pine 2x4 framing for added strength. Pressure treated wood chemicals/preservatives are a no-no with aluminum (not to mention heavy). I mixed a pint of Minwax Golden Oak stain into a quart of spar varnish and thoroughly sealed the exterior deck wood which produced a lovely warm finish. All the wood used inside and out will receive the same treatment. I have cut all the interior flooring and completed the exterior deck but am waiting until the final Gluvit treatment has been applied and cured to install.

GLASS: 2 original windows glasses were intact upon acquisition but I broke one while stripping paint from the frames. I am using thin acrylic which I cut to the appropriate size. The hard part there will be rounding the corners but I think a Dremel with a cutting wheel should do the trick. I extra windows cut to size to allow for a learning curve on the windows.

BOTTOM PAINT: As we live a block from the river and are deeply committed to preserving the ecosystem we love, I decided against any type of biocide bottom paint or ablatives. This boat will not live in the water full time so I used Rustoleum on the hull as well. It will spend at most a few days to a week in the water at a time and will be in motion most of that time so bottom growth is not a concern. The sides will be polished to a blinding shine and then waxed.
FLOTATION: For flotation, I acquired a bunch of foam blocks used by utility trailer manufacturers to stack their trailers on flatbed trailers for transport. Those blocks are 12" square by about 18" long. I cut each block using a fine toothed hand saw into 3 pieces measuring 4" thick to fit into the sides and wrapped each section in cling wrap to keep foam bits out of the bilge pump. I fit foam into every side section from the top of the gunwale to about 4 inches from the floor but do not plan to add flotation in the floor under the deck to prevent risk of capsizing should I take on water.

POWER: I plan to install a modern 70-90hp motor so I have enough juice to get out into Tampa Bay and spend time in Clearwater and St. Pete. While I would prefer a Honda, I will likely end up with a Mercury given they are plentiful and cheaper on average. I am not entertaining the notion of an appropriate vintage motor because I love my friends and family and do not want to smoke out everyone on the river as I pass. I will install LED running and interior lighting and a trolling motor for quiet river cruising. The head will not dump into the water as the original plumbing allowed, but will use a self contained RV system with an electric pump.
This entire restoration is being done by hand except for today's wire wheel work on the pitting. Hand stripped, hand sanded and polished, hand painted, all foam, wood, and decking hand sawn.
I am lucky on 2 major points: First, from work I have access to plenty of scrap material used on this project. All the wood and window materials were scrap bought at a deep discount and the foam was free. Second, I am lucky all the original window frames, roof rails, and deck fittings were present upon acquisition. I will, however, have to hit Craigslist for a new trailer as the current one is not good for anything but storage.
I estimate I am a couple months from completion and look forward to the inaugural cruise which I will call "The 3 Hour Tour". I will reach out with questions as they arise.
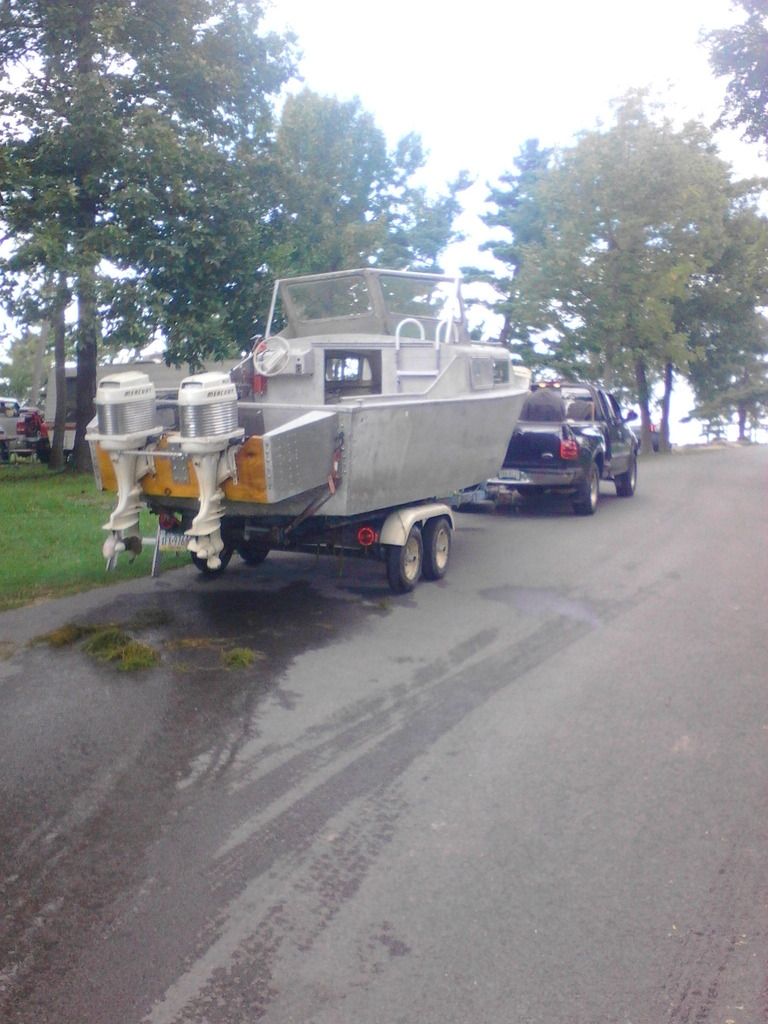
Current state as of February 7, 2015


I have been a lurker here on the forum for about the past 6 months since I started my project but decided today I would register and join the conversation. I am about 85-90% complete on my 1955 (or so) Lone Star Cruisemaster restoration and you guys have been instrumental in helping me get the job done. I thank you for the advice and information as I near completion of my first SOLO boat restoration. I have restored a number of air cooled VWs and an Austin Healy but this is the first boat I have owned or restored by myself. I grew up helping my dad on countless basketcase-to-beauties boat projects. I bought a bare hull that sat on a boat hoarding neighbor's lot for @ 30 years. I was told it was a 1960s Star Craft, but after months of internet searching to identify the model, I discovered it is actually a Lone Star Cruisemaster from @1955.
STRIPPING: To start, I removed and trashed the1950s flotation foam and went to town stripping several layers of crappy white and aqua blue paint by hand using Jasco and Klean Strip brand strippers and a sharpened putty knife. Stripping took several months as I was working on it only after work and on weekends. I went around each and every rivet by hand with Scotch Brite red and green pads, sandpaper, wire and plastic bristled brushes until all the paint was removed. Suffice to say I am now intimately familiar with every rivet on this boat. The original green paint was the hardest part to remove and speaks to the quality of materials used by the manufacturer.
PRIME & PAINT: Once stripped, I sanded with varying grits and more red and green pads until I achieved a nice shine. I then applied Rustoleum clean metal primer to the interior and the exterior cabin and decks followed by thinned Rustoleum enamel which I mixed using 50/50 Safety Yellow and Safety Red for an eye popping orange. Primer and paint were applied using 4" foam rollers. Thus far I have applied 4 coats and plan on several more for maximum durability. [I know how some of you feel about using paint other than marine topcoats on boats so it is unnecessary for you to reiterate your feelings on the matter. I have used Rustoleum enamel on other projects and found it to hold up well to the elements. I was meticulous in my prep so I am not worried.]
RIVET SEALING: I applied Gluvit generously to every rivet inside the hull in the floor and along all the interior seams. I filled the hull with water 2 weekends ago to test for leaks and discovered a pinhole in the floor that was the result of pitting and only one leak along the starboard seam back aft. That discovery led me to purchase another quart of Gluvit. This morning I brass wire wheeled the entire exterior deck until I saw either shiny metal or until the pit opened into a pinhole. I only found one more pinhole. I will Gluvit the entire exterior deck this afternoon.
DECKING: For exterior decking, I used untreated pine 1x4 furring strips with untreated pine 2x4 framing for added strength. Pressure treated wood chemicals/preservatives are a no-no with aluminum (not to mention heavy). I mixed a pint of Minwax Golden Oak stain into a quart of spar varnish and thoroughly sealed the exterior deck wood which produced a lovely warm finish. All the wood used inside and out will receive the same treatment. I have cut all the interior flooring and completed the exterior deck but am waiting until the final Gluvit treatment has been applied and cured to install.
GLASS: 2 original windows glasses were intact upon acquisition but I broke one while stripping paint from the frames. I am using thin acrylic which I cut to the appropriate size. The hard part there will be rounding the corners but I think a Dremel with a cutting wheel should do the trick. I extra windows cut to size to allow for a learning curve on the windows.
BOTTOM PAINT: As we live a block from the river and are deeply committed to preserving the ecosystem we love, I decided against any type of biocide bottom paint or ablatives. This boat will not live in the water full time so I used Rustoleum on the hull as well. It will spend at most a few days to a week in the water at a time and will be in motion most of that time so bottom growth is not a concern. The sides will be polished to a blinding shine and then waxed.
FLOTATION: For flotation, I acquired a bunch of foam blocks used by utility trailer manufacturers to stack their trailers on flatbed trailers for transport. Those blocks are 12" square by about 18" long. I cut each block using a fine toothed hand saw into 3 pieces measuring 4" thick to fit into the sides and wrapped each section in cling wrap to keep foam bits out of the bilge pump. I fit foam into every side section from the top of the gunwale to about 4 inches from the floor but do not plan to add flotation in the floor under the deck to prevent risk of capsizing should I take on water.
POWER: I plan to install a modern 70-90hp motor so I have enough juice to get out into Tampa Bay and spend time in Clearwater and St. Pete. While I would prefer a Honda, I will likely end up with a Mercury given they are plentiful and cheaper on average. I am not entertaining the notion of an appropriate vintage motor because I love my friends and family and do not want to smoke out everyone on the river as I pass. I will install LED running and interior lighting and a trolling motor for quiet river cruising. The head will not dump into the water as the original plumbing allowed, but will use a self contained RV system with an electric pump.
This entire restoration is being done by hand except for today's wire wheel work on the pitting. Hand stripped, hand sanded and polished, hand painted, all foam, wood, and decking hand sawn.
I am lucky on 2 major points: First, from work I have access to plenty of scrap material used on this project. All the wood and window materials were scrap bought at a deep discount and the foam was free. Second, I am lucky all the original window frames, roof rails, and deck fittings were present upon acquisition. I will, however, have to hit Craigslist for a new trailer as the current one is not good for anything but storage.
I estimate I am a couple months from completion and look forward to the inaugural cruise which I will call "The 3 Hour Tour". I will reach out with questions as they arise.
Current state as of February 7, 2015
Last edited by a moderator: