My next steps on '53 Alumacraft

tonynoriega2

Petty Officer 2nd Class
Joined
Jun 26, 2012
Messages
114
Hi all...

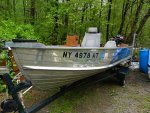
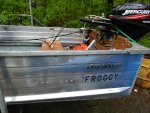
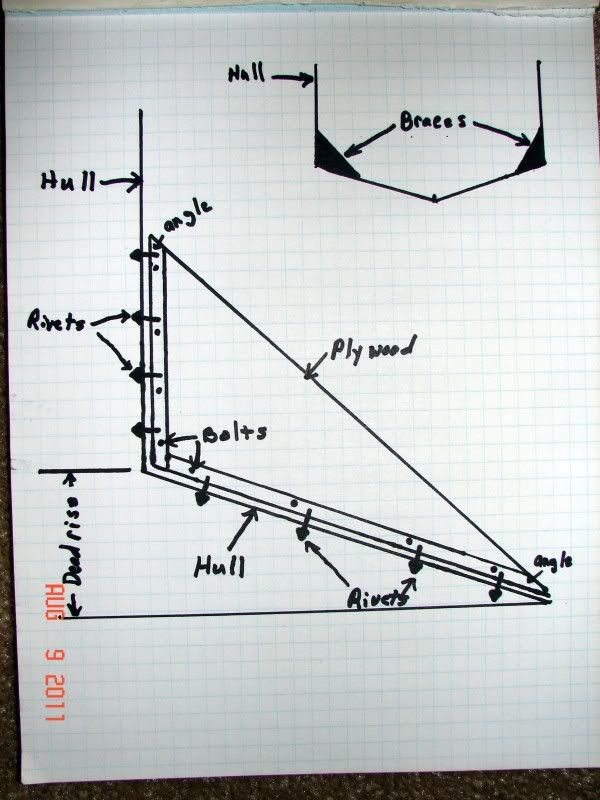
So i got the transom braces and wood out, and removed the center bench last night...vacuumed out the crap and got out some of the fishing pole holder brackets that someone self installed up towards the gun wale...

Wanted to run my next steps by yall to see if I am on the right track..

Tonight I plan to build a couple of saw horses and flip her over... rub her down...oh wait... nevermind.

In any case...I plan on giving her a bath with TSP (as found by some other recommendations here) inside and out.

Scrubbing the non-skid and transom areas very well.

Then, gonna take some 100 grit to the hull, inside and outside to get some of the wear and tear off... there is no paint.

Followed by some 320 grit around the outside bottom hull to give it a nice shine.

Lastly some mothers aluminum polish to get it nice looking....

The upper areas of the outside hull, and inside I am going to spray with an self etching primer...

That is as far as I can go now...

Any feedback is greatly appreciated.

0815120755.jpg
 

Star

Chief Petty Officer
Joined
Sep 21, 2010
Messages
481
Re: My next steps on '53 Alumacraft

Forget the 320 grit paper except for bad oxidation areas. Forget about Mother's Alum polish. Your surfaces that I can see are not bad at all. Two SOS brillo pads cleanes my 14' Starcraft. Wash it down with dish soap and water. If you want a true mirror polish buy a lambs wool compounding pad for a 7" right angle grinding, not a car polisher. Dupont 7 rubbing compound. Did my tinny in about one and a half hours. I have pics on here somewhere if you are interested.
 

Attachments

  • Picture 001.jpg
    Picture 001.jpg
    126.4 KB · Views: 0
  • Picture 004.jpg
    Picture 004.jpg
    127.8 KB · Views: 0

Georgia_Redneck

Recruit
Joined
Aug 14, 2012
Messages
4
Re: My next steps on '53 Alumacraft

Another thong you can use instead of dish soap is a 50/50 mix of vinegar and water. As for a mirror finish use WD-40 and a car polish drill bit attachment.
 

jigngrub

Fleet Admiral
Joined
Mar 19, 2011
Messages
8,155
Re: My next steps on '53 Alumacraft

How do you plan to reinforce the middle of your boat where you removed the bench? Benches in aluminum boats are much more than something to just sit on, they're part of your boats structure and add strength to weak spots.

Your thin gunwales aren't designed to support your thin sidewalls over that long of a span without your middle bench.


What kind of a floatation foam plan do you have?
 

tonynoriega2

Petty Officer 2nd Class
Joined
Jun 26, 2012
Messages
114
Re: My next steps on '53 Alumacraft

I do not have flotation foam, but plan to put a floor in. Which would have some beams running from port to starboard of the boat, with some MG plywood on top of that...

Would that be enough to support the middle of the boat?

I am guessing that you would suggest I add flotation foam under my floor?

I also plan on using those braces from the middle seat to secure them to the floor, or something similar, to add structural rigidity.

My initial thought is to run a beam down the center as well, along with two beams running from port to starboard...
 

jigngrub

Fleet Admiral
Joined
Mar 19, 2011
Messages
8,155
Re: My next steps on '53 Alumacraft

Short answer: no a "floor" will not support the sides of the boat... but you do have options.

1. One option is to build an raised casting type deck from the bow of your boat back to where the middle seat was. The top of the deck should be as high or higher than the top of your seat was. This will give you lots of below deck storage as well as the strength your sidewalls need.

2. Option 2 is to build storage boxes on each side of your boat after you get the "floor" in, these boxes should be located where your middle seat was. One of these boxes could be a livewell if you're a fisherman.

This boat and pics are a good example of what I'm talking about:

4-15-1220Finished_B.jpg


4-15-1220Finished_A.jpg


3. A third option would be to build and install side braces where your bench seat used to be.

Like in this drawing:
DSC02176.jpg
 

tonynoriega2

Petty Officer 2nd Class
Joined
Jun 26, 2012
Messages
114
Re: My next steps on '53 Alumacraft

Roger that... Awesome insight and very much appreciated. I like the side storage/bench seating idea... may run with that one.
 
Top