New Project... SleekCraft Aristocrat... Some questions...

bigblock454

Petty Officer 1st Class
Joined
Apr 28, 2008
Messages
206
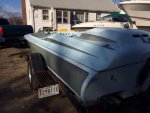
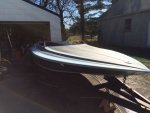
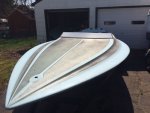
Greetings iboats friends! I picked up another project! She's a 1978 Sleek Craft Aristocrat. A 20' tunnel hull that I fell in love with because of her unique lines, and the builders reputation for building decent boats, mostly learned right here on the forums from other "sleek" restorers. I was hesitant to post so soon in the build, as lately it seems there are more discouraging rather than encouraging when it comes to rebuilding a boat that seemingly needs everything. Nonetheless, I will press on, and ask some questions. This boat has "left hand steer" and the throttle/shift lever is on the port gunwale. I've actually thought about building a center "console" between front seats to mount a conventional throttle/shift, but wondering how obtainable are the port mounted ones, should I want to keep her that way? The original is still there, but not sure if it can be bought up to snuff. I'm also considering a throttle "pedal", as I've always liked that prospect. She also has dual aluminum fuel tanks. There is one gas gauge on the dash with a toggle switch that says "fuel". I'm guessing that was so you could toggle between tank sending units to see how much gas was in either tank, correct? As far as picking up fuel from both tanks evenly, would I just run fuel lines from the pick-ups on both tanks, into a tee, then to the fuel pump? Thanks for getting me started with these questions, if you can help. I'll post some pics asap. I have a 383 in the shop being built (shortblock and vortec heads), and have started with transom replacement already. Thanks again!

Norm
 

Bondo

Moderator
Staff member
Joined
Apr 17, 2002
Messages
71,083
This boat has "left hand steer" and the throttle/shift lever is on the port gunwale. I've actually thought about building a center "console" between front seats to mount a conventional throttle/shift, but wondering how obtainable are the port mounted ones, should I want to keep her that way?

Ayuh,.... Many controllers can be reconfigured to work on either side,.....
There is one gas gauge on the dash with a toggle switch that says "fuel". I'm guessing that was so you could toggle between tank sending units to see how much gas was in either tank, correct? As far as picking up fuel from both tanks evenly, would I just run fuel lines from the pick-ups on both tanks, into a tee, then to the fuel pump?

Nope,... Ya need a selector valve, drawin' from both tanks like you want, with a T will usually drain one tank, 'n leave ya outa gas, even though the one tank is still full,....
 

GA_Boater

Honorary Moderator Emeritus
Joined
May 24, 2011
Messages
49,038
Hey BB - Don't worry about the naysayers. Some commenters are always negative and some are really trying to help. Also some comments are to determine if the OP can do the work. It isn't the easiest to fix up some of the projects that pop up here.

Ya gotta show us what she looks like so we can see her lines, too. :D

Since you have a switch on the dash for fuel tank selection, I'll guess it changes which sender is active and actuates an electric selector valve. Not knowing how deep into her bowels you are at this stage, you should find the valve on the fuel lines between the tanks and fuel pump on the old motor.
 

Woodonglass

Supreme Mariner
Joined
Dec 29, 2009
Messages
25,929
Now THIS sounds like a WAY KOOL restoration!!! I can't wait to see some Pix!!!! I presume she's a JET BOAT???? Is all the hardware in good shape?
Some creative innovation and I'm sure between your hard work and our motivational dissertations she'll be on the water in NO TIME!!!! Hurry up with those PIX!!!!!:D;)
 
Last edited:

bigblock454

Petty Officer 1st Class
Joined
Apr 28, 2008
Messages
206
Wow, thanks for the quick feedback Bondo, GA and WOG!! I will post pics tonight when I'm back on the 'puter! She's a solid hull... as in "fiberglass". Wood... not so much, so I'm tearing it all out. Hand lay up for sure... lots of roving and HEAVY!! She's an I/O (Alpha), and that's another thing that attracted me to her. Just informed about 20min ago that motor is ready to pick up! She only has one central "stringer" because the "tunnels" are her main structure, it seems. The sole (floor) is one 4 x 8 piece of plywood, glassed in. Ripping that out also, to get to stringer (I'm assuming it's a goner). Talk later... back to work on her!

Norm
 

bigblock454

Petty Officer 1st Class
Joined
Apr 28, 2008
Messages
206
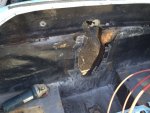
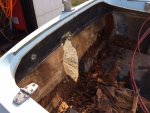
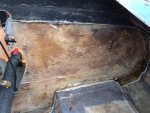
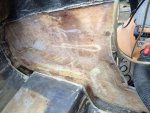
I got transom wood out (pretty bad), and tearing sole (floor) out next. Also made a template for the missing windshield and will get smoked lexan for that tomorrow. On the off chance anybody reading this needs a windshield template for a sleek "aristocrat", lemme know! I will discuss all I'm doing with her soon. Needing to find the aluminum channel used for the upper windshield moulding. It fits over the 3/16" windshield, as well as fitting into the side windshield posts. Will send pics of what I have later. Just wanted to throw it out there now, incase somebody knows what it is and where to get it. I've seen the automotive "trim" used, and may have to go that route, but would like to get the real stuff, as it adds a great deal of rigidity to the windscreen.

Norm
 

GA_Boater

Honorary Moderator Emeritus
Joined
May 24, 2011
Messages
49,038
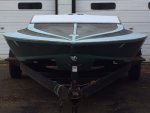
The head on shot looks a Speeder right out of Star Wars, LOL Boy, shes wide and low.

The problem with the W/S trim is putting a nice curve in it. I imagine a good metal shop may be able to handle that.
 

bigblock454

Petty Officer 1st Class
Joined
Apr 28, 2008
Messages
206
Thanks GA! Indeed... Aluminum must be annealed before it can be bent easily. There are tricks to doing it. Once annealed, it is quite malleable.
 

GA_Boater

Honorary Moderator Emeritus
Joined
May 24, 2011
Messages
49,038
True, annealing makes it easier to form. I was thinking more along the lines of me doing the forming and looking like it or letting a pro with all the tools do far better looking job. My favorite tool is a big hammer and some of my work is best left out of sight. LOL

A quick question. Did you lift the cap to get at the transom? She looks like you need to be a tunnel rat to get to the wood.
 

bigblock454

Petty Officer 1st Class
Joined
Apr 28, 2008
Messages
206
Hey GA... I guess the short answer is "yes" as the "cap" lifts off in the stern section, to cover the motor (or to leave it exposed, Once out of the way, access to the transom is very easy. Some pics!


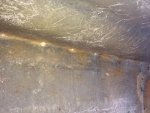
Old rotted transom
IMG_0809.JPG


Messy and a little tedious
IMG_0849.JPG


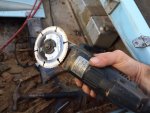
Weapon of choice!!
IMG_0850.JPG


Port Side
IMG_0869.JPG


Starboard Side
IMG_0873.JPG


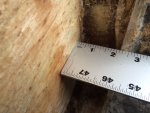
2 1/8" Wood thickness
IMG_0855.JPG
 

bigblock454

Petty Officer 1st Class
Joined
Apr 28, 2008
Messages
206
So... good news... My transom total height of wood is less than 24", that means that I can get two pieces out of a single 4 x 8. Bad news... with a thickness of 2 1/8", I need 3 laminates of 3/4" ply, so I have to buy two sheets anyway. Oh well.
 

bigblock454

Petty Officer 1st Class
Joined
Apr 28, 2008
Messages
206
Next up... I would love to remove the cap to get easy access to underneath that loooong bow/deck. But I see that she is "glued" together with a butt joint. No "shoebox" or nice stackable joint here. I'm guessing this is typical construction of these types of boats? Anyway, I'm worried about the hull sides spreading out on me, so I may have to shore them up if I do remove cap. then again, the "barrelback" cross section of her hull may keep everything strong, That and her short "squatty" sides, Glassing her back together with just but joints could be a little tedious, but I'm not expecting anything to be easy!

Here's a pic of her "joint" between hull and cap from underneath

IMG_0898.JPG
 

bigblock454

Petty Officer 1st Class
Joined
Apr 28, 2008
Messages
206
Hey WOG, I don't remember off hand. More than 48" though, if that's where your headed! :D I thought I did mention "she's an I/O... Alpha". I will be installing an A1G2 in her. I have them in my other two boats, and like them.
 

bigblock454

Petty Officer 1st Class
Joined
Apr 28, 2008
Messages
206
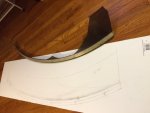
Here's some pics of my windshield adventure. I'm happy that I had that little section of original windshield, as it greatly helped with my measurements. IMG_0875.JPG


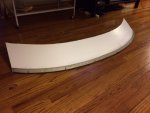
I used Coro-Plast to make a template. Easy to work with... and cheap! IMG_0878.JPG


Happy with the fit of the mock-up! IMG_0911.JPG
IMG_0903.JPG
 
Last edited:

bigblock454

Petty Officer 1st Class
Joined
Apr 28, 2008
Messages
206
I just picked up a hunk of acrylic (18" x 60" x 3/16" smoke gray) from a local plastic vendor for $50.
 

bigblock454

Petty Officer 1st Class
Joined
Apr 28, 2008
Messages
206
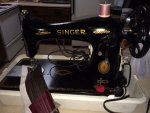
So... future plans: Going to continue with getting her hull straightened out, with new transom fabrication, new sole (single 4 x 8 'glassed both sides), and new (more than likely) central stringer. I will back off on fuel system/ drive / etc. questions until she's solid. I'm on the fence as far as "paint or re-gelcoat". I've been painting all my life, shooting darn near everything from waterbased to urethanes and epoxies. I've never played with gelcoat before, and it sounds intriguing, but I hear that it's not for the "faint of heart". I love the durability factor of the gel, but a nice coat of urethane, would get her looking good in a hurry. Paint scheme?? Sure... Gloss black hull, cobalt blue striping, white seating and interior pieces (a personal theme). Where am I getting the interior done??


This came in "the mail" today... hey, comon... it's just another tool!! I've watched my grandma go through three layers of vinyl, fabricating my go-kart seats when I was little, with a machine just like this!
IMG_0934.JPG
 

bigblock454

Petty Officer 1st Class
Joined
Apr 28, 2008
Messages
206
Yup, I will be attempting my own upholstery! I've sewn dodgers, and canvas "bimini" type canvas tops before, but this will certainly be a new venture for me! I have four boats currently, and the ability to fabricate my own cushions and upholstery pieces will pay huge dividends!
 
Last edited:

bigblock454

Petty Officer 1st Class
Joined
Apr 28, 2008
Messages
206
I'm ready to fabricate new transom, I cant help but to think that the original transom thickness is too thick for the Alpha G2 that I'm installing in her. The wood was 2 1/8" thick, plus approx 3/8" thickness for outside hull and 1/8" to 1/4" for inside skin. We're talking 2 3/4" final thickness, give or take an 1/8" (inside skin). I've read that 2 1/4" was the max thickness desired. I know this has been addressed on the forums in the past, and will go back and research. Just wondering "why so thick originally"?? She had an early (pre alpha, I believe) unit on her originally. Did they require thicker transoms? Thanks.

Norm
 
Top