New vacuum bag setup

erikgreen

Captain
Joined
Jan 8, 2007
Messages
3,105
Hey all -

I've started experimenting with vacuum bagging (and soon resin infusion) at home, and I thought I'd chronicle things here to gather comments and advice.

I'm working on a winter-long refit project for my 21 foot sea ray, and there are a lot of jobs on it that will be done better or easier with a vacuum bag.

Here's what I've got set up so far:
  • Nylon/polyester taffeta fabric from JoAnn fabrics - peel ply
  • mesh flow media from Express Composites
  • Polyethylene plastic sheets (painter's drop cloths)
  • Harbor freight 3 cfm vacuum pump (I had a robinair surplus pump that died as I was setting this system up... grrr.)
  • Vacuum controller from veneersupplies.com
  • 1/4" interior diameter vinyl tubing with fiber reinforcement, 20', home depot
  • many brass fittings from harbor freight, 1/4" pipe one end and bayonet on the other
  • aluminum air manifold, harbor freight
  • aluminum vacuum bag fitting, Express Composites
  • 4" PVC pipe overflow pot/reservoir, parts from Home Depot
  • vacuum gauge from veneer supplies.com
  • relay from the local surplus place
  • tuck tape, clay, etc. + misc bits from all over
I got the whole pump+ controller + tubing set up this weekend... basically I used a couple old outlet boxes with half an extension cord to set up a heavy duty relay (30A/240v) to switch the pump on and off via the vacuum controller. The controller has an adjustment screw that's currently set to about 25 inches hg. When the pressure is lower than that the pump is powered on until it's reached, then it shuts off.

Soo... I got it all powered on and tested the pump (after blowing the first one out, used pump). It sucked down to about 12" then kept running. After some searching I found the bag material I was using, which is 2 mil polyethylene, had torn a couple small holes. I was shrinking it around a section of 2x4 for the heck of it, just to try it all out. I patched those with tuck tape and got up a little higher... but it still leaked. Then I discovered the wood I had the bag on had holes (serves me right for grabbing stuff from the scrap pile to try this with). Once those were taped, I got up to 18"... the pump is supposed to be able to get to 25 microns, so I had lots of leaks.

After searching some more I tightened the clean-out on the bottom of my reservoir and used some JB weld to seal the tubing attachments at the end... then I remembered I could have just tried some tape. Messy solution. But I got it mostly sealed, up to 25", and the pump cut out for the 10 seconds at a time the leak took to raise the pressure again.

I also tried a thicker 4 mil poly sheet, it leaked a bit too and didn't stretch as well. I may get some professional bagging material and try that just to compare today.

I also will probably re-do the reservoir... I need to use more glue to seal the ends on, so they won't leak (I'm using PVC primer and cement). I wish there was a better way to do the clean out hole thing, that big screw plug tends to leak. I could use a different material like steel (I have an old pressure pot for sandblasting) for that, but it'd be harder to clean out. Hmm.

More news as experiments warrant. I'll try to take some pics tonight, too.

Erik
 

system-f

Senior Chief Petty Officer
Joined
Dec 3, 2008
Messages
667
Re: New vacuum bag setup

This thread is near worthless without pics :)
 

erikgreen

Captain
Joined
Jan 8, 2007
Messages
3,105
Re: New vacuum bag setup

I'll get some :)

For the moment, try to imagine a pump:
66466.gif


Connected to a vacuum controller:
controller.gif


and a gauge:
gauge-standard-metal-black.jpg


with a bunch of clear tubing with braided white reinforcement that leads to a big PVC pipe section, then to one of these:

valveov.jpg


That's stuck in a piece of clear plastic sheet, bordered by red tape. There's a piece of 2x4 under the sheet, and the 2x4 sits on top of the top of an old school desk made out of particle board, one of the little ones with the formica tops.

That plus some wiring and extra tubing is pretty much it at this point :)

Erik
 

drewpster

Commander
Joined
Oct 17, 2006
Messages
2,059
Re: New vacuum bag setup

How does the vac controller work eric? Is it a vac/ electric relay? adjustable?
 

erikgreen

Captain
Joined
Jan 8, 2007
Messages
3,105
Re: New vacuum bag setup

It's adjustable via a screw for "hold" vacuum, the pressure it starts the pump off at... it turns it off a couple inches or so above that... not sure how that part works yet. There's a gap between off and on pressure, otherwise it'd cycle on and off continually.

The vac controller is a relay and vac swtich, takes 12v input. I rigged it to control a bigger relay so I could skip worrying about the pump killing the $25 vac switch. So basically the vac switch controls the relay which switches the 120v outlet the pump is plugged into.

It's very similar to KnottyBuoyz' setup if you remember him... he spends more time over at the boatdesign.net site now, and pics of his setup are there.

Erik
 

drewpster

Commander
Joined
Oct 17, 2006
Messages
2,059
Re: New vacuum bag setup

Ok so the vac switch controls another relay that turns the 120 on/0ff right? Since the vac switch is 12volt, do you need a 12/120 volt relay to work with it?

vac switch- 12volt in and out---------relay 12 volt control switching 120 on/off.... make any sense?
 

drewpster

Commander
Joined
Oct 17, 2006
Messages
2,059
Re: New vacuum bag setup

also what are you using for a 12 volt source? battery?
 

ondarvr

Supreme Mariner
Joined
Apr 6, 2005
Messages
11,527
Re: New vacuum bag setup

For bagging the lower cost and make do items can work OK with some fiddling, but for infusion you should step to the real stuff, it makes a huge difference.

Find your closest Composites One location and you'll be able find everything you need, they carry a full line of the AIRTECH products.

http://www.airtechonline.com/

http://www.compositesone.com/
 

erikgreen

Captain
Joined
Jan 8, 2007
Messages
3,105
Re: New vacuum bag setup

also what are you using for a 12 volt source? battery?

I'm using a 12v/1 amp wall wart... I just cleaned out all my old computer parts in the basement, so I have a couple dozen assorted power supplies from old equipment.

Yes, it's a 12 volt relay with contacts capable of anything up to 240/30A. There was even a bigger one with 12v capable of triggering up to 50A and 360v current there, but I decided that was overkill :) I rigged up the outlet in an old outlet box with a switch in another box next door. If I turn that off the 12v power to the vac switch and relay is still running, but the pump won't start unexpectedly. I unplug everything to shut it all off for sure.

As it stands now, the outlet the pump is in can also run another device at the same time, so I could conceivably control a second pump, or a timer, or any other 110v device at the same time.

ondarvr, I tend to agree at this point. I'm starting cheap just so I can get started... my first bags that actually have resin will probably just be to laminate a couple layers of cloth on my new transom. Later on I'll try out infusion of parts and molding, at which point I'll want high quality supplies.

But for right now having to unexpectedly buy a pump tapped me out :)

Erik
 

system-f

Senior Chief Petty Officer
Joined
Dec 3, 2008
Messages
667
Re: New vacuum bag setup

Find your closest Composites One location and you'll be able find everything you need, they carry a full line of the AIRTECH products.

You probably already know this, but just in case you plan on doing this call them first. My location has a $125 min order which isn't a big deal I just haven't needed $125 worth of junk yet. Otherwise the people there seem great to deal with.
 

Squid Billy

Petty Officer 2nd Class
Joined
Jun 3, 2008
Messages
152
Re: New vacuum bag setup

For those wanting to go the route of Bagging, (which I am doing myself) I would stay away from switches and the whole on-off thing! I have been there, done that, and have the T-shirt for it. I finally got fed up with many, many hours of expensive work going straight to the trash can. (bagging RC Airplane wings and fuselages, ... BIG ONES)

Go over to ebay and get a used Gast or something like that, that is MADE to stay on constantly. You will be way less frustrated and you will actually like what your doing .... TRUST ME! I bought 2 of them for around $75.00 each. I have a single and a double and they were bought at that price. If you ever have done any glass work and have had a layup go wrong and had to remove it, you will have just saved yourself a lot of time, money and aggravation ... and you did it all on the cheap!

Besides, it will let you afford to buy and drink more beer with a smile instead of out of necessity! ;)

One thing we need to remember when it comes to equipment ... K.I.S.S! ;)
 

Squid Billy

Petty Officer 2nd Class
Joined
Jun 3, 2008
Messages
152
Re: New vacuum bag setup

Hmmm, ...

I just looked at eBay and searched for "Gast" (without quotes) and they had tons of them for under $75.00 and many with buy it now's.
 

erikgreen

Captain
Joined
Jan 8, 2007
Messages
3,105
Re: New vacuum bag setup

Actually, I think my pump could probably run continuously without too much of a problem... it's a two stage, so it uses the smaller stage once it gets to a certain vacuum.

Plus with the switch I can set it to hold a lower vacuum than full if I care to do so... not sure why I'd want that for vacuum bagging, but whatever...

Erik

PS: I stopped at lunch and got some real bagging film, so I'll see how that works in comparison to the cheap/trash bag stuff
 

ondarvr

Supreme Mariner
Joined
Apr 6, 2005
Messages
11,527
Re: New vacuum bag setup

[qoute]
Plus with the switch I can set it to hold a lower vacuum than full if I care to do so... not sure why I'd want that for vacuum bagging, but whatever...

For bagging you don't want or need a full vacuum, it will much lower, just depends on the part. For infusion, more is better, 25 at sea level would be considered low, but will work if done correctly.
 

Squid Billy

Petty Officer 2nd Class
Joined
Jun 3, 2008
Messages
152
Re: New vacuum bag setup

Actually, I think my pump could probably run continuously without too much of a problem... it's a two stage, so it uses the smaller stage once it gets to a certain vacuum.

Just make sure it "IS" rated to run continuous and you should be fine.

Plus with the switch I can set it to hold a lower vacuum than full if I care to do so... not sure why I'd want that for vacuum bagging, but whatever...

Without the switch, you can regulate the vacuum with a vacuum regulator valve. They are a little pricey but you can use a simple drain ****. The use for regulating the pressure is because some things you do not want to pull fully or the items will be crushed or worse yet, ... you suck out ALL the resin.

PS: I stopped at lunch and got some real bagging film, so I'll see how that works in comparison to the cheap/trash bag stuff

Cool, but remember, all the stuff they sell for bagging, is not needed at all, but it could make it a more enjoyable experience and with that, ... I believe it's an individuals call on what works for them.

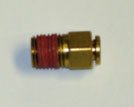
Also ... one of the best things I bought for bagging, are Push-In Vacuum Line Quick Release Connectors.
 

Attachments

  • Vac_Push-_in_Quick_Release.jpg
    Vac_Push-_in_Quick_Release.jpg
    2.2 KB · Views: 0

BobsGlasstream

Commander
Joined
Sep 11, 2009
Messages
2,128
Re: New vacuum bag setup

Erik,
Great start on the vacuum bagging.
I option to try rather then the big buks for the polyurethane bags is to go to a dept store and get a heavy duty thick clear vinyl shower curtain. I have had good luck with them. you may need to replace more often but at $5 it is more affordable.
The switch you bought is the same one I use only I bought mine at a local control supplier. It is manufactured by Air logic. I can get you the part number.
As for the pump, I have seen folks use the one you are using and had good luck with them. I think it was Squid Billy that recommended Gast and they are good pumps, I use a Thomas Wobble pump and it also works great. I only paid $75 for the pump on ebay.
My set up looks just like the one sold at Veneersupplies. I just made it myself. I have posted pic's of my table but not my vac system.
I do a lot of woodworking and veneering so the vac press is priceless.
Good luck with you project.
Bob
 

erikgreen

Captain
Joined
Jan 8, 2007
Messages
3,105
Re: New vacuum bag setup

Thanks Bob.

Last night I had to go help with SCUBA class so not much time to work on anything, but I did find a replacement vacuum reservoir/overflow pot.

A couple summers ago my old neighbor gave me an antique compressor. I didn't really want it, but long story short it came with a 6 inch by about 2 foot tank. I took it partly apart last night, and found it has two fitting holes the right size. I'll see if I can find my NPT tap tonight and clean them up, and it should work dandy for a tank.

I'm also thinking I'll mount all this on a hand cart for portability. We'll see what I come up with.

I'll take pics tonight too.

Erik
 

ondarvr

Supreme Mariner
Joined
Apr 6, 2005
Messages
11,527
Re: New vacuum bag setup

I took these pics while we were infusing a hull at Asksano Cats, if you look around the site you'll see the finished hull design.

http://www.aksano.com/advanced.php

I have some pics of a hull I helped infuse a few weeks ago, but I'm looking for a pic of the finished boat, as soon as I find it I'll post them.
 

BobsGlasstream

Commander
Joined
Sep 11, 2009
Messages
2,128
Re: New vacuum bag setup

erikgreen,
When I get home this weekend I post some pic's of my vac system.
When I built mine I had no idea that I would find so many uses for it.

ondarvr,
Very cool project and system, those surge tanks look like you are pulling some serious cfm. :cool:
Bob
 
Top