Oiler wick

jpatterson12

Cadet
Joined
Sep 2, 2009
Messages
24
Hey guys,
where does the little felt oiler pad that comes in the breaker points box ride? I'm thinking it goes on the back of the moveable point arm and rests against the cam so as to apply oil during rotation. Is that about right? Engine is a '65 MQ11 9-1/2HP.
 

cajuncook1

Chief Petty Officer
Joined
Sep 3, 2009
Messages
559
Re: Oiler wick

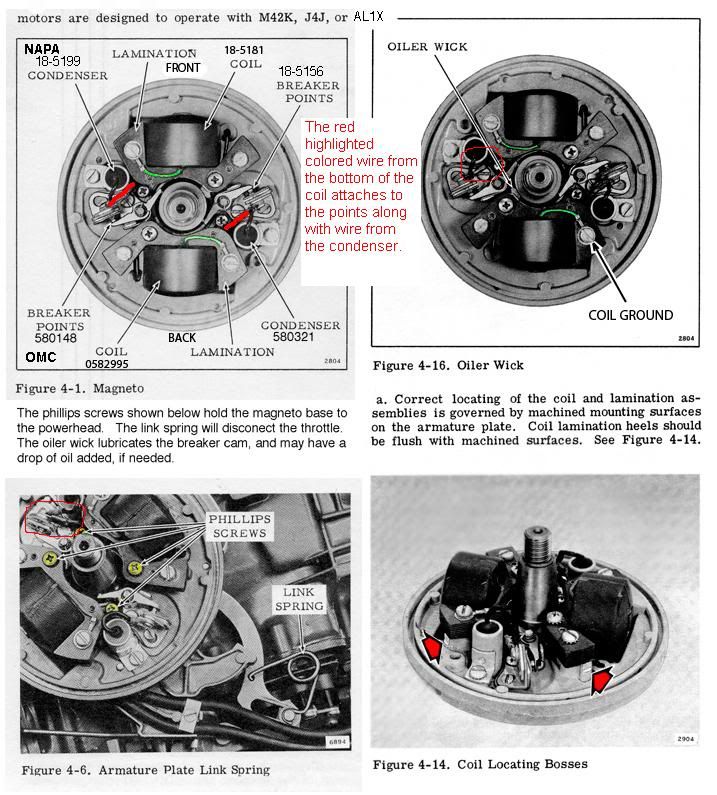
The oiler wicker bracket is under the coil going to top cylinder. I posted the below information to help another member, but should help you just the same.


Your going to need to inspect your point, condenser and coils. They are located under the flywheel. Hopefully all you need to do is clean and regap your points and you might be in business. Still check your coils and condensers and plug wires.


Here is how to pop your flywheel off and it gives you information about re-torquing you flywheel nut.

How to Change Coils and set points on old OMC's?/ 294072


Here are two link to show you how to test your coils and condensers.

How to test a coil in an antique outboard engine - YouTube

Antique Outboards and all about condensers - YouTube


How to replace your coils, points and condenser. Please take digital pictures as you go, so it will help you return everything back in the right order. Keep cheap zip lock bags available to put your parts in so you don't lose them. They are small.

If your coils are good, but your points and or condensers are bad, then you can certainly order a set of points and condenser here from iboats. Easy breezy.

Here is some information I put together for a guy on another forum, but the information should help you out just the same.


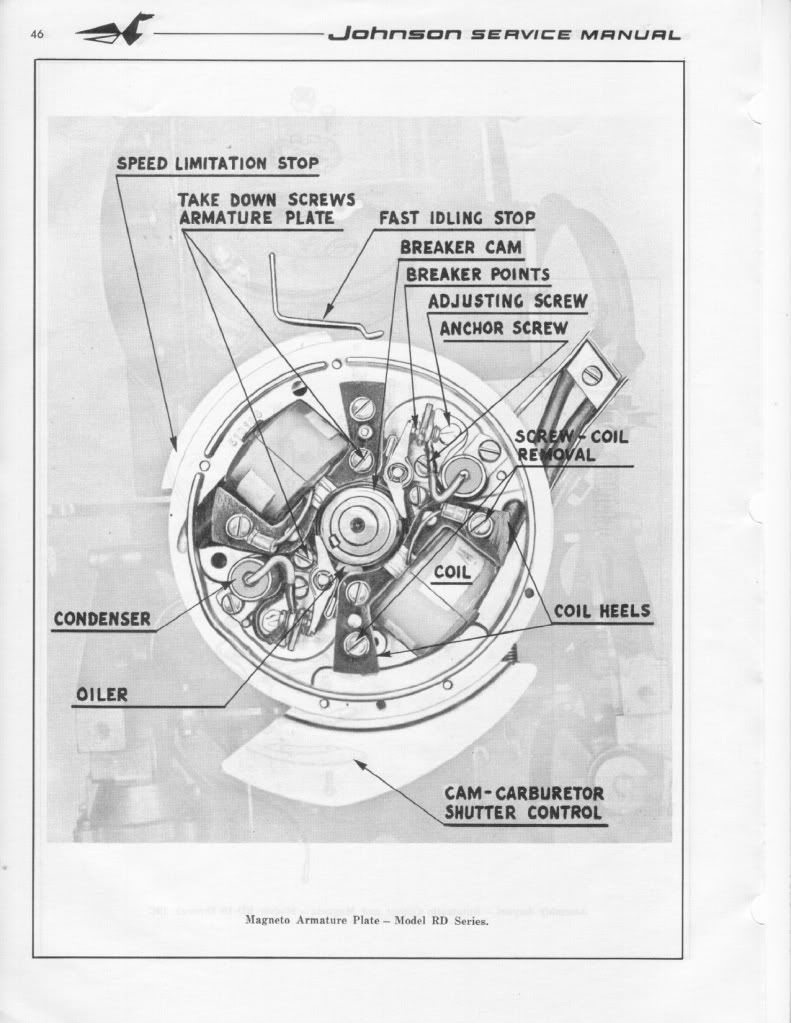
Here is a diagram of a generic OMC (Johnson/Evinrudle/Gale) ignition assembly. You will have to remove the coil designated for the top cylinder and put the oil wicker in. It should be already be coated with a very light oil. (not grease). The purpose of the oil wicker is to lightly lubricate the outside riding surface of the cam so the point shoes do not prematurely wear. If you look at the points they have little shoes that ride along the cam. Please make sure the (breaker)points cam is on the correct side or the ignition will be out of timing. It should have the word [highlight]top[/highlight] machine written on the side facing up.

Ignitionplateandoilwick.jpg


FYI: You can only set(gap) one set of points at a time. Put the flywheel nut back on(turn with a wrench or ratchet clockwise) to allow you turn the crankshaft. (Please remove both spark plugs to make it easier to turn the crankshaft and prevent accidental starting)

You gap the point to 0.020 when the point shoes is at the top(high point of the cam). It should have a mark along with the word top. Then you will turn clockwise to the next set of point 180 degrees and set those points the same way. You will notice that the point of the previous set will be closed and when you come around again they will open up. *** When they are open no current is allow through. This is how you set your timing with the points.***

When you go to set the point's gap. Very gently snug the anchor screw, then adjust the gap with adjusting screw and the feeler gauge until the feeler gauge is sliding through with slight resistance only. Then tighten the anchor screw. Repeat procedure with second set of points. Please make sure your hands are clean and the feeler gauge is clean, because oil on the points can foul them up and create resistance....poor or no no spark. ALways use a spark check to evaluate spark. It should jump minimum 1/4 inch. Blue sharp snappy spark.

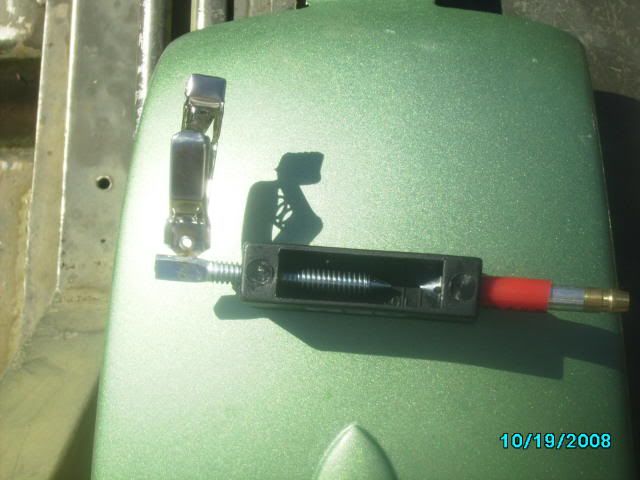
Here is a picture of a spark check...Cheap $6

sparktesterpic.jpg


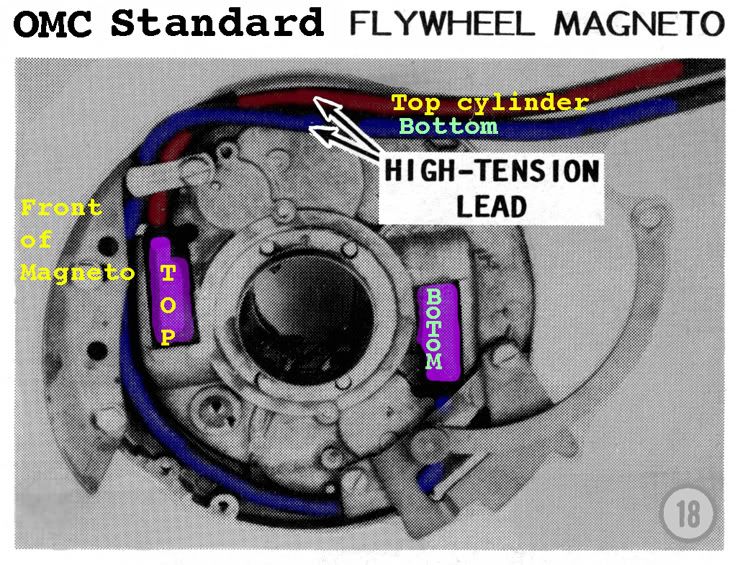
Here is a picture of how to tell which wire is going to the correct cylinder. Thanks to Garry for providing the picture on other post.


TopCyl.jpg


If your using the existing wires then cut about 1/4 inch of end going the coil, so you have clean un-oxidized copper contacting the spiking in the coil. Twist the end of the spark plug wire onto the coil spike. If you have replaced the wires, make sure they are 7mm copper metal core and not the automobile stuff.

***** Please make sure two things*****

1.) Make sure all the wires are tucked away under the flywheel and not rubbing up against the cam or crank, because with will eventually get damage and create a short, then no spark!!

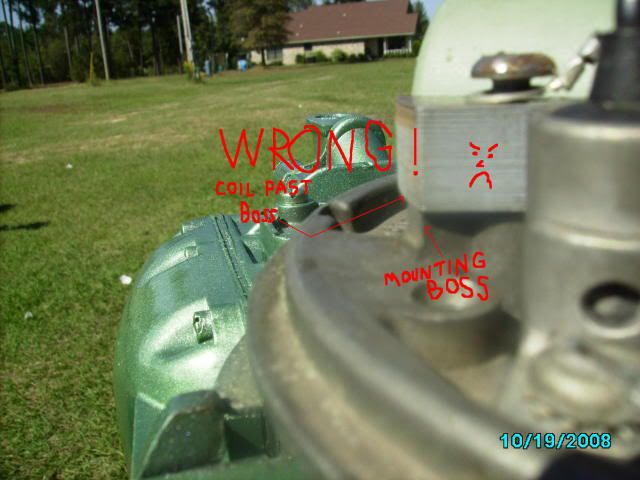
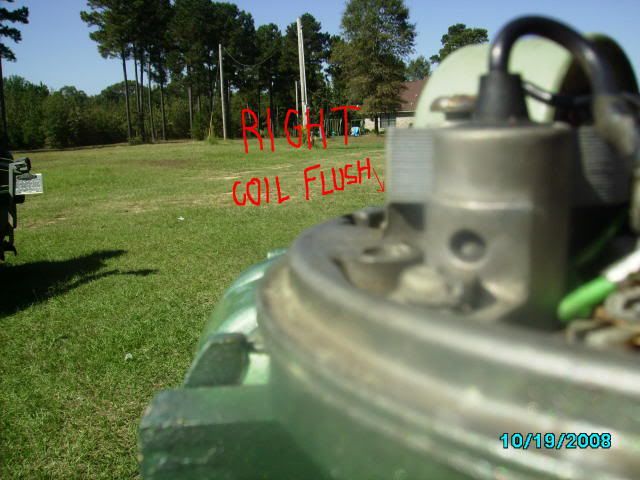
2.) Make sure the coil heels (ends) are evenly lined up with the mounting boss.

Here are some pictures. (Compliments of JBJennings..nice fella)

wrongcoilmount.jpg


rightwaytomountcoil.jpg


Lining up the coil heel with the mounting boss prevent damage of the coils and the flywheel magnet, prevent rubbing as the flywheel turns.

[highlight]*** Make sure the throttle is advanced to that start position***[/highlight]


Here is another picture that Garry (thanks Garry!!) supplied on another post with some modification.

OMC_Stdwithwirecolors.jpg


Both diagrams, should answer your questions.
 

jpatterson12

Cadet
Joined
Sep 2, 2009
Messages
24
Re: Oiler wick

That's a ton of great info! Thanks very much! What I'm up against is this- a basic tune up. The coils look like they just came out of the box, the points are a little pitted, but not much. I bought new points and condensers, but couldn't figure out where the oiler wick was supposed to fit. I've watched You Tube videos till I can't see straight, but none of them mention the oiler wick. The Clymer's manual sure does. The plug wires look fine. I picked up an Ohm meter to get the right gap for the points, and am getting antsy to get started tuning the old girl up. Thanks again for all your help!
 

kfa4303

Banned
Joined
Sep 17, 2010
Messages
6,094
Re: Oiler wick

Hi jp. Here's another great link to help you rebuild the ignition. It's for a slightly different model, but all of the steps are the same. As far as the oiler wick goes, if you look at the base of the post one of the sets of points slides down on to you will see a small barb. The felt oiler wick goes here and is held in place by the barb itself. You only need a few dabs of light oil to it. Although, to be honest, you can leave it out if you want. I don't use them on my motor and I've never had an issue. Instead, you can put a few dabs of oil directly on the cam and/or rocker arm pads.

3 HP Evinrude Lightwin Ignition System Tune-Up 1952-1967
 
Last edited:

HighTrim

Supreme Mariner
Joined
Jun 21, 2007
Messages
10,486
Re: Oiler wick

Follow Cajun Cooks advice. He lead you in the right direction. He is a fellow aomci member and dedicated to the preservation of antique outboards. Install the oiler wick, it is necessary, and is the reason that most of the cams have survived until today. They don't make them anymore afterall.

Would the motor run without the wick? Well sure it would. Probably for years too, but not another 50 years. I think it is greedy to only care about the motor for you own life. Lets keep them running for our grandkids grandkids! We are not talking about a high ticket item here now are we! :)
 
Last edited:
Top