Old Johnson 3hp

lynchmv

Cadet
Joined
Apr 17, 2023
Messages
9
As the title states, I have an old Johnson 3hp 2 stroke outboard. The model on the plate is JW22C. I received this motor from my brother-in-law and it wasn't running. After reading a *lot* of posts here and elsewhere online, I've managed to get it running. My issue is that even when following these instructions, I can't get the motor to do more than idle, without dying out.

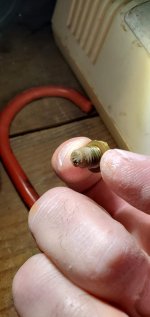
Initial setting is: Slow speed = seat gently, then open 1-1/2 turns. Start engine and set the rpms to where it just stays running. In segments of 1/8 turns, start to turn the S/S needle valve in. Wait a few seconds for the engine to respond. As you turn the valve in, the rpms will increase. Lower the rpms again to where the engine will just stay running. Eventually you'll hit the point where the engine wants to die out or it will spit back (sounds like a mild backfire). At that point, back out the valve 1/4 turn. Within that 1/4 turn, you'll find the smoothest slow speed setting. When you have finished the above adjustment, you will have no reason to move them again unless the carburetor fouls/gums up from sitting, in which case you would be required to remove, clean, and rebuild the carburetor anyway.

After starting the motor, I can adjust the throttle anywhere between the 'START' and 'SLOW' and it just runs and runs. But, if I go anywhere past 'START' it bogs down and dies. Any ideas?
 

racerone

Supreme Mariner
Joined
Dec 28, 2013
Messages
38,411
Simple test to do.----Does spark jump a gap of at least 1/4" or more, yes or no?----If coils are original they might be cracked and due for replacement.----A fuel pump to run with a remote tank was an option.----The spot for the fuel pump is on the block.----Fuel filter might be plugged.----High speed jet in carburetor might be plugged.
 

lynchmv

Cadet
Joined
Apr 17, 2023
Messages
9
Simple test to do.----Does spark jump a gap of at least 1/4" or more, yes or no?----If coils are original they might be cracked and due for replacement.----A fuel pump to run with a remote tank was an option.----The spot for the fuel pump is on the block.----Fuel filter might be plugged.----High speed jet in carburetor might be plugged.
Thanks for these suggestions. I'll be able to try these this weekend and report back.

One thing to note, I am doing all of this with the cover (part 18 in the link below) off and parts 33, 34, 37 and 38 all off as well. Basically I'm adjusting the needle without the dial and slow speed spring on. Should I assemble the whole thing before trying again? Part 38 is listed as the 'slow speed spring' - I'm just a shade-tree mechanic, so if any additional instruction is more than welcomed.

The external fuel tank + pump sounds promising. I didn't see that listed here so had no idea it was an option.


racerone

Supreme Mariner
Joined
Dec 28, 2013
Messages
38,411
The high speed jet ( orifice plug ) must be clean.----It is found in the bottom of the float bowl.
 

F_R

Supreme Mariner
Joined
Jul 7, 2006
Messages
28,226
I agree, sounds like a dirty orifice plug. It must be absolutely, positively CLEAN without a trace of gum or crud in it. But don't go jamming drills or wires, etc, through it. Oversize orifice (hole) is just as bad as a clogged one. It is a precision item.
 

lynchmv

Cadet
Joined
Apr 17, 2023
Messages
9
I agree, sounds like a dirty orifice plug. It must be absolutely, positively CLEAN without a trace of gum or crud in it. But don't go jamming drills or wires, etc, through it. Oversize orifice (hole) is just as bad as a clogged one. It is a precision item.
OK, looking at the exploded diagram, I'd say that's probably the one thing I didn't check/clean. How should I clean it? Brake cleaner and compressed air?
 

lynchmv

Cadet
Joined
Apr 17, 2023
Messages
9
I agree, sounds like a dirty orifice plug. It must be absolutely, positively CLEAN without a trace of gum or crud in it. But don't go jamming drills or wires, etc, through it. Oversize orifice (hole) is just as bad as a clogged one. It is a precision item.
Alright, in this exploded diagram (https://www.marineengine.com/parts/...manufacturer=Johnson&section=CARBURETOR+GROUP) I see parts 40 and 41, but it looks like 39 goes into the chamber? I can't really tell if it's in there or not. I did spray inside there with carb cleaner and it forced its way up into the silencer, where it came out of the hole on the bottom of that. I have a couple of clips of the motor running and sputtering out.

This one it's just running then dies:

This one I'm attempting to throttle it up and it sputters out:
 

racerone

Supreme Mariner
Joined
Dec 28, 2013
Messages
38,411
You have to make sure item #39 is clean.----This is not a mystery to us.---And does spark jump a gap of 1/4" on both leads , yes or no ?-----Fuel filter checked ??----Water pump impeller replaced ??
 

lynchmv

Cadet
Joined
Apr 17, 2023
Messages
9
Is there a secret to getting to #39? It looks like it's threaded with a slot for a flathead and that it screws into the chamber before #40/41, is that correct?

I will check the spark and other items mentioned, thanks again.
 

saltchuckmatt

Commander
Joined
Jul 19, 2019
Messages
2,811
You can clean it in place if it doesn't want to come out....carb spray cleaner and I use torch tip cleaners.

Also, get a small spray bottle with 50 to 1 in it and when it begins to die squirt a little into the carb.
 

lynchmv

Cadet
Joined
Apr 17, 2023
Messages
9
Yes, thank you for asking though. One of my first tasks was getting the gas tank back in working order. That was a learning experience in itself!
 

lindy46

Captain
Joined
Nov 27, 2008
Messages
3,886
Another thing to check is the timing. There is a cam on the magneto which must be adjusted so that the carb butterfly opens at the correct point.
 

lynchmv

Cadet
Joined
Apr 17, 2023
Messages
9
Time for an update! I apparently didn't clean the carb as well as I thought I did last time. After watching a few more YouTube videos on disassembly, cleaning and reassembly, I'm happy to say a good, thorough cleaning was all that it needed. For reference, I've attached a picture of one of the clogged needle seat. Thanks for all the suggestions and help!
 

Attachments

  • 20230502_183846.jpeg
    20230502_183846.jpeg
    521.1 KB · Views: 5

StevesShadow

Recruit
Joined
Jun 18, 2023
Messages
3
Time for an update! I apparently didn't clean the carb as well as I thought I did last time. After watching a few more YouTube videos on disassembly, cleaning and reassembly, I'm happy to say a good, thorough cleaning was all that it needed. For reference, I've attached a picture of one of the clogged needle seat. Thanks for all the suggestions and help!
Great when the op let's the rest know what the problem was. We all learn that way
 
Top