pantaloonz
Petty Officer 1st Class
- Joined
- Nov 28, 2014
- Messages
- 237
Hi Gang,
Hibernated through the winter. I had a lot of fun with the boat last year and she's GOING to make it at least a couple more seasons. I had to replace the gas tank last year and had some issues with water in the outdrive (resolved). So I'm taking on some upgrades to the inside.
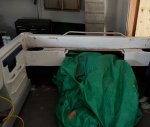
What I really disliked about this boat was how much fiberglass/plastic/decking there was that prevented me from getting a good look at the engine, wiring, and don't get me started on how hard it was to access the engine mounts (again all last year). Because of the new tank, the logistics of the stern have changed a bit and I want to make a one piece engine cover, and flat cover with hatched lift to access the battery and vent areas. I also needed to get some breathing room between the deck and the engine. Here's what we had to fight with.

So obviously you can't see how close the floor boards are to the engine. But you can see how close that fiber glass is and how much of a PITA it is to get any where close to rear of the engine, trace wires, or get after the steering mechanism.. I wanted a change. so I grabbed my respirator, a vacuum cleaner, and my grinder and had a little fun...

Ahhhh.. Room to move!
First obviously the fiberglass is all gone, (need to clean up those pokey parts on the side) I very quickly found some homespun wiring that has long since frayed. This probably is contributing to my funky tach readings, and flakey fuel readings (ya think?). Also I want to free up those vent hoses and make sure all is well there. I'm also in a much better position to position the fuel and vent hoses for more efficient routing.
It's not much, but removing 1.5" on either side of the engine makes A HUGE difference in accessibility. I was able to get the vacuum hose down in there and finally clean those out. I'll let your imagination wander on what I found.. I smells better I'm going to shorten the gas tank hole, which in turn will lengthen the storage for the water fun gear. I also gained better access to where I believe I had some insects (sawdust like crap all over) they are gone now too!!
I will replace the carpet back here if time allows... anyhow..
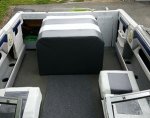
The dotted lines represent two separate builds. the first will be a flat panel covering most of the back, only as thick as the remaining fiberglass over the engine and enough to cover the left and right sides, which a hinged door for access (no more struggling to get back there again!
Then I will build a very simple engine box with hose allotments out of thin plywood which I will fiberglass for rigidity and strength. Lining the underside with good quality fire resistant/sound damping foam..
Questions:
1. I'm leaning towards just cleaning the floors really well and spraying a flooring in like Dura-XX/Truck liner etc.. Not quite sure I'll go carpet route again, unless I can find some decent carpeting.. suggestion?
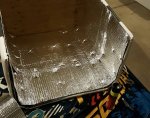
2. the former engine box had AWESOME foam. It was dark green, dense, and obviously flame/sound spec'd. Where can I find more of this stuff?
3. I don't really want to sew/foam another engine box (but will if you guys deem that best). It's common for us to use the engine box (not purposely) when having our water fun. The surface should be something that would not be too tough for us to stand on/climb on.. again sewing and foaming that is not something I 'want' to do, but if it's for the best,.. I will.
As always, thank you for taking the time to read this, I would not still have this baby running if not for the people here!
-Pantz
Hibernated through the winter. I had a lot of fun with the boat last year and she's GOING to make it at least a couple more seasons. I had to replace the gas tank last year and had some issues with water in the outdrive (resolved). So I'm taking on some upgrades to the inside.
What I really disliked about this boat was how much fiberglass/plastic/decking there was that prevented me from getting a good look at the engine, wiring, and don't get me started on how hard it was to access the engine mounts (again all last year). Because of the new tank, the logistics of the stern have changed a bit and I want to make a one piece engine cover, and flat cover with hatched lift to access the battery and vent areas. I also needed to get some breathing room between the deck and the engine. Here's what we had to fight with.

So obviously you can't see how close the floor boards are to the engine. But you can see how close that fiber glass is and how much of a PITA it is to get any where close to rear of the engine, trace wires, or get after the steering mechanism.. I wanted a change. so I grabbed my respirator, a vacuum cleaner, and my grinder and had a little fun...

Ahhhh.. Room to move!
First obviously the fiberglass is all gone, (need to clean up those pokey parts on the side) I very quickly found some homespun wiring that has long since frayed. This probably is contributing to my funky tach readings, and flakey fuel readings (ya think?). Also I want to free up those vent hoses and make sure all is well there. I'm also in a much better position to position the fuel and vent hoses for more efficient routing.
It's not much, but removing 1.5" on either side of the engine makes A HUGE difference in accessibility. I was able to get the vacuum hose down in there and finally clean those out. I'll let your imagination wander on what I found.. I smells better
I will replace the carpet back here if time allows... anyhow..
The dotted lines represent two separate builds. the first will be a flat panel covering most of the back, only as thick as the remaining fiberglass over the engine and enough to cover the left and right sides, which a hinged door for access (no more struggling to get back there again!
Then I will build a very simple engine box with hose allotments out of thin plywood which I will fiberglass for rigidity and strength. Lining the underside with good quality fire resistant/sound damping foam..
Questions:
1. I'm leaning towards just cleaning the floors really well and spraying a flooring in like Dura-XX/Truck liner etc.. Not quite sure I'll go carpet route again, unless I can find some decent carpeting.. suggestion?
2. the former engine box had AWESOME foam. It was dark green, dense, and obviously flame/sound spec'd. Where can I find more of this stuff?
3. I don't really want to sew/foam another engine box (but will if you guys deem that best). It's common for us to use the engine box (not purposely) when having our water fun. The surface should be something that would not be too tough for us to stand on/climb on.. again sewing and foaming that is not something I 'want' to do, but if it's for the best,.. I will.
As always, thank you for taking the time to read this, I would not still have this baby running if not for the people here!
-Pantz


