pics of my weekend TINT upgrade!!!

redone4x4

Lieutenant Commander
Joined
Feb 28, 2009
Messages
1,548
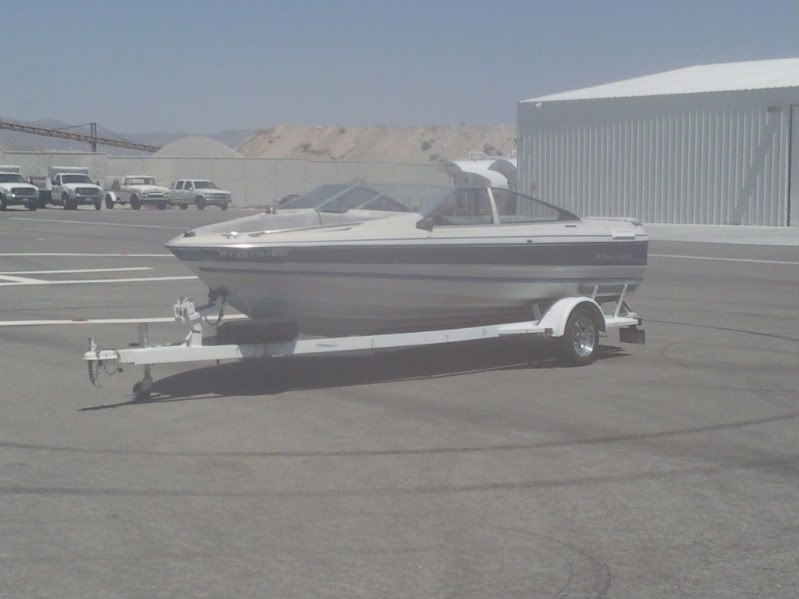
heres a quick before and after pic of the tint job. its not perfect, but neither is my 22 yr old capri :D
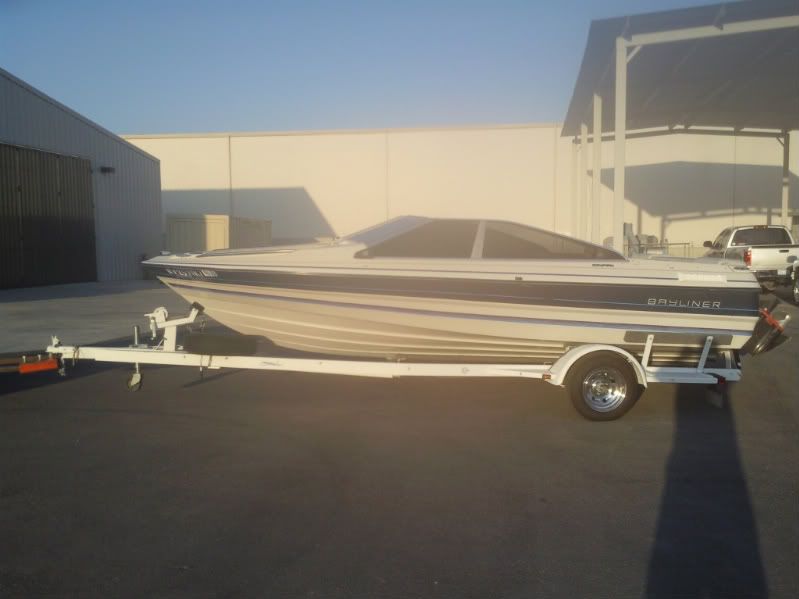
. I also added the new blower vents, new trailer tires on chrome wheels. shes getting there! sorry about the pic quality, it was my camera phone. I was quoted $175 for the tint, my buddy and I did it for $45 total including the tint kit.

BEFORE:
August09beholdpics011.jpg


AFTER:
August09beholdpics015.jpg
 

pduquette

Ensign
Joined
Jun 22, 2007
Messages
999
Re: pics of my weekend TINT upgrade!!!

I like it ! came out cool onyour boat! peter
 

ziggy

Admiral
Joined
Jun 30, 2004
Messages
7,473
Re: pics of my weekend TINT upgrade!!!

looks great rd4x4. i like the wheels too. mine are the worst looking old, faded, black painted, wheels that i've ever seen. i need something like those i think..
 

redone4x4

Lieutenant Commander
Joined
Feb 28, 2009
Messages
1,548
Re: pics of my weekend TINT upgrade!!!

looks great rd4x4. i like the wheels too. mine are the worst looking old, faded, black painted, wheels that i've ever seen. i need something like those i think..

thanks guys...i got the wheels off CL for $40 believe it or not, before I had the traditional white spoke steels that i painted with the trailer.
 

mphy98

Lieutenant
Joined
Oct 20, 2008
Messages
1,422
Re: pics of my weekend TINT upgrade!!!

looooookiiinnngg gooooood as freddie prince would have said it. or looking good! :D
 

marine4003

Lieutenant Junior Grade
Joined
Feb 3, 2008
Messages
1,119
Re: pics of my weekend TINT upgrade!!!

thanks guys...i got the wheels off CL for $40 believe it or not, before I had the traditional white spoke steels that i painted with the trailer.

Nice job, i hear Vegas isnt doing so hot..lots of deals around...soak 'em up.
 

WAVENBYE2

Lieutenant Commander
Joined
Apr 28, 2007
Messages
1,636
Re: pics of my weekend TINT upgrade!!!

Looks good Dude!! Is that the 20% you were talking about?? I like it, Man you guys are killing me, I am getting farther and farther behind!! Arrgg!
 

redone4x4

Lieutenant Commander
Joined
Feb 28, 2009
Messages
1,548
Re: pics of my weekend TINT upgrade!!!

Looks good Dude!! Is that the 20% you were talking about?? I like it, Man you guys are killing me, I am getting farther and farther behind!! Arrgg!

yep, its 20%. came out perfect since we dont boat at night. if you do, it might be a little too dark, but it was kinda late when we finished. I really like it. And I got the new blower vents from ebay, that did a ton for the exterior looks, IMO. come on now, ur turn Wavenbye!!! get some tint!:eek::D

As for vegas, yes its dead. I work jobs now i never would have fathomed before, but hey it works for now. I scour craigslist for stuff I would never buy new but that I want, it works out great. That way we can afford cool things if we do it right. plus selling stuff on there is nice too.
 

redone4x4

Lieutenant Commander
Joined
Feb 28, 2009
Messages
1,548
Re: pics of my weekend TINT upgrade!!!

anyone else have pics? i know theres pics of that wellcraft all tinted up. anyone else?
 

werthert

Petty Officer 1st Class
Joined
Jul 4, 2009
Messages
209
Re: pics of my weekend TINT upgrade!!!

Why are pictures and real life so different with boats? I think this is one of those that when you see it in person your like... wow. I'm sure the pics don't do it justice. It didn't look that different until I used my minds eye as if I was right there... yeah, made a difference then. Nice job!
 

thedukeryan

Petty Officer 1st Class
Joined
Jul 21, 2009
Messages
298
Re: pics of my weekend TINT upgrade!!!

Having done the same to my old Bayliner I can say that the pics don't do it justice. I was extremely pleased with the upgrades. Your boat looks great!!! I don't know about you but my old vents where completely cracked and beat up. Those new vents look nice. Nice job on the tint as well adds some needed contrast to the boat in my opinion. Between the wheels, tint and vents you really dressed it up without spending much cash. Whats your opinion on the tint? Did you find it pretty easy? I personally found it pretty simple. I wouldn't consider doing it on a brand new off the lot car but I found it more than suitable for my boats. Any regrets or things you would of done differently?
 

ShaneCarroll

Chief Petty Officer
Joined
Feb 10, 2009
Messages
639
Re: pics of my weekend TINT upgrade!!!

I was thinking about tinting the windows on my boat, after looking at how great your boat came out, it just adds more "justification" for the other half. But, I guess I better concentrate on making sure the boat will actually run good for more than one outing this time, before I worry about tinting the windows. They won't look that good with a boat that's always on the trailer.:(
 

redone4x4

Lieutenant Commander
Joined
Feb 28, 2009
Messages
1,548
Re: pics of my weekend TINT upgrade!!!

Having done the same to my old Bayliner I can say that the pics don't do it justice. I was extremely pleased with the upgrades. Your boat looks great!!! I don't know about you but my old vents where completely cracked and beat up. Those new vents look nice. Nice job on the tint as well adds some needed contrast to the boat in my opinion. Between the wheels, tint and vents you really dressed it up without spending much cash. Whats your opinion on the tint? Did you find it pretty easy? I personally found it pretty simple. I wouldn't consider doing it on a brand new off the lot car but I found it more than suitable for my boats. Any regrets or things you would of done differently?

Tinting was a PITA. but i wasnt going to pay a shop to do it on a 22 yr old boat. it came out alright, every window has at least one imperfection lol. it just takes practice, Im going to do our work trucks and my girlfriends car too, I might re-do the boat after i get that practice in. but, for now it will help it look clean and somewhat modern, IMO. I had to modify the vents a little to get them to fit the way I wanted to, but the old ones were literally crumbling when i took them off so it was a drastic improvement.
 

LIQUID PROZAC

Petty Officer 1st Class
Joined
Jun 19, 2009
Messages
307
Re: pics of my weekend TINT upgrade!!!

saweeeeet redone!!!! looks really great i too have a 87 bayliner that we tinted the week we got it so no before or after pics but it is night and day i too have the white spoke rims and am verrrrrrry jealous of your rims very nice upgrades enjoy:D--will have the smart tabs in about a month--can't wait
 

redone4x4

Lieutenant Commander
Joined
Feb 28, 2009
Messages
1,548
Re: pics of my weekend TINT upgrade!!!

thanks i appreciate it. I got the smarttabs, but didnt think about the 4200 sealant. so i gotta drive waaay across town tomorrow and get it, then I'll have mine on tomorrow afternoon as long as the boss stays away from the shop lol. I have to move my transom tiedown hooks on the trailer to make em work also. lets see some pics prozac!
 

jdlough

Master Chief Petty Officer
Joined
Jul 15, 2006
Messages
824
Re: pics of my weekend TINT upgrade!!!

redone,

A quick Smart Tab SX install tip. The install instructions say use a 3/16" bit for aluminum or wood and a 7/32" bit for fiberglass.

I first did a test partial install on an old fiberglass boat-planter in my yard. It seemed to me that the 7/32" bit was just a 'teeny' bit too big. I tried again with a 13/64" bit (the size right between 3/16" and 7/32"), and it seemed that the screw bit into the fiberglass better, but did not chip the fiberglass.

The supplied screws are pretty short, so you'll feel better about the install if you feel them really bite into the fiberglass.

I recommend that you try the smaller 13/64" first. If you think it's too small, its easier to drill a bigger hole, than try to shrink a hole that's too big.

Also, use a brand new SHARP bit. I found that old bits tend to 'polish' their way thru the fiberglass, rounding off the hole or chipping the glass.

Finally, if your hull is bottom painted, scrape the paint at least 1/2" away from the holes, so the 4200 over-fill will stick to actual fiberglass, not paint.

Jim
 

fire831

Petty Officer 1st Class
Joined
Aug 26, 2002
Messages
373
Re: pics of my weekend TINT upgrade!!!

That looks sharp. Good job.
 

redone4x4

Lieutenant Commander
Joined
Feb 28, 2009
Messages
1,548
Re: pics of my weekend TINT upgrade!!!

redone,

A quick Smart Tab SX install tip. The install instructions say use a 3/16" bit for aluminum or wood and a 7/32" bit for fiberglass.

I first did a test partial install on an old fiberglass boat-planter in my yard. It seemed to me that the 7/32" bit was just a 'teeny' bit too big. I tried again with a 13/64" bit (the size right between 3/16" and 7/32"), and it seemed that the screw bit into the fiberglass better, but did not chip the fiberglass.

The supplied screws are pretty short, so you'll feel better about the install if you feel them really bite into the fiberglass.

I recommend that you try the smaller 13/64" first. If you think it's too small, its easier to drill a bigger hole, than try to shrink a hole that's too big.

Also, use a brand new SHARP bit. I found that old bits tend to 'polish' their way thru the fiberglass, rounding off the hole or chipping the glass.

Finally, if your hull is bottom painted, scrape the paint at least 1/2" away from the holes, so the 4200 over-fill will stick to actual fiberglass, not paint.

Jim


sounds good ill try that. Just bought new drill bits today too. I read on here somewhere that running the drill in reverse will not chip the glass out, and it works. I'll try that first.
 

jdlough

Master Chief Petty Officer
Joined
Jul 15, 2006
Messages
824
Re: pics of my weekend TINT upgrade!!!

Hey again redone,

Again not on topic, but you're about to drill holes in your transom and I want to say this in a post you'll see before drilling. Just my opinion, but to me the drill in reverse trick seems to work to make that initial tiny indent, so the bit doesn't wander.

After the indent, reverse just seems to polish the hole.

If your bit is real sharp, I think regular, forward direction is better. Just use very slight pressure and let the drill do the work. No hurry. This way, the sharp bit will shave off just what it needs to make the hole. Do not push hard - if you push hard, the bit will have enough bite to tear out big chunks of fiberglass.

A 'brad point bit' (see pic) works best. It has a center point so the bit doesn't wander, and the outside edge of the bit has an extra sharp vertical perimeter cutting edge to make a perfect round hole (vertical outside edge not really shown in the pic, sorry). I think they are either Dewalt or Bosche and both Lowes and Home Depot have them. At any rate, they're the gold-colored ones, and cost twice as much as regular bits. They are worth it.

I know that these are just fine details - any regular bit will work just fine. (But we ARE talking about drilling 16 holes in your transom. I'd want EVERY hole to be perfect.)

The SmartTab SX's work so great that if I had no other choice I'd install them with roofing nails.

Jim
 

Attachments

  • bradpointbit.jpg
    bradpointbit.jpg
    3.3 KB · Views: 0

redone4x4

Lieutenant Commander
Joined
Feb 28, 2009
Messages
1,548
Re: pics of my weekend TINT upgrade!!!

yep thats what i got. ya i meant start the hole in reverse, then carefully finish in forward. it still wont be until tomorrow afternoon sometime before i can get em on though. will the 4200 have enough time to cure if we are going out this saturday?
 
Top