pictures of the dismantling and questions about roll or brush on coatings

Lowlysubaruguy

Chief Petty Officer
Joined
Dec 3, 2012
Messages
514
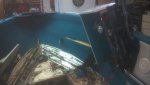
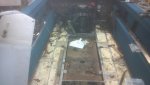
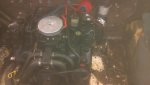
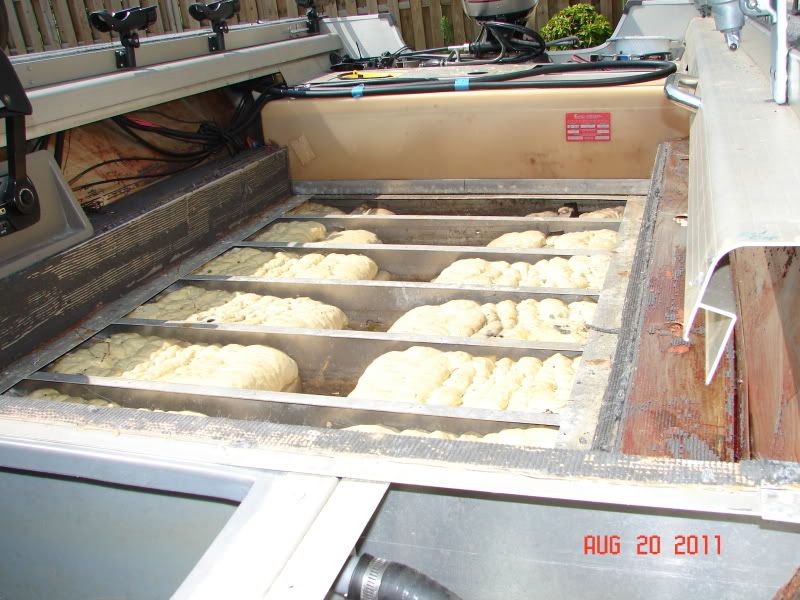
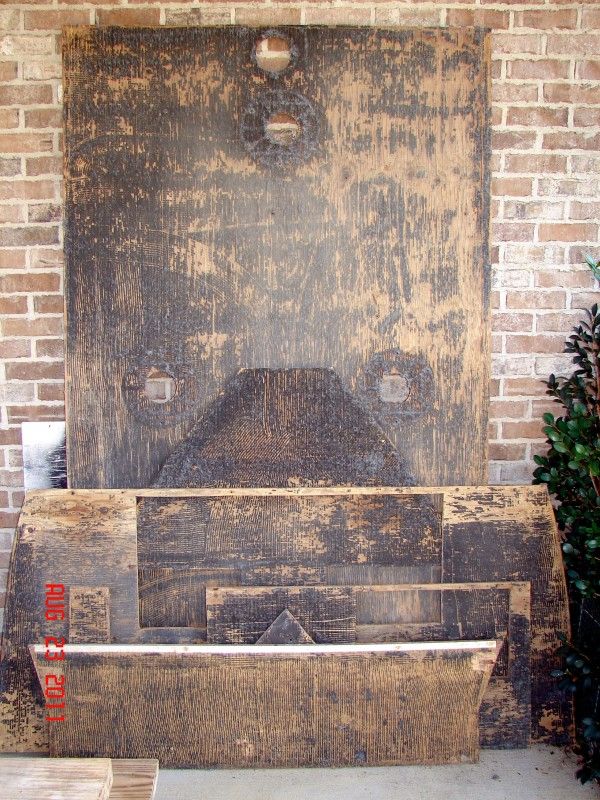
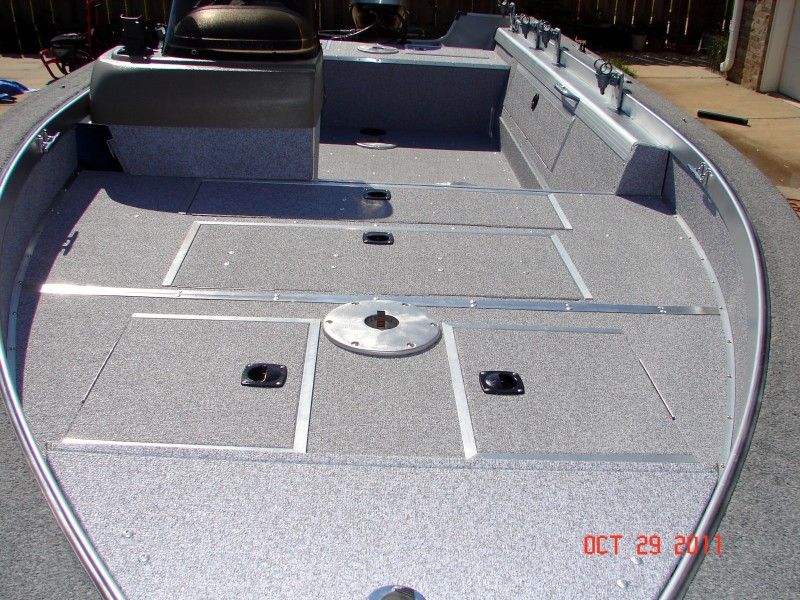
heres some photos of the dismantling still more to go and lots of clean up. I have three months . So lifes good. someone once said a picture is worth a thousand words ive got a thousand words for it for sure. I hope to sleep somenight in the future. I decided to go with New wood plywood then found ther shut down no one has 3/4 and no one will. So Im back to marine plywood for a flooring substrate. Time to get stuff ordered. Im remote and nothing I need comes very fast.

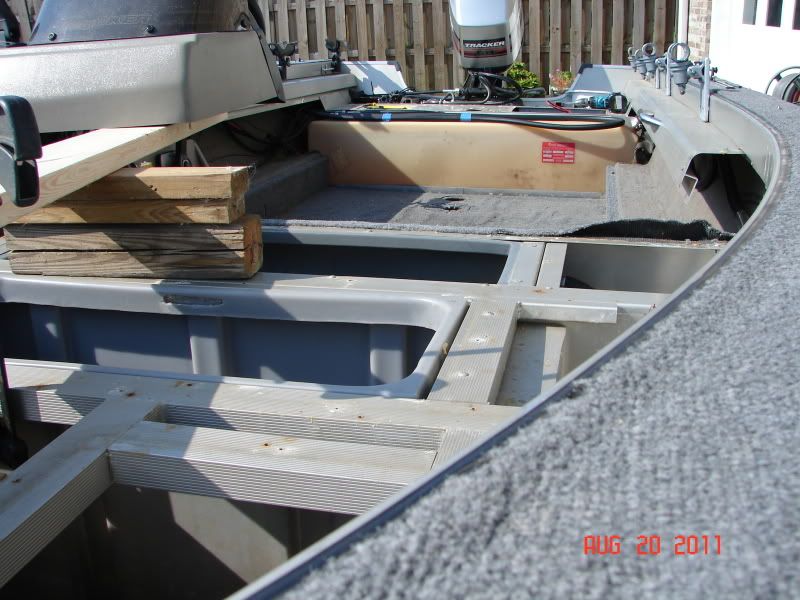
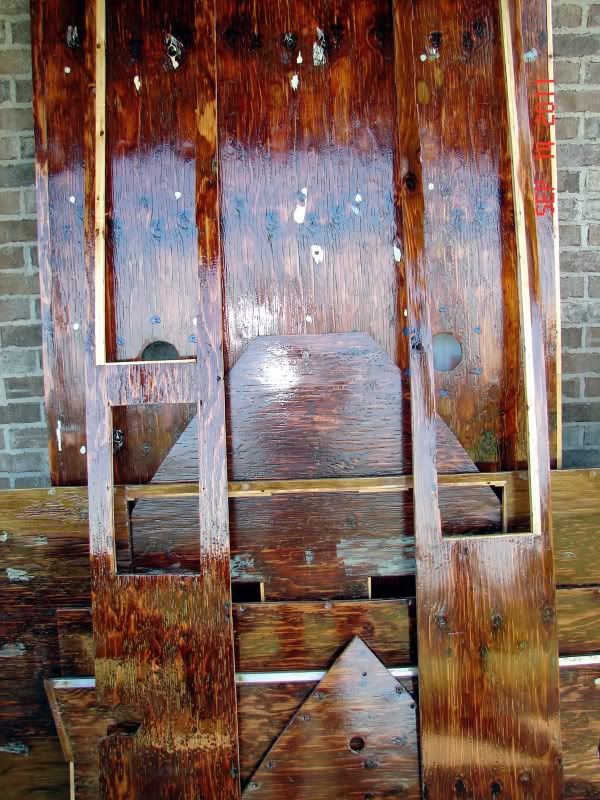
Then to my questions I will probably never run out of questions Im really thinking after Ive pulled and cleaned the reminants of carpet and adhesives from the gunnels sides and bow im going to coat these areas and few of the storage areas with some form of roll on or brush coating vs vinyl or carpet. And if there appealing enough to me I might also do the floors as well. The top of the gunnels are almost 7 inches wide. Ill do this area last my but lives here a lot.

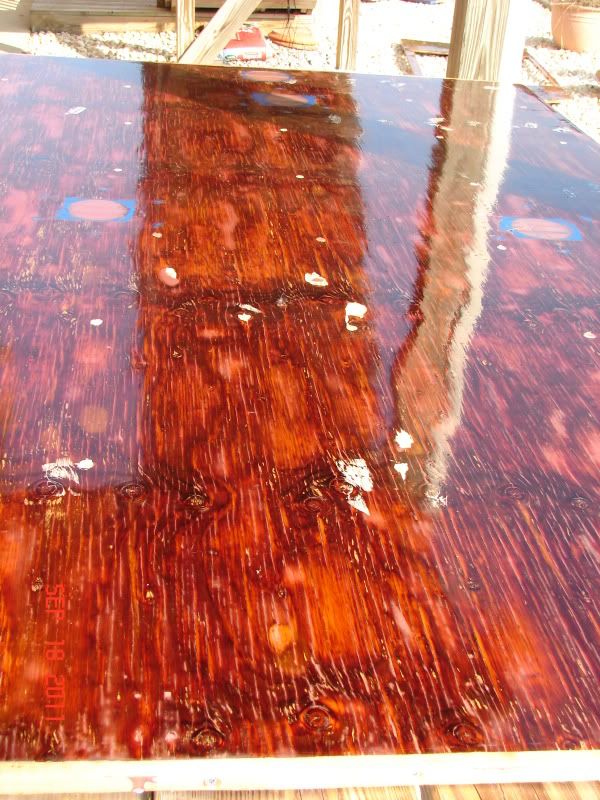
What i want is a surface thats some what slip reisistant and that will dry off when wiped down in rain or dew conditions. I sit on the gunnels top surface a lot. The surface needs to be semi smooth I do not want something that is course or abrasive but I also dont want to be sliding back and forth or falling into the river under rough conditions either. Theres also a lot of things that paint will not cover so paints not an option. It also needs to look good. Some of the rubberized coatings seem to look kind of nasty in the photos Tuff Deck in particular.

Im thinking about Kiwi Grip even talked to tech support who leads me to think I can play with the coating mixes to get exactly what Im looking for. I am pretty talented with a roller and brush some of the reviews i read said the application is tricky to get right And i have lots of semi hidden areas to practice on until I get it right. There support also left me thinking they will be ther with answers before I start I did not get a sales pitch I got a how to from start to finish. there a little more money per square foot but I probably spent 15 minute with the tech guy today who really knew how to instal ther product from the beginning to end. I can also tint it to a color that works with the flooring as well. Any thoughts here are greatly appreciated.

Another would be Tuff Deck But i dont think it will dry off as fast as a hardened surface might.
and there have to be at least two or three others including just hauling it to a body shop next town over and having it rhino lined however id like to be able to touch up areas as they wear through which will make this less desirable plus I think rhino lining might be spendy. I also read a lot of these style coating tend to develop a chalky like residue on the surface as they age.

It doenst have to be cheap or that easy to apply as long as i get the end result. Saving moneys good but Im pretty sure when this is done I wont be looking back at the expenses tallying any of it up. Im thinking long term. Me and a couple of buddies plan to be retired floating around in the cold rain complaining about the lack of salmon were catching instead of working when we get old.

Thanks
 

Attachments

  • 2012-12-12_19-52-40_365.jpg
    2012-12-12_19-52-40_365.jpg
    140.1 KB · Views: 1
  • 2012-12-12_19-52-11_916.jpg
    2012-12-12_19-52-11_916.jpg
    136.7 KB · Views: 1
  • 2012-12-12_19-52-49_366.jpg
    2012-12-12_19-52-49_366.jpg
    123.2 KB · Views: 1

jigngrub

Fleet Admiral
Joined
Mar 19, 2011
Messages
8,155
Re: pictures of the dismantling and questions about roll or brush on coatings

You should keep all of your posts in one thread LSG, makes it easier to keep track of stuff.

I don't think I've heard any bad reviews here about Kiwi Grip, just about everybody that has it seems to love it.

Have you core sampled that foam to see if it's dry all the way to the bottom? It doesn't look to be in that bad of shape from the pics.

What materials are your inner sidewalls made of and what put that gouge in it toward the bow on the starboard side? Maybe that'll buff out?
 

Lowlysubaruguy

Chief Petty Officer
Joined
Dec 3, 2012
Messages
514
Re: pictures of the dismantling and questions about roll or brush on coatings

Sorry about the double post I actually did it on pupose thinking the first pictures would be on the top of this post putting them deep in the middle of the post might make them hard for some to find and see.

Im really glad you mentioned the condition of the foam. Theres one corner the foam didnt fill the cavity had a pocket that held water its still drying out two weeks in a heated shop. This is the area of the worst rot in the floor. I think i will remove it from this area and refill it. Im also going to make sure if any of its not in great shape or has pockets to hold water its fixed. the rest must be pretty solid I can walk on all of it without compressing it. Theres three holes for the seats and the holes are deep it looks good in these areas.

I should have posted this the entire boat is welded aluminum except the floor board, tops of the instrument panel and pedsital that the windshield live on. The blues areas are all carpet its all leaving. This will be the hardest part cleaning the glues and left over carpet off theres tons of it with all the storage areas in the bow and sides.

Unless i get some other input here this is my plan which im happy to now have. To recap my plans are to replace all wood with marine plywood fit and then coat both sides with marine resin. Going to fit it all and work one row of holes and rivets at a time and coat the holes with resin thorgoughly before installing rivets. Then a layer of thin mat and resin over the top filling a couple of areas that wood wont curve to and covering all seams and rivets. then coating everything side walls gunnel tops and flooring with Kiwi Grip. Probably going with white I will tint it lightly with little Jade to dull it out and make it fit some of the trim colors, bright white can tend to be overly bright on really sunny days. im kind of an over dooer it will be thick as its got to cover a few aluminum sopports and hinges that carpet used to cover. It will probably take 6 gallons or more to do everything theres lots of cargo areas in the bow the boats 39 inches deep from the top of the floor to the top of the gunnel. Im not to concerned about added weight first I think the last few years the plywoods never dried out probably holding more water weight than I am going to add second it moves fast enough I could loose a MPH or two and have no regrets if this last the rest of its life.

One point id like to make the storage area in the bow one side they screwed through three layers of stuff and did not rivet this area. I dont know if the screws pulled loose eating into the wood allowing moisture into the plywood or if they just could not seal the holes because of all the layers of crap they went through. But the plywood in this area was the worst rot in the whole boat. I will be sealing any hole in my boat from now one. Every area screws went into wood had more rot than other areas. I read a lot about water intrusion through holes on this forum and it was really appearant on my boat. Not just places that was missed when it was assembled but every hole or screw i added over time should have been sealed.

Im really winning. Ive taken my boat for grannet the last few years its degraded interior left me with less love for it. I also had a couple of personal life issues that are now better. I have been battling cancer for almost 4 years now and the prognosis is i am winning. i searched for this boat for years. Found it used 6 months old in Feb of 07 paid exactly what the guy was asking saved $5000 over new. And loved it for so long. Now that I have a fairly good idea of what direction this is going i want it fixed and better than new. I even slept last night. I can already visualize that last piece of trim going in in my mind. Its perfect for my needs will run 55 MPH when propped right and we have had 12 people in it on a 4th of July fireworks watching event. I moved here to be on the water. Since i dont live on The Big Island this boats perfect for my needs and it and I plan to be around a long time.

One last thing that may be a tip to some with mercruiser Alpha drives. My boat makes this slight knocking nose when idling in gear worse when turning. The cure has been to remove the outdrive and grease the splines of the drive shaft where they slide into the engine. This is good for a few years. So now that I have this thing gutted I see a grease fitting on the top of the drive tube. its invisable on my boat covered in steering and a large wiring harness. Im thinking about screwing a grease gun flex hose to it permanent making it so I can grease it with no effort in the future. Might cost me like $10 to do this now.

thanks for your input
 

jigngrub

Fleet Admiral
Joined
Mar 19, 2011
Messages
8,155
Re: pictures of the dismantling and questions about roll or brush on coatings

1. Core sample your foam, take a piece of PVC pipe and cut a couple notches on one end to make "teeth". Then push and twist it down through the foam all the way to the hull, pull the pipe out and you'll have a plug of foam in it. Push the plug out from the other end of the pipe and examine the foam for moisture on the bottom of the plug. Do this in several places, where the water was ponding in the boat would be a good place to start. Floatation foam can look good and feel dry on top and be waterlogged on the bottom. This adds hundreds of pounds of weight to your boat and the foam that is wet won't float your boat in an emergency. The wet foam will never dry out in a boat because it's too thick and sunlight and air will never get to it. It'll also create very humid conditions below your deck which will breed mildew, mold, and rot.

2. Your decking: Sealing your decking with multiple (4) coats of epoxy resin on both sides and all edges will give your the best protection. Make sure you use epoxy resin and not polyester resin.

Finishing your decking: I suggest you paint on whatever product you're going to use before installing your decking, do the topside and edges of all of the pieces.

Installing your decking: I strongly suggest you install your decking with exposed fasteners through the finish, this will enable you to remove your decking in the future without having to destroy your deck finish. This comes in extremely handy should you have to make below repairs in the future... especially with a below deck fuel tank like you have, or if you need to make livewell, or hull repairs.

Sealed decks are for fiberglass boats because they have to be for strength, removable decks are for aluminum boats so you can work on them without destroying them.

I know you're probably thinking "What about the water that gets in my bilge?". The only water that should get in your bilge should be water from scrubbing your deck or if you get caught in a rain storm. This water should be drained out of the boat by removing the bilge plug when the boat is on the trailer and raising the bow as high as it will go with the trailer jack. The rest of the time your boat should stay covered or sheltered with the bilge plug out when not in use. Exposing the inside of your boat to the outside elements is the reason it's in the condition it's in today... and after all the work you're going to put in this boat, you don't want it to rot again in 5 yrs. do you?
 

Lowlysubaruguy

Chief Petty Officer
Joined
Dec 3, 2012
Messages
514
Re: pictures of the dismantling and questions about roll or brush on coatings

Thanks for your input which has spurred another volley of questions

First if I do find bad foam and for a fact i plan to fill some of the pockets that are collecting water what kind of foam do i use I assume spray foam from the hardware store will not hold up?

Next floor and fuel tank. Its not really a removable deck. The floor does not come up easy regardless of how I install it or cover it so its not in the desired future to be back in here. Also the way it seemed to be anchored to the bracing and the foam had adhered to it tells me its structerally part of the boats design and not meant to come up with any ease. Should I think about replacing that 16 almost 17 year old plastic tank? That would be the only reason to go back here again the front deck both pedistals and drivers seat compartment cover enough of the floor that its 75% of this project to go back in for a gas tank. Id be inclined to install one if any of you suggest it because it might have an issue in 10 years or less.

Im hoping the floor panels fit well enough to predrill as many holes and seal them as well as possible before starting the actual install. You mentioned water not being a normal part of a boats interior. Your funny. We fish in rain that makes most hurricanes seem like summer showers. And my boats cover usually comes off about April and stays off till October. I cover it if its not headed out for a while but it sees a lot of exposure to the elements. So rain and water are part of this boats life. One more reason to seal the flooring complete incuding fastners.

Im open for suggestions though and nothings been done at this point so I could easily change directions Thanks again
 

jigngrub

Fleet Admiral
Joined
Mar 19, 2011
Messages
8,155
Re: pictures of the dismantling and questions about roll or brush on coatings

You can buy the foam online here:
Urethane Foam , Expanding Marine Polyurethane Foam
It's the same site I buy my epoxy resin and they have great service and quick shipping.

As for the removable decking. I bought my '97 Tracker brand new and it came from the factory with exposed deck fasteners. It also came with carpet I changed once.
Removing the decking from my boat is easy, and so is putting it back in.
DSC02192.jpg

DSC02205.jpg


This is what my 14 yr. old decking looked like after removing the carpet (because I keep my boat covered when not in use).
DSC02209.jpg


This is what it looked like after removing the carpet adhesive and applying 1 coat of epoxy resin.
DSC02215.jpg

This is after 4 coats of epoxy resin.
DSC02217.jpg

You can see where I patched the old screw holes with epoxy filler before applying the resin. Yes, that's the original plywood installed at the factory that had carpet on it for 14 yrs (because I keep my boat covered when not in use).

This is what my boat looks like with the new vinyl on the old decking.
DSC02252.jpg

I used rivets for exposed fasteners this time instead of self tapping screws to prevent twisting the vinyl deck covering, but they are exposed and I can remove them and my decking easily.

I'm not worried about water getting in my bilge from fishing in a rain, getting caught in a thunder storm, or scrubbing my boat down... that's where the water is supposed to go. I just pull the bilge plug at the end of the day and it all drains out. That's another mistake a lot of people make, not removing the bilge plug after every outing so the bilge can drain and breathe.

Your boat is only 1 year older than mine, but there's a big difference in the way our decking held up.


I see quite a few aluminum boat owners on the forum opt for the concealed deck fastener method, and I've seen several regret it because of problems below deck they didn't anticipate when installing the decking. Most are below deck leaks they thought they had fixed, but didn't. A couple of others were floatation foam mistakes. In every case the person has chosen to leave the problem "as is" instead of fixing it because they didn't want to destroy their new deck finish to get to the problem.

... but, this is your boat and you can do it any way you want... I'm just trying to help.
 

Lowlysubaruguy

Chief Petty Officer
Joined
Dec 3, 2012
Messages
514
Re: pictures of the dismantling and questions about roll or brush on coatings

the wheels of progress are finally turning, Pre Christmas and the holidays and then snow, seemed to eat up the last month. Pretty typical and why this is a winter project. Lifes good tonight. I have the boat gutted to a point its now worth about $5 but its not for sale. I have one side stripped to bare aluminum and have found what seems to work well enough to know its actually going to happen. Should have the entire boat stripped by the end of the weekend and hopefully steam cleaned so it can dry before i start reasembly. But the ugly part of this job is about to end. I enjoy making stuff but this parts been less than enjoyable.

i have made one decision and that is admitting that i cannot make a decision on what to cover it with. last week looking at all the glue and residue from carpet mat. I was sure id never get it stripped well enough to put a roll on coating. And was about comitted to Vinyl on everything. However tonight Im thinking Ive could do a roll on coating and be happy with it not to mention the alumimun looks like new and Im confident i can get the adhesion needed for long life. Kiwigrip is possibly my number one choice. But i still think something with a little cushion might still be better. ill figure it out. soon I will be moving in the forward direction and installing stuff. Will put a couple pictures of the insides when its all bare aluminum.

I wanted to comment on the stripper i am using its called ready strip its one of the more environmentally freindly strippers out there, has a very low odor. I have stripped a few things and hate this part of the process. I was impressed. Paint a thick coat on with a brush working it different directions ( at least when stripping areas with carpet fragments remaining) and let it sit 4 plus hours. Its probably 55 to 60 degrees in my shop 5 hours and it was still wet and working it could have sat a couple more hours. what i found was it did not seem to dry out and become hard to work has a very long work zone so you can put a lot of it on and not fear its setting up in a hurry. very low odors didnt seem to eat me alive some the vapors when working a lot leave your face and skin lightly burned just from the vapors. i also had a hefty scrapper that you work with two hands its blade cuts both directions and between the two of them i stripped one entire side with a gallon and one blade. Im pretty impressed with it. I will have some nooks and cranny to strip which will really tell.

Thought id update those who have been watching.
 
Top