catfighter
Petty Officer 1st Class
- Joined
- Aug 11, 2009
- Messages
- 263
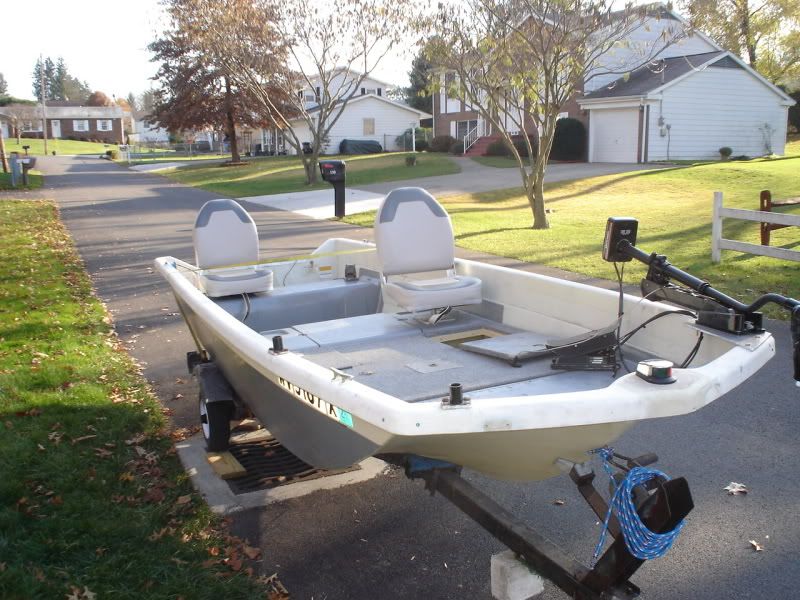
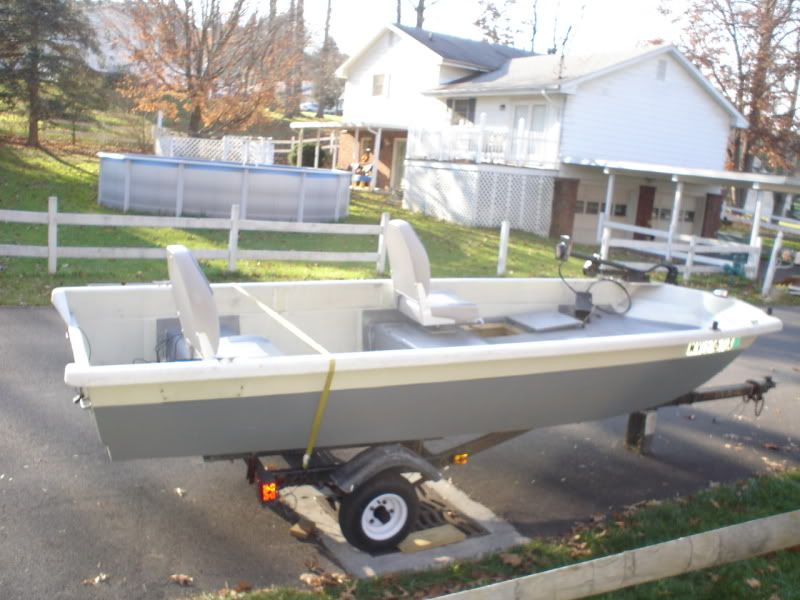
I have decided to make a thread for my catfish boat project. Later, I plan to put this in the "Completed Projects" when totally complete.
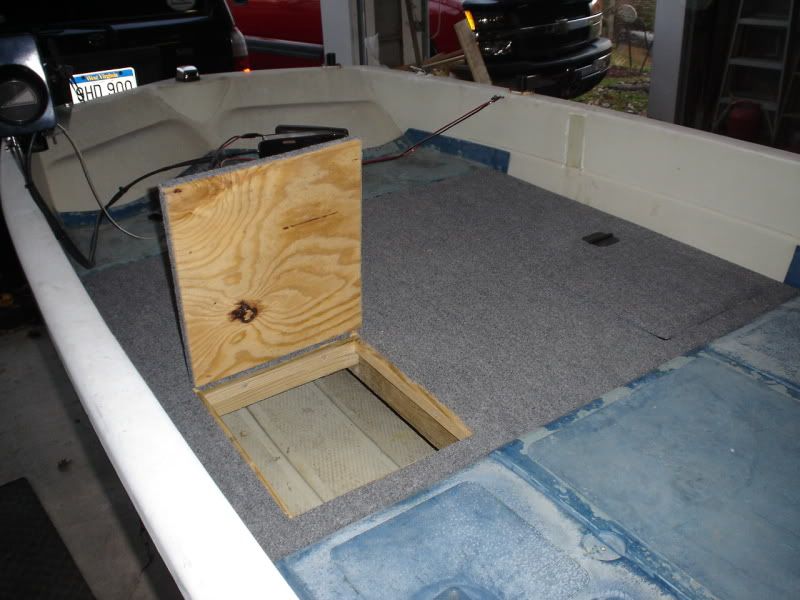
I don't plan to do much more, but I need to rebuild the transom, paint the benches, and finish flattening out the stern deck.
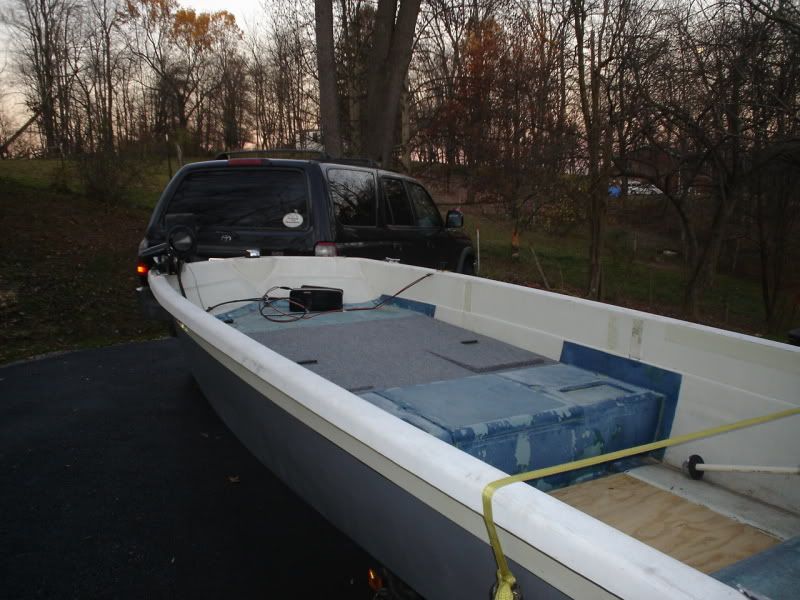
Anyway, here goes my casting deck build:
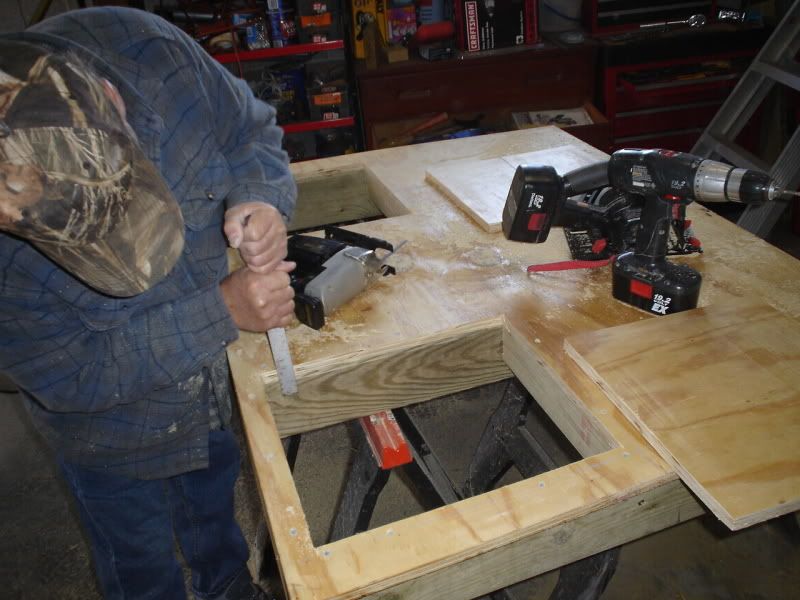
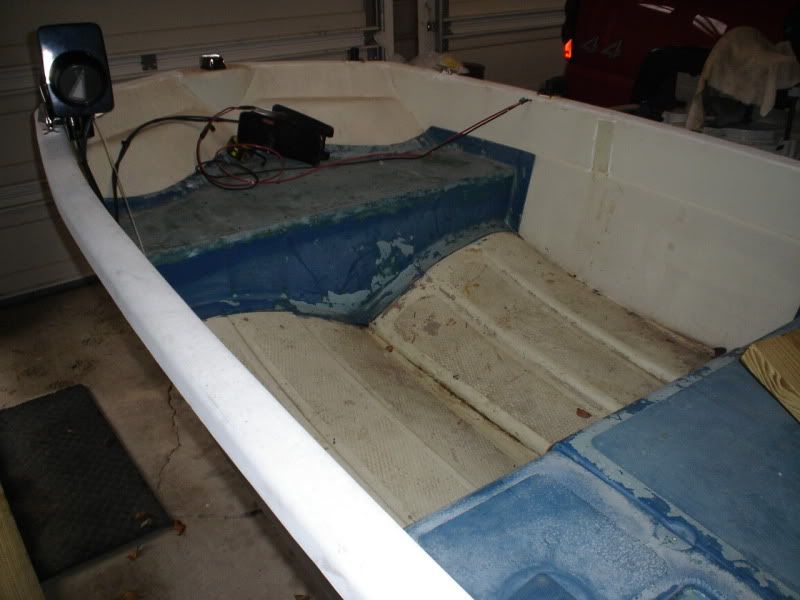
This is pre-build; notice how the front of floor slopes up and makes it impossible to stand on. This was the main reason I decided to do this build.
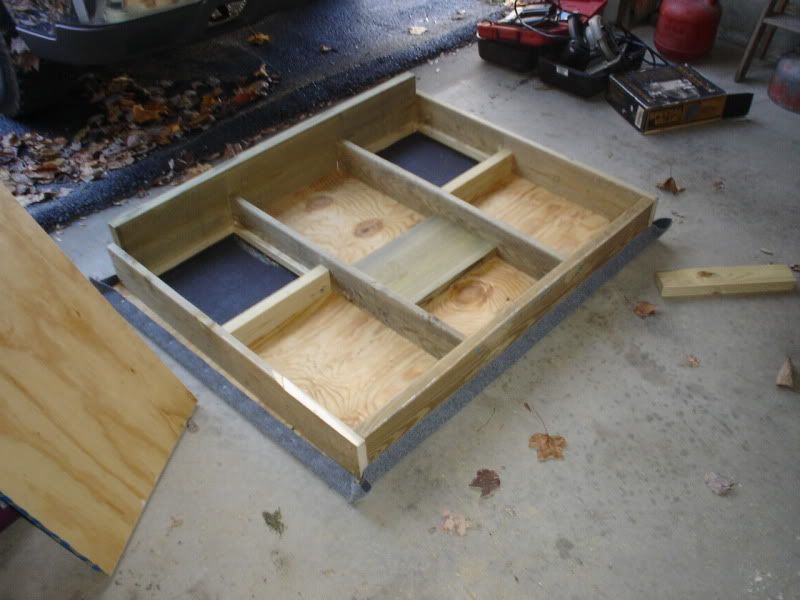
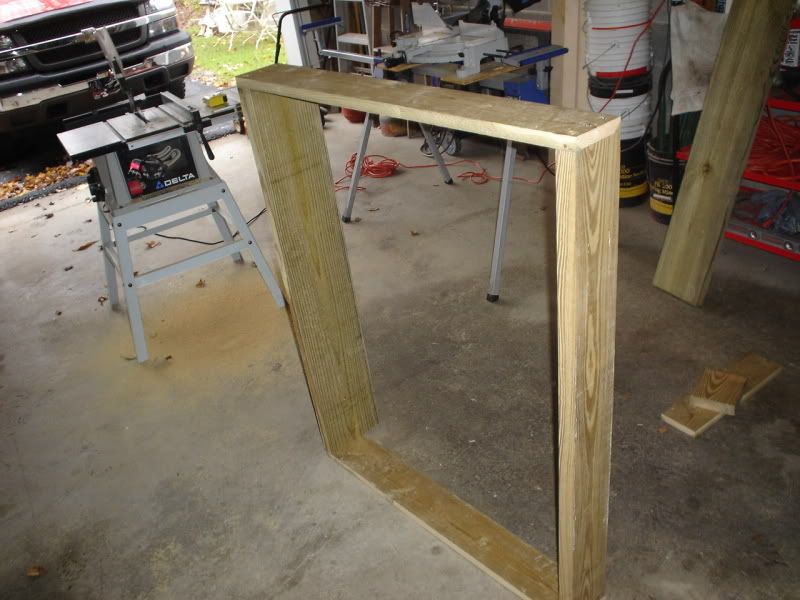
Here are the stringers. The sides are 1x4" treated wood. The front and back are 2" treated boards cut perfectly to allow the weight on the deck to be distributed to the boat floor (rather than hanging from the sides, which would have meant drilling holes in the fiberglass sides). It means the deck is heavier, but a ton more stable.
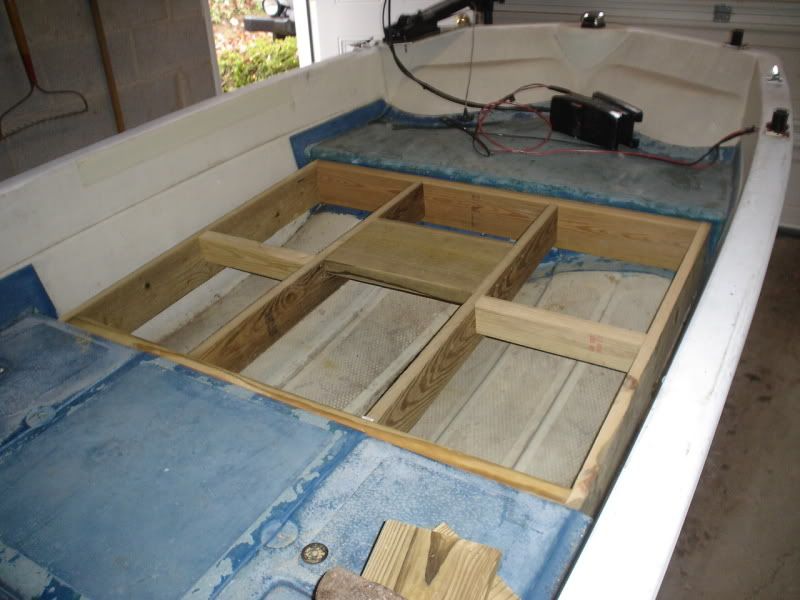
The joists are made by 1x4 and 2x4 treated wood. The large 2x10 plate is attached between two joists (15" apart) for pedestal seat I plan to install. It's attached with 10 3" SS screws and easily held 400+ pounds and probably could have held 200 more! It's sturdy, believe me. This weighs about 40lbs.

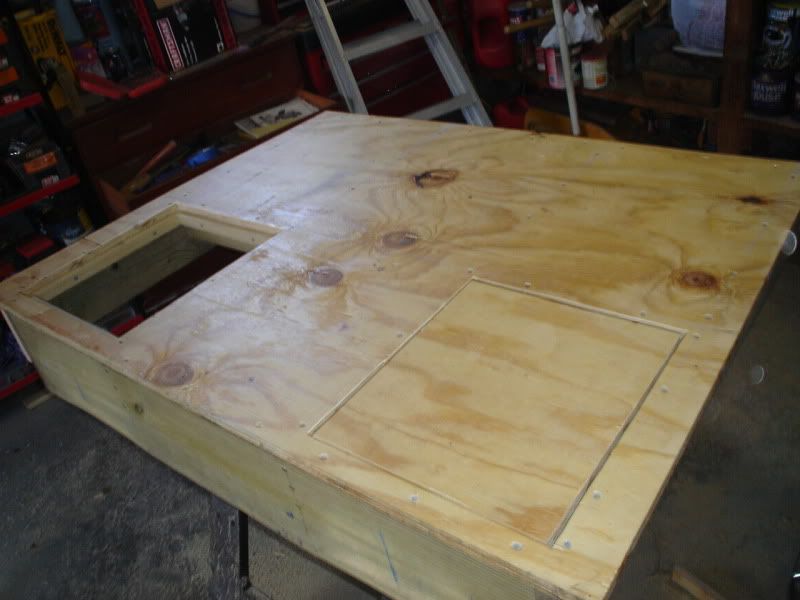
This was a fit test. It didn't fit at first b/c the fiberglass benches have these bubbled sides that I didn't account for. We hit it with the belt sander and it popped into place perfectly by standing on it; it also stayed in place, i.e. we had to pry it out with a mattock. A perfect fit, IMO.
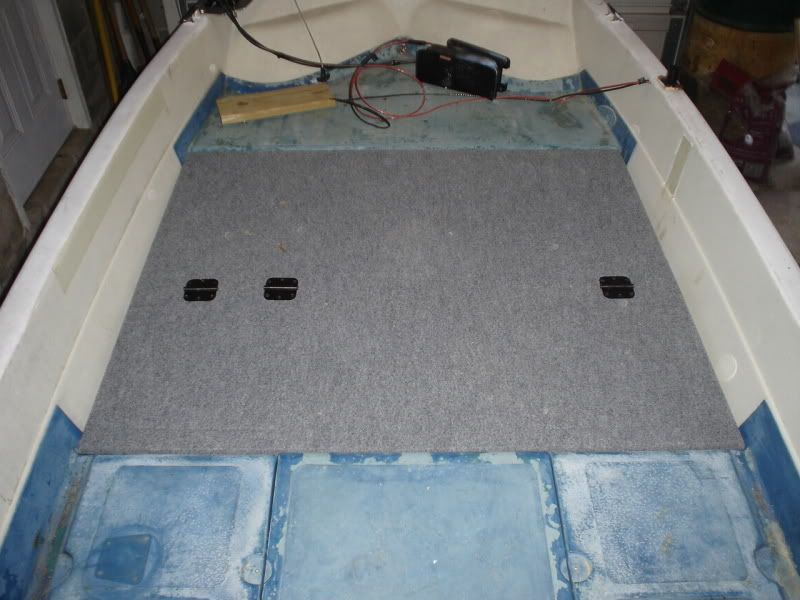
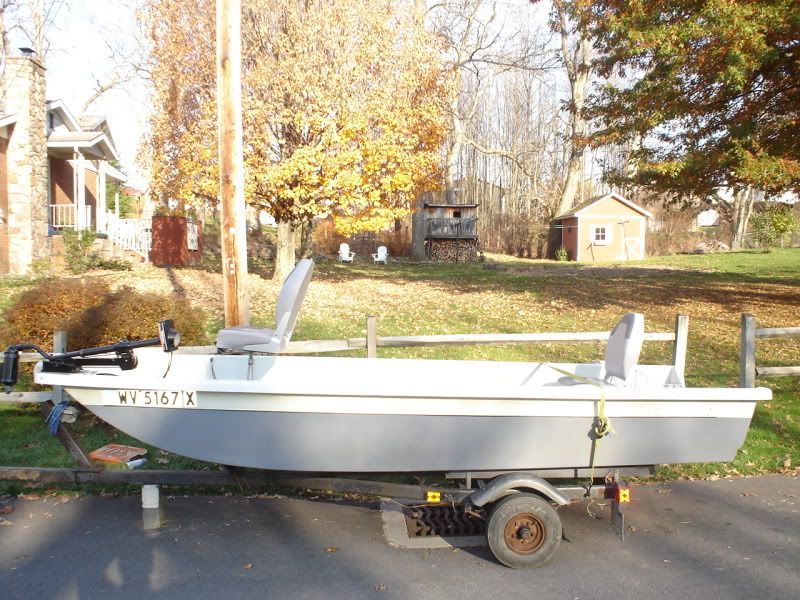
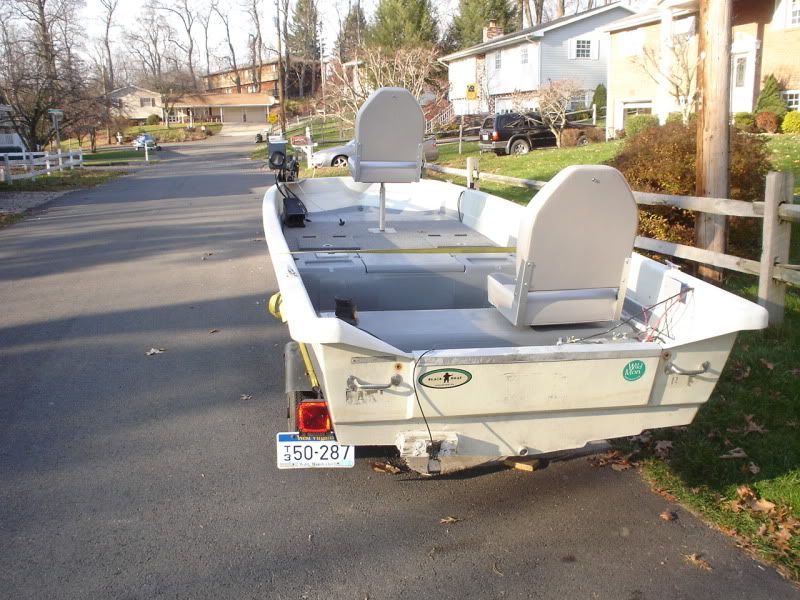
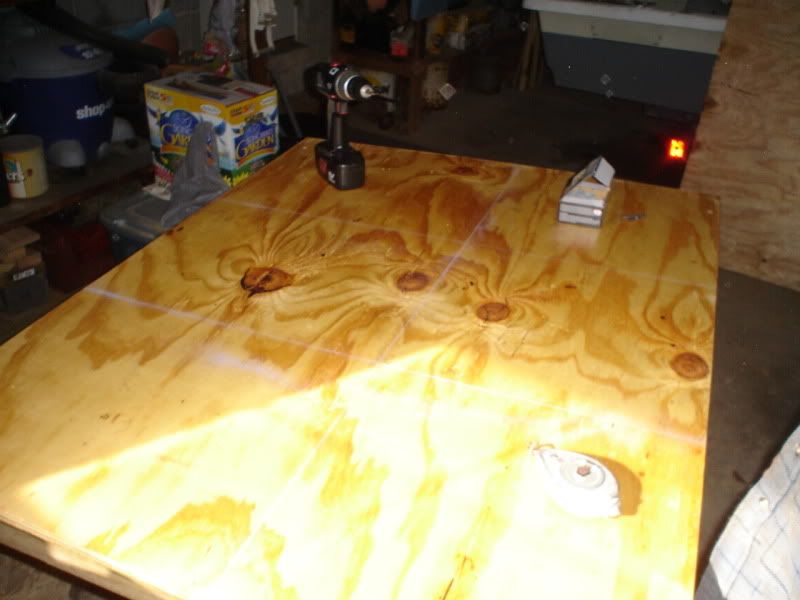
So I decided on 3/4" plywood for the deck floor. I cut it to fit in my boat and varnished it with Helmsman spar varnish (I think it's Rustoleum brand). I chalk-lined the joists and used 1.5" coated decking screws to attach it to the frame. To ensure it would fit perfectly back in the boat, I drilled two guide-holes when the frame was in the boat as a reference for when we took the frame back out.
 l
l
I don't plan to do much more, but I need to rebuild the transom, paint the benches, and finish flattening out the stern deck.
Anyway, here goes my casting deck build:
This is pre-build; notice how the front of floor slopes up and makes it impossible to stand on. This was the main reason I decided to do this build.
Here are the stringers. The sides are 1x4" treated wood. The front and back are 2" treated boards cut perfectly to allow the weight on the deck to be distributed to the boat floor (rather than hanging from the sides, which would have meant drilling holes in the fiberglass sides). It means the deck is heavier, but a ton more stable.
The joists are made by 1x4 and 2x4 treated wood. The large 2x10 plate is attached between two joists (15" apart) for pedestal seat I plan to install. It's attached with 10 3" SS screws and easily held 400+ pounds and probably could have held 200 more! It's sturdy, believe me. This weighs about 40lbs.
This was a fit test. It didn't fit at first b/c the fiberglass benches have these bubbled sides that I didn't account for. We hit it with the belt sander and it popped into place perfectly by standing on it; it also stayed in place, i.e. we had to pry it out with a mattock. A perfect fit, IMO.
So I decided on 3/4" plywood for the deck floor. I cut it to fit in my boat and varnished it with Helmsman spar varnish (I think it's Rustoleum brand). I chalk-lined the joists and used 1.5" coated decking screws to attach it to the frame. To ensure it would fit perfectly back in the boat, I drilled two guide-holes when the frame was in the boat as a reference for when we took the frame back out.