Rochester Carb rebuild

floattest

Petty Officer 2nd Class
Joined
Jul 10, 2008
Messages
104
This is a 4MV, 17059286. About done but I have a question. The new pump assembly is different than the one that came out of the carb. In the picture the old one is on the left it is 2.375 long and the one on the right is 2.625 long. Just not sure if the kit was wrong or what. It seems like I won't be able to adjust the pump lever with this longer pump. Anybody know what I should do with this thing? Thanks.
 

Attachments

  • pumpassembly.jpg
    pumpassembly.jpg
    13.9 KB · Views: 0

woosterken

Lieutenant
Joined
May 18, 2005
Messages
1,431
Re: Rochester Carb rebuild

could you move the new spring and seal over to the old shaft?
or get out the dremmel tool and cut the new shaft down to the size of the old one.

woosterken
 

woosterken

Lieutenant
Joined
May 18, 2005
Messages
1,431
Re: Rochester Carb rebuild

could you move the new spring and seal over to the old shaft?

woosterken
 

Gary H NC

Fleet Admiral
Joined
Dec 1, 2005
Messages
8,972
Re: Rochester Carb rebuild

I would move the seal only to the old shaft.That way you keep the original spring tension and shaft length.
 

smarks

Petty Officer 2nd Class
Joined
Mar 23, 2010
Messages
119
Re: Rochester Carb rebuild

How about the bench grinder??
 

6meter

Chief Petty Officer
Joined
May 15, 2010
Messages
525
Re: Rochester Carb rebuild

Just curious but every carb kit I've gotten has included the accelerator pump, but without the spring and retainer. You were supposed to put the old spring and retainer on the new pump shaft. How did you get two complete accel pumps?
As to your question, swap the rubber and under spring to the old shaft.
 

joenapier

Seaman
Joined
Sep 23, 2008
Messages
72
Re: Rochester Carb rebuild

I had a similar situation - new accel pump is longer and the seal was a different shape. I also got no underspring with the kit.

I used the new accel pump with the old rubber skirt seal and had to special order the underspring.

The longer shaft on the new pump did not cause me any problem - it still squirted plenty of gas in the primaries during acceleration. Because the accel pump lever does not depress the pump/piston all the way down in either linkage hole (big shot or little shot) then I think the amount of fuel delivered is about the same with either pump.
 

6meter

Chief Petty Officer
Joined
May 15, 2010
Messages
525
Re: Rochester Carb rebuild

Bad kit. Through the years I have learned to use nothing but Delco kits based upon the carb number. To many problems with aftermarket pieces. The initial shot of gas upon acceleration is the only time the pump works and prevents a hesitation. I'm sure the are different pumps that you can use to "customize" your carb, along with 100's of other adjustments.
 

floattest

Petty Officer 2nd Class
Joined
Jul 10, 2008
Messages
104
Re: Rochester Carb rebuild

Thanks all.

My favorite comment:

"I'm sure the are different pumps that you can use to "customize" your carb, along with 100's of other adjustments."

just great. :)
 

6meter

Chief Petty Officer
Joined
May 15, 2010
Messages
525
Re: Rochester Carb rebuild

Glad you smiled. I took that as you don't sound to confidant working on one. But after working on them for 15 years at Chevy dealers, you learn a bit about them. When you tweek this and that then twist this a schoch and bend that a bit and turn it just a hair, it changes them. Most of the time all you have to do is get them clean, really clean. Q-jets do have a alot of things you can adjust.
 

floattest

Petty Officer 2nd Class
Joined
Jul 10, 2008
Messages
104
Re: Rochester Carb rebuild and more

Re: Rochester Carb rebuild and more

I'm going to post my reply here because I'm almost positive that my problems are carb related. Thanks for any help anyone can offer.

Problem: poor off idle performance after running in water in gear at temp for 20 minutes or more. Boat seems to run rougher and rougher over time unitl it dies and then is dinfficult to start, can get it started in nuetral but then when dropped to idle speed and dropped into gear it dies. To get back last night I had to adjust the idle high and have friend hold off the ESA while I dropped into gear, stumble coughed and got going was able to run for about 25 minutes at 2K then it died again. Luckily within a hundred yards of the launch. I stretched the no wake rule in the channel just to get back to the launch.

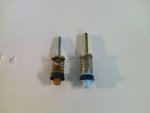
Now I will follow up the original post. I ended up using the old pump assembly. The rubber still was in good shape and it pumps fuel in the bores nicely. I didn't take the chance of grinding the one that was in the kit to a measured length on the old one. It seemd like low risk to put back the one I took out. I did note a different spring rate in the two pump assys, which also made me stick with the one I had taken out.

I went through all the carb adjustments in the book before installing. There is quite a few and some of them even by going to the manual seem tricky. Like the choke linkage adjustments have you measre betwee the choke valve and the carb body, but the choke linkage is in a slot so it depends on if you hold the valve to the edge of the body or away from it to measure. Anyway. I made several bends in the stops and links to get what I think are the correct adjustments. I have an OMC factory manual from 1982. My motor is 1979 but I made sure the carb sections were dealing with the same carb model. See the first post for the model number. By the way the factory OMC manual is awesome. Anybody with an OMC needs one.

Installed the carb and set the idle screws 3.5 out.

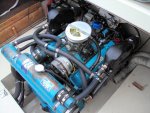
After installing the carb and a new spin/on fuel water seperator I fired her up and it came to life immediatey. This is in the drivway marina. It seemed to idle nice and I let it come up to temperature. Made sure of no fuel leaks and every thing was normal.

Went to the launch to adjust the idle screws and the idle stop screw as the last adustments.

With it in the water let it run up to temperature and tried to do the lean drop process by turning in one screw at a time until idle drops and then back off 1/2 turn. This doesn't seem to go by the book. The idle screws don't seem to have much affect.

I ended up at about 2.5 turns out on the idle screws. I think I had the idle stop set a little high, maybe 650 rpms, but I decided to set out and see how she ran.

That's what led me to this article on quadra-jets when I struggled with this before. This is some good stuff and the guy has written lots of articles about q-jets. ALthough they are not neccessarily marine apps I think a lot of it could be useful for us here at iboats.

http://www.florida4x4.com/tech/quadrajet/qjtshoot.pdf

So anyway to continue, off idle perf was good I was able to shift in and out of fwd and reverse and navigate the launch and channel and idled out to the sound. It takes about 20 minutes to get past the no wake zone and then I ran here for about 20 minutes at 3.5K and all seemed pretty good.

When I slowed down to 1.5K it started running rough and died and then the problem stated starts up.

Had the same problem last year with a different carb rebuilt by a marine shop.

That is another reason I think my problem is listed in the linked document.

I know I may need to go through some tests to diagnose it, I'll do my best as you suggest. I'm not a marine mechanic but I'll work through this.

Just a quick history: I have gone through cooling issues and ended up putting on a new set of center riser style manifolds and a new water pump. Cooling is steady at all conditions but it does seem to run a bit high, guessing by the dash gage I would say 175 or 180. The old manifolds were crudded/rusted up and it overheated frequently. Oddly It ran pretty good, relating to idle and off idle, other than the overheating. When I went through this last year is when I had the other carb rebuilt and I installed it. I had a few stalls around the launches and wanted to make some preventative steps. So I did a normal tune-up and put the rebuilt carb on. Used a new carb gasket, the 1/4 inch thick one.

If you are still reading, thanks. If you have an idea or maybe a place to start I appreciate any advice I can get, thanks.
 

Alpheus

Lieutenant Commander
Joined
Aug 3, 2009
Messages
1,759
Re: Rochester Carb rebuild

Use the longer pump. It works perfect...
 

floattest

Petty Officer 2nd Class
Joined
Jul 10, 2008
Messages
104
Re: Rochester Carb rebuild

I just had a thought and/or question regarding this thread and my problem.

Does the primary jet size relate to engine running temp?

Since my problems seemed to start when I put the new manifolds on it. They are not the stock OMC manifolds. Looks like this. It's a good install and the cooling system works good.

But maybe it runs a different temp that OMC intended. would that fact affect carb adjustment.

I've had two different rebuilt carbs on it with the same symptoms.

I know I may be flailing, but I'm at a bit of a loss as to what to try next.

thanks,
 

Attachments

  • manifolds2.jpg
    manifolds2.jpg
    145.9 KB · Views: 0

floattest

Petty Officer 2nd Class
Joined
Jul 10, 2008
Messages
104
Re: Rochester Carb rebuild

ENGINE FIXED!

It wasn't a fuel issue afterall. 2 rebuilt carbs, I've pumped the tank twice now, All filters have been replaced more than once, many iterations of idle screw adjustment, also cleared the tank vent (more on that later) and blew out the antisiphon valve with carb cleaner, it's in good working condition too. Anyway, Who cares now, it's fixed. Just a lot of time lost, but the good news is a lot of new knowledge that I can share.

After replacing the fuel the last time and no success I was convinced I may have an iginition and/or ESA problem. I tested the two switches on the shift converter and made a slight adjustment to the overstroke switch. I found some corrosion and questionable condition on the old ESA so I put a new one on it. Also replaced the coil and wires. The plug wires were pretty old so I figured no reason not to eliminate them as the cause.

Same thing. It would run great for about 30 minutes in the driveway at 1K or on the water at 3K. didn't matter. The idle quality loss and stalling when going into gear was repeatable every time.

Finally dug into the distributor and completely dissasemble it. (lesson learned, should have looked at distributor long ago, after first carb rebuild) Well, one of the weights had lost it's advance plate guide pin. Was rattling around inside the dizzy. Not the pivot pin but the other one that goes in the slot in the advance plate. The shaft bearings were good except for too much end play. Was going to replace the weights but decided to make the plunge and upgrade to breakerless. Total cost about $410 including the CDI ESA.

I bought the Mallory breakerless, coil and wires kit. This coil requires the ballast resistor, part 700. Then you run a 12V wire from ignition switch to the ballast resistor/coil. The new ESA is the CDI unit and does not require a diode fix. I like the plug wires from mallory a little better than the sierra wires. They both seem like good quality but the boots and the terminals seem like better quality on the mallory wires and the mallory wires are trimmed to different lengths. They fit better. Who knows, they are both better than way old wires!

Mallory kit to replace the old YM624JV: M9-26000 SS
It includes YLM624AV and coil 9-29716 and wires set, then add ballast resistor Mallort part 700.
The ESA is CDI 123-9898P.
Also needed 25 feet of 16 gage wire and a few connectors.

Idle is steady now, shifting is perfect. It will stumble slightly as it is designed to it seems both into and out of gear. When at idle around the docks shifting from fwd to revers it is smooth and easy, idle drops down to as low as 500-600 and no stalling! In nuetral I have the idle at about 700. Maybe a bit high.

The one weird thing left to figure is that My cheapo direct hook up timing light doesn't work right. Can't figure this out. It fires at about 30 degrees btdc of #1. Been all through this finding tdc 1 and setting the dizzy multiple times. Had to time it by ear and then test run it to eliminate ping. Not happy about this but it has proved successful as we were pulling hard on her yesterday through some tough wind chop on Puget Sound and going 27 mph. Daughter thought we caught air a couple times, but it was just the big 5 feet deep holes between the chop, fun ride, dry too, this hull is a tough girl.

So my plan is to find a better timing light, inductive, to perhaps weed out this strange problem. I really want to be able to get the timing perfect by the light, but I probably have near perfect the way it is.

So the last hing as I mentioned earlier is the tank vent. I noticed while doing some wiring that it has a loop. Kinda like you do with a dishwasher hose. I'm sure that the idea is to keep water from getting into the tank from the vent, and maybe it works becasue the last time I filled it with gas it was spitting water/air OUT of the tank vent while filling indicating that there was water in the bottom of the loop. Anybody have this loop in the tank vent hose? My concern is that if the lower portion of the loop get's water or gas in it that the vent won't pull air and it will stall. The last two cruises kinda disprove that though. I'm thinking that if on a long cruise in rough water a lot of water could get pulled into the tank through the vent and the loop.

Anyway, all minor stuff now.

Took my buddy crabbing on Thursday. Took 5 dungeness. On Friday Wife, Daughter and captain went for a long cruise by Hat Island and Whidbey. Great Fun! Run most of the time around 1.5K and about 7-8 mph on the gps. I like that speed best for low stress cruising.

Thanks again for all the help and happy cruising to all.
 
Top