I first want to thank all the many contributers here with their project documentations. You have helped me so much over the years with my boat project(s). I've been a member here before but can't seem to logon with my old pass and name so I registered again. Thought some of you might find this new project of mine interesting. Never can hurt to see one more. There will be pics tomorrow so Its kinda boring until then! Sorry. Heres my story and I'm sticking with it!
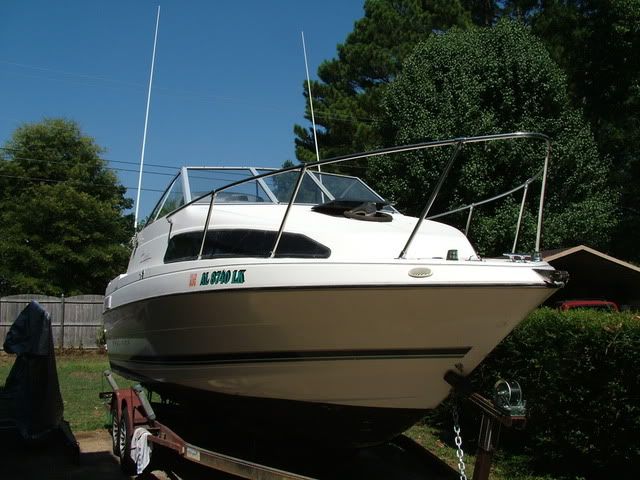
I refitted a 96 Bayliner 2252 Cierra, a Hurricane Ivan survivor a few years ago and have enjoyed it with my family since, many lessons learned along the way as I put in new power, all the electrical, redo cabin and upholstery, new trim tabs, docking lights,.(Got the boat and trailer for 800 bucks off ebay, quite the bargain I thought at the time. How many of us have said that "gotta have it, the trailer is worth that!"... Don't believe it!). I didn't have to do much glass work other than the mounting for a trim tab pump and a few new options as the hull was in excellent shape. I've done some light fiberglass work in the past as well as a few vintage car redos and a few other boats so I'm somewhere between a novice and your average factory boat builder on a Friday. I am a stickler for doing it right though!
Now I'm helping my best bud to refit a 60 something 25 foot? Sportcraft Sea Eagle circa 1960 something from the hull up. We already refitted the trailer and are almost complete with that project. Just have to refit the brakes and lighting. (I've heard they may be important!)
We were going to fix a soft spot in the aft flooring of the boat but after cutting up a bit of the deck we found rot. No surprise since the boat is 40+ years old, just wasn't expecting so much. We cut a bit further and found that old crappy sprayed in (pumped in?) foam has been holding 6 inches of water almost all the way to the forward cuddy bulkhead for several years. So, the stringers are toast all the way to the cuddy. The good news is there is good wood from the captains seat forward through the cuddy.
So, before I started cutting out stringers I have a few questions and comments to throw out to the community here:
1. I plan to use epoxy only for all of the glass work. Would poly resin (which I have many gallons of) be okay to coat the stringers with before installation , or am I asking for trouble later? Should it all be epoxy? I've read that there are adhesion issues, maybe water intrusion later. Would poly coated stringers be incompatible with epoxy over csm over the poly coated stringers? I'd like to poly the deck boards and stringers, then use epoxy over csm if there aren't major issues with doing that. Once again, I have lots of poly.
2. We don't plan to refoam (floatation) anything. My bud (owner of the project) say's "If it goes down, Goodbye!" I have a hard time thinking that way but it is his boat. Neither one of us wants the rot that happened because of the foam to happen again in the future. We think that drainage from under the deck is more important. Is there a better way?
3. Will the cost of importing fir for the stringers outweigh the use of untreated clear pine? I can get really nice dry, clear, fine grain pine to do the stringers here but have never dealt with replacing them in this big of a project. I've scabbed some in before and didn't have any problems with it.
4. I'm going to do a core sample of the transom when I get the stringers cut out. My gut feeling is there will be some issues at the bilge. I won't go on here about what I should do; it seems like the general consensus is cut it and replace it. I would like to know though, how many have done the poured in epoxy transom and have had good results.
I'll post an outline for the project next post with some pics of where we are starting from. I've already got the deck completely pulled and all the soggy foam pulled, chopped, shredded, hammered...etc, and most all the delammed fiberglass out.(so you don't get to hear me ***** about how hard that was, you've done it you know, you haven't look out, its the worst part of it all besides paying for it!) I've already worked most of the itchies out from that! Sorry no great pics of the before and afters but we've already been there done that!
Here are some general specs for the project:
Fresh 165hp Merc I6 we have already built (to replace the feeble, gasping 150 Merc I6) , allowance made for future replacement with one of several merc v-8s we have (one good 5.0L and several 5.0's in pieces). Build the stringers now to suit both options.
New Interior paint to replace the 40+ year old vinyl upholstery and pull all the staples where it was attached, (what's with those 60's colors?) interior siding, replace the rotted stanchions and reinforce the gunwhales.
New deck layout with fishing the Gulf in mind. Rod storage, bait well and live well, new passenger seats for 4 with comfort etc in mind. Yes fresh water cooling is a high priority! We won't ride in saltwater till that is in. We are on the Tennessee river at this point.
Pull the windscreen and replace the sealant/gasket. Fix some rotten sub deck plywood on the forward starboard cuddy deck, maybe a new forward deck hatch, new chocks and fittings as needed, maybe an anchor davit and hatch. We have several donor boats at hand to help with that as well as several we have gutted in the past. Anyone need a trailer? lol
Figure out how to fit the two 35 gallon aluminum gas tanks we have port and starboard ( have already had the filler necks and vents moved and rewelded) above deck and box them in without cluttering up the deck. They are roughly 18 in wide by 12in tall and 5 ft long. I don't want to sacrifice stringer strength trying to set them below deck. We can't afford custom tanks below the deck. Not much room for that anyway.
Figure out a deck layout that would be suitable for bottom fishing on the Gulf (not too far out probably). I'm sure after re-reading this post some or all are going to give input as to floatation. I'm pushing for it but my bud is holding the funds for this project, totally his call. I'll see where it goes and how hard I can push him with your input. Personally if it was my boat I would stuff the belowdecks with whatever closed cell I could get my hands on cheap. He said maybe all the ping pong balls he could find, lol! He never wants to chop faom again I think.
New electrics, gauges, remote, steering and a comfortable captains chair, and hopefully a more than comfortable co pilot seat!
LOL reading back that's more than general specs, hope I didn't bore you with all that. I'm gonna get the camera out tomorrow and give the visual. I look forward to your input on yet another stringer/deck/who know's what project.
Thanks for your help all, its been a pleasure reading and seeing what you all have built!
I will post pics, I will post pics...tomorrow!
Smooth Water! ~Chef