Starcraft 1984 Mariner 18, Winter project

Foxcat

Seaman Apprentice
Joined
Nov 18, 2015
Messages
44
Wife's been out of town and Ive been holding down the fort, but was able to get a little more done.

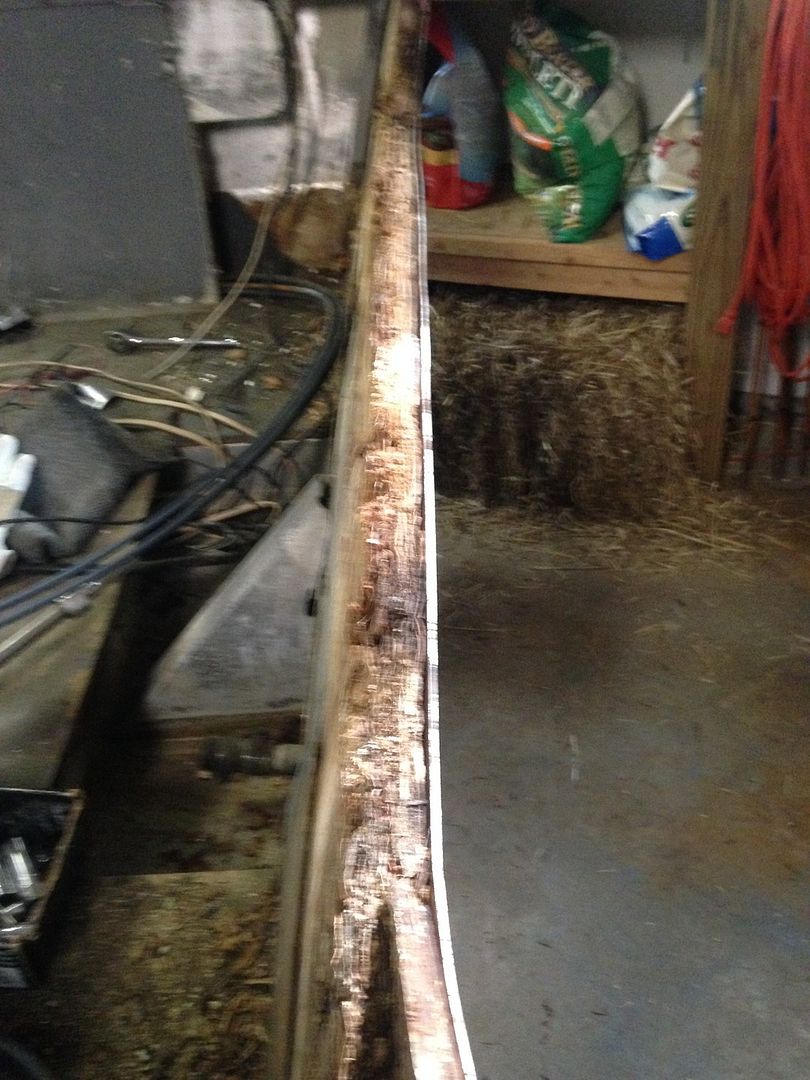
Blurry pic, but you can see that the transom is not bent.


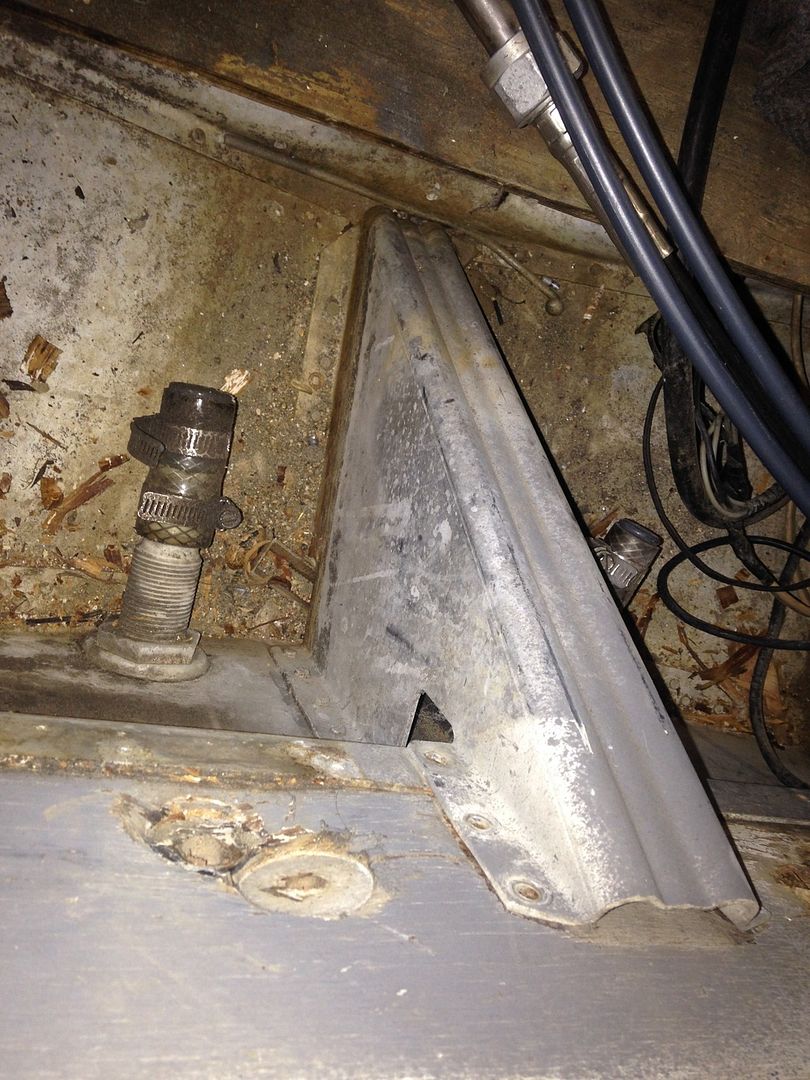
Also note that the knee is in good shape, with no popped rivets or torn metal. This is a view looking down over the transom.
 

Foxcat

Seaman Apprentice
Joined
Nov 18, 2015
Messages
44
Was able to remove the transom board in three pieces, but it was very fragile. I was expecting mulch like others have found, but instead it was like a flaky pastry. Baklava anyone?


So here's something weird. Transom corner is bowed out about 1/4 inch. No popped rivets, and as shown above, the transom is otherwise straight. Maybe somebody hit something or caught something with this corner at some point? Thinking I could just bend it back into place with a hammer and a board. Thoughts?


Watermann

Starmada Splash of the Year 2014
Joined
Jan 12, 2013
Messages
13,822
Oh boy yeah that's some flaky crust right there.

Nice to see your knee brace wasn't broken or cracked up. :encouragement:
 

g0nef1sshn

Lieutenant
Joined
Feb 24, 2015
Messages
1,291
I would think he used to pull skiers or tubers. Or winter freeze/thaw cycles maybe. New bolts through might pull it back in just fine?
 

jbcurt00

Moderator
Staff member
Joined
Oct 25, 2011
Messages
25,113
New transom wood, reattach the splash well w screws and thru bolt the motor, toweyes/handles and splashwell drains and I doubt that bow will be that noticeable.

I'd try that 1st. If it doesn draw up straight, then decide if other measures are necessary.
 

Foxcat

Seaman Apprentice
Joined
Nov 18, 2015
Messages
44
Sounds good, new hardware might just do the trick. Ordering epoxy and other supplies today so there's no delay when I'm ready to move on to the next steps.
 

Foxcat

Seaman Apprentice
Joined
Nov 18, 2015
Messages
44
Aha! Looking under the console, I found a spot on the original top surface that was cut out for controls. It was covered up with a board so I couldn't see this from the topside. I'll have to see if there is a way to mount my current controls into this space. This also corroborates that it was indeed originally a center console.


Watermann

Starmada Splash of the Year 2014
Joined
Jan 12, 2013
Messages
13,822
Jeez you think the PO could've found some longer screws? :rolleyes:
 

Foxcat

Seaman Apprentice
Joined
Nov 18, 2015
Messages
44
Got the pour-in foam out of the boat in eight pieces. It was mostly dry, so going to save to reinsert under the new floors. Found that the PO had replaced the floors once and had removed the foam from the bow to put in some sticky stuff around the rivets and on the seams. I still need to scrape all of that stuff out.


Now, here's the bad part- the middle six ribs are cracked on each side under the chines that I removed. Some of them are cracked clear through, but on the good side I can find no cracking in the skin of the hull under these areas. This boat was previously used on Lake Erie, and I think the PO had a great time beating this boat nearly to death on the waves.


I found a master welder in a nearby town who does aluminum and works on pontoon boats. Im going to approach him and ask for his services. Do you think that additional aluminum rod should be added to the sides of the ribs (under the chines) to reinforce them? Also, noting that the chines have been previously removed and reinstalled, there are a lot of holes in the ribs which may have contributed to their failure. Should I have the chines welded in too?
 

jbcurt00

Moderator
Staff member
Joined
Oct 25, 2011
Messages
25,113
Do you mean STRINGERS when you said chines ^^^?

I doubt the chines have ever been removed amd reinstalled, but if the PO pulled foam and replacrd the deck, the stringers may have been removed and reinstalled, hence the double holes in the ribs.

Welding wouldnt be my 1st choice, but there are quite a few rib cracks and doing anything else would also be quess work too, IMO.

Make sure to check the rib ends and the hull very closely for cracks. Whatever caused the rib cracks would seem severe enough to damage other stuff.
 

Foxcat

Seaman Apprentice
Joined
Nov 18, 2015
Messages
44
Oh yeah, sorry, I meant stringers!
I really think that pounding the waves did this damage: The ribs that are cracked indirectly support the floor via the stringers, and the section of floor directly over this area of damage supported the center console and driver seat. Ive looked at the rib ends and don't see any damage there.

I am a little weary of welding since I've read how tricky it can be and that it tends to weaken the metal that is welded. I just can't see any alternative short of removing the ribs and inserting new ones, and thats not going to happen.
 

Foxcat

Seaman Apprentice
Joined
Nov 18, 2015
Messages
44
Thanks for the info Watermann. I found my way to your sea nymph resto page to see how you arrived at your fix for broken ribs. Looks very solid, with none of the issues related to welding.
 

Watermann

Starmada Splash of the Year 2014
Joined
Jan 12, 2013
Messages
13,822
You can also see that the ribs had no holes on top, the cracks developed from the bottom and went up and over. I personally think that after the hull suffers the impact and loosens the rivets then the working back and forth process creates the cracks from work hardening at the foot of the rib. Seeing the black around the broken rivets is a big indicator that the rivet is loose and had been working back and forth in the hole and it should be replaced not just re-bucked.

I had some great ideas offered for repairs and went with the splinting of the cracked ribs using SS machine screws and 5200 to seal them. So far so good and with the paint over the SS heads I can tell if anything goes wrong by the paint chipping from movement. Every spring I inspect the entire boat looking damage or any loosened fasteners.
 

Foxcat

Seaman Apprentice
Joined
Nov 18, 2015
Messages
44
Yeah, every one of my breaks passes through a hole in the rib where the stringers were riveted in. In some cases, the stringer had been removed and re-rivetted in a different hole, with up to four holes on top of each rib. I imagine these additional holes substantially weakened the integrity of the ribs. I think I'm going to use your splinting approach. However, I think I will also need to shorten the height of both stringers that I removed so that I can move them out a few inches toward the sides of the boat, away from the holes that they were mounted in. If I were to put the stringers back in their original places, it seems to me that the additional weight of the floor and the console resting back on top of these broken spots would be a bad thing.
 

Watermann

Starmada Splash of the Year 2014
Joined
Jan 12, 2013
Messages
13,822
What's the count on the cracked ribs and are they on both sides? It wasn't the deck that caused the damage rather impact from the outside. I agree not to put the deck support stringers on those mauled spots.

To adjust the size of the stringer what I would do is run it though the table saw down the middle with a non-ferrous metal blade then over lap the 2 pieces, drill holes and either solid rivet them back together or use SS machine screws with nylocs. You could use some 5200 to make the joint even more solid.
 

Foxcat

Seaman Apprentice
Joined
Nov 18, 2015
Messages
44
The damage is on six ribs, on both sides, middle of the boat. Directly under each stringer. One stringer was only held in place by two remaining rivets, and the other was held in by five or six remaining rivets.


Here's a close-up of a break, showing the multiple holes.


I like your suggestion concerning how to shorten the height of the stringers. I was wondering if I should bend them to make them shorter, but I don't think Icould get a sharp clean bend 2"in along the length of each stringer.
When you say non-ferrous blade, I'm not sure what you mean. I looked at Lowes yesterday, and I saw diamond cutting wheels for tile and such- is that what I should be looking at?
 
Last edited:

oldhaven

Chief Petty Officer
Joined
Aug 30, 2015
Messages
578
This enlargement and drilling of multiple holes looks it could be a cause of the failure as stress cracks develop from impacts that would probably be fine in otherwise sound ribs. Hard to see why the stringers have been pulled and replaced so many times with new holes when the old ones were visible. Perhaps they ripped out and the old holes were too big. I am going to try to use the same rib holes at the ends for rivets in the deck by using some of these blind hole transfer punches to "spot" the holes. I will dry fit the deck with these in the holes, then use the punch marks to drill from the bottom. Worst case is having to enlarge the hole in the deck material slightly for mislocation, but it could mean no new holes in the ribs. I will be relocating the stringers, so no problem there, but I may be able to use the same rivet holes in the rib ends to prevent the cracking I have seen in other project pictures. My deck had never been replaced so there are only the original holes in them. Worth a try.

http://www.travers.com/blind-hole-spotter/p/71-600-312/?gclid=CM_-qvWs7ckCFQErHwodE1QNEw

Ron
 

classiccat

"Captain" + Starmada Splash Of The Year 2020
Joined
Dec 20, 2010
Messages
3,412
That’s rough…...and I think calls for focus in 2 areas…how you support the deck…but then also how your boat is supported by the trailer.

For supporting the deck, If I were in your shoes, I’d consider adding stringers that run side-to-side rather than stern-to-bow. Fasten angle along the length of each of the broken ribs…facing-up. It will add structural support for the broken ribs as well as provide a fastening point for stringers. Something to think about...

Regarding the trailer setup, I would want long bunks that get as close to the outer-chine as possible.
 
Top