Starting new project 1973 Sea Ray 240 SRV

sheboyganjohn

Senior Chief Petty Officer
Joined
Aug 2, 2005
Messages
753
Re: Starting new project 1973 Sea Ray 240 SRV

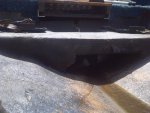
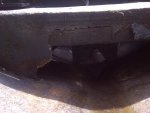
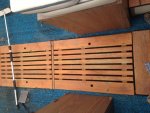
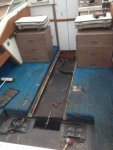
Here is the empty engine bay and the transom starting to get stripped down. Did a partial de-naming, not so obnoxious now.

SheboyganVillage-20130621-00305.JPG SheboyganVillage-20130621-00304.JPG
 
Last edited:

sheboyganjohn

Senior Chief Petty Officer
Joined
Aug 2, 2005
Messages
753
Re: Starting new project 1973 Sea Ray 240 SRV

Not the greatest glass job on the engine mounts. Little crooked in front of the fuel tank also. All this will get replaced. I am planning on going from the console back for the floor, and hopefully on that far for the stringers. Call me crazy, but I am looking forward into removing the transom. The panel between the two keyholes is very spongy and I stuck a finger into a whole that was where one of the lines for the trim tabs came out and I could dig wet wood out with my finger, it should come our real easy.

SheboyganVillage-20130623-00306.JPG SheboyganVillage-20130623-00309.JPG
 
Last edited:

sheboyganjohn

Senior Chief Petty Officer
Joined
Aug 2, 2005
Messages
753
Re: Starting new project 1973 Sea Ray 240 SRV

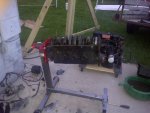
Have the trailer up on blocks now, took all four wheels off so I can have the car tires taken off and trailer tires put on. Also worked on the one engine with the cracked block while waiting for the grill to heat up (we don't need no stinkin' propane, charcoal or wood only). Have it torn down to the block with the crank, pistons, and cam still in it. Not too shabby for my first ever engine teardown. A big plastic storage tote and a bunch of zip lock bags have helped keep everything organized.
 

mrdjflores

Lieutenant Junior Grade
Joined
Apr 1, 2009
Messages
1,169
Re: Starting new project 1973 Sea Ray 240 SRV

Good work so far..the transom is a bit tricky to get in there in one piece, if you leave the boat cap on. I replaced mine with a full width/thickness transom instead of the original 'bump' transom. After a broken toe and some screaming, got it in place
 

sheboyganjohn

Senior Chief Petty Officer
Joined
Aug 2, 2005
Messages
753
Re: Starting new project 1973 Sea Ray 240 SRV

Good work so far..the transom is a bit tricky to get in there in one piece, if you leave the boat cap on. I replaced mine with a full width/thickness transom instead of the original 'bump' transom. After a broken toe and some screaming, got it in place

That is why I am looking forward to taking it out, not so sure about putting the new one in. I have done enough broken toes in my life that I will pass on that one.
 

sheboyganjohn

Senior Chief Petty Officer
Joined
Aug 2, 2005
Messages
753
Re: Starting new project 1973 Sea Ray 240 SRV

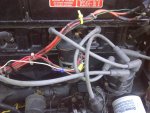
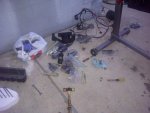
Here are some picks from the motor teardown.

The clump of wires with the blue cable tie all went to the coil, not sure why we need that many, I believe the other motor only has two. Guess that is what happens when someone swaps in an old auto block.

SheboyganVillage-20130623-00311.JPG


Here is how far I got before I had to load up the grill with food.

SheboyganVillage-20130623-00313.JPG

My high tech parts sorting method.

SheboyganVillage-20130623-00314.JPG
 
Last edited:

sheboyganjohn

Senior Chief Petty Officer
Joined
Aug 2, 2005
Messages
753
Re: Starting new project 1973 Sea Ray 240 SRV

From what I can tell, neither the cracked riser, nor the cracked block were leaking internal I decided to repair with JB weld. I did not get a picture. What I did was take a dremel tool with a burr bit and grind out the crack making it slightly recessed (not more then 1/64"). I then ground down the surface 1/2" on either side of the crack. When I got to the end of the crack I ground the recess past the end about 3/4". After a good cleaning with acetone, I coated the whole thing with JB weld to cover all the area that I ground out leaving it sit proud of the area.

On a related note, snapped off one rocker arm stud, the head will be going to a machine shop to switch from press in studs to screw in studs.
 

sheboyganjohn

Senior Chief Petty Officer
Joined
Aug 2, 2005
Messages
753
Re: Starting new project 1973 Sea Ray 240 SRV

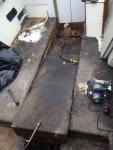
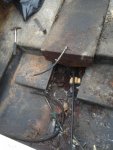
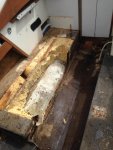
Finally getting back around to the boat project. Started the gutting job yesterday. Took a bunch of measurements and then hack work began. Pulled out the old seats, the fuel tank, and opened up one side and started digging out foam. The good news is the foam was dry and the deck was still nice clean wood. The problem was the main stringers came out like wet grass. I am hoping the outer stringer are dry so I can leave the outer foam in. Here are some of the pics. I will add more of the foam area once I get out and work on it this afternoon. Plan on pulling out the motor mounts, back deck, and start on the transom.

IMG_0252.JPG
IMG_0258.JPG IMG_0267.JPG IMG_0266.JPG
 
Last edited:

sheboyganjohn

Senior Chief Petty Officer
Joined
Aug 2, 2005
Messages
753
Re: Starting new project 1973 Sea Ray 240 SRV

In one of the pictures above you can see how I used a big spud bar to pry up the fuel tank by running the end of it out of one of the keyholes.

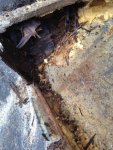
Here you can see how bad the transom is.

IMG_0243.JPG
 
Last edited:

Mikeopsycho

Senior Chief Petty Officer
Joined
Feb 6, 2014
Messages
738
Re: Starting new project 1973 Sea Ray 240 SRV

I'd like to tag along, looks interesting.

Mike
 

Scott Danforth

Grumpy Vintage Moderator still playing with boats
Staff member
Joined
Jul 23, 2011
Messages
50,230
Re: Starting new project 1973 Sea Ray 240 SRV

Mind if a fellow cheesehead climbs aboard?
 

sheboyganjohn

Senior Chief Petty Officer
Joined
Aug 2, 2005
Messages
753
Re: Starting new project 1973 Sea Ray 240 SRV

Here is where I left off yesterday. Turned out the foam and wood from this point forward was good. I may just scab in new wood going back.

IMG_0268.JPG

As I worked towards the stern the wood got wetter and the foam started to get wet.

IMG_0270.JPG

The transom did not have any glass in the area under the deck. Complete mush.

IMG_0280.JPG
 
Last edited:

sheboyganjohn

Senior Chief Petty Officer
Joined
Aug 2, 2005
Messages
753
Re: Starting new project 1973 Sea Ray 240 SRV

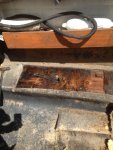
The starboard side was completely drenched. Foam was soaked and all the wood was rotten.

IMG_0281.JPG

From here forward it is still rotted. Looks like I will have to replace everything on this side.

IMG_0282.JPG
 
Last edited:

sheboyganjohn

Senior Chief Petty Officer
Joined
Aug 2, 2005
Messages
753
Re: Starting new project 1973 Sea Ray 240 SRV

Got everything from the forward towards the stern out so it was time to start working on the transom. Here is my starting cut pattern on the transom. The skin on the inside came out real easy.

IMG_0283.JPG IMG_0284.JPG IMG_0285.JPG
 
Last edited:

sheboyganjohn

Senior Chief Petty Officer
Joined
Aug 2, 2005
Messages
753
Re: Starting new project 1973 Sea Ray 240 SRV

Here is where I finished up for the night.


IMG_0287.JPG IMG_0288.JPG
 
Last edited:

sheboyganjohn

Senior Chief Petty Officer
Joined
Aug 2, 2005
Messages
753
Re: Starting new project 1973 Sea Ray 240 SRV

Mike and Scott, thanks for tagging along. The more the merrier. Feel free to make comments or post questions along the way. I am always open for debate and criticism. That is how everyone (including me) learns about the process.
 

bigdirty

Senior Chief Petty Officer
Joined
Oct 4, 2013
Messages
652
Re: Starting new project 1973 Sea Ray 240 SRV

I'm on board too if that's ok with you... for the most part it that looks like what I just tore out of my boat :lol: I think its pretty bad that mine is a 93, and for the most part was rotted WORSE that yours.. at least you can still recognize some of that as WOOD in your boat..
 

sheboyganjohn

Senior Chief Petty Officer
Joined
Aug 2, 2005
Messages
753
Re: Starting new project 1973 Sea Ray 240 SRV

I think it all depends on where the rot comes in. If there are a bunch of holes in the floors or the stringers are not sealed to the hull and let water though out the underdeck you get rot everywhere. I think all the water in mine came in through the transom. I think it is going to take a whole day for me to plug all the holes. there were 15 some holes that were plugged with plastic pop rivets, not exactly waterproof. The farther back I got, the worse the rot. Some of the wood came out like it was a stack of wet grass.
 

sheboyganjohn

Senior Chief Petty Officer
Joined
Aug 2, 2005
Messages
753
Was able to get some grinding in. Was nice to be able to grind for a few hours and not sweat to death.

IMG_0291.JPG

Must have been amateur day running the chopper gun at the factory the day they built the boat. Had a lot of dry fibers and missing resin spots.

IMG_0294.JPG IMG_0293.JPG
 
Last edited:

bigdirty

Senior Chief Petty Officer
Joined
Oct 4, 2013
Messages
652
lookin good man... well, not great uh... amounts of resin in the transom skin.. :laugh: but she looks in useable shape anyway.. how are you liking the glass dust? ughhh... it goes EVERYWHERE!!! I'm not looking forward to the next time i have to do it...
 
Top