Sorry, I thought yours was the 1500 with the older L/U! Too many posts to remember I reckon! :facepalm:
So I'll retract the "morpodite" description, you have a Wonderful 1500 with a lovely L/U! :lol:
Your comment jogged my memory; the old, old engines had a metal screw that went into the 3/8" flushing port on the side of the water pump base.
Later models that still had the flushing port, had a larger, plastic screw with a rubber gasket on the end. But I don't recall the hole in the pump body being threaded.
But, and again I'm pulling this from some very old brain cells (!), the flushing hole in the pump body was 3/8" and could be tapped-out to fit the "retro" flusher.
Another thought, get a 2nd flushing screw; drill and tap it to accept the flusher; remove the "normal" flushing screw and install the plastic "adapter" when you want to flush.
For greater durability, you might want to install a Heli-Coil in the plastic. Or, just permanently screw the flushing rig into the plastic "adapter" and screw the whole mess into the flushing port.
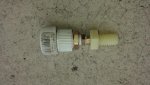
One more thought, that plug isn't a lot to work with; if you can find the correct-sized bolt & thread-pitch, you can drill that, thread it, then screw the flusher into it. Since you're planning on using it a lot, you may find the OEM plastic plug won't hold up to the use.
The most Awsome adaptation would be to install a 3/8" Heli-Coil in the pump base, this would directly accept the motor flusher. You could probably do it in place, but it'd be hard to contain any plastic shards from drilling-out the pump base. I would want to remove the base, to make it easier to work with and to ensure this would actually be feasible.
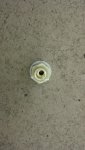
BTW you can just make out the flushing hole in the pic below; there are 2 water pump bases listed for your motor, one without a hole, and the 49-69222A1 pump body with a flushing hole.
I don't see any threads in that pic and I can't recall ever seeing a flusher that would screw into the larger threads in the gearcase. Interesting mystery!
Hope that all makes sense! Let us know what you come up with...............ed


")